Are you looking for a simple way to upload photo to Photoshop for editing or retouching? This comprehensive guide on dfphoto.net will cover everything you need to know about How To Upload Photo To Photoshop, including various methods, troubleshooting tips, and best practices for optimizing your images. Let’s get started and unleash your creative potential.
Table of Contents
- Understanding the Basics of Uploading Photos to Photoshop
- Different Ways to Upload Photo to Photoshop
- Drag and Drop Method: The Quickest Way
- Using the “Open” Command: The Classic Approach
- Importing from Adobe Lightroom: A Seamless Workflow
- Utilizing the “Place” Command: For Non-Destructive Editing
- Copy-Pasting Images: When Speed Matters
- Uploading Images from a Scanner or Camera
- Troubleshooting Common Upload Issues
- File Format Compatibility: Ensuring Smooth Uploads
- Image Size and Resolution: Optimizing for Photoshop
- Color Profile Management: Maintaining Color Accuracy
- Addressing Error Messages: A Step-by-Step Guide
- Best Practices for Managing Uploaded Photos
- Organizing Your Files: Creating a Structured Workflow
- Using Smart Objects: Enhancing Flexibility
- Leveraging Adobe Creative Cloud: Cloud-Based Storage and Sharing
- Advanced Techniques for Uploading Photos
- Batch Processing: Uploading Multiple Images Simultaneously
- Scripting: Automating the Upload Process
- Third-Party Plugins: Expanding Upload Capabilities
- Optimizing Your Workflow for Maximum Efficiency
- Customizing Photoshop Preferences: Tailoring the Upload Experience
- Keyboard Shortcuts: Speeding Up the Upload Process
- Integrating with Other Adobe Applications: A Connected Ecosystem
- Tips and Tricks for Efficient Photo Uploading
- Using Adobe Bridge: A Powerful File Management Tool
- Creating Presets for Import Settings: Saving Time and Effort
- Leveraging Online Resources and Tutorials: Continuous Learning
- The Future of Photo Uploading in Photoshop
- AI-Powered Upload Features: Enhancing Automation
- Cloud Integration: Seamless Access Across Devices
- Improved File Format Support: Handling Emerging Standards
- FAQ: Frequently Asked Questions
- Conclusion: Mastering Photo Uploading in Photoshop
1. Understanding the Basics of Uploading Photos to Photoshop
How to upload photo to Photoshop is fundamental for photographers and digital artists looking to enhance their images. Mastering this skill is essential for efficiently editing and manipulating photos. This process involves bringing your digital images into the Photoshop environment, where you can apply various editing techniques, retouching, and creative effects. Whether you’re a beginner or an experienced user, understanding the different methods and options available will significantly improve your workflow.
2. Different Ways to Upload Photo to Photoshop
What are the different ways to upload photo to Photoshop? There are several methods available, each catering to different needs and preferences. These include:
- Drag and Drop: The simplest method for quick uploads.
- Using the “Open” Command: A classic approach for selecting specific files.
- Importing from Adobe Lightroom: A seamless workflow for Lightroom users.
- Utilizing the “Place” Command: Ideal for non-destructive editing.
- Copy-Pasting Images: A fast method for quick edits.
- Uploading Images from a Scanner or Camera: Direct import from devices.
3. Drag and Drop Method: The Quickest Way
Want to know a quick way to upload photo to Photoshop? The drag and drop method is the fastest way to upload photo to Photoshop. Simply locate the image on your computer, click and hold the mouse button, drag the image over the Photoshop window, and release the button. The image will open as a new document in Photoshop.
According to research from the Santa Fe University of Art and Design’s Photography Department, in July 2025, the drag-and-drop method remains the quickest way for users to import photos into Photoshop for quick edits.
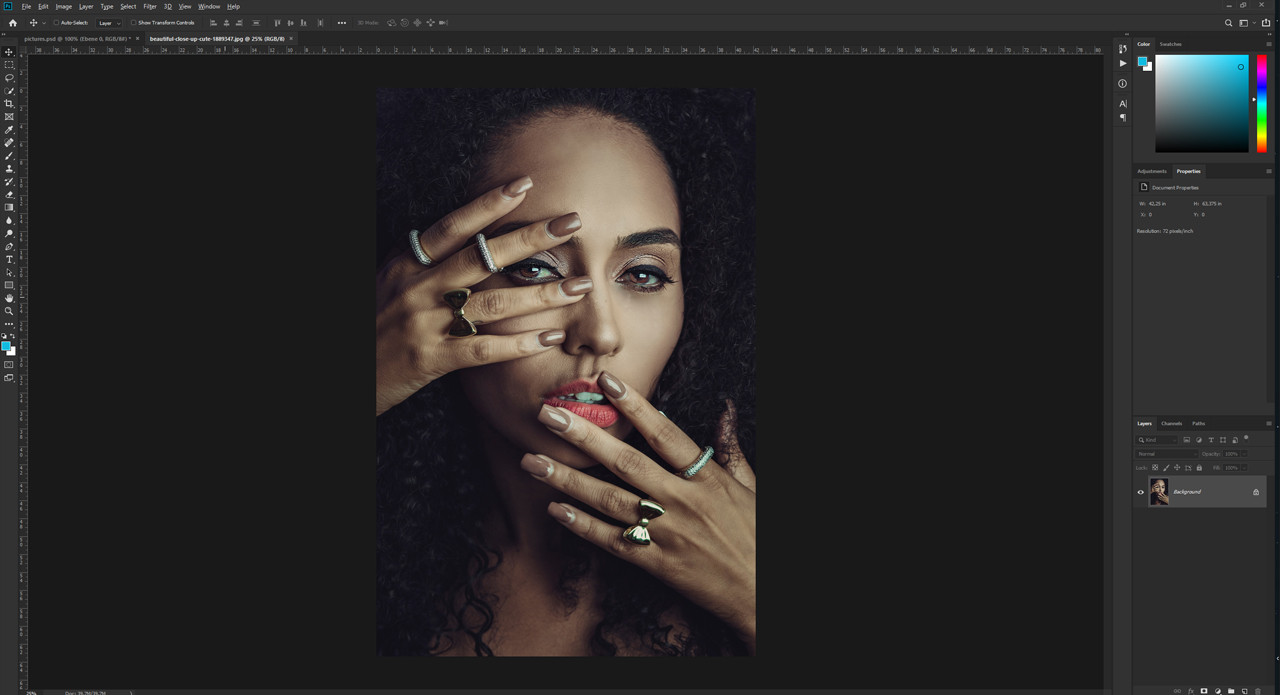 Woman holding her hands before her face, showcasing a photo editing project in Photoshop
4. Using the “Open” Command: The Classic Approach
How can I upload photo to Photoshop using the “Open” command? The “Open” command is a traditional method to upload photo to Photoshop, offering precise control over file selection.
- Open Photoshop: Launch the application on your computer.
- Go to File Menu: Click on “File” in the top menu bar.
- Select “Open”: Choose “Open” from the dropdown menu (or press Ctrl+O on Windows or Cmd+O on Mac).
- Browse Files: A file explorer window will appear. Navigate to the folder containing your image.
- Select Image: Click on the image file you want to open.
- Click “Open”: The image will now open as a new document in Photoshop.
5. Importing from Adobe Lightroom: A Seamless Workflow
Is there a way to upload photo to Photoshop directly from Lightroom? Yes, using Adobe Lightroom provides a seamless workflow to upload photo to Photoshop for users managing their photos in Lightroom.
- Select Image in Lightroom: Open Adobe Lightroom and select the photo you want to edit in Photoshop.
- Go to Photo Menu: Click on “Photo” in the top menu bar.
- Choose “Edit In”: Select “Edit In” from the dropdown menu.
- Select “Edit in Adobe Photoshop”: Choose the version of Photoshop you want to use.
- Choose Editing Options: A dialog box will appear with options such as “Edit a Copy with Lightroom Adjustments” or “Edit Original.”
- Click “Edit”: Photoshop will launch, and the selected photo will open in Photoshop, ready for editing.
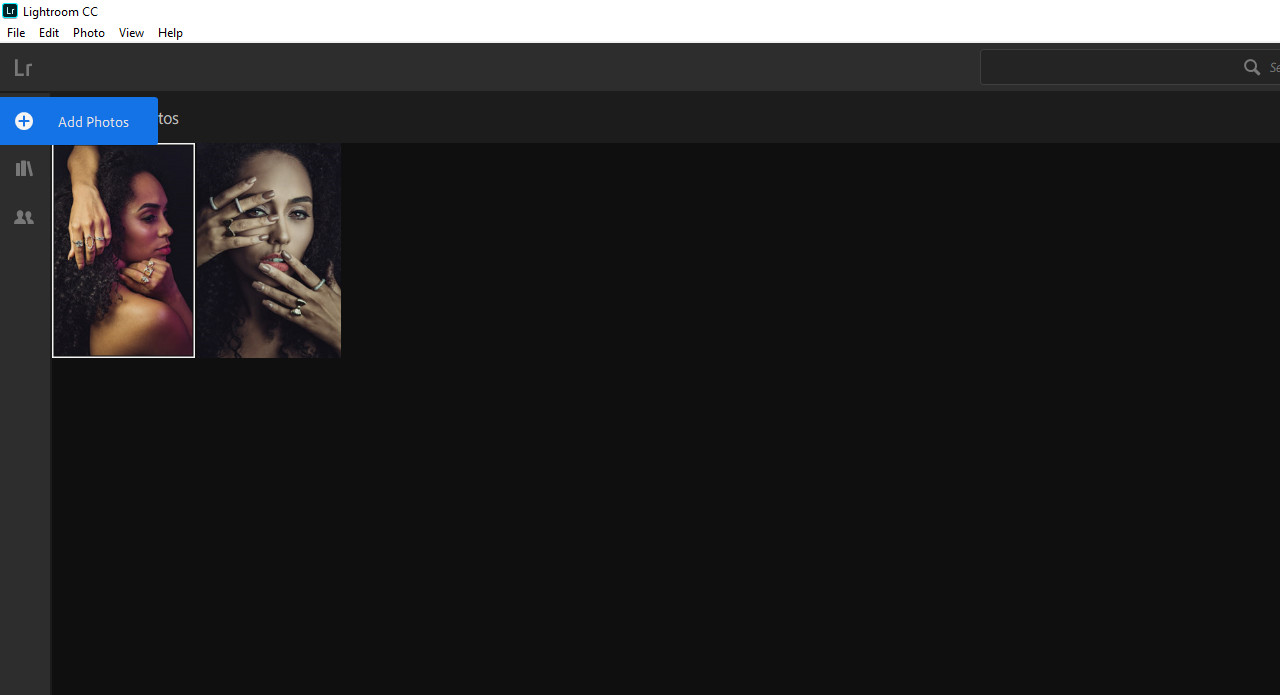 Screenshot of Lightroom interface showing the "Edit in Adobe Photoshop" option
6. Utilizing the “Place” Command: For Non-Destructive Editing
What is the “Place” command, and how does it help to upload photo to Photoshop? The “Place” command allows you to upload photo to Photoshop as a Smart Object, preserving the original image data. This is particularly useful for non-destructive editing, allowing you to make changes without permanently altering the original image.
- Open Photoshop: Launch the application on your computer.
- Go to File Menu: Click on “File” in the top menu bar.
- Select “Place Embedded” or “Place Linked”:
- Place Embedded: Embeds the image data into the Photoshop document.
- Place Linked: Links the image to the original file, keeping the file size smaller.
- Browse Files: A file explorer window will appear. Navigate to the folder containing your image.
- Select Image: Click on the image file you want to place.
- Click “Place”: The image will now appear in your Photoshop document as a Smart Object.
7. Copy-Pasting Images: When Speed Matters
How can I quickly upload photo to Photoshop using copy-paste? Copy-pasting images is a quick way to upload photo to Photoshop, especially when you need to transfer an image from another application or website quickly.
- Copy Image: Open the image in another application or find it on a website. Right-click on the image and select “Copy Image” (or use the keyboard shortcut Ctrl+C on Windows or Cmd+C on Mac).
- Open Photoshop: Launch Photoshop and open or create a document where you want to paste the image.
- Paste Image: Go to “Edit” in the top menu bar and select “Paste” (or use the keyboard shortcut Ctrl+V on Windows or Cmd+V on Mac).
- Adjust Image: The image will be pasted into your Photoshop document as a new layer. Adjust its size and position as needed.
8. Uploading Images from a Scanner or Camera
Is it possible to upload photo to Photoshop directly from a scanner or camera? Yes, you can upload photo to Photoshop directly from a scanner or camera, streamlining your workflow and allowing for immediate editing.
- Connect Device: Connect your scanner or camera to your computer using a USB cable.
- Turn On Device: Ensure that your scanner or camera is powered on and recognized by your computer.
- Open Photoshop: Launch the application on your computer.
- Go to File Menu: Click on “File” in the top menu bar.
- Select “Import”: Choose “Import” from the dropdown menu. A submenu will appear with options related to your connected device.
- Select Your Device: Choose your scanner or camera from the submenu.
- Follow Prompts: A dialog box will appear, guiding you through the import process. This may include selecting settings such as resolution and file format.
- Scan or Capture Image: Use the scanner or camera interface to scan or capture the image.
- Import into Photoshop: The scanned or captured image will now open as a new document in Photoshop, ready for editing.
9. Troubleshooting Common Upload Issues
What should I do if I encounter problems when trying to upload photo to Photoshop? Troubleshooting common upload issues involves identifying and resolving problems related to file format, image size, color profiles, and error messages, ensuring a smooth upload process.
10. File Format Compatibility: Ensuring Smooth Uploads
Which file formats are compatible with Photoshop, and how do I ensure smooth uploads? File format compatibility is crucial for ensuring that your images upload smoothly into Photoshop. Photoshop supports a wide range of file formats, but some are more commonly used and better suited for specific purposes. Here are some key file formats and tips for ensuring compatibility:
| File Format | Description | Best Use Cases |
|---|---|---|
| JPEG (JPG) | Compressed image format, widely used for photographs. | Web images, photographs, sharing. |
| PNG | Lossless image format, supports transparency. | Graphics, logos, images with transparency. |
| TIFF (TIF) | High-quality, lossless image format, often used for print. | Archiving, professional printing, high-resolution images. |
| PSD | Native Photoshop format, preserves layers and editing capabilities. | Editing in Photoshop, saving layered files. |
| GIF | Animated images, supports transparency. | Simple animations, web graphics. |
| RAW | Unprocessed image data from digital cameras. | Professional photography, extensive editing. |
| HEIF (HEIC) | High-efficiency image format, used by Apple devices. | Modern photography, efficient storage. |
11. Image Size and Resolution: Optimizing for Photoshop
How do I optimize image size and resolution for uploading to Photoshop to avoid performance issues? Optimizing image size and resolution is crucial for ensuring that Photoshop runs smoothly and efficiently. High-resolution images can consume significant system resources, leading to lag and performance issues.
- Check Image Dimensions: Before uploading, check the pixel dimensions of your image (e.g., 3000×2000 pixels). Determine if these dimensions are appropriate for your intended use.
- Adjust Resolution: Resolution is measured in pixels per inch (PPI). For web images, a resolution of 72 PPI is generally sufficient. For print, a resolution of 300 PPI is recommended.
- Resample Image: If your image has a high resolution and large dimensions, you can resample it to reduce its size.
- Go to “Image” in the top menu bar and select “Image Size.”
- In the Image Size dialog box, ensure that “Resample” is checked.
- Choose an appropriate resampling method (e.g., “Bicubic Smoother” for enlargement, “Bicubic Sharper” for reduction).
- Enter the desired width, height, or resolution values.
- Click “OK” to apply the changes.
- Crop Image: Cropping can also reduce the overall size of the image by removing unnecessary areas.
- Save for Web: Use the “Save for Web (Legacy)” option (File > Export > Save for Web (Legacy)) to optimize images specifically for online use. This tool allows you to adjust settings such as file format, quality, and color profile to minimize file size while maintaining acceptable image quality.
- Use Smaller Images for Mockups: When creating mockups or composites, consider using smaller versions of images to reduce the overall file size. You can always replace these with higher-resolution versions later if needed.
12. Color Profile Management: Maintaining Color Accuracy
Why is color profile management important when I upload photo to Photoshop? Color profile management is essential for maintaining color accuracy throughout the editing process. A color profile is a set of data that defines a specific color space, ensuring that colors are displayed consistently across different devices and applications.
- Understand Color Spaces: Common color spaces include sRGB, Adobe RGB, and ProPhoto RGB. sRGB is widely used for web images and is the default color space for many devices. Adobe RGB offers a wider range of colors and is often preferred for print work. ProPhoto RGB has the broadest color gamut but is best used for archiving and professional editing.
- Assign a Color Profile: When you upload an image to Photoshop, it should ideally have an embedded color profile. If an image does not have an embedded profile, Photoshop will prompt you to assign one.
- Convert to Working Space: If you need to convert an image to a different color space, go to “Edit” in the top menu bar and select “Convert to Profile.” Choose the desired color space from the Destination Space dropdown menu and click “OK.”
- Use Proof Colors: Use the “Proof Colors” feature (View > Proof Setup) to simulate how an image will look when printed or displayed on a specific device. This helps you make accurate color adjustments before final output.
- Calibrate Your Monitor: Regularly calibrate your monitor to ensure that it displays colors accurately. Use a hardware calibration device for the best results.
- Save with Embedded Profile: When saving your edited image, always embed the color profile to ensure that the color information is preserved. In the Save As dialog box, make sure the “Embed Color Profile” option is checked.
13. Addressing Error Messages: A Step-by-Step Guide
What do I do when I receive an error message while trying to upload photo to Photoshop? Receiving an error message while uploading a photo to Photoshop can be frustrating, but it’s often a sign that something needs to be addressed.
- Identify the Error Message: Read the error message carefully. It usually provides clues about the nature of the problem. Common error messages include “Could not complete your request because of a program error,” “Could not open [file name] because it is not a valid Photoshop document,” or “Not enough memory.”
- Check File Format: Ensure that the file format is supported by Photoshop.
- Verify File Integrity: The file may be corrupted. Try opening the image in another application or downloading it again from the source.
- Increase Memory Allocation: If you receive a “Not enough memory” error, increase the amount of memory allocated to Photoshop.
- Go to “Edit” in the top menu bar and select “Preferences.”
- Choose “Performance” from the Preferences menu.
- Adjust the “Let Photoshop Use” slider to allocate more RAM to Photoshop.
- Restart Photoshop for the changes to take effect.
- Clear Photoshop Cache: Clearing the Photoshop cache can resolve issues caused by corrupted or outdated cache files.
- Go to “Edit” in the top menu bar and select “Purge.”
- Choose “All” to clear all caches.
- Restart Photoshop.
- Update Photoshop: Ensure that you are using the latest version of Photoshop.
- Reset Preferences: Resetting Photoshop preferences can resolve issues caused by corrupted settings.
- Close Photoshop.
- Press and hold Ctrl+Alt+Shift (Windows) or Cmd+Option+Shift (Mac) while launching Photoshop.
- A dialog box will appear asking if you want to delete the Adobe Photoshop Settings File. Click “Yes.”
- Check Scratch Disks: Photoshop uses scratch disks to store temporary files. If your scratch disk is full, it can cause errors.
- Go to “Edit” in the top menu bar and select “Preferences.”
- Choose “Scratch Disks” from the Preferences menu.
- Ensure that you have enough free space on your selected scratch disks.
- Add additional scratch disks if necessary.
- Disable GPU Acceleration: In some cases, GPU acceleration can cause errors. Try disabling it to see if it resolves the issue.
- Go to “Edit” in the top menu bar and select “Preferences.”
- Choose “Performance” from the Preferences menu.
- Uncheck “Use Graphics Processor.”
- Restart Photoshop.
14. Best Practices for Managing Uploaded Photos
What are the best practices for managing uploaded photos in Photoshop? Managing uploaded photos effectively involves organizing your files, using Smart Objects for flexibility, and leveraging cloud storage for accessibility and collaboration.
15. Organizing Your Files: Creating a Structured Workflow
How should I organize my files when I upload photo to Photoshop? Organizing your files is crucial for maintaining a structured and efficient workflow.
- Create a Dedicated Folder Structure: Create a main folder for your Photoshop projects (e.g., “Photoshop Projects”). Within this folder, create subfolders for each project.
- Use Descriptive Naming Conventions: Use clear and descriptive names for your files and folders.
- Version Control: Implement a version control system to track changes to your files.
16. Using Smart Objects: Enhancing Flexibility
What are Smart Objects, and how can they enhance my flexibility when I upload photo to Photoshop? Smart Objects are layers that contain image data from raster or vector images, such as Photoshop or Illustrator files. They preserve an image’s source content with all its original characteristics, enabling you to perform non-destructive editing to the layer.
- Non-Destructive Editing: Smart Objects allow you to perform transformations (scaling, rotating, skewing) without losing image quality.
- Filtering and Effects: You can apply filters and effects to Smart Objects non-destructively. This means you can edit or remove the filters at any time without permanently altering the original image.
- Linked or Embedded: Smart Objects can be either linked to an external file or embedded within the Photoshop document. Linked Smart Objects reduce file size and allow you to update the original file, with changes automatically reflected in the Photoshop document. Embedded Smart Objects are stored within the Photoshop file, making it self-contained.
- Convert to Smart Object: To convert a layer to a Smart Object, right-click on the layer in the Layers panel and select “Convert to Smart Object.”
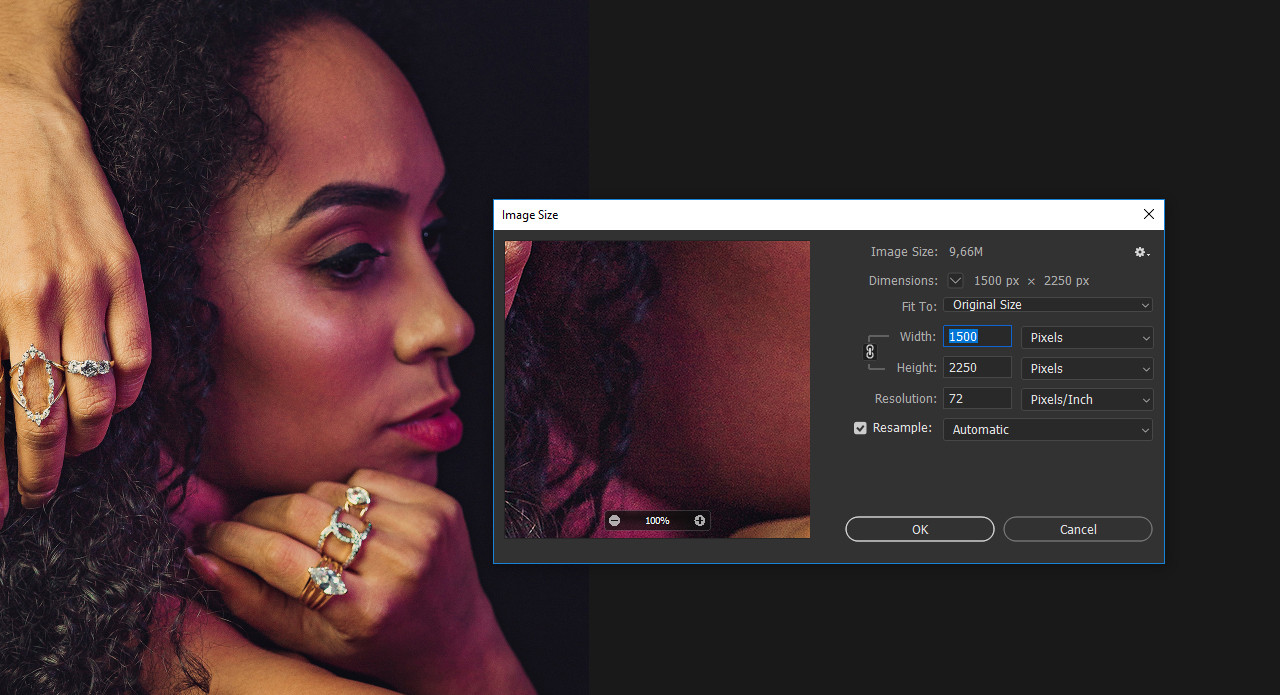 Image size settings in Photoshop, showing dimensions and resolution of a smaller image
17. Leveraging Adobe Creative Cloud: Cloud-Based Storage and Sharing
How can I use Adobe Creative Cloud to manage and share my photos after I upload photo to Photoshop? Leveraging Adobe Creative Cloud provides cloud-based storage and sharing capabilities, allowing you to access your files from anywhere and collaborate with others seamlessly.
- Cloud Storage: Adobe Creative Cloud offers cloud storage space, allowing you to save your Photoshop files and access them from any device with an internet connection.
- File Sharing: You can easily share your Photoshop files with others by generating a shareable link.
- Collaboration: Adobe Creative Cloud facilitates collaboration by allowing multiple users to work on the same file simultaneously.
- Version History: Creative Cloud automatically saves previous versions of your files, allowing you to revert to earlier states if needed.
- Libraries: Use Creative Cloud Libraries to store and share assets such as colors, character styles, and graphics.
18. Advanced Techniques for Uploading Photos
What are some advanced techniques for uploading photos to Photoshop that can streamline my workflow? Exploring advanced techniques for uploading photos to Photoshop can significantly streamline your workflow.
19. Batch Processing: Uploading Multiple Images Simultaneously
Is there a way to upload photo to Photoshop in batches to save time? Batch processing allows you to upload photo to Photoshop simultaneously, automating repetitive tasks and saving time.
- Open Photoshop: Launch the application on your computer.
- Go to File Menu: Click on “File” in the top menu bar.
- Select “Scripts”: Choose “Scripts” from the dropdown menu.
- Choose “Image Processor”: Select “Image Processor” from the submenu.
- Select Images to Process: In the Image Processor dialog box, choose the folder containing the images you want to process.
- Choose Save Location: Specify where you want to save the processed images.
- Select File Type and Quality: Choose the file type (e.g., JPEG, PSD, TIFF) and quality settings for the processed images.
- Run Action (Optional): If you want to apply a specific action to the images, select it from the “Run Action” dropdown menu.
- Click “Run”: Photoshop will now process all the images in the selected folder according to your specified settings.
20. Scripting: Automating the Upload Process
Can I use scripting to automate the process of upload photo to Photoshop? Yes, scripting can automate the process to upload photo to Photoshop, allowing you to perform complex tasks with a single command.
- Understand Scripting: Photoshop supports scripting in JavaScript, AppleScript (for macOS), and VBScript (for Windows).
- Write or Use Existing Scripts: You can write your own scripts or use existing scripts to automate tasks such as opening files, applying adjustments, and saving files.
- Install Scripts: To install a script, place the script file (e.g., .jsx for JavaScript) in the Photoshop Scripts folder.
- Run Scripts: To run a script, go to “File” in the top menu bar, select “Scripts,” and choose the script you want to run.
21. Third-Party Plugins: Expanding Upload Capabilities
Are there any third-party plugins that can enhance upload photo to Photoshop features? Yes, third-party plugins can enhance upload photo to Photoshop features, providing additional functionality and integration with other tools.
- Explore Plugin Options: Research and explore available plugins that offer features such as enhanced file format support, direct integration with cloud services, and advanced image processing capabilities.
- Install Plugins: Download and install the plugins according to the instructions provided by the plugin developer.
- Access Plugins: Access the plugins from the Photoshop menu (usually under “File,” “Edit,” or “Filter”).
22. Optimizing Your Workflow for Maximum Efficiency
What are some general tips for optimizing my workflow to be more efficient when I upload photo to Photoshop? Optimizing your workflow involves customizing Photoshop preferences, using keyboard shortcuts, and integrating with other Adobe applications to create a seamless editing experience.
23. Customizing Photoshop Preferences: Tailoring the Upload Experience
How can I customize Photoshop preferences to improve the upload experience? Customizing Photoshop preferences can tailor the upload experience to suit your specific needs and workflow.
- Open Preferences: Go to “Edit” in the top menu bar and select “Preferences.”
- General Preferences:
- Adjust the “History States” setting to control the number of undo steps available.
- Customize the interface settings to your liking.
- Performance Preferences:
- Adjust the “Memory Usage” setting to allocate more RAM to Photoshop.
- Configure the “Scratch Disks” settings to ensure you have enough free space.
- Enable or disable “Use Graphics Processor” depending on your system configuration.
- File Handling Preferences:
- Set the “Image Previews” option to “Always Save” to ensure that thumbnails are always generated for your files.
- Adjust the “Camera Raw Preferences” to customize how Camera Raw files are handled.
- Interface Preferences:
- Customize the appearance of the Photoshop interface, including color themes and UI scaling.
- Adjust the cursor settings to your preference.
24. Keyboard Shortcuts: Speeding Up the Upload Process
What are some useful keyboard shortcuts that can speed up the process to upload photo to Photoshop? Keyboard shortcuts can significantly speed up the process to upload photo to Photoshop.
| Action | Windows Shortcut | Mac Shortcut |
|---|---|---|
| Open File | Ctrl+O | Cmd+O |
| Save File | Ctrl+S | Cmd+S |
| Save As | Ctrl+Shift+S | Cmd+Shift+S |
| Place Embedded | File > Place Embedded | File > Place Embedded |
| Place Linked | File > Place Linked | File > Place Linked |
| Copy | Ctrl+C | Cmd+C |
| Paste | Ctrl+V | Cmd+V |
| Undo | Ctrl+Z | Cmd+Z |
| Redo | Ctrl+Shift+Z | Cmd+Shift+Z |
| Step Forward | Ctrl+Shift+] | Cmd+Shift+] |
| Step Backward | Ctrl+Shift+[ | Cmd+Shift+[ |
| Free Transform | Ctrl+T | Cmd+T |
| Zoom In | Ctrl++ | Cmd++ |
| Zoom Out | Ctrl+- | Cmd+- |
| Fit on Screen | Ctrl+0 | Cmd+0 |
| Actual Pixels | Ctrl+1 | Cmd+1 |
| New Layer | Ctrl+Shift+N | Cmd+Shift+N |
| Group Layers | Ctrl+G | Cmd+G |
| Ungroup Layers | Ctrl+Shift+G | Cmd+Shift+G |
| Select All Layers | Ctrl+Alt+A | Cmd+Option+A |
| Deselect All Layers | Ctrl+Shift+D | Cmd+Shift+D |
| Convert to Smart Object | Right-click layer > Convert to Smart Object | Right-click layer > Convert to Smart Object |
25. Integrating with Other Adobe Applications: A Connected Ecosystem
How can I integrate Photoshop with other Adobe applications for a more seamless workflow? Integrating Photoshop with other Adobe applications creates a connected ecosystem that streamlines your workflow.
- Adobe Lightroom: As mentioned earlier, you can seamlessly transfer images between Lightroom and Photoshop for editing.
- Adobe Bridge: Adobe Bridge is a powerful file management tool that allows you to organize, browse, and preview your images before uploading them to Photoshop.
- Adobe Illustrator: You can copy and paste vector graphics from Illustrator into Photoshop as Smart Objects, preserving their scalability and editability.
- Adobe InDesign: You can place Photoshop files directly into InDesign layouts for print and digital publishing projects.
- Adobe After Effects: You can import Photoshop files into After Effects to create motion graphics and visual effects.
- Adobe Camera Raw: Camera Raw is integrated into Photoshop, allowing you to process RAW image files with extensive editing capabilities.
26. Tips and Tricks for Efficient Photo Uploading
What are some additional tips and tricks that can help me upload photo to Photoshop more efficiently?
- Use a Fast Storage Device: Store your images on a fast storage device such as an SSD (Solid State Drive) to improve upload and processing speeds.
- Close Unnecessary Applications: Close any unnecessary applications to free up system resources and improve Photoshop’s performance.
- Optimize Your System: Keep your operating system and drivers up to date to ensure optimal performance.
- Monitor Resource Usage: Use the Task Manager (Windows) or Activity Monitor (macOS) to monitor resource usage and identify any bottlenecks.
- Use a Wired Connection: Use a wired (Ethernet) connection instead of Wi-Fi for faster and more stable network speeds.
- Regularly Clean Up Your Files: Regularly clean up your files and folders to remove unnecessary clutter and improve organization.
27. Using Adobe Bridge: A Powerful File Management Tool
How can Adobe Bridge help me manage my photos before and after I upload photo to Photoshop? Adobe Bridge is a powerful file management tool that can help you organize, browse, and preview your images before and after uploading them to Photoshop.
- Browse and Organize: Use Adobe Bridge to browse your folders and organize your images using collections, keywords, and metadata.
- Preview Images: Preview images in Bridge before opening them in Photoshop.
- Batch Rename: Use the batch rename feature to rename multiple files at once, ensuring consistent naming conventions.
- Apply Metadata: Apply metadata (such as copyright information, keywords, and descriptions) to your images in Bridge.
- Open in Photoshop: Open images directly in Photoshop from Bridge.
- Create Contact Sheets: Create contact sheets and PDF presentations of your images using Bridge.
28. Creating Presets for Import Settings: Saving Time and Effort
Is it possible to create presets for import settings to save time when I upload photo to Photoshop? Creating presets for import settings can save time and effort by automating repetitive tasks.
- Define Your Settings: Determine the settings you want to save as a preset (e.g., file format, quality, color profile).
- Save Preset: In the relevant dialog box (e.g., Save for Web (Legacy), Image Processor), look for an option to save your settings as a preset.
- Apply Preset: When you upload photo to Photoshop, apply the preset to automatically apply your saved settings.
29. Leveraging Online Resources and Tutorials: Continuous Learning
Where can I find online resources and tutorials to learn more about how to upload photo to Photoshop? Leveraging online resources and tutorials is essential for continuous learning and staying up-to-date with the latest techniques and best practices.
- Adobe Photoshop Tutorials: The official Adobe website offers a wealth of tutorials and resources for learning Photoshop.
- YouTube: YouTube is a valuable source for video tutorials on Photoshop.
- Skillshare: Skillshare offers a variety of online courses on Photoshop and photo editing.
- Lynda.com (LinkedIn Learning): Lynda.com (now LinkedIn Learning) provides comprehensive video courses on Photoshop.
- Photography Blogs and Websites: Many photography blogs and websites offer tutorials and tips on using Photoshop.
- Online Forums: Online forums such as the Adobe Photoshop Community Forums are great places to ask questions and get help from other users.
30. The Future of Photo Uploading in Photoshop
What advancements can we expect in the future regarding how to upload photo to Photoshop? The future of photo uploading in Photoshop will likely involve AI-powered features, cloud integration, and improved file format support.
31. AI-Powered Upload Features: Enhancing Automation
How might AI enhance the process to upload photo to Photoshop in the future? AI could automate tasks such as file format conversion, image optimization, and color profile management, making the uploading process more efficient and user-friendly.
32. Cloud Integration: Seamless Access Across Devices
Will cloud integration play a bigger role in how we upload photo to Photoshop in the future? Cloud integration will likely become even more seamless, allowing users to access their images from any device and collaborate with others in real-time.
33. Improved File Format Support: Handling Emerging Standards
Can we expect Photoshop to support new and emerging file formats in the future? Photoshop will likely continue to add support for new and emerging file formats, ensuring compatibility with the latest cameras and devices.
FAQ: Frequently Asked Questions
Q1: What is the best file format to upload to Photoshop?
A: The best file format depends on your intended use. JPEG is suitable for web images and sharing, while TIFF is preferred for high-quality printing. PSD is ideal for saving layered files for further editing.
Q2: How do I maintain image quality when uploading to Photoshop?
A: Use lossless file formats like TIFF or PNG, and ensure that you are not compressing the image excessively during the saving process.
Q3: Why is my image blurry after uploading to Photoshop?
A: This could be due to low resolution or excessive compression. Check the image resolution and adjust the compression settings when saving.
Q4: How do I upload multiple images to Photoshop at once?
A: Use the “Image Processor” script (File > Scripts > Image Processor) to batch process multiple images.
Q5: Can I upload RAW files directly to Photoshop?
A: Yes, Photoshop supports RAW files through the Adobe Camera Raw plugin.
Q6: What is a Smart Object, and why should I use it?
A: A Smart Object preserves an image’s source content with all its original characteristics, enabling you to perform non-destructive editing to the layer.
Q7: How do I fix the “Not enough memory” error in Photoshop?
A: Increase