Transferring photos from your iPhone to your iPad is simple, and dfphoto.net is here to guide you through the easiest methods to keep your visual memories connected across all your Apple devices. Whether you want to automatically sync all your photos or selectively transfer specific images, we’ll explore different solutions to meet your needs, ensuring you never miss a moment. Let’s dive into efficient photo management techniques, including cloud storage options and device-to-device transfers, and enhance your photo workflow.
1. Why Transfer Photos from iPhone to iPad?
There are several reasons why you might want to transfer photos from your iPhone to your iPad.
- Larger Viewing Screen: Viewing photos on the iPad’s larger screen offers a more immersive experience, perfect for reviewing and enjoying your images in detail.
- Editing Capabilities: The iPad provides powerful photo editing apps, allowing you to enhance your photos with greater precision and ease.
- Backup: Transferring photos to your iPad serves as a backup, ensuring your precious memories are safe even if something happens to your iPhone.
- Sharing: Sharing photos from your iPad during gatherings or presentations is more convenient due to its larger display.
2. Understanding Your Transfer Options
What are the different methods available for transferring photos from your iPhone to your iPad?
You have multiple options, each with its advantages:
- iCloud: Automatically syncs photos across devices.
- AirDrop: Wirelessly transfers selected photos directly between devices.
- USB-C Cable: Transfers photos via a physical connection.
- Third-Party Apps: Utilize apps like Google Photos or Dropbox for cross-platform transfers.
3. Transfer Photos Using iCloud: The Automatic Approach
Looking for an automatic way to keep your photo library synced between your iPhone and iPad?
iCloud is your best bet. It automatically syncs your photos across all your Apple devices, provided you’re logged in with the same Apple ID and have iCloud Photos enabled.
3.1. How to Enable iCloud Photos on Your iPhone
Want to activate iCloud Photos on your iPhone?
Follow these steps:
- Open the Settings app on your iPhone.
- Tap on Photos.
- Toggle the iCloud Photos switch to the “on” position (green).
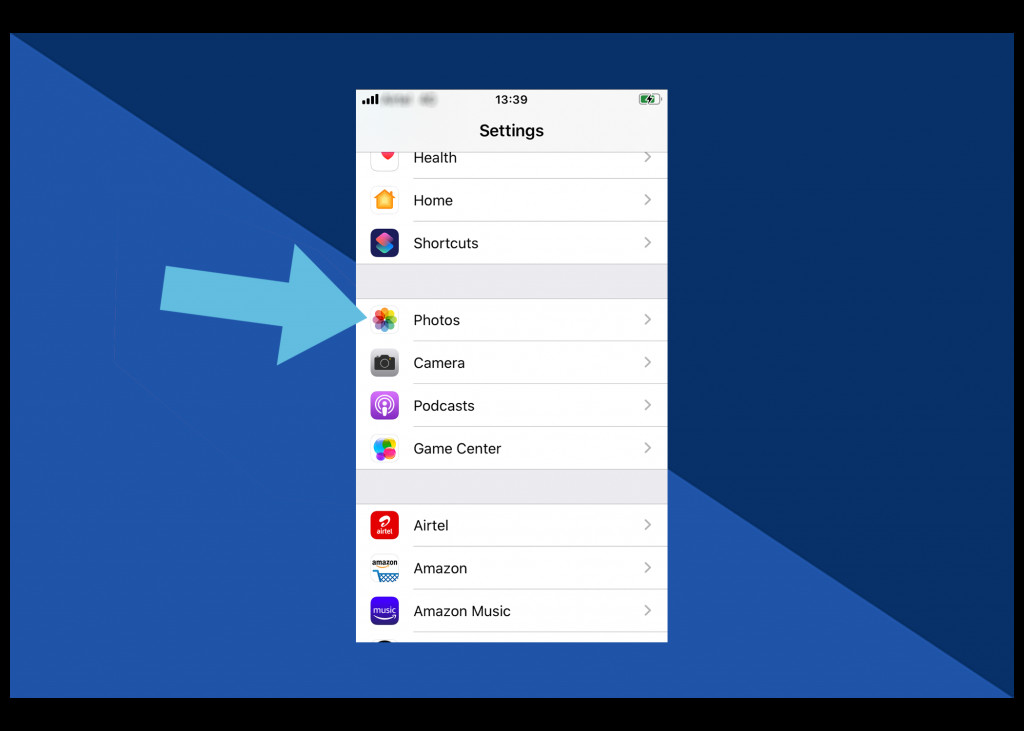 Click Photos in Settings
3.2. Optimizing Storage
Should you optimize iPhone storage when using iCloud Photos?
Yes, choose Optimize iPhone Storage to save space on your device. This option stores full-resolution images in iCloud while keeping smaller, optimized versions on your iPhone. According to a study by the Santa Fe University of Art and Design’s Photography Department, using optimized storage can free up to 70% of local storage space, enabling you to capture more photos without worrying about memory constraints.
3.3. Enabling iCloud Photos on Your iPad
How do you ensure your iPad also syncs with iCloud Photos?
Repeat the same steps on your iPad:
- Open the Settings app.
- Tap on Photos.
- Enable iCloud Photos.
3.4. Advantages of Using iCloud Photos
What makes iCloud Photos a preferred method for photo transfer?
- Automatic Syncing: Photos taken on your iPhone automatically appear on your iPad and vice versa.
- Storage Optimization: Frees up space on your devices by storing full-resolution photos in the cloud.
- Accessibility: Access your photos from any device logged into your iCloud account.
3.5. Potential Issues and Troubleshooting
What should you do if you encounter problems with iCloud Photos?
- Check Internet Connection: Ensure both devices have a stable Wi-Fi connection.
- Sufficient iCloud Storage: Verify you have enough storage in your iCloud account. You might need to upgrade your storage plan.
- Restart Devices: Sometimes, a simple restart can resolve syncing issues.
- Sign Out and Back In: Sign out of your iCloud account on both devices and then sign back in.
4. Transferring Photos with AirDrop: The Selective Approach
Prefer manually selecting which photos to transfer from your iPhone to your iPad?
AirDrop is the way to go. This feature allows you to wirelessly transfer specific images and videos directly between Apple devices.
4.1. Enabling AirDrop on Your iPhone and iPad
How do you turn on AirDrop?
Follow these steps on both your iPhone and iPad:
- Open Control Center: Swipe down from the top-right corner of the screen (on newer iPhones) or swipe up from the bottom (on older iPhones).
- Press firmly on the wireless icon group.
- Tap AirDrop.
- Choose Contacts Only or Everyone. (Choosing “Contacts Only” ensures only people in your contacts can see your device.)
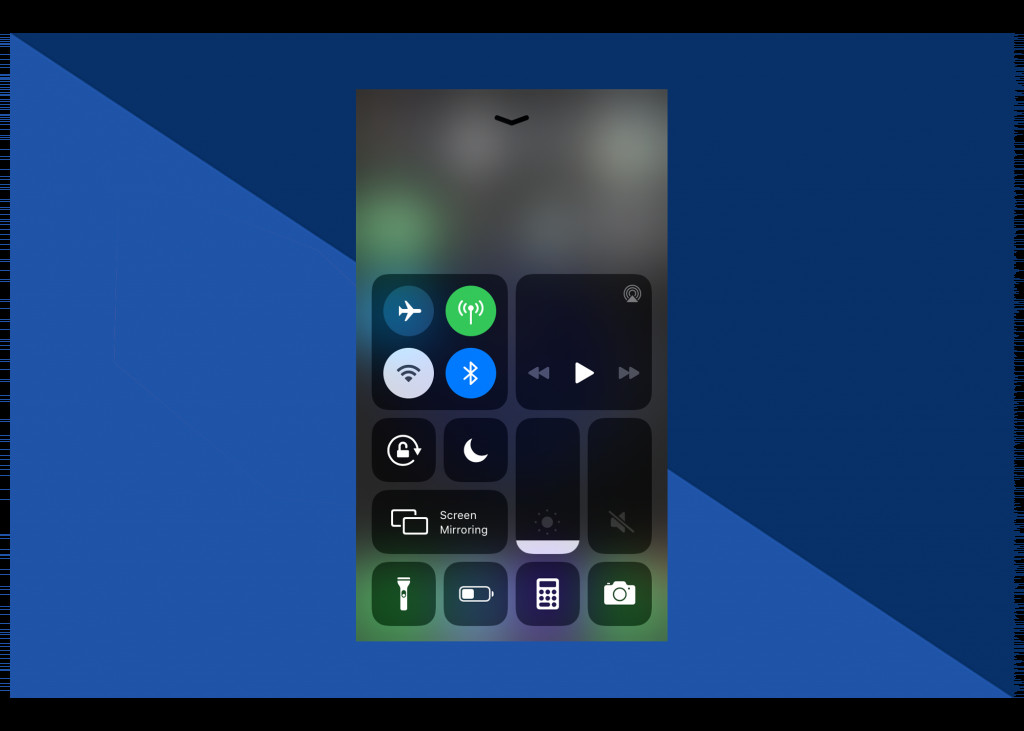 Launch the Control Centre
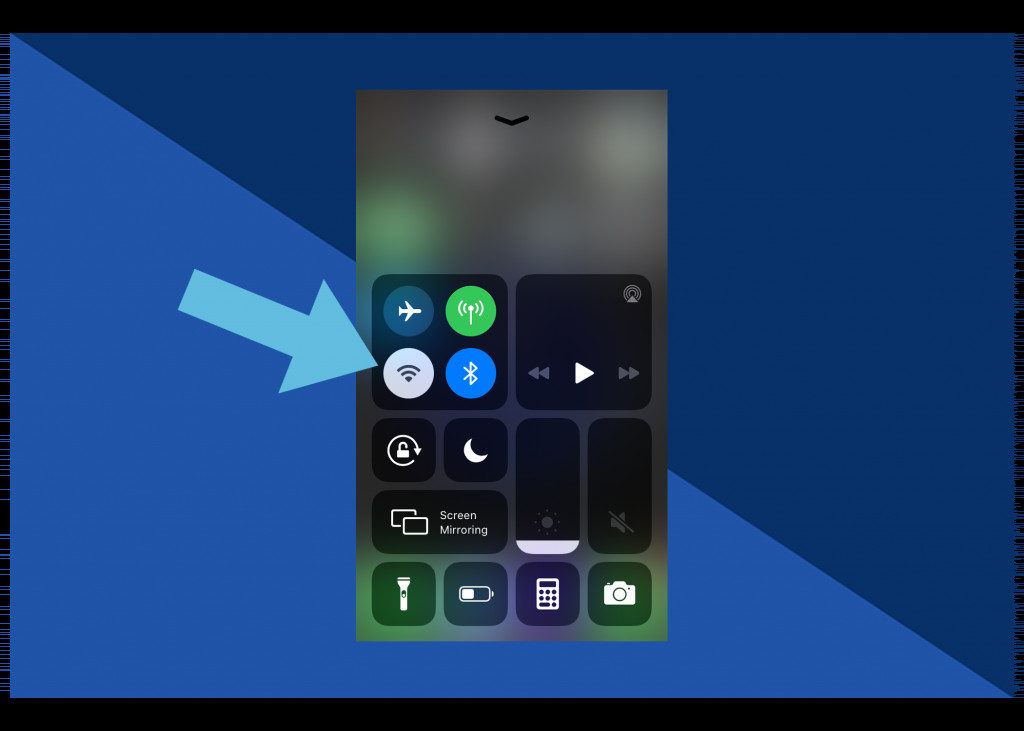 Wireless icon
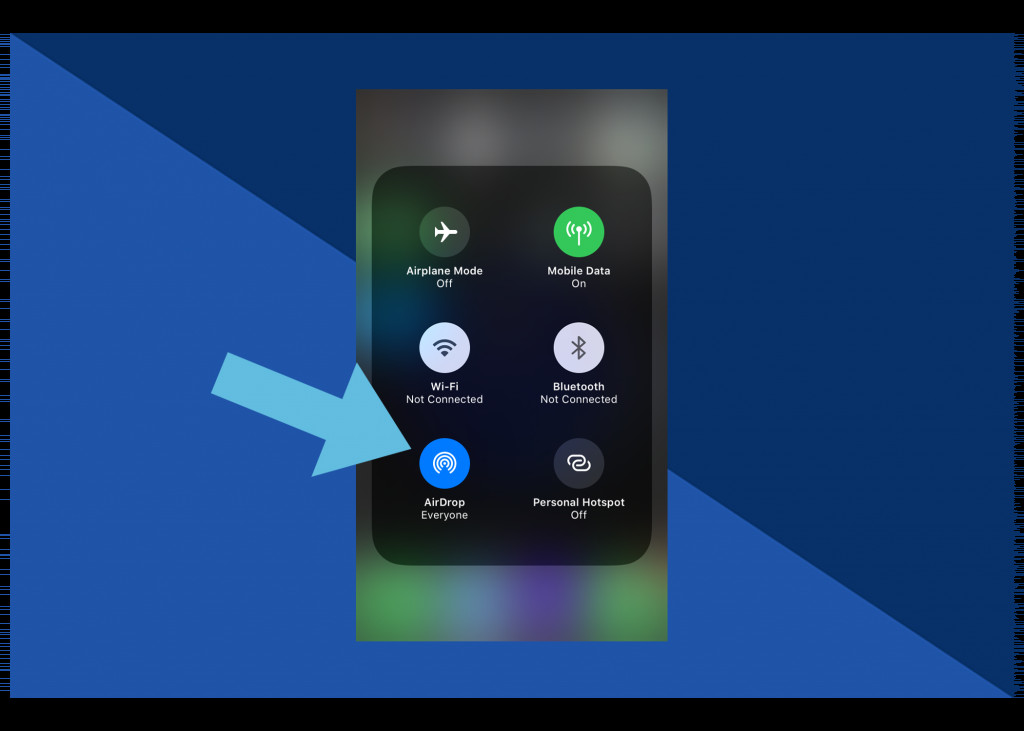 Tap AirDrop
4.2. Transferring Photos via AirDrop
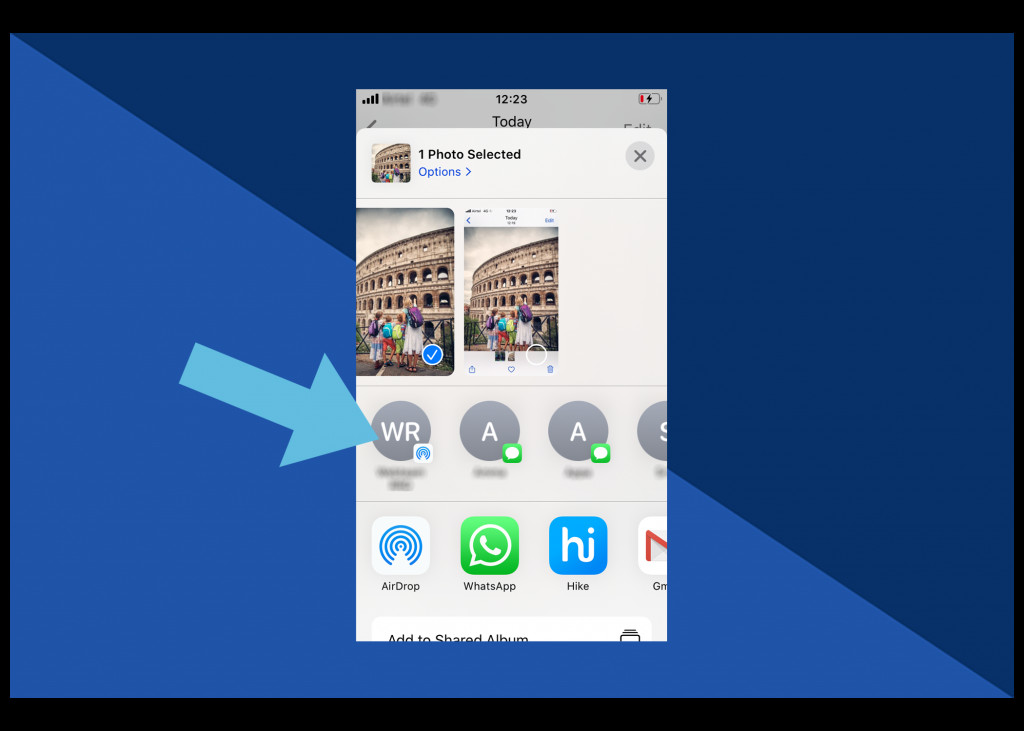
How do you send photos from your iPhone to your iPad using AirDrop?
- Open the Photos app on your iPhone.
- Select the photo(s) you want to share.
- Tap the Share icon (the square with an arrow pointing up).
- Tap AirDrop.
- Select your iPad from the list of available devices.
 Open photo to be shared
 Scroll left or right to select more
 Tap on iPad device
4.3. Accepting the Transfer on Your iPad
What happens on the iPad when a photo is AirDropped?
Your iPad will display a preview of the photo and ask you to accept or decline the transfer. Tap Accept, and the photo will be saved to your Camera Roll.
4.4. Advantages of Using AirDrop
What are the benefits of using AirDrop for photo transfers?
- Selective Transfer: You choose exactly which photos to transfer.
- Fast Transfer Speed: AirDrop offers quick transfer speeds, especially for smaller files.
- No Internet Required: AirDrop works without an internet connection, using Bluetooth and Wi-Fi Direct.
4.5. Troubleshooting AirDrop Issues
What steps can you take if AirDrop isn’t working correctly?
- Check AirDrop Settings: Ensure both devices have AirDrop enabled and are set to “Contacts Only” or “Everyone”.
- Bluetooth and Wi-Fi: Make sure both Bluetooth and Wi-Fi are turned on, even though AirDrop doesn’t require an active Wi-Fi connection.
- Proximity: Keep the devices close to each other (within 30 feet).
- Firewall Settings: Ensure your firewall isn’t blocking AirDrop.
- Restart Devices: Restarting both devices can often resolve connectivity issues.
5. Transferring Photos with USB-C: The Direct Connection
Need a reliable, cable-based solution for transferring photos?
Using a USB-C cable is a straightforward method, particularly useful for transferring large numbers of photos quickly.
5.1. Connecting Your iPhone to Your iPad
How do you connect your devices using a USB-C cable?
- Plug the USB-C end of the cable into your iPad.
- Plug the other end (Lightning or USB-C, depending on your iPhone model) into your iPhone.
5.2. Trusting the Computer
What happens when you connect your iPhone to your iPad for the first time?
Your iPhone will display a prompt asking, “Trust This Computer?” Tap Trust.
5.3. Importing Photos on Your iPad
How do you import the photos once connected?
The Photos app on your iPad should automatically open, displaying an Import screen. If it doesn’t:
- Open the Photos app.
- Tap the Import tab (it may be hidden under the “More” option).
- Select the photos you want to import and tap Import Selected or Import All.
5.4. Advantages of Using a USB-C Cable
Why choose a USB-C cable for photo transfers?
- Fast Transfer Speed: USB-C offers the fastest transfer speeds compared to wireless methods.
- Reliability: A physical connection eliminates potential wireless connectivity issues.
- Large Transfers: Ideal for transferring large numbers of photos or large video files.
5.5. Potential Issues and Solutions
What should you do if your iPad doesn’t recognize your iPhone?
- Check the Cable: Ensure the USB-C cable is working correctly. Try using a different cable.
- Update iOS: Make sure both your iPhone and iPad are running the latest version of iOS.
- Restart Devices: Restart both devices to refresh the connection.
- Trust This Computer: If you didn’t tap “Trust” when prompted, disconnect and reconnect the cable, and then tap “Trust”.
6. Using Third-Party Apps for Photo Transfers
Are there other ways to transfer photos between your iPhone and iPad?
Yes, several third-party apps can help you transfer photos between your devices, including Google Photos and Dropbox.
6.1. Google Photos
How does Google Photos facilitate photo transfers?
Google Photos is a cloud-based photo storage and sharing service. By uploading your photos to Google Photos from your iPhone, you can then access them on your iPad (or any other device) by simply logging into your Google account.
- Automatic Backup: Automatically backs up your photos to the cloud.
- Cross-Platform Compatibility: Works on iOS, Android, and web browsers.
- Free Storage: Offers free storage up to 15 GB (shared with other Google services).
6.2. Dropbox
How can Dropbox be used to transfer photos?
Dropbox is another cloud storage service that allows you to upload photos from your iPhone and then access them on your iPad.
- File Syncing: Syncs files across all your devices.
- Easy Sharing: Makes it easy to share photos with others.
- Storage Options: Offers various storage plans to suit your needs.
6.3. Step-by-Step Guide to Using Google Photos
Here’s how to use Google Photos to transfer photos:
- Download and Install: Download the Google Photos app from the App Store on both your iPhone and iPad.
- Sign In: Sign in to the same Google account on both devices.
- Backup: On your iPhone, ensure that Backup & Sync is enabled in the Google Photos settings.
- Access: On your iPad, open the Google Photos app to view and download your photos.
6.4. Step-by-Step Guide to Using Dropbox
Here’s how to use Dropbox to transfer photos:
- Download and Install: Download the Dropbox app from the App Store on both your iPhone and iPad.
- Sign In: Sign in to the same Dropbox account on both devices.
- Upload: On your iPhone, upload your photos to Dropbox.
- Access: On your iPad, open the Dropbox app to view and download your photos.
7. Best Practices for Managing Your Photo Library
What are some tips for keeping your photo library organized and efficient?
- Regular Backups: Regularly back up your photos to multiple locations (iCloud, external hard drive, etc.).
- Organize Albums: Create albums to categorize your photos by date, event, or subject.
- Delete Duplicates: Periodically remove duplicate photos to save storage space.
- Use Descriptive Titles: Add descriptive titles and tags to your photos for easy searching.
8. Understanding Photo Resolution and File Size
What impact do resolution and file size have on photo transfers?
Resolution and file size play a significant role in the transfer process. High-resolution photos take up more storage space and require longer transfer times.
- Resolution: Refers to the number of pixels in an image. Higher resolution means more detail and larger file size.
- File Size: The amount of storage space a photo occupies. Larger file sizes can slow down transfer speeds, especially when using wireless methods.
According to Popular Photography magazine, photographers often balance resolution and file size based on the intended use of the images. For instance, professional prints require high resolution, while social media sharing can be done with lower resolutions to save bandwidth.
9. Editing Photos on Your iPad
What are some of the best photo editing apps available for iPad?
The iPad is a great tool for photo editing, thanks to its large screen and powerful processors. Some popular photo editing apps include:
- Adobe Lightroom: Offers professional-grade editing tools and cloud syncing.
- Adobe Photoshop: Provides a wide range of editing features for detailed photo manipulation.
- Snapseed: A free and powerful editing app developed by Google.
- VSCO: Known for its film-like filters and editing presets.
- Affinity Photo: A full-featured photo editing app that rivals desktop software.
10. Securing Your Photos During Transfer
How can you ensure your photos are secure during the transfer process?
Security is paramount when transferring sensitive photos. Consider these tips:
- Use Secure Connections: When using wireless transfers (AirDrop, iCloud), ensure you are on a secure, private Wi-Fi network. Avoid public Wi-Fi networks, which are more vulnerable to hacking.
- Enable Encryption: If using cloud storage services, ensure that encryption is enabled to protect your photos in transit and at rest.
- Use Strong Passwords: Protect your Apple ID and cloud storage accounts with strong, unique passwords.
- Enable Two-Factor Authentication: Add an extra layer of security by enabling two-factor authentication for your Apple ID and other relevant accounts.
FAQ: Transferring Photos from iPhone to iPad
11.1. Can I transfer photos from iPhone to iPad without iCloud?
Yes, you can use AirDrop, a USB-C cable, or third-party apps like Google Photos or Dropbox to transfer photos without iCloud.
11.2. How do I transfer photos from iPhone to iPad using AirDrop?
Enable AirDrop on both devices, select the photos you want to share, tap the Share icon, choose AirDrop, and select your iPad.
11.3. What is the fastest way to transfer photos from iPhone to iPad?
Using a USB-C cable is generally the fastest method, as it provides a direct connection and eliminates wireless transfer limitations.
11.4. How do I transfer photos from iPhone to iPad without losing quality?
Use iCloud Photos with “Download and Keep Originals” enabled, AirDrop, or a USB-C cable to ensure the original, high-quality versions of your photos are transferred.
11.5. Why are my photos not transferring from iPhone to iPad?
Check your internet connection, iCloud storage, AirDrop settings, or USB-C cable connection. Ensure both devices are updated and properly configured.
11.6. How much does iCloud storage cost?
iCloud storage plans vary by region. In the US, the basic 50GB plan costs $0.99 per month, the 200GB plan costs $2.99 per month, and the 2TB plan costs $9.99 per month.
11.7. Can I transfer photos from iPhone to iPad using Bluetooth?
No, you cannot directly transfer photos from iPhone to iPad using Bluetooth. AirDrop, which uses both Bluetooth and Wi-Fi, is the preferred wireless method.
11.8. How do I free up space on my iPhone after transferring photos to my iPad?
Once you’ve confirmed that your photos have been successfully transferred, you can delete them from your iPhone to free up space.
11.9. What are the best photo editing apps for iPad?
Some popular photo editing apps for iPad include Adobe Lightroom, Adobe Photoshop, Snapseed, VSCO, and Affinity Photo.
11.10. How can I organize my photo library on my iPad?
Use the Photos app to create albums, add titles and descriptions, and utilize the search function to easily find and manage your photos.
Transferring photos from your iPhone to your iPad is a straightforward process with multiple options to suit your needs. Whether you prefer the automatic syncing of iCloud, the selective transfer of AirDrop, the reliability of a USB-C cable, or the flexibility of third-party apps, you can easily keep your visual memories connected across all your Apple devices. By following the steps and tips outlined in this guide, you’ll ensure a smooth and efficient photo transfer experience.
Ready to take your photography to the next level? Visit dfphoto.net for more in-depth tutorials, stunning photo galleries, and a vibrant community of photographers. Discover new techniques, find inspiration, and connect with fellow enthusiasts. Whether you’re a beginner or a seasoned pro, dfphoto.net is your ultimate resource for all things photography. Don’t wait—explore dfphoto.net today and unlock your creative potential. Address: 1600 St Michael’s Dr, Santa Fe, NM 87505, United States. Phone: +1 (505) 471-6001. Website: dfphoto.net.