Achieving a clean, white background in your photos can elevate product photography, portraits, and more. While seemingly simple, capturing perfect white backdrops requires specific techniques. This guide will provide a step-by-step approach for beginners using DSLR cameras to master white background photography.
 Alt text: Camera, lens, and lighting equipment set up for photography.
Understanding Lighting:
The foundation of successful white background photography lies in proper lighting. Ideally, bright, indirect sunlight is optimal. Experiment with different locations and times of day to find soft, diffused light that minimizes harsh shadows. A large window on a cloudy day or a spot just inside an open garage can provide excellent conditions. Avoid direct sunlight, which creates strong shadows and overexposed highlights.
 Alt text: A photo taken in good lighting but with a gray background, demonstrating the need for further adjustments.
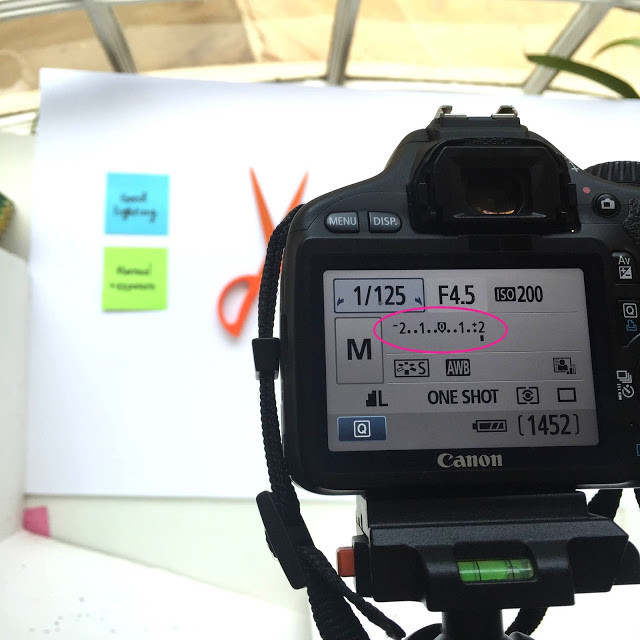
Mastering Exposure:
Shooting in Auto mode often results in a grayish background and underexposed subjects because the camera compensates for the bright white. Switch to Manual mode to control exposure settings:
- Exposure Compensation: Increase the exposure compensation value. Start at +1 and incrementally adjust until the background appears brighter, aiming for +2 or higher. Review the light meter to guide your adjustments.
- ISO: Maintain a low ISO (around 200) to minimize noise. Increase ISO only if necessary in low-light situations.
- Aperture: Use a low aperture (f/4.5 or lower) to maximize light intake and create a shallow depth of field, blurring the background and focusing attention on the subject.
- Shutter Speed: Adjust shutter speed to fine-tune exposure. When handheld, avoid speeds slower than 1/60th of a second to prevent blur. A tripod allows for slower shutter speeds.
 Alt text: Comparison of photos with different exposure levels, showcasing the impact on background brightness.
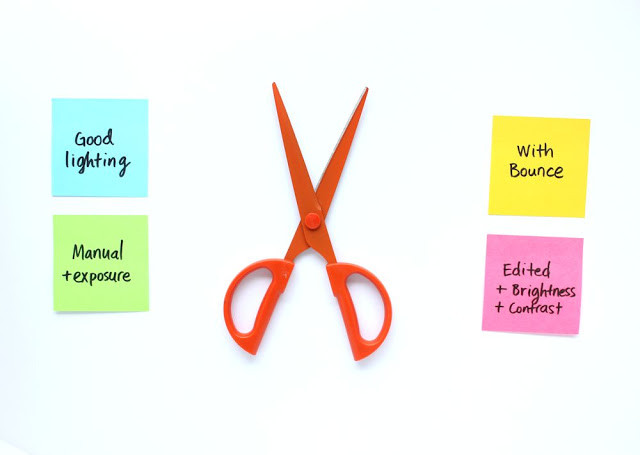
Utilizing a White Bounce Card:
A white bounce card, positioned opposite the light source, reflects light back onto the subject, filling in shadows and creating a more even illumination. A simple foam board works effectively.
 Alt text: A photo demonstrating the use of a white bounce card to reduce shadows.
Basic Photo Editing:
Post-processing enhances the final image. Increase brightness and contrast to achieve a pure white background and enhance subject clarity.
 Alt text: Before and after photo showcasing the impact of brightness and contrast adjustments.
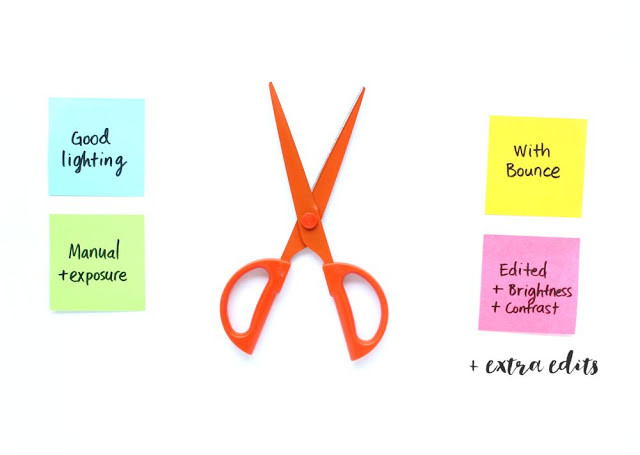
Advanced Editing Techniques:
For further refinement, use a lighten or dodge tool at low opacity to brighten dark corners or edges.
 Alt text: A photo demonstrating subtle edits to remove dark corners and create a uniformly white background.
Conclusion:
By understanding lighting, mastering exposure settings, using a bounce card, and applying basic editing techniques, you can achieve professional-looking photos with pristine white backgrounds. Practice and experimentation will help you refine your skills and create stunning visuals.

