Taking photos of clothes to sell online starts with understanding how crucial visuals are in today’s e-commerce landscape; dfphoto.net is here to guide you through each step of capturing eye-catching images that will attract buyers and increase sales. By mastering these photography tips, you can beautifully showcase apparel, highlight key features, and convert online browsers into paying customers. This comprehensive guide helps you create professional-looking photos that enhance your listings with product photography, garment presentation, and visual merchandising, ultimately boosting your online sales success.
1. Prepare Your Clothing Items
Ensuring your clothes look their absolute best is crucial for online sales. This meticulous approach significantly impacts how potential buyers perceive your items.
1.1. Eliminate Wrinkles
Wrinkles can make clothing appear unkempt and unprofessional, regardless of its actual condition. Thankfully, ironing isn’t the only solution. According to research from the Santa Fe University of Art and Design’s Photography Department, in July 2025, steaming can effectively remove wrinkles while being gentler on delicate fabrics. Using a clothes steamer or placing the garment in the dryer for a few minutes can quickly smooth out wrinkles.
1.2. Banish Stains
Stains are a major deterrent for buyers. Whether selling new or used clothing, ensuring your items are stain-free is essential. A stain remover pen works wonders for small blemishes, while a gentle solution of dish detergent and warm water can tackle more stubborn stains. If selling second-hand items, washing the garment before photographing it is imperative.
1.3. Remove Lint and Debris
Lint, pet hair, and other small debris can detract from the overall appearance of clothing. A lint roller is an invaluable tool for quickly removing these imperfections. Run the lint roller over the garment’s surface to ensure a clean and polished look.
1.4. Trim Loose Threads
Loose threads can make clothing look unfinished or poorly maintained. Carefully trim any loose threads with a pair of scissors, being mindful not to cut into the fabric itself. If the thread is unraveling the seam, consider using a sewing kit or consulting a seamstress for repair.
2. Select The Right Camera
Choosing the right camera for photographing clothes depends on your goals and resources. Factors to consider include whether you’re selling clothes as a side hustle or a full-time business, the volume of photos you’ll be taking, and your budget.
2.1. Smartphone Cameras
Smartphone cameras have significantly improved in recent years, offering excellent image quality suitable for online clothing sales. If you’re just starting or have a limited budget, a smartphone camera can be a great option. They are convenient, easy to use, and often provide features like built-in editing tools.
2.2. DSLR Cameras
For those looking to take their clothing photography to the next level, a DSLR camera offers superior image quality, versatility, and control. DSLR cameras allow you to use different lenses, adjust settings like aperture and shutter speed, and capture more detailed and professional-looking photos.
2.3. Lens Guide
The lens you choose can significantly impact the look and feel of your clothing photos.
| Lens Type | Use Cases | Pros | Cons |
|---|---|---|---|
| Prime Lens | Ideal for flat lays and detail shots, offering sharpness and clarity. | Excellent image quality, wider aperture for better low-light performance, often more compact and lightweight. | Less versatile than zoom lenses, require moving around to adjust framing. |
| Zoom Lens | Versatile for various shots, from full-length to close-ups, providing flexibility in framing. | Greater flexibility in framing, convenient for shooting from different distances. | Can be heavier and more expensive than prime lenses, image quality may not be as high as prime lenses. |
| Macro Lens | Perfect for capturing intricate details like textures, stitching, and embellishments. | High magnification, excellent for showcasing fine details, can also be used for other types of photography. | Limited depth of field, can be challenging to use in low light, often more expensive than other lenses. |
| Wide-Angle Lens | Useful for photographing clothing in a lifestyle setting, capturing the garment along with its surroundings. | Can capture a wider field of view, useful for creating a sense of space and depth. | Can distort images, may not be ideal for showcasing clothing in a straightforward manner, requires careful composition to avoid unwanted elements in the frame. |
3. Shooting Styles
3.1. Flat Lay Photography
Flat lay photography is a simple and accessible way to showcase clothing items. It involves laying the clothing on a flat surface and taking a photo from directly above.
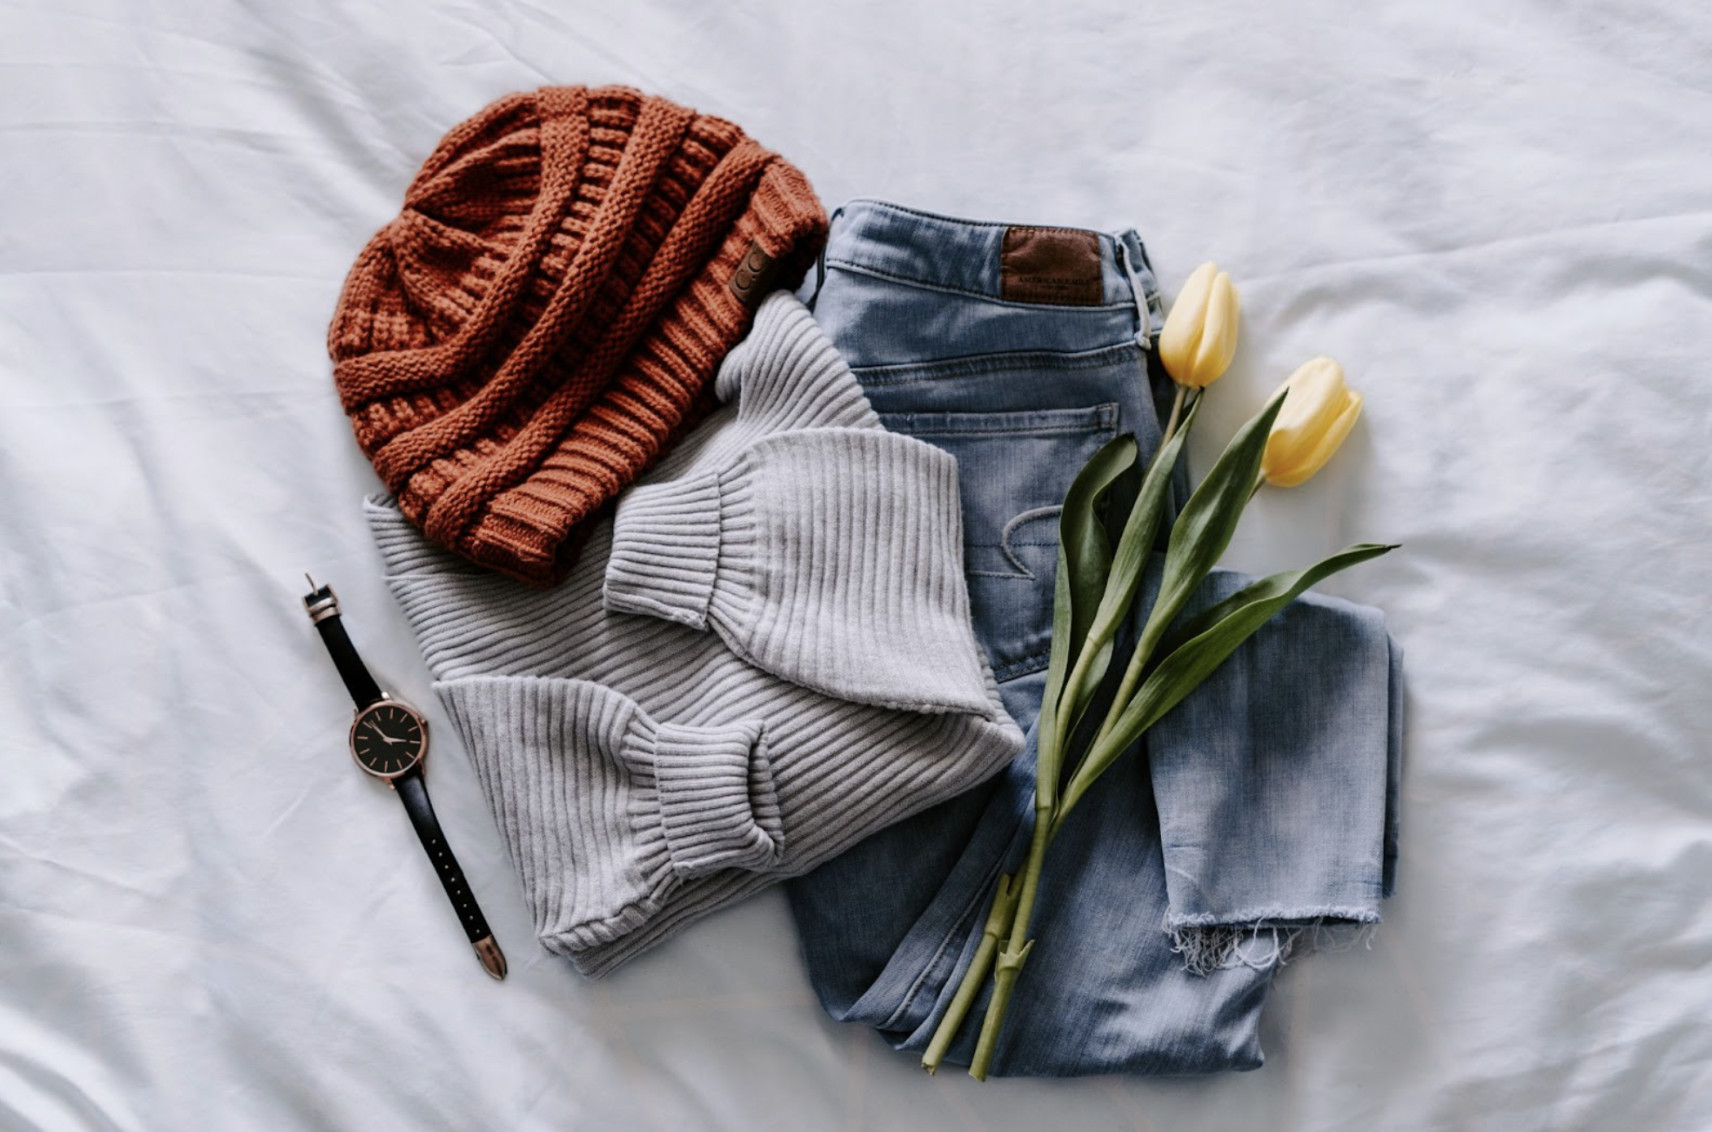 Flatlay disposition of clothes showcases various clothing items arranged on a clean backdrop
3.1.1. Benefits of Flat Lay Photography:
- Simplicity: Requires minimal equipment and setup.
- Accessibility: Can be done at home without professional assistance.
- Versatility: Suitable for various clothing items and styles.
3.1.2. Tips for Effective Flat Lay Photography:
- Choose a Clean Backdrop: Use a white or plain-colored sheet, blanket, or backdrop to create a clean and uncluttered background.
- Arrange Items Artistically: Experiment with different arrangements to showcase the clothing in an appealing way. Consider layering items, adding accessories, or creating visual interest with folds and textures.
- Ensure Proper Lighting: Use natural light or artificial lighting to illuminate the clothing evenly and avoid harsh shadows.
- Capture High-Quality Images: Use a high-resolution camera or smartphone camera to capture clear and detailed images.
3.2. Model Photography
Using models to showcase clothing can add a personal and relatable touch to your online listings. Models can bring the clothing to life, allowing potential buyers to visualize how it looks when worn.
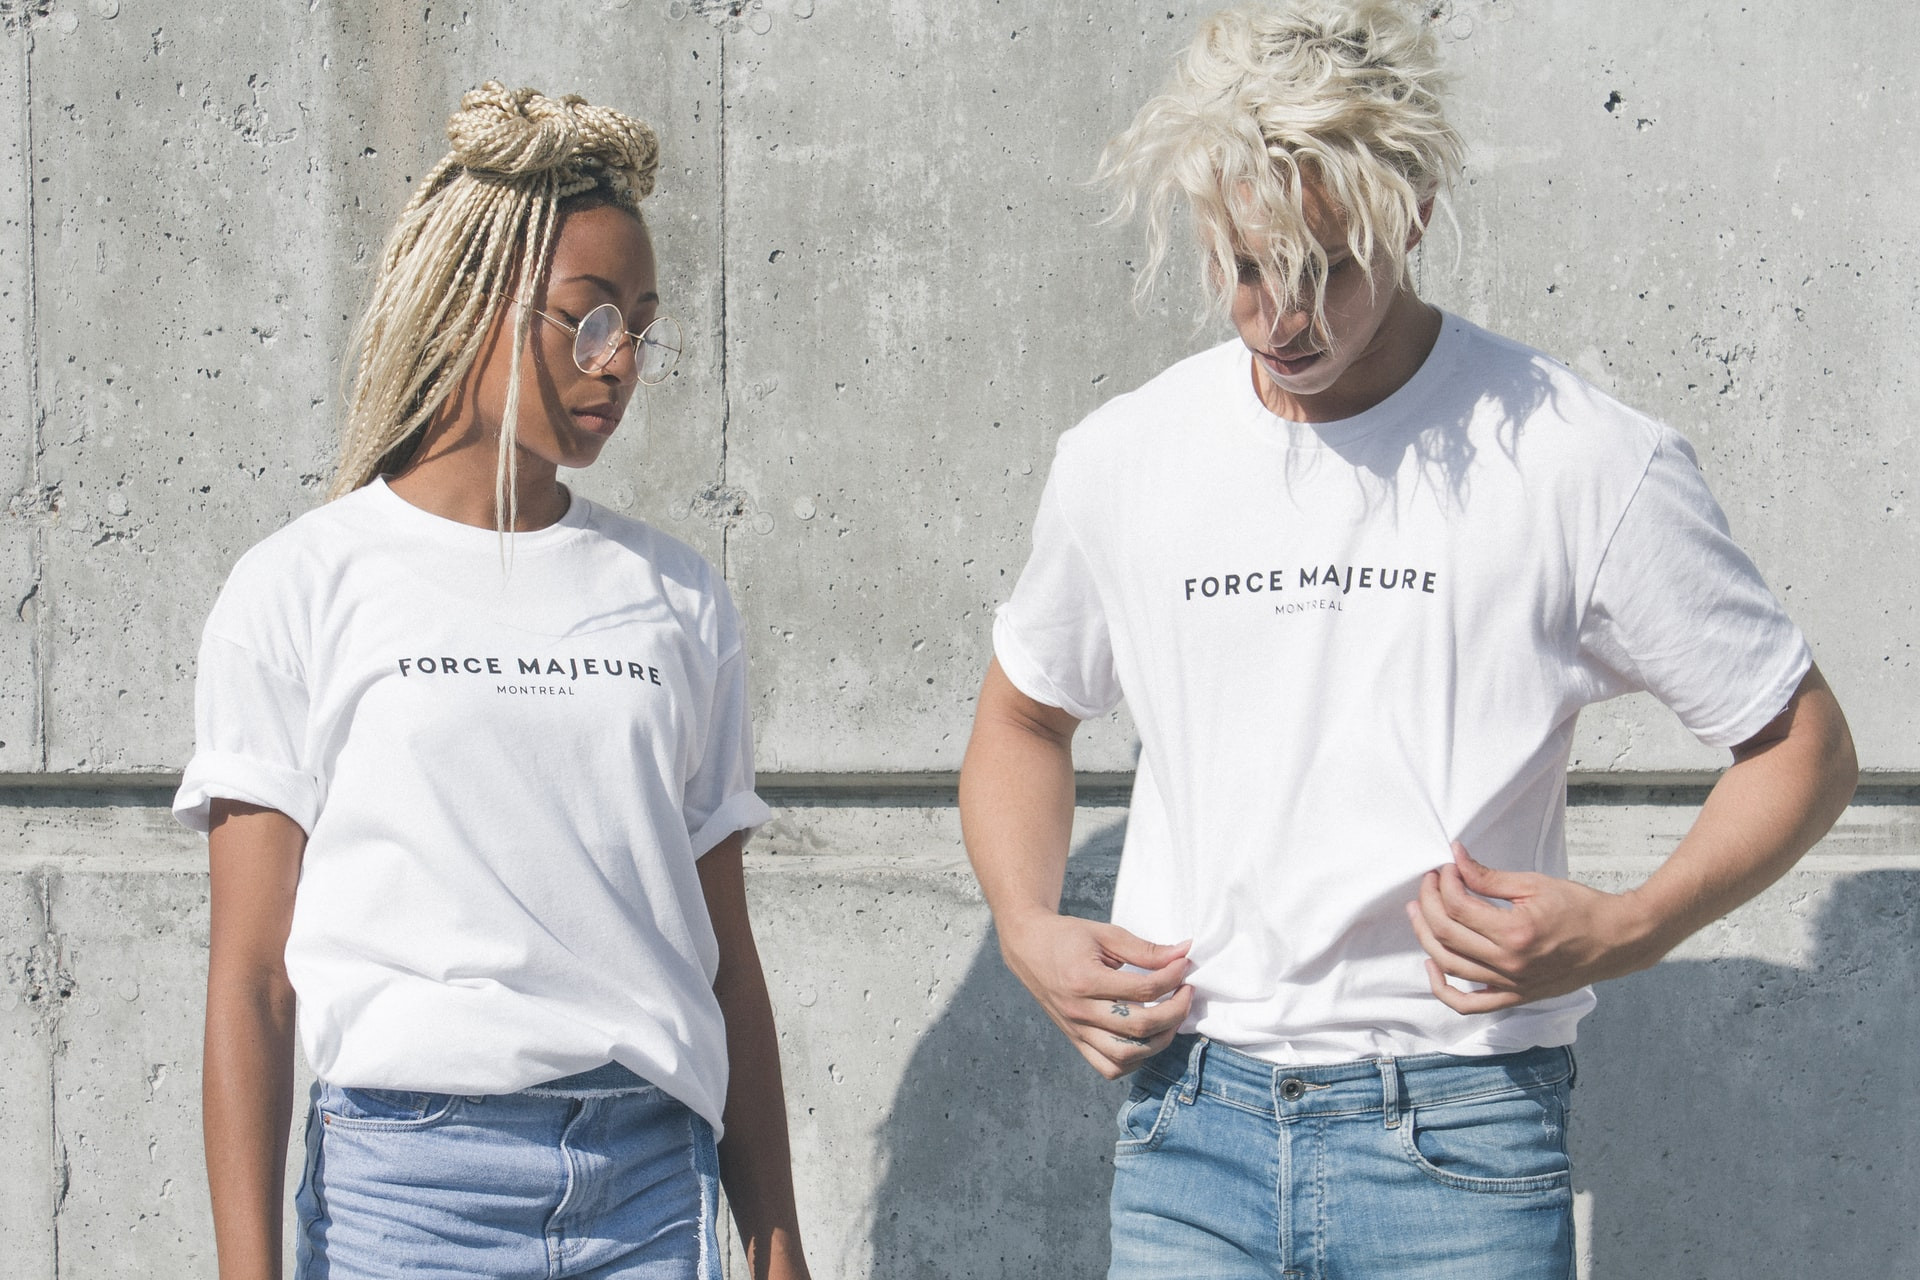 Woman and man showcasing their t shirts, both smiling and presenting the garments
3.2.1. Benefits of Model Photography:
- Relatability: Allows buyers to see how the clothing looks when worn, increasing their likelihood of purchase.
- Personalization: Adds a human element to your listings, making them more engaging and appealing.
- Versatility: Can be adapted to various styles and target audiences.
3.2.2. Tips for Effective Model Photography:
- Choose the Right Model: Select a model who aligns with your brand and target audience. Consider factors like age, body type, and style.
- Provide Clear Direction: Communicate your vision to the model and provide clear instructions on posing and expressions.
- Select a Suitable Location: Choose a location that complements the clothing and enhances the overall aesthetic of the photos.
- Capture a Variety of Shots: Take a variety of shots, including full-length, close-up, and detail shots, to showcase the clothing from different angles.
3.3. Hanging Photography
Hanging photography is another effective way to showcase clothing items, particularly dresses, blouses, and other garments that hang well. This method allows you to display the clothing in a streamlined and elegant manner.
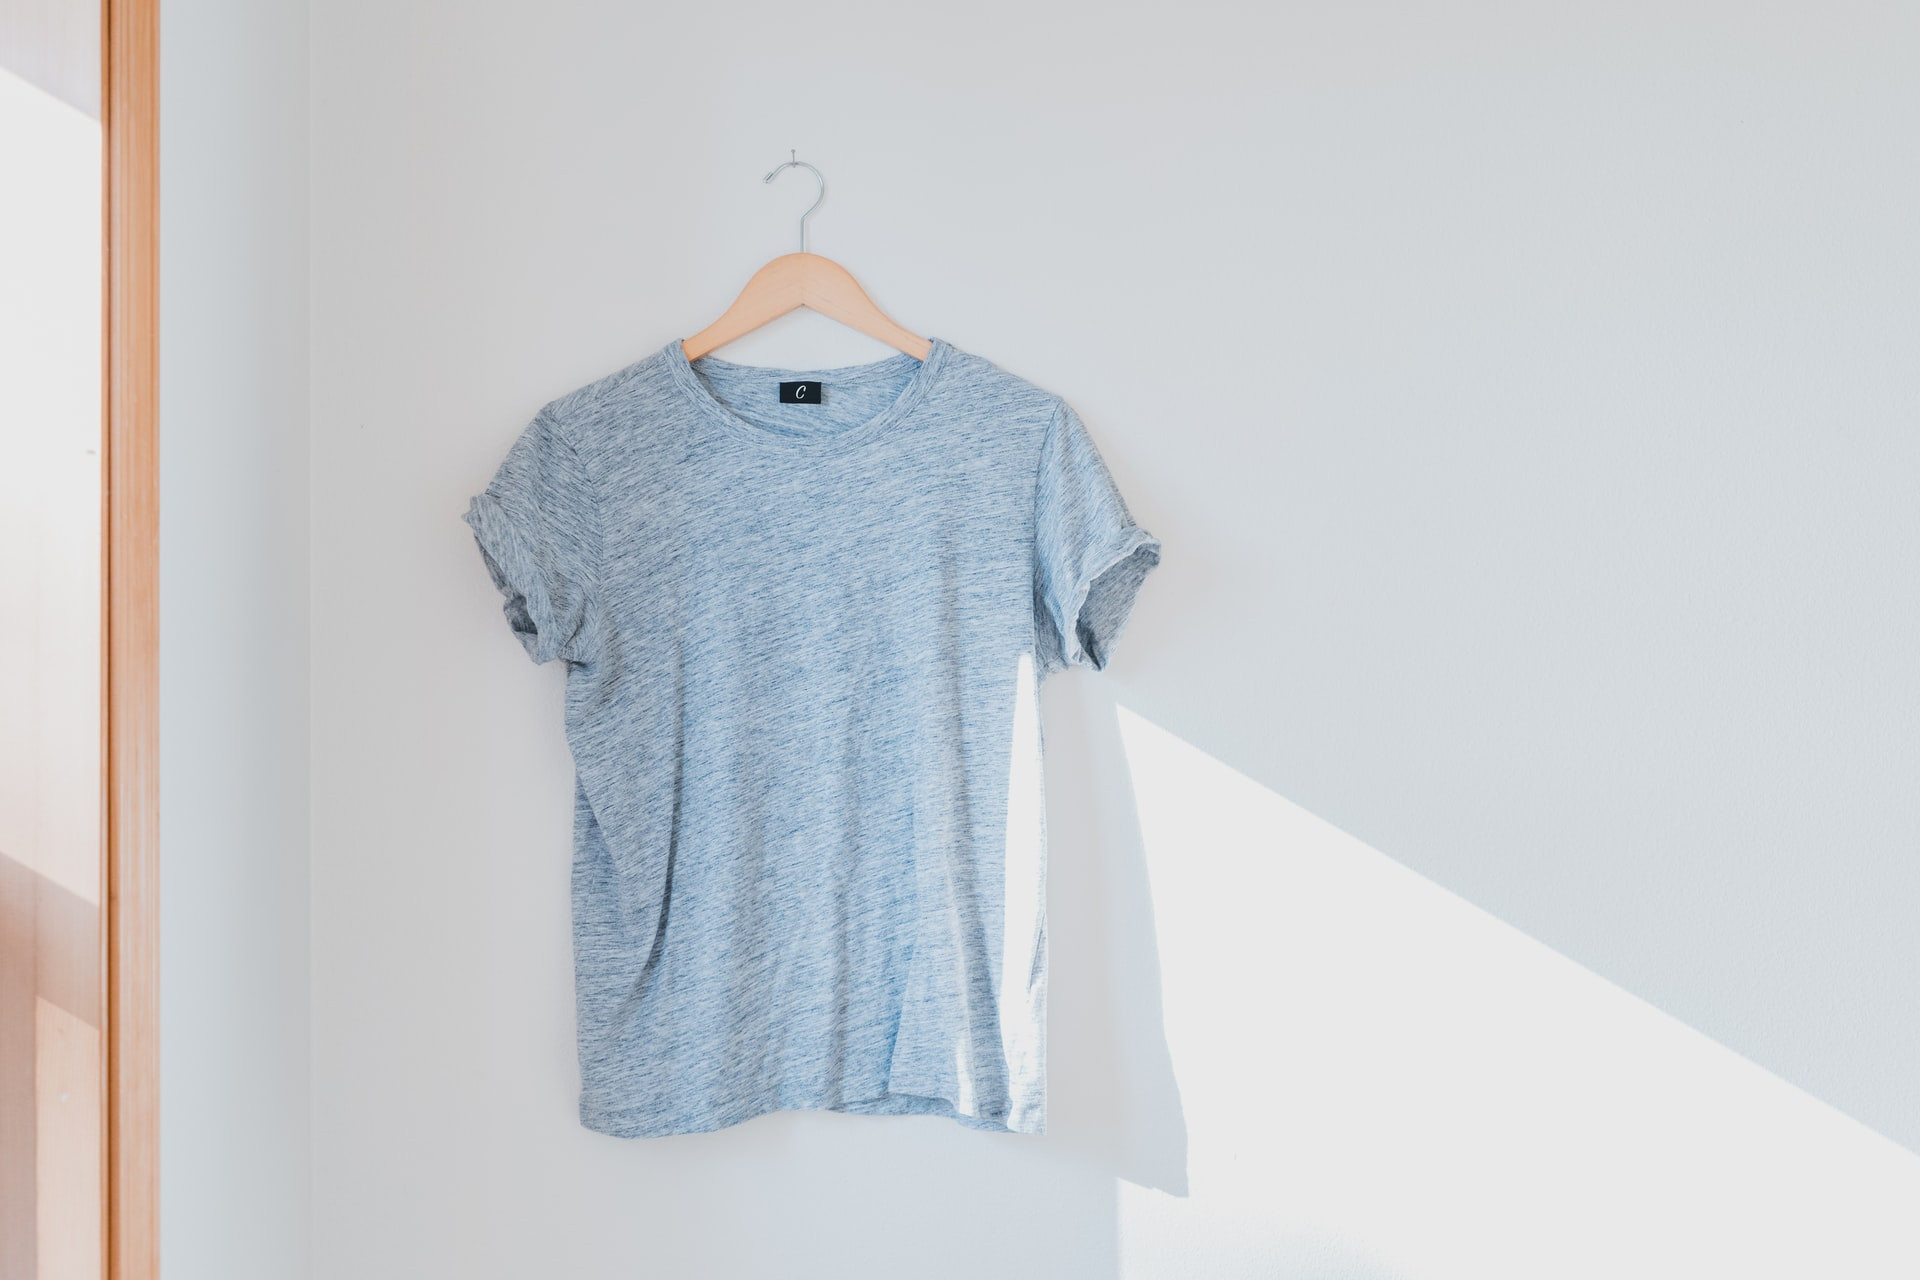 T-shirt hanging on a white wall showcases garment simplicity and design
3.3.1. Benefits of Hanging Photography:
- Streamlined Appearance: Displays clothing in a neat and organized manner.
- Versatility: Suitable for various clothing items that hang well.
- Simplicity: Requires minimal equipment and setup.
3.3.2. Tips for Effective Hanging Photography:
- Choose a Suitable Hanger: Select a hanger that complements the clothing and provides adequate support.
- Select a Clean Background: Use a white or plain-colored wall or backdrop to create a clean and uncluttered background.
- Ensure Proper Lighting: Use natural light or artificial lighting to illuminate the clothing evenly and avoid harsh shadows.
- Adjust Clothing for Optimal Appearance: Straighten the clothing, smooth out wrinkles, and ensure it hangs properly to showcase its best features.
4. Choosing Setting & Background
4.1. Plain Backgrounds
The safest option is to use a plain background. This ensures that the focus remains on the clothes you are selling. Consider using a tool like Designify to remove or change backgrounds quickly and consistently across all your photos.
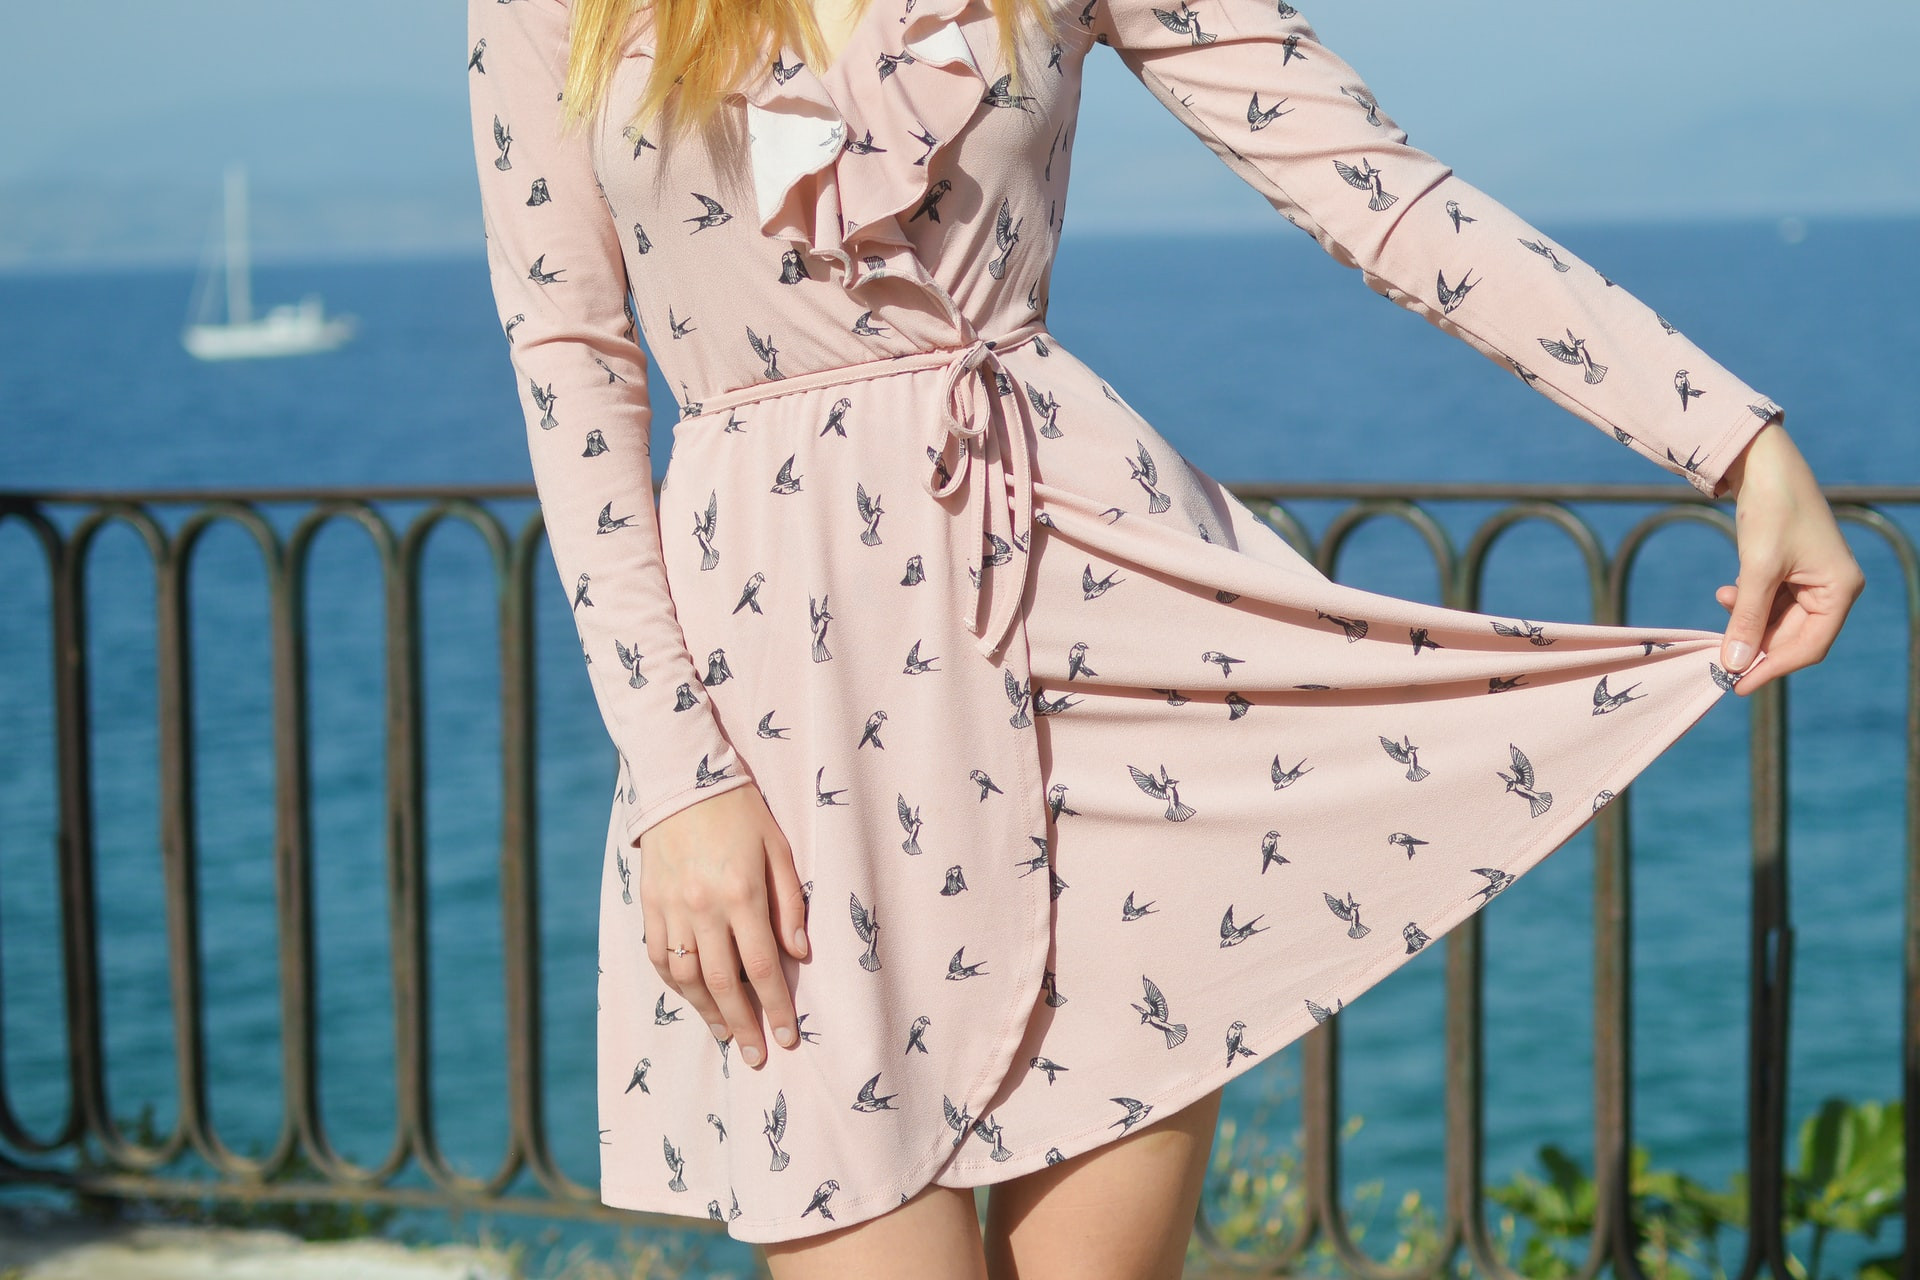 Woman wearing a pink dress with the sea in the background, demonstrating background impact on product focus
4.2. Designify Tool
- Hop on over to Designify.
- Drag and drop your photos onto the tool.
- The tool removes the background, allowing you to select an automated background design.
- Edit the background by clicking on your preferred design > Edit.
- Add elements like logos or sale stickers to your photo and position them.
- Save and download your design.
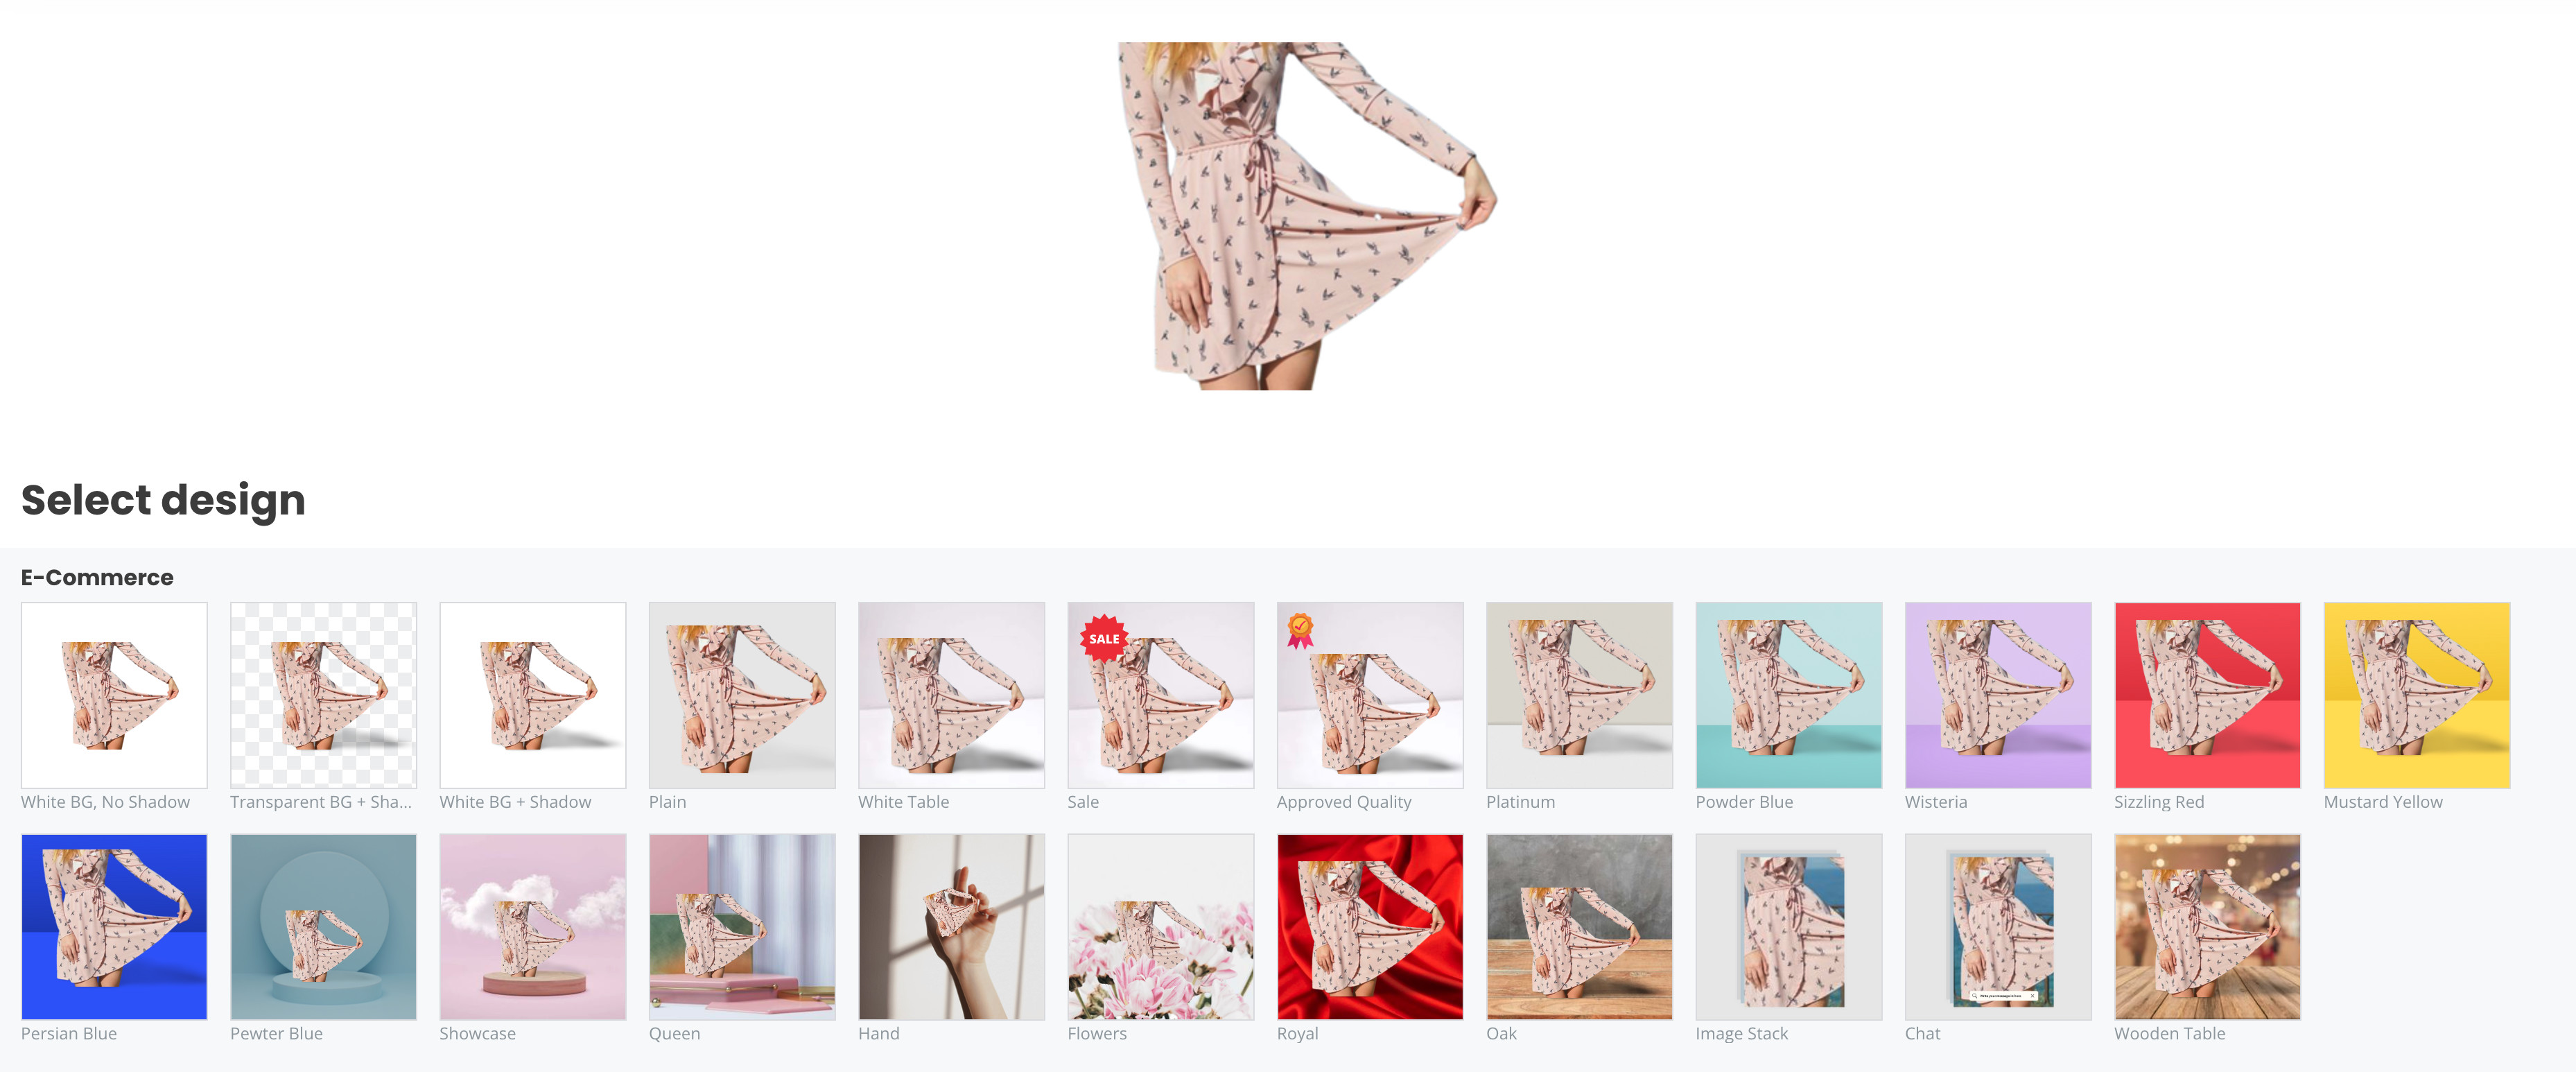 Changing the background of the photo on designify, showing options for background modification
4.3. Batch Editing
If you have several photos to edit, use the Batch Edit feature to process all photos with the same background and elements. This significantly reduces editing time.
5. Lighting Techniques
5.1. Natural Lighting
Using natural daylight is free and provides an authentic look. However, natural light changes throughout the day, making it challenging to maintain consistency.
5.2. Staged Lighting
Studio lighting provides more control over the lighting scenario, allowing for consistent results. While it requires an initial investment, it is a worthwhile option for maintaining consistent lighting.
5.3. Avoiding Mixed Lighting
Mixing artificial and natural lighting is generally not recommended. However, using a reflector to bounce backlight can help control natural lighting to some extent.
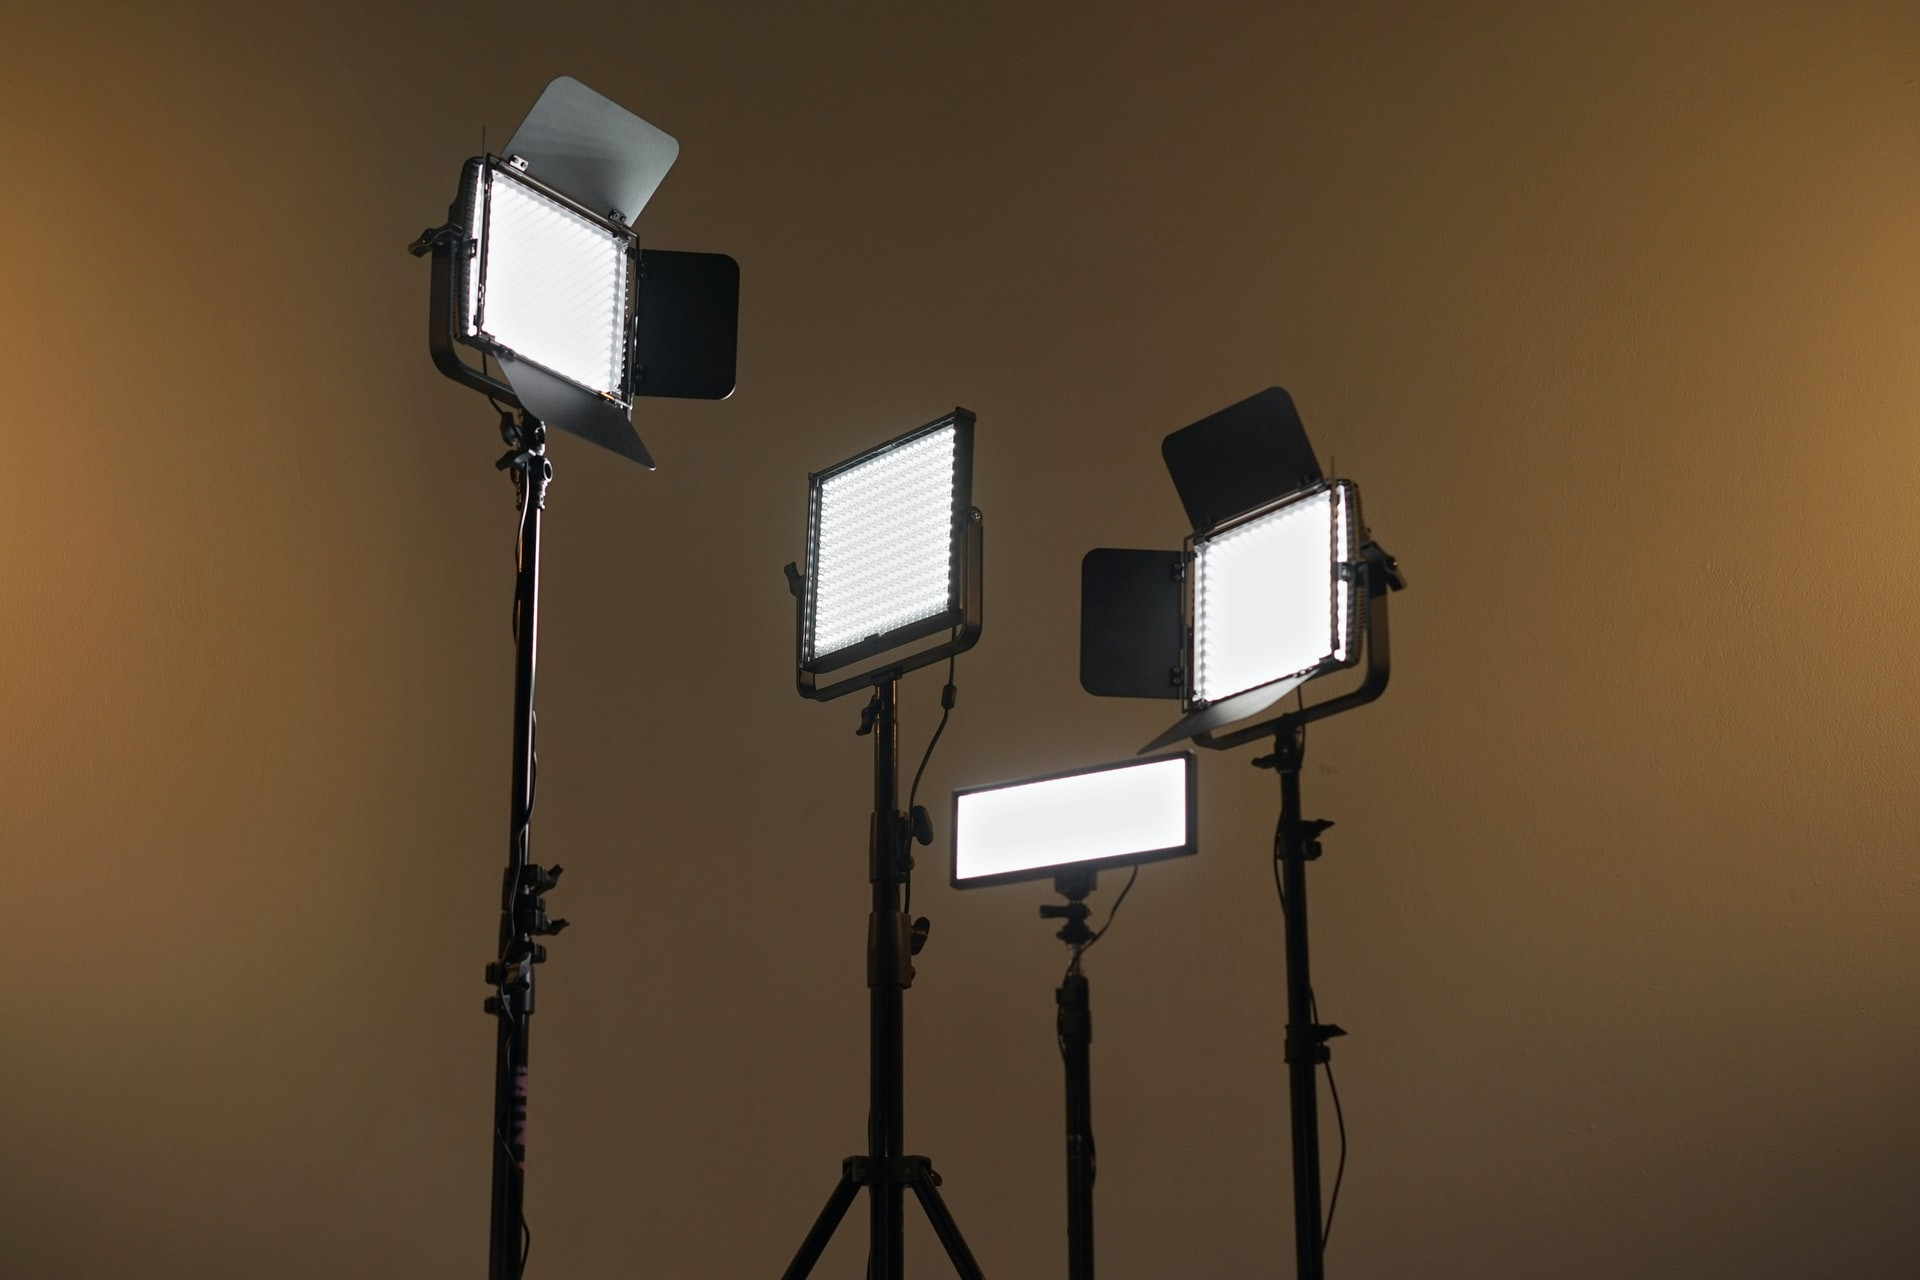 Photography studio lighting set up showcasing equipment for controlling light
6. Show the Clothing Label
Always include a photo of the clothing label. This helps provide details, assists in writing descriptions, and speeds up the uploading process. Having the item number readily available also makes finding the original price and description much easier.
FAQ: Taking Photos of Clothes to Sell Online
6.1. What is the best camera to use for clothing photography?
The best camera depends on your budget and needs. Smartphone cameras are great for beginners, while DSLR cameras offer more control and higher quality for professionals.
6.2. How can I make my clothing photos look more professional?
Ensure your clothes are clean, wrinkle-free, and well-lit. Use a plain background, consider model photography, and edit your photos for consistency.
6.3. What are the key elements of good lighting for clothing photography?
Good lighting is even, consistent, and free from harsh shadows. Natural light is great, but studio lighting provides more control.
6.4. How important is the background in clothing photography?
The background should be simple and non-distracting to keep the focus on the clothing. Plain backgrounds are generally recommended.
6.5. Should I use models to showcase my clothing?
Using models can add a personal touch and help buyers visualize the clothing. However, it’s not always necessary, and flat lay or hanging photography can also be effective.
6.6. What is flat lay photography, and how can I use it to sell clothes?
Flat lay photography involves laying clothes on a flat surface and taking a photo from above. It’s a simple and accessible way to showcase clothing, especially for beginners.
6.7. How can I remove wrinkles from clothing before photographing it?
Use a clothes steamer, place the garment in the dryer, or iron the clothing to remove wrinkles.
6.8. What is the best way to edit clothing photos for online sales?
Use photo editing software to adjust brightness, contrast, and color balance. Remove any blemishes or distractions, and ensure consistency across all photos.
6.9. How can I ensure my clothing photos are consistent in terms of lighting and background?
Use consistent lighting, either natural or studio, and maintain a plain background. Batch editing tools can also help ensure consistency.
6.10. Why is it important to show the clothing label in my photos?
Showing the label provides important details, assists in writing descriptions, and speeds up the uploading process.
By following these guidelines, you’re well-equipped to take amazing photos of clothes to sell online. Whether you’re listing items on eBay, Depop, or setting up your own eCommerce store, these tips will help you reach the finish line. dfphoto.net is your resource for enhancing your photography skills and showcasing your products effectively.
Ready to elevate your online clothing sales with stunning product photos? Visit dfphoto.net today to explore more expert tips, tutorials, and resources.