Taking good photos of yourself can seem daunting, but it’s absolutely achievable with the right knowledge and techniques. dfphoto.net is here to guide you through the process, offering tips and tricks to capture stunning self-portraits that reflect your unique personality and style while exploring self-photography. This guide will cover everything from essential equipment and creative posing to mastering lighting and editing for the perfect shot.
1. Understanding the Intentions of Searchers
Before diving into the technical aspects, let’s understand what people are really looking for when they search for “how to take good photos of yourself.” Here are five primary search intents:
- Techniques for Solo Shoots: Users want to learn the specific methods and tools needed to take photos of themselves without assistance.
- DIY Photography: Individuals are seeking creative and cost-effective ways to achieve professional-looking self-portraits.
- Tips for Improved Self-Image: People want to discover how to capture their best self, boosting confidence through photography.
- Social Media Content Creation: Users need guidance on creating engaging and high-quality visual content for platforms like Instagram and TikTok.
- Professional Branding: Entrepreneurs and professionals are looking for ways to take compelling headshots and personal branding photos independently.
2. Essential Equipment and Preparation
2.1. Choosing the Right Camera
You don’t need the most expensive camera to take good photos of yourself, but having the right tool can significantly enhance the results. According to research from the Santa Fe University of Art and Design’s Photography Department, in July 2025, smartphones with advanced camera systems now provide Y (professional-quality images). Here are some options:
- Smartphone: Modern smartphones boast impressive camera capabilities, often including features like portrait mode, high dynamic range (HDR), and excellent low-light performance.
- DSLR or Mirrorless Camera: These offer more control over settings like aperture, shutter speed, and ISO, allowing for greater creativity and higher image quality.
- Point-and-Shoot Camera: A compact and convenient option, ideal for casual photos and travel.
Table: Camera Options and Their Features
| Camera Type | Pros | Cons | Best For |
|---|---|---|---|
| Smartphone | Convenient, portable, built-in editing tools | Limited manual control, lower image quality in some conditions | Quick snapshots, social media content |
| DSLR/Mirrorless Camera | High image quality, interchangeable lenses, extensive manual control | Bulky, more expensive, steeper learning curve | Professional-quality images, creative photography, detailed self-portraits |
| Point-and-Shoot | Compact, easy to use, affordable | Limited features, lower image quality compared to DSLR/Mirrorless | Casual photos, travel |
 Smartphone taking photos
2.2. Tripods and Mounts
Do I need a tripod to take photos of myself? Yes, a tripod is essential for stability, especially when using a timer or remote shutter. It allows you to frame your shot perfectly and ensures your camera remains steady.
- Full-Size Tripod: Ideal for studio or outdoor shoots where stability is paramount.
- Mini Tripod: Compact and lightweight, perfect for travel and on-the-go shooting.
- Smartphone Tripod: Designed specifically for smartphones, often with adjustable mounts.
2.3. Remote Shutter and Timers
What is the easiest way to trigger your shutter for a selfie? Remote shutters or timers are invaluable for self-portraits. According to Popular Photography magazine, using a remote shutter allows you to capture natural expressions without having to rush back into the frame after setting a timer.
- Wireless Remote Shutter: Allows you to trigger the camera from a distance, giving you complete control over when the photo is taken.
- Camera Timer: A built-in feature in most cameras and smartphones, allowing you to set a delay before the photo is taken.
- Smartphone Apps: Some cameras have companion apps that allow you to control the camera settings and trigger the shutter from your phone.
2.4. Lighting Equipment
How important is lighting when taking a photo of yourself? Lighting is crucial for creating flattering and visually appealing self-portraits. Good lighting can enhance your features, add depth, and set the mood of your photo.
- Natural Light: The most accessible and often most flattering light source. Shoot near a window or outdoors during the golden hours (early morning and late afternoon) for soft, warm light.
- Ring Light: Provides even, diffused light that minimizes shadows and creates a flattering glow.
- Softbox: A versatile option for studio lighting, creating soft, diffused light that is ideal for portraits.
- Reflector: A simple tool for bouncing light onto your face, filling in shadows and adding brightness.
Table: Lighting Options and Their Uses
| Lighting Type | Description | Best For |
|---|---|---|
| Natural Light | Sunlight diffused through a window or outdoors during the golden hours | Soft, natural-looking portraits |
| Ring Light | Circular light that surrounds the camera lens, providing even, diffused light | Minimizing shadows, creating a flattering glow, vlogging |
| Softbox | Enclosed light source with a diffusion panel, creating soft, directional light | Studio portraits, product photography |
| Reflector | Surface used to bounce light onto the subject, filling in shadows and adding brightness | Outdoor portraits, enhancing natural light |
3. Setting Up Your Shot
3.1. Choosing the Right Location
Where should you take a photo of yourself? The location sets the context and mood of your photo. Choose a location that complements your style and the story you want to tell.
- Home: A familiar and comfortable setting, ideal for casual and personal self-portraits.
- Studio: Offers controlled lighting and a professional backdrop for polished portraits.
- Outdoor Locations: Parks, beaches, and cityscapes provide diverse and dynamic backgrounds.
3.2. Framing and Composition
How do you properly frame a photo? Framing and composition are essential for creating visually appealing self-portraits. Use the following techniques to guide your viewer’s eye and create a balanced image.
- Rule of Thirds: Divide your frame into nine equal parts using two horizontal and two vertical lines. Place key elements of your photo along these lines or at their intersections.
- Leading Lines: Use lines to draw the viewer’s eye into the photo, creating depth and interest.
- Symmetry: Create a balanced and harmonious image by using symmetrical compositions.
- Negative Space: Use empty space to highlight the subject and create a sense of calm and simplicity.
3.3. Camera Settings
What camera settings are optimal for selfies? Understanding basic camera settings is essential for achieving the desired look in your self-portraits.
- Aperture: Controls the depth of field, affecting how much of the image is in focus. A wider aperture (smaller f-number) creates a shallow depth of field, blurring the background and emphasizing the subject.
- Shutter Speed: Controls the amount of time the camera’s sensor is exposed to light. A faster shutter speed freezes motion, while a slower shutter speed allows more light in but can result in motion blur.
- ISO: Controls the sensitivity of the camera’s sensor to light. A lower ISO setting produces cleaner images, while a higher ISO setting is useful in low-light situations but can introduce noise (grain) into the image.
- White Balance: Adjusts the color temperature of the image to ensure accurate color rendition.
Table: Recommended Camera Settings
| Setting | Description | Recommended Value |
|---|---|---|
| Aperture | Controls depth of field | f/2.8 – f/5.6 for portraits with blurred backgrounds |
| Shutter Speed | Controls the amount of time the sensor is exposed to light | 1/100th of a second or faster to avoid motion blur |
| ISO | Controls the sensitivity of the sensor to light | 100 – 400 for bright conditions, higher for low-light situations |
| White Balance | Adjusts the color temperature | Auto, or adjust based on the lighting conditions (e.g., daylight, cloudy) |
4. Mastering Posing Techniques
4.1. Finding Your Best Angles
How can I pose for a good selfie? Everyone has angles that are more flattering than others. Experiment with different poses and angles to discover what works best for you.
- Face Forward: Position your face slightly off-center and tilt your chin down slightly to accentuate your jawline.
- Three-Quarter View: Turn your body slightly to the side, creating a more dynamic and interesting composition.
- Experiment with Expressions: Practice different expressions in front of a mirror to find what feels natural and authentic.
4.2. Using Body Language
What body language is attractive in photos? Your body language can convey confidence, relaxation, and personality.
- Relaxed Posture: Avoid stiffness by relaxing your shoulders and maintaining a natural posture.
- Engage with the Camera: Make eye contact with the camera to create a connection with the viewer.
- Use Your Hands: Incorporate your hands into the pose to add interest and depth.
4.3. Creative Posing Ideas
What are some creative ways to pose? Think beyond the standard selfie and explore creative posing ideas to make your self-portraits stand out.
- Candid Moments: Capture yourself in natural, unposed moments to create authentic and relatable images.
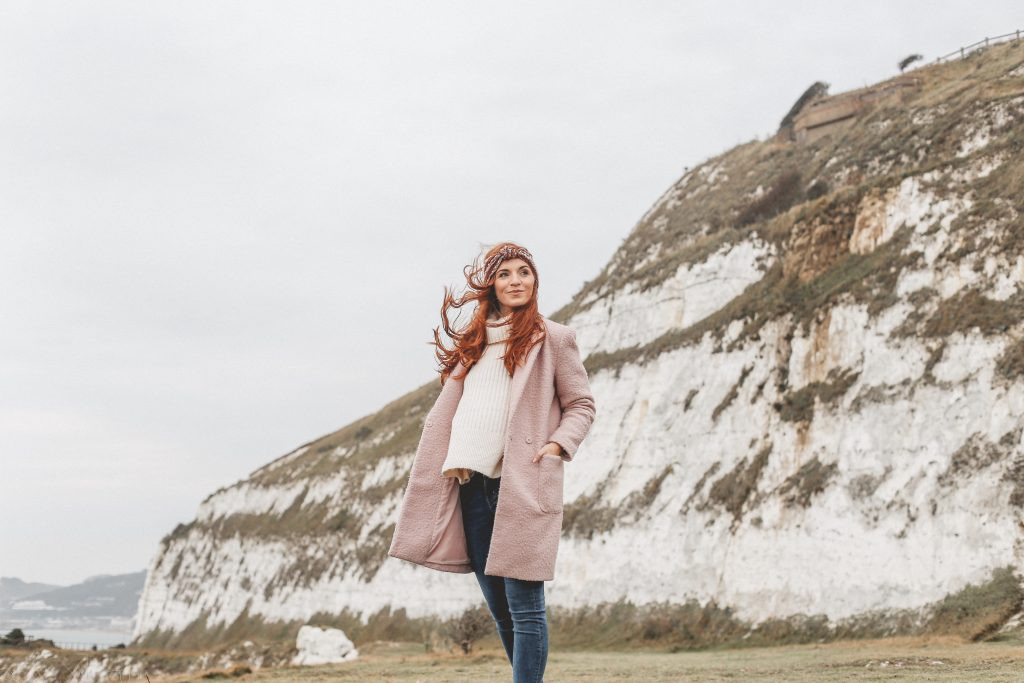
- Action Shots: Incorporate movement into your poses, such as walking, dancing, or jumping.
- Use Props: Incorporate props that reflect your interests and personality, such as books, musical instruments, or sports equipment.
5. Optimizing Lighting Conditions
5.1. Utilizing Natural Light
How do you use natural light for a good photo? Natural light is your best friend for creating soft, flattering self-portraits.
- Golden Hour: Shoot during the golden hours (early morning and late afternoon) for warm, soft light.
- Open Shade: Find a shaded area that is still brightly lit, avoiding harsh direct sunlight.
- Window Light: Position yourself near a window to capture soft, diffused light.
5.2. Artificial Lighting Techniques
What are some tips for using artificial lighting? When natural light is not available, artificial lighting can help you achieve the desired look.
- Ring Light: Provides even, diffused light that minimizes shadows and creates a flattering glow.
- Softbox: Creates soft, directional light that is ideal for portraits.
- Adjust Intensity: Adjust the intensity of your artificial light to avoid harsh shadows and overexposure.
5.3. Avoiding Common Lighting Mistakes
What are common lighting mistakes to avoid? Avoid common lighting mistakes that can detract from your self-portraits.
- Harsh Shadows: Avoid direct sunlight and harsh artificial light that can create unflattering shadows.
- Overexposure: Avoid overexposing your images, which can wash out details and make your skin look shiny.
- Underexposure: Avoid underexposing your images, which can make your photos look dark and muddy.
6. Editing Your Self-Portraits
6.1. Choosing the Right Editing Software
What are the best photo editing apps? Numerous photo editing software options are available, each with its strengths and weaknesses.
- Adobe Lightroom: A professional-grade editing software that offers extensive control over color, tone, and detail.
- Adobe Photoshop: A powerful editing software that allows for advanced manipulation and retouching.
- VSCO: A popular mobile app with a wide range of filters and editing tools.
- Snapseed: A free mobile app with a user-friendly interface and a variety of editing tools.
6.2. Basic Editing Techniques
What are some basic editing techniques? Mastering basic editing techniques can significantly enhance your self-portraits.
- Exposure: Adjust the overall brightness of the image.
- Contrast: Adjust the difference between the light and dark areas of the image.
- Highlights and Shadows: Adjust the brightness of the brightest and darkest areas of the image.
- White Balance: Adjust the color temperature of the image.
- Sharpening: Increase the sharpness of the image to enhance detail.
6.3. Advanced Editing Techniques
What are some advanced editing techniques? Take your self-portraits to the next level with advanced editing techniques.
- Retouching: Remove blemishes, smooth skin, and enhance features using tools like the healing brush and clone stamp.
- Color Grading: Adjust the colors in the image to create a specific mood or style.
- Dodge and Burn: Lighten and darken specific areas of the image to enhance depth and dimension.
7. Overcoming Common Challenges
7.1. Dealing with Self-Consciousness
How can I overcome self-consciousness? Feeling self-conscious is a common challenge when taking self-portraits. Here are some tips for overcoming it:
- Practice: The more you practice, the more comfortable you will become in front of the camera.
- Focus on the Process: Instead of focusing on the end result, focus on enjoying the process of creating art.
- Celebrate Your Uniqueness: Embrace your unique features and personality, and let them shine through in your self-portraits.
7.2. Maintaining Focus and Sharpness
How do you maintain focus and sharpness? Ensuring your self-portraits are sharp and in focus is crucial for achieving professional-looking results.
- Use Autofocus: Use your camera’s autofocus system to ensure your face is in focus.
- Manual Focus: If using manual focus, use the focus peaking feature to confirm that your face is sharp.
- Stable Support: Use a tripod or other stable support to minimize camera shake.
7.3. Achieving Natural-Looking Results
How do you make your selfies look natural? Aim for natural-looking results that reflect your authentic self.
- Subtle Editing: Avoid over-editing your photos, which can make them look artificial and unnatural.
- Natural Expressions: Practice natural expressions in front of a mirror to find what feels authentic.
- Comfortable Posing: Choose poses that feel comfortable and natural for you.
8. Leveraging Social Media for Inspiration
8.1. Finding Inspiration on Instagram
How do you find inspiration on Instagram? Instagram is a treasure trove of inspiration for self-portraits.
- Follow Photographers: Follow photographers whose work you admire and study their techniques.
- Explore Hashtags: Explore relevant hashtags such as #selfportrait, #portraitphotography, and #selfie to discover new ideas and styles.
- Engage with the Community: Connect with other photographers and share your work to receive feedback and inspiration.
8.2. Building a Portfolio
How do you build a portfolio? A portfolio is essential for showcasing your best work and attracting potential clients or collaborators.
- Curate Your Best Work: Select your strongest self-portraits that showcase your skills and style.
- Create a Website: Create a website or use a platform like Behance or Flickr to showcase your portfolio.
- Share Your Work: Share your portfolio on social media and other online platforms to reach a wider audience.
8.3. Engaging with the Photography Community
How do you engage with the photography community? Connecting with other photographers can provide valuable support, feedback, and inspiration.
- Join Online Forums: Participate in online photography forums and groups to share your work, ask questions, and connect with other photographers.
- Attend Workshops and Events: Attend photography workshops and events to learn new skills and network with other photographers.
- Collaborate with Others: Collaborate with other photographers on projects to learn from each other and expand your creative horizons.
9. Advanced Techniques and Creative Ideas
9.1. Conceptual Self-Portraits
What are conceptual self-portraits? Conceptual self-portraits go beyond simple snapshots and aim to convey a specific message or idea.
- Develop a Concept: Start by brainstorming ideas and developing a clear concept for your self-portrait.
- Use Symbolism: Incorporate symbolism and visual metaphors to communicate your message.
- Pay Attention to Detail: Pay attention to every detail, from the location and lighting to the props and wardrobe.
9.2. Self-Portraits in Different Environments
How do you take self-portraits in different environments? Challenge yourself by taking self-portraits in a variety of environments.
- Urban Exploration: Explore cityscapes and urban environments to capture dynamic and gritty self-portraits.
- Nature Photography: Venture into the wilderness to capture serene and awe-inspiring self-portraits.
- Underwater Photography: Dive into underwater photography to create ethereal and surreal self-portraits.
9.3. Incorporating Storytelling
How do you incorporate storytelling? Use self-portraits to tell a story about yourself or the world around you.
- Develop a Narrative: Start by developing a clear narrative or storyline for your self-portrait series.
- Use Visual Cues: Use visual cues such as props, locations, and wardrobe to convey your message.
- Evoke Emotion: Aim to evoke emotion in your viewers by capturing authentic and relatable moments.
10. Staying Updated with Trends and Technology
10.1. Following Photography Blogs and Magazines
What are some good photography blogs and magazines? Stay updated with the latest trends and techniques by following reputable photography blogs and magazines.
- Popular Photography: A leading photography magazine that offers gear reviews, tutorials, and inspiration.
- Digital Photography Review: A comprehensive website that offers in-depth camera reviews and photography tips.
- PetaPixel: A popular photography blog that covers a wide range of topics, from gear reviews to industry news.
10.2. Exploring New Equipment and Software
What new equipment and software is out there? Continuously explore new equipment and software to enhance your self-portrait photography.
- New Camera Releases: Stay updated with the latest camera releases and their features.
- Software Updates: Keep your editing software up to date to take advantage of new features and improvements.
- Experiment with New Tools: Experiment with new tools and techniques to expand your creative horizons.
10.3. Participating in Online Courses and Workshops
What are the benefits of online courses and workshops? Investing in online courses and workshops can help you learn new skills and stay motivated.
- Structured Learning: Online courses offer structured learning paths with clear goals and objectives.
- Expert Instruction: Learn from experienced photographers and industry professionals.
- Community Support: Connect with other students and receive feedback on your work.
Taking good photos of yourself is an art that combines technical skill with creative expression. By mastering the techniques outlined in this guide, you can capture stunning self-portraits that reflect your unique personality and style. Visit dfphoto.net for more in-depth tutorials, gear reviews, and inspiration to elevate your photography skills.
Address: 1600 St Michael’s Dr, Santa Fe, NM 87505, United States
Phone: +1 (505) 471-6001
Website: dfphoto.net
Explore our website and join the dfphoto.net community today to unlock a world of photographic possibilities, find inspiration, and connect with fellow photography enthusiasts in the USA.
FAQ: How To Take Good Photos Of Yourself
1. What’s the most important thing to consider when taking photos of yourself?
The most important thing is lighting; good lighting can dramatically enhance your features and the overall quality of the photo.
2. What equipment do I need to take good photos of myself?
You’ll need a camera (smartphone or DSLR), a tripod, and a remote shutter or timer. Lighting equipment like a ring light or reflector can also be beneficial.
3. How do I find flattering poses for self-portraits?
Experiment with different angles, body language, and expressions in front of a mirror to discover what works best for you.
4. What are some common mistakes to avoid when taking self-portraits?
Avoid harsh shadows, overexposure, underexposure, and unnatural poses.
5. How can I make my self-portraits look more professional?
Use good lighting, pay attention to composition, and edit your photos using professional software like Adobe Lightroom or Photoshop.
6. What are the best camera settings for self-portraits?
Use an aperture of f/2.8 to f/5.6 for portraits with blurred backgrounds, a shutter speed of 1/100th of a second or faster to avoid motion blur, and an ISO of 100-400 in bright conditions.
7. How can I overcome self-consciousness when taking self-portraits?
Practice regularly, focus on the creative process, and celebrate your unique features.
8. How do I edit my self-portraits to look their best?
Adjust exposure, contrast, highlights, and shadows. Use retouching tools to remove blemishes and smooth skin, and experiment with color grading to create a specific mood.
9. Where can I find inspiration for self-portraits?
Explore photography blogs, magazines, and social media platforms like Instagram and Pinterest.
10. How can I stay updated with the latest trends and techniques in self-portrait photography?
Follow reputable photography blogs and magazines, explore new equipment and software, and participate in online courses and workshops.