Sending photos from your iPhone should be a breeze, and at dfphoto.net, we understand the frustration when it doesn’t work as expected. Let’s troubleshoot why you can’t send photos from your iPhone to your desktop email and find a solution that gets you back on track, exploring image sharing and visual communication. This guide focuses on easy image transfer, effective photo sharing tips, and mobile photography solutions to solve this common issue and introduce you to the vibrant world of photography.
1. Why Can’t I Send Photos From My iPhone to My Email Anymore?
The reason you can’t send photos from your iPhone to your email could be due to several factors, including incorrect email settings, iOS updates, large file sizes, or issues with your email account. Start by verifying your email account settings on your iPhone, ensuring they match the recommended settings from your email provider, and checking for iOS updates that may have altered functionality.
Here’s a detailed breakdown:
- Incorrect Email Settings: Your iPhone’s email settings might not be correctly configured to work with your email provider (like Comcast).
- iOS Updates: Apple frequently releases iOS updates, and sometimes these updates can change settings or introduce bugs that affect email functionality.
- Large File Sizes: If your photos are high-resolution, they can be too large to send via email.
- Email Account Issues: There might be a problem with your email account itself, such as storage limits or server issues.
2. How Do I Verify My Email Account Settings on My iPhone?
To verify your email account settings on your iPhone, go to Settings > Mail > Accounts, select your email account, and double-check the incoming and outgoing server settings, port numbers, and authentication methods. Ensure that the settings match the recommended configuration from your email provider.
Here’s a step-by-step guide:
- Open Settings: Tap the Settings app on your iPhone.
- Go to Mail: Scroll down and tap on “Mail.”
- Select Accounts: Tap on “Accounts.”
- Choose Your Email Account: Select the email account you’re having trouble with (e.g., your Comcast account).
- Verify Account Information:
- Tap on your email address at the top.
- Ensure the “Account” toggle is enabled (green).
- Verify your name and email address are correct.
- Check Incoming Mail Server Settings:
- Under “Incoming Mail Server,” ensure the “Hostname,” “Username,” and “Password” are correct.
- Contact your email provider (Comcast) to confirm the correct server settings.
- Check Outgoing Mail Server Settings:
- Under “Outgoing Mail Server,” tap “SMTP.”
- Tap on the primary server listed (it will say “On” next to it).
- Ensure the “Hostname,” “Username,” and “Password” are correct.
- Again, contact your email provider to confirm these settings.
3. How Do I Check For and Install iOS Updates?
To check for and install iOS updates, navigate to Settings > General > Software Update. Your iPhone will automatically search for available updates. If an update is available, download and install it to ensure your device has the latest features and bug fixes.
Here’s how to do it:
- Open Settings: Tap the Settings app on your iPhone.
- Go to General: Scroll down and tap on “General.”
- Select Software Update: Tap on “Software Update.”
- Check for Updates: Your iPhone will automatically check for available updates.
- Download and Install: If an update is available, tap “Download and Install.” You may need to enter your passcode.
- Agree to Terms: Follow the on-screen prompts to agree to the terms and conditions.
- Install Now or Later: You can choose to install the update immediately or schedule it for later.
- Update Completion: Your iPhone will restart to complete the update process.
4. How Can I Reduce the Size of Photos I Send Via Email?
You can reduce the size of photos you send via email by adjusting the image size in the Mail app when composing your email. After selecting the photo to attach, you’ll typically see options for small, medium, large, or actual size. Choose a smaller size to decrease the file size and make it easier to send.
Here’s how:
- Start a New Email: Open the Mail app and start composing a new email.
- Add Photo: Tap in the body of the email where you want to insert the photo. A menu will appear; select “Insert Photo or Video.”
- Choose Photo: Select the photo you want to send.
- Adjust Size: Before sending, the Mail app should give you options for the image size. Look for options like “Small,” “Medium,” “Large,” or “Actual Size.” Choose “Small” or “Medium” to reduce the file size.
- Send Email: Finish composing your email and send it.
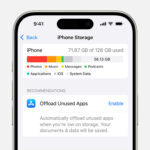
5. What If My Email Account Has Storage Limits?
If your email account has storage limits, you may not be able to send or receive large attachments, including photos. Check your email account’s storage usage and delete unnecessary emails or attachments to free up space. You can also consider using cloud storage services like iCloud, Google Drive, or Dropbox to share photos instead.
Follow these steps to manage your email storage:
- Check Storage Usage:
- Comcast: Log in to your Comcast email account through the web browser. Look for a storage usage indicator, usually in the settings or account overview section.
- iCloud: Go to Settings > [Your Name] > iCloud > Manage Storage.
- Delete Unnecessary Emails:
- Go through your inbox, sent items, and trash folders.
- Delete large emails with attachments that you no longer need.
- Empty your trash folder to permanently delete these emails.
- Download and Remove:
- Download important attachments (photos, documents) to your computer.
- Delete the original emails with the attachments from your email account.
- Use Cloud Storage:
- Upload large files (photos, videos) to cloud storage services like Google Drive, Dropbox, or iCloud Drive.
- Share a link to the file instead of sending it as an attachment.
- Archive Emails:
- Move older emails to an archive folder instead of keeping them in your inbox.
- This helps reduce the size of your active mailbox.
- Contact Support: If you’re still having trouble, contact your email provider’s support team for assistance.
6. Could There Be a Problem With My Internet Connection?
Yes, a poor or unstable internet connection can prevent you from sending photos via email from your iPhone. Ensure you have a stable Wi-Fi or cellular connection before attempting to send photos. Try switching between Wi-Fi and cellular data to see if the issue persists.
Here’s what to check:
- Wi-Fi Connection:
- Make sure your iPhone is connected to a stable Wi-Fi network.
- Go to Settings > Wi-Fi and ensure you are connected to a network with a strong signal.
- If the Wi-Fi signal is weak, try moving closer to the router or restarting the router.
- Cellular Data:
- If you’re using cellular data, ensure that you have a strong cellular signal.
- Go to Settings > Cellular and make sure “Cellular Data” is turned on.
- Check if you have enough data allowance. If you’ve used up your data, you may need to purchase more or wait until your data plan resets.
- Airplane Mode:
- Make sure Airplane Mode is turned off.
- Go to Settings and ensure the “Airplane Mode” toggle is off.
- Restart iPhone:
- Sometimes, simply restarting your iPhone can resolve network connectivity issues.
- Press and hold the power button (and either volume button on newer iPhones) until the power-off slider appears.
- Slide to power off, wait a few seconds, and then press the power button again to turn it back on.
- Reset Network Settings:
- If the problem persists, you can try resetting your network settings.
- Go to Settings > General > Transfer or Reset iPhone > Reset > Reset Network Settings.
- Note that this will reset your Wi-Fi passwords, so you’ll need to re-enter them.
7. How Do I Use iCloud to Share Photos?
To use iCloud to share photos, enable iCloud Photos in Settings > Photos, then select the photos you want to share and create an iCloud link to send via email. The recipient can then view and download the photos from the link.
Here’s a detailed guide:
- Enable iCloud Photos:
- Go to Settings on your iPhone.
- Tap on your name at the top to access your Apple ID settings.
- Tap on “iCloud.”
- Tap on “Photos.”
- Toggle “iCloud Photos” to the on position (green).
- Make sure you have enough iCloud storage. If not, you may need to upgrade your iCloud storage plan.
- Select Photos to Share:
- Open the “Photos” app on your iPhone.
- Navigate to the photos you want to share.
- Tap “Select” in the top right corner.
- Choose the photos you want to share by tapping on them.
- Create iCloud Link:
- Tap the “Share” icon (the square with an arrow pointing upward) in the bottom left corner.
- Scroll down and tap “Copy iCloud Link.”
- An iCloud link will be generated and copied to your clipboard.
- Share the Link:
- Open the Mail app and start composing a new email.
- Paste the iCloud link into the body of the email.
- Send the email to the recipient.
- Recipient Access:
- The recipient will receive the email with the iCloud link.
- They can click on the link to view the photos in a web browser.
- They can download the photos individually or as a zip file.
8. What Are Other Cloud Storage Options Besides iCloud?
Besides iCloud, other popular cloud storage options include Google Drive, Dropbox, and Microsoft OneDrive, which allow you to upload photos and share them via shareable links. These services offer similar functionality and can be used on various devices.
Here’s a brief overview of each:
- Google Drive:
- Pros: Generous free storage (15 GB shared across Google services), easy integration with other Google apps (Gmail, Google Photos), collaborative features.
- Cons: Privacy concerns related to Google’s data collection practices.
- How to Use:
- Download the Google Drive app from the App Store.
- Upload your photos to Google Drive.
- Generate a shareable link and send it via email.
- Dropbox:
- Pros: Simple and user-friendly interface, reliable file syncing, strong security features.
- Cons: Limited free storage (2 GB), more expensive paid plans.
- How to Use:
- Download the Dropbox app from the App Store.
- Upload your photos to Dropbox.
- Create a shareable link and send it via email.
- Microsoft OneDrive:
- Pros: Integration with Microsoft Office apps, good for users already in the Microsoft ecosystem.
- Cons: Can be less intuitive for users unfamiliar with Microsoft services.
- How to Use:
- Download the OneDrive app from the App Store.
- Upload your photos to OneDrive.
- Generate a shareable link and send it via email.
9. How Do I Use AirDrop to Send Photos to My Computer?
If your computer is a Mac, you can use AirDrop to wirelessly send photos from your iPhone. Enable AirDrop on both devices, select the photos on your iPhone, tap the share icon, and choose your Mac from the AirDrop options.
Follow these steps to use AirDrop:
- Enable AirDrop on Your iPhone:
- Open Control Center by swiping down from the top-right corner of the screen (or swiping up from the bottom on older iPhones).
- Press and hold the Wi-Fi or Bluetooth card in the top-left corner.
- Tap AirDrop and choose “Everyone” or “Contacts Only.” “Everyone” is less secure but more convenient if the devices aren’t in your contacts.
- Enable AirDrop on Your Mac:
- Open Finder.
- Click on “AirDrop” in the sidebar.
- If AirDrop is not enabled, click “Turn On Bluetooth” or “Allow me to be discovered by:” and choose “Everyone” or “Contacts Only.”
- Share Photos from iPhone:
- Open the “Photos” app on your iPhone.
- Select the photos you want to share.
- Tap the “Share” icon (the square with an arrow pointing upward) in the bottom left corner.
- Look for your Mac’s name or icon in the AirDrop section of the share sheet.
- Tap on your Mac’s name or icon to send the photos.
- Accept on Mac:
- Your Mac will receive a notification asking if you want to accept the incoming files.
- Click “Accept.”
- The photos will be saved to your “Downloads” folder by default.
10. What If I Still Can’t Send Photos After Trying These Steps?
If you still can’t send photos after trying these steps, consider contacting Apple Support or your email provider’s support team for further assistance. They can provide specific troubleshooting steps or identify any underlying issues with your device or account.
Here are additional troubleshooting steps:
- Check Email Account Status:
- Log in to your Comcast email account via a web browser to ensure your account is active and functioning correctly.
- Check for any notifications or alerts from Comcast regarding account issues.
- Reset Email Account on iPhone:
- Delete your email account from your iPhone and then add it back.
- Go to Settings > Mail > Accounts.
- Select your email account and tap “Delete Account.”
- Then, go back to Accounts and tap “Add Account” to set it up again.
- Check Date and Time Settings:
- Incorrect date and time settings can sometimes cause issues with email functionality.
- Go to Settings > General > Date & Time.
- Make sure “Set Automatically” is turned on.
- Clear Mail App Cache:
- There is no direct way to clear the cache for the Mail app on iOS. However, deleting and re-adding the email account can help.
- Try a Different Email App:
- Download and try using a different email app, such as Gmail or Outlook, to see if the issue persists.
- This can help determine if the problem is with the Mail app or your email account settings.
11. Understanding Email Protocols: POP3, IMAP, and Exchange
Understanding email protocols like POP3, IMAP, and Exchange can help you configure your email settings correctly. IMAP (Internet Message Access Protocol) is generally recommended as it syncs emails across devices, while POP3 (Post Office Protocol version 3) downloads emails to one device and deletes them from the server by default. Exchange is commonly used for business email accounts and offers advanced features like calendar and contact syncing.
Here’s a more detailed explanation:
- POP3 (Post Office Protocol version 3):
- How it Works: POP3 downloads emails from the server to your device. Once downloaded, the emails are typically deleted from the server (though you can configure it to leave a copy).
- Advantages:
- Simple to set up.
- Works well if you only check your email on one device.
- Disadvantages:
- Not ideal for multiple devices because emails are not synchronized.
- If your device is lost or damaged, you could lose your emails.
- Use Case: Best for users who primarily use one device to access their email and want to save storage space on the server.
- IMAP (Internet Message Access Protocol):
- How it Works: IMAP synchronizes emails between the server and your devices. When you read, send, or delete an email on one device, the changes are reflected on all other devices and on the server.
- Advantages:
- Emails are synchronized across multiple devices.
- Emails are stored on the server, so you won’t lose them if your device is lost or damaged.
- Disadvantages:
- Requires a constant internet connection to access the latest emails.
- Can consume more server storage space.
- Use Case: Ideal for users who access their email from multiple devices (e.g., iPhone, iPad, computer) and want their email to be synchronized across all devices.
- Exchange:
- How it Works: Exchange is a more comprehensive protocol developed by Microsoft, typically used for business email, calendaring, and contact management. It synchronizes email, calendars, contacts, and tasks across devices.
- Advantages:
- Advanced features for collaboration and productivity.
- Centralized management of email and related services.
- Strong security features.
- Disadvantages:
- More complex to set up and manage.
- Typically requires a Microsoft Exchange server.
- Use Case: Best for businesses and organizations that require robust email, calendaring, and contact management solutions.
12. Tips for Optimizing iPhone Photo Settings for Emailing
Optimize your iPhone photo settings by using the “Most Compatible” camera setting, which saves photos in JPEG format instead of HEIC, and adjusting the photo resolution to a lower setting if necessary. HEIC files are smaller but not universally compatible, while JPEG files are widely supported.
Here’s how to optimize:
- Use “Most Compatible” Camera Setting:
- Go to Settings > Camera > Formats.
- Choose “Most Compatible.” This will save photos in JPEG format, which is more widely supported.
- The “High Efficiency” setting saves photos in HEIC format, which is smaller but not universally compatible.
- Adjust Photo Resolution:
- While you can’t directly adjust the photo resolution in the Camera app, you can use third-party apps to reduce the resolution before sending.
- Alternatively, the Mail app provides options to resize the photo when attaching it to an email.
- Disable HDR (High Dynamic Range):
- HDR photos can be larger in size. Disabling HDR might reduce the file size.
- Go to Settings > Camera and toggle off “Smart HDR” (or “Auto HDR” on older iPhones).
- Use Photo Editing Apps:
- Use photo editing apps to compress photos before sending.
- Apps like Image Size, Reduce Photo Size, or Compressor can help you reduce the file size of your photos.
- Clear Camera Roll Regularly:
- Delete unnecessary photos and videos from your Camera Roll to free up storage space.
- This can help improve your iPhone’s performance and reduce the number of large files you need to manage.
13. Email Etiquette When Sending Photos
When sending photos via email, consider email etiquette by compressing large files, providing context in the email body, and being mindful of the recipient’s email storage limits. Respect their time and bandwidth by sending only necessary photos and keeping the email concise.
Follow these tips for good email etiquette:
- Compress Large Files:
- Compress large photo files into a ZIP archive before sending them.
- This reduces the overall size of the email and makes it easier for the recipient to download.
- Provide Context:
- Include a brief description of the photos in the email body.
- Explain why you’re sending the photos and any relevant details.
- Be Mindful of Recipient’s Storage:
- Consider the recipient’s email storage limits before sending large attachments.
- If you’re sending a large number of photos, consider using a cloud storage service and sharing a link instead.
- Use Descriptive Subject Lines:
- Use a clear and descriptive subject line that accurately reflects the content of the email.
- For example, “Photos from [Event Name]” or “Family Vacation Photos.”
- Respect Recipient’s Time:
- Keep the email concise and to the point.
- Avoid sending unnecessary photos or lengthy explanations.
- Get Permission if Necessary:
- If the photos contain sensitive or private information, get the recipient’s permission before sending them.
- Respect their privacy and preferences.
- Use Appropriate Language:
- Use professional and respectful language in your email.
- Avoid using slang, jargon, or offensive language.
- Proofread Before Sending:
- Proofread your email for grammar and spelling errors before sending it.
- A well-written email demonstrates professionalism and attention to detail.
14. Understanding Photo Metadata and Privacy Implications
Photo metadata contains information about the photo, such as the date, time, location, and camera settings. Be aware of the privacy implications when sharing photos, as this metadata can reveal sensitive information. You can remove metadata before sending photos using third-party apps or built-in iPhone settings.
Here’s a more detailed explanation:
- What is Photo Metadata?
- Photo metadata is information embedded within a photo file that describes various aspects of the image.
- Common types of metadata include:
- EXIF (Exchangeable Image File Format): Camera settings (aperture, shutter speed, ISO), date and time the photo was taken, camera model, and GPS location.
- IPTC (International Press Telecommunications Council): Descriptive information such as captions, keywords, and copyright details.
- XMP (Extensible Metadata Platform): A more flexible and extensible metadata format.
- Privacy Implications:
- GPS Location: The GPS coordinates embedded in a photo can reveal where the photo was taken. This can be a privacy risk if you share photos taken at your home, workplace, or other sensitive locations.
- Personal Information: Metadata can contain personal information, such as your name, email address, and copyright details.
- Security Risks: Metadata can be used to track the origin and history of a photo, which can be a security risk in certain situations.
- How to Remove Metadata on iPhone:
- Using Third-Party Apps:
- Download a metadata removal app from the App Store (e.g., Metapho, Exif Metadata).
- Open the app and select the photo you want to remove metadata from.
- Follow the app’s instructions to remove the metadata.
- Sharing Without Metadata:
- When sharing photos directly from the Photos app, iOS may offer options to remove location data before sharing.
- Tap the “Options” button at the top of the share sheet and toggle off “Location.”
- Using Third-Party Apps:
- Best Practices for Sharing Photos Privately:
- Review Metadata: Before sharing photos, review the metadata to ensure it doesn’t contain sensitive information.
- Remove Location Data: Always remove location data from photos before sharing them, especially if the photos were taken at sensitive locations.
- Use Secure Sharing Methods: Use secure sharing methods, such as encrypted messaging apps or cloud storage services with strong privacy settings.
- Be Mindful of Social Media: Be cautious when posting photos on social media, as social media platforms may retain metadata or use it for their own purposes.
- Inform Others: If you’re taking photos of other people, inform them that you’re capturing their location and other metadata.
15. How to Back Up Photos From Your iPhone
Backing up photos from your iPhone is crucial to prevent data loss. You can use iCloud, iTunes (Finder on macOS Catalina and later), or third-party services like Google Photos or Dropbox to back up your photos regularly.
Here’s a detailed guide:
- iCloud Backup:
- How it Works: iCloud automatically backs up your iPhone data, including photos, to Apple’s cloud servers.
- Steps:
- Go to Settings > [Your Name] > iCloud > iCloud Backup.
- Toggle “iCloud Backup” to the on position (green).
- Tap “Back Up Now” to start an immediate backup.
- Ensure your iPhone is connected to Wi-Fi and plugged into a power source during the backup process.
- Pros:
- Automatic and seamless backup.
- Easy to restore your data if needed.
- Cons:
- Requires sufficient iCloud storage (you may need to purchase additional storage).
- Dependent on a stable internet connection.
- iTunes/Finder Backup:
- How it Works: iTunes (on older macOS versions) or Finder (on macOS Catalina and later) allows you to back up your iPhone data to your computer.
- Steps:
- Connect your iPhone to your computer using a USB cable.
- Open iTunes (or Finder on macOS Catalina and later).
- Select your iPhone when it appears in iTunes/Finder.
- Click “Back Up Now” to start the backup process.
- You can choose to encrypt the backup for added security.
- Pros:
- Backup data is stored locally on your computer.
- Faster backup and restore speeds compared to iCloud.
- Cons:
- Requires a computer and USB cable.
- Manual backup process.
- Google Photos Backup:
- How it Works: Google Photos allows you to back up your photos to Google’s cloud servers.
- Steps:
- Download the Google Photos app from the App Store.
- Open the app and sign in with your Google account.
- Enable “Backup & sync” to automatically back up your photos.
- Choose your backup quality (High quality or Original quality).
- Pros:
- Generous free storage (15 GB shared across Google services).
- Easy to access your photos from any device.
- Cons:
- Privacy concerns related to Google’s data collection practices.
- Dropbox Backup:
- How it Works: Dropbox allows you to back up your photos to Dropbox’s cloud servers.
- Steps:
- Download the Dropbox app from the App Store.
- Open the app and sign in with your Dropbox account.
- Enable “Camera Uploads” to automatically back up your photos.
- Pros:
- Simple and user-friendly interface.
- Reliable file syncing.
- Cons:
- Limited free storage (2 GB).
16. Exploring Third-Party Apps for Enhanced Photo Sharing
Explore third-party apps like WeTransfer, MailDrop, or dedicated photo sharing platforms for enhanced photo sharing options, especially when dealing with large files or needing advanced features like password protection or expiration dates.
Here’s a more detailed overview:
- WeTransfer:
- How it Works: WeTransfer allows you to send large files (up to 2GB for free) without requiring the recipient to create an account.
- Pros:
- Simple and user-friendly interface.
- No account required for recipients.
- Files are available for download for a limited time (typically 7 days).
- Cons:
- Limited free storage (2GB).
- No password protection for free accounts.
- How to Use:
- Go to the WeTransfer website or use the WeTransfer app.
- Upload your photos.
- Enter the recipient’s email address and your email address.
- Click “Transfer.”
- The recipient will receive an email with a download link.
- MailDrop:
- How it Works: MailDrop is a feature built into macOS Mail that allows you to send large attachments (up to 5GB) via iCloud.
- Pros:
- Seamless integration with macOS Mail.
- Attachments are stored in iCloud and available for download for 30 days.
- Cons:
- Only works with macOS Mail.
- Requires an iCloud account.
- How to Use:
- Compose a new email in macOS Mail.
- Attach your photos.
- If the attachments are too large, Mail will automatically offer to use MailDrop.
- Send the email.
- The recipient will receive a link to download the attachments from iCloud.
- Dedicated Photo Sharing Platforms:
- Flickr:
- Flickr is a popular photo sharing platform with a large community of photographers.
- It offers generous free storage (1000 photos) and advanced features for organizing and sharing photos.
- 500px:
- 500px is a premium photo sharing platform for professional and aspiring photographers.
- It offers advanced features for showcasing and selling your photos.
- SmugMug:
- SmugMug is a paid photo sharing platform that offers unlimited storage and advanced features for selling your photos.
- Flickr:
- Other Options:
- Telegram: Telegram is a messaging app that allows you to send large files (up to 2GB) and create albums for sharing photos.
- WhatsApp: WhatsApp is a messaging app that allows you to send photos and videos to individual contacts or groups.
- Signal: Signal is a secure messaging app that allows you to send photos and videos with end-to-end encryption.
17. Troubleshooting Common Email Attachment Issues
Troubleshoot common email attachment issues by checking the file size limits of your email provider, ensuring the file format is supported, and verifying your internet connection. If problems persist, try compressing the files or using a different email client.
Here’s a more detailed guide:
- Check File Size Limits:
- Most email providers have file size limits for attachments.
- Exceeding these limits can prevent you from sending emails with attachments.
- Common file size limits:
- Gmail: 25MB
- Outlook: 20MB
- Yahoo Mail: 25MB
- Comcast: 25MB
- If your attachments exceed these limits, compress the files or use a cloud storage service and share a link instead.
- Ensure File Format is Supported:
- Some email providers may not support certain file formats.
- Commonly supported file formats:
- Images: JPEG, PNG, GIF
- Documents: PDF, DOC, DOCX, TXT
- Archives: ZIP
- If your file format is not supported, convert it to a supported format or use a different sharing method.
- Verify Internet Connection:
- A poor or unstable internet connection can prevent you from sending emails with attachments.
- Ensure you have a stable Wi-Fi or cellular connection before attempting to send emails.
- Try switching between Wi-Fi and cellular data to see if the issue persists.
- Compress Files:
- Compressing files can reduce their size and make them easier to send via email.
- Use file compression tools to create ZIP archives of your attachments.
- Use a Different Email Client:
- If you’re still having trouble sending attachments, try using a different email client.
- This can help determine if the problem is with your email client or your email account settings.
- Clear Cache and Cookies:
- Clearing the cache and cookies in your web browser can sometimes resolve issues with email attachments.
- Instructions for clearing cache and cookies vary depending on your browser.
- Disable Antivirus Software:
- Antivirus software can sometimes interfere with email attachments.
- Try temporarily disabling your antivirus software to see if the issue persists.
- If disabling antivirus software resolves the issue, adjust your antivirus settings to allow email attachments.
- Contact Support:
- If you’ve tried all of these troubleshooting steps and you’re still unable to send attachments, contact your email provider’s support team for assistance.
18. Exploring Mobile Photography Techniques for Better Photos
Enhance your mobile photography by exploring techniques like using natural light, applying the rule of thirds, experimenting with different angles, and utilizing built-in iPhone camera features like Portrait mode and filters.
Here are some techniques:
- Use Natural Light:
- Natural light is the best light for photography.
- Avoid using the built-in flash on your iPhone, as it can create harsh shadows and unflattering lighting.
- Shoot outdoors during the golden hours (early morning and late afternoon) for warm, soft light.
- Shoot indoors near a window for diffused, natural light.
- Apply the Rule of Thirds:
- The rule of thirds is a compositional guideline that involves dividing your image into nine equal parts using two horizontal lines and two vertical lines.
- Place key elements of your composition along these lines or at the intersections of the lines to create a more balanced and visually appealing image.
- Enable the grid in your iPhone’s camera settings to help you apply the rule of thirds.
- Experiment with Different Angles:
- Don’t just shoot from eye level.
- Experiment with different angles to create more interesting and dynamic compositions.
- Shoot from a low angle to make your subject appear larger and more imposing.
- Shoot from a high angle to create a sense of perspective and scale.
- Use Portrait Mode:
- Portrait mode on the iPhone creates a shallow depth of field effect, blurring the background and making your subject stand out.
- Use Portrait mode for portraits, close-ups, and other subjects where you want to create a sense of depth and separation.
- Use Filters:
- The iPhone’s built-in camera app offers a variety of filters that can enhance the look and feel of your photos.
- Experiment with different filters to find the ones that you like best.
- Use filters sparingly, as overusing them can make your photos look artificial.
- Use Editing Apps:
- Use photo editing apps to enhance your photos and correct any flaws.
- Popular photo editing apps include Adobe Lightroom Mobile, Snapseed