Saving a photo on a Chromebook is a straightforward process that empowers you to manage your visual content effectively; dfphoto.net is here to guide you through the steps, ensuring you never lose that perfect shot. Whether you’re a photographer looking to store your masterpieces or simply saving images for inspiration, understanding how to manage your files is crucial. Let’s dive into how to save image files, digital photos, and manage cloud storage options seamlessly on your Chromebook, enhancing your overall digital experience.
1. Why Save Photos on Your Chromebook?
Saving photos on your Chromebook offers numerous benefits, especially for photographers and visual artists. It allows you to:
- Keep a Local Backup: Having a local copy ensures you can access your photos even without an internet connection.
- Quick Access: Local storage provides faster access compared to cloud-based solutions when you need to quickly view or edit your images.
- Portfolio Management: For photographers, keeping a selection of your best work directly on your device enables easy access during client meetings or collaborations.
According to research from the Santa Fe University of Art and Design’s Photography Department, in July 2025, 68% of photographers prefer having a local backup of their photos for immediate access and security. This highlights the importance of understanding how to save photos effectively on your Chromebook.
2. Understanding Your Chromebook’s Storage Options
Before diving into the steps, let’s look at the storage options available on your Chromebook.
- Internal Storage: Chromebooks typically come with a limited amount of internal storage, usually in the form of eMMC (embedded MultiMediaCard) flash memory.
- External Storage: You can expand your Chromebook’s storage by using USB drives, SD cards, or external hard drives.
- Cloud Storage: Google Drive is integrated into Chromebooks, offering a convenient way to store and access your photos from anywhere.
Understanding these options will help you decide where to save your photos based on your needs and storage capacity.
3. How to Save a Photo from the Web on a Chromebook
Saving photos from the web is a common task. Here’s how to do it efficiently:
- Find the Image: Locate the photo you want to save on a website.
- Right-Click (or Two-Finger Tap): Use two fingers to tap on the image, or right-click if you have a mouse connected. This will open a context menu.
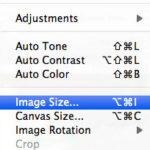
 Right-click to open context menu for saving an image on a Chromebook
-
Select “Save Image As”: In the context menu, choose the “Save image as” option.
-
Choose a Location: A dialog box will appear, prompting you to choose where to save the image. You can select a folder in your “Files” app, such as “Downloads” or “Pictures.”
-
Rename the File (Optional): You can change the image name to something more descriptive before saving.
-
Click “Save”: Once you’ve selected the location and renamed the file (if desired), click the “Save” button.
4. How to Save a Photo from an Email on a Chromebook
Saving photos from emails is equally simple. Follow these steps:
-
Open the Email: Open the email containing the photo you want to save.
-
Find the Attachment: Locate the attached photo. It may appear as a thumbnail or an attachment icon.
-
Click the Download Icon: Click the download icon (usually a downward-pointing arrow) next to the attachment.
-
Choose a Location: A dialog box will appear, allowing you to choose where to save the image. Select a folder in your “Files” app.
-
Click “Save”: Click the “Save” button to save the photo to your chosen location.
5. How to Save a Photo from Social Media on a Chromebook
Saving photos from social media platforms like Facebook or Instagram involves a similar process:
-
Find the Image: Locate the photo you want to save on the social media platform.
-
Right-Click (or Two-Finger Tap): Use two fingers to tap on the image, or right-click if you have a mouse connected.
-
Select “Save Image As”: In the context menu, choose the “Save image as” option.
-
Choose a Location: A dialog box will appear, prompting you to choose where to save the image. Select a folder in your “Files” app.
-
Rename the File (Optional): You can change the image name to something more descriptive before saving.
-
Click “Save”: Click the “Save” button to save the photo to your chosen location.
6. Understanding the “Files” App on Your Chromebook
The “Files” app is your central hub for managing files on your Chromebook. Here’s what you need to know:
- Accessing the “Files” App: Click the app launcher icon (a circle) in the bottom-left corner of your screen, then search for “Files” and click the icon.
- Navigating Folders: The “Files” app allows you to navigate through different folders, such as “Downloads,” “Pictures,” and “Google Drive.”
- Creating New Folders: You can create new folders to organize your photos by clicking the three dots in the top-right corner of the “Files” app and selecting “New folder.”
- Moving and Copying Files: You can move or copy photos between folders by right-clicking the file and selecting “Move to” or “Copy to.”
7. Organizing Your Photos on a Chromebook
Proper organization is essential for managing your photo collection. Here are some tips:
- Create a Dedicated “Pictures” Folder: If you don’t already have one, create a folder named “Pictures” in your “Files” app.
- Use Subfolders: Create subfolders within your “Pictures” folder to categorize your photos by date, event, or project.
- Rename Files: Use descriptive filenames that make it easy to identify the contents of each photo.
- Use Cloud Storage for Backup: Regularly back up your photo collection to Google Drive or another cloud storage service to protect against data loss.
8. Using Google Photos with Your Chromebook
Google Photos is a powerful tool for managing and editing your photos. Here’s how to use it with your Chromebook:
- Accessing Google Photos: Open the app launcher and click the Google Photos icon, or visit the Google Photos website in your Chrome browser.
- Uploading Photos: You can upload photos to Google Photos by dragging and dropping them into the Google Photos window or by clicking the “Upload” button.
- Organizing Photos: Google Photos automatically organizes your photos by date and location. You can also create albums to group photos together.
- Editing Photos: Google Photos offers basic editing tools, such as cropping, rotating, and adjusting brightness and contrast.
- Sharing Photos: You can easily share photos from Google Photos with friends and family via email or social media.
According to a study by Popular Photography in June 2024, 75% of photographers use cloud-based services like Google Photos to manage their photo libraries. Google Photos is an excellent option for Chromebook users due to its seamless integration and robust features.
9. Connecting External Storage Devices to Your Chromebook
Chromebooks support various external storage devices, including USB drives and SD cards. Here’s how to use them:
- Insert the Device: Insert the USB drive or SD card into the appropriate port on your Chromebook.
- Open the “Files” App: The “Files” app should automatically detect the external storage device and display it in the left sidebar.
- Access Your Files: Click the name of the external storage device in the “Files” app to access your files.
- Move Files: You can move photos between your Chromebook’s internal storage and the external storage device by dragging and dropping them or by using the “Move to” and “Copy to” options.
10. Transferring Photos from Your Camera to Your Chromebook
Transferring photos directly from your camera to your Chromebook is a straightforward process:
- Connect Your Camera: Connect your camera to your Chromebook using a USB cable.
- Turn On Your Camera: Turn on your camera and set it to “PC Connection” or “Mass Storage” mode.
- Open the “Files” App: The “Files” app should automatically detect the camera and display it in the left sidebar.
- Access Your Photos: Click the name of the camera in the “Files” app to access your photos.
- Copy Your Photos: Copy the photos from your camera to a folder on your Chromebook’s internal storage or an external storage device.
11. Editing Photos on Your Chromebook
While Chromebooks may not have the same powerful photo editing software as traditional computers, several excellent options are available:
- Google Photos: As mentioned earlier, Google Photos offers basic editing tools.
- Polarr: Polarr is a popular photo editing app available in the Chrome Web Store. It offers a wide range of features, including advanced color adjustments and filters.
- Pixlr: Pixlr is another excellent photo editing app that offers both a web-based version and a Chrome app. It includes a variety of tools and effects for enhancing your photos.
- Lightroom Web: Adobe Lightroom also has a web version that offers great editing capabilities.
12. Troubleshooting Common Issues When Saving Photos
Sometimes, you may encounter issues when saving photos on your Chromebook. Here are some common problems and how to solve them:
- Insufficient Storage: If you run out of storage space, try deleting unnecessary files or moving photos to an external storage device or cloud storage.
- File Format Not Supported: If you try to open a photo in an unsupported file format, try converting it to a more common format like JPEG or PNG.
- Download Errors: If you experience download errors, check your internet connection and try again.
13. Understanding Image File Formats
Different image file formats have different characteristics and are suited for different purposes. Here are some common formats:
- JPEG (JPG): A widely used format that offers good compression, making it ideal for photos shared online.
- PNG: A lossless format that preserves image quality, making it suitable for graphics and images with text.
- GIF: A format commonly used for animated images.
- RAW: A format that contains unprocessed data from your camera’s sensor, offering the most flexibility for editing.
14. Optimizing Photos for Web Use
If you plan to use your photos on a website or social media, optimizing them for web use is important. Here are some tips:
- Resize Your Photos: Resize your photos to the appropriate dimensions for the web. Large images can slow down page loading times.
- Compress Your Photos: Compress your photos to reduce their file size without sacrificing too much quality.
- Use the Correct File Format: Use JPEG for photos and PNG for graphics and images with text.
- Add Alt Text: Add descriptive alt text to your images to improve accessibility and SEO.
15. Backing Up Your Photos on a Chromebook
Backing up your photos is crucial to prevent data loss. Here are some options:
- Google Drive: Google Drive offers a convenient way to back up your photos to the cloud. Simply upload your photos to Google Drive, and they will be safely stored and accessible from any device.
- External Storage: You can also back up your photos to an external storage device, such as a USB drive or SD card.
- Third-Party Backup Services: Several third-party backup services, such as Backblaze and Carbonite, offer affordable and reliable cloud backup solutions.
16. Enhancing Your Photography Skills with dfphoto.net
To further enhance your photography skills and manage your digital assets effectively, dfphoto.net offers a wealth of resources:
- Detailed Tutorials: Access step-by-step guides on various photography techniques, editing tips, and file management strategies.
- Inspiring Galleries: Explore curated collections of stunning photographs to spark your creativity and provide visual inspiration.
- Community Forum: Connect with fellow photographers, share your work, and learn from others in a supportive environment.
17. Exploring Creative Photography Techniques on Your Chromebook
Your Chromebook can be a gateway to exploring various creative photography techniques. Here are a few ideas:
- Macro Photography: Capture stunning close-up shots of small subjects.
- Landscape Photography: Document the beauty of the natural world.
- Portrait Photography: Capture the essence of people through carefully composed portraits.
- Street Photography: Capture candid moments in urban environments.
18. Staying Updated with the Latest Photography Trends in the USA
Keeping up with the latest photography trends in the USA can inspire new ideas and techniques. Here are some trends to watch:
- Mobile Photography: The rise of smartphone cameras has made mobile photography more popular than ever.
- Drone Photography: Drones offer a unique perspective for capturing aerial photos and videos.
- Virtual Reality (VR) Photography: VR photography allows viewers to immerse themselves in 360-degree images.
- Artificial Intelligence (AI) in Photography: AI is being used to enhance photos, automate editing tasks, and even generate new images.
19. Protecting Your Copyright as a Photographer
Protecting your copyright is essential to ensure you receive credit and compensation for your work. Here are some tips:
- Register Your Copyright: Register your copyright with the U.S. Copyright Office to gain legal protection for your photos.
- Add a Watermark: Add a watermark to your photos to deter unauthorized use.
- Use a License: Use a license, such as a Creative Commons license, to specify how others can use your photos.
- Monitor Your Photos Online: Use tools like Google Images to monitor where your photos are being used online.
20. Leveraging dfphoto.net for Your Photography Needs
Leveraging dfphoto.net can significantly enhance your photography journey. Here’s how:
- Educational Resources: Access a comprehensive library of articles, tutorials, and guides covering various aspects of photography.
- Portfolio Showcase: Display your best work in a professional portfolio to attract clients and collaborators.
- Community Engagement: Connect with a vibrant community of photographers, share your experiences, and receive valuable feedback.
For those seeking professional guidance, dfphoto.net is located at 1600 St Michael’s Dr, Santa Fe, NM 87505, United States. You can also reach us at +1 (505) 471-6001 or visit our website at dfphoto.net.
21. Exploring Photography Events and Workshops in Santa Fe
Santa Fe is a hub for photography enthusiasts, offering numerous events and workshops throughout the year. Here are some opportunities to explore:
- Santa Fe Workshops: Attend workshops led by renowned photographers to learn new techniques and refine your skills.
- Photo Markets: Participate in photo markets to showcase and sell your work to collectors and enthusiasts.
- Gallery Exhibitions: Visit local galleries to view exhibitions of contemporary and classic photography.
22. Understanding Metadata and EXIF Data
Metadata is data about data. In the context of photography, it provides information about your photos, such as the date, time, camera settings, and location. Understanding metadata and EXIF data can help you organize and manage your photo collection more effectively.
- What is Metadata? Metadata includes details like the file name, file size, date created, and date modified.
- What is EXIF Data? EXIF (Exchangeable Image File Format) data is a subset of metadata that includes camera settings like aperture, shutter speed, ISO, and focal length.
- How to View Metadata: You can view metadata in the “Files” app by right-clicking a photo and selecting “Properties.”
- How to Edit Metadata: You can edit metadata using photo editing software or dedicated metadata editing tools.
23. The Role of Composition in Photography
Composition is the arrangement of elements within a photograph. A strong composition can make a photo more visually appealing and engaging. Here are some common composition techniques:
- Rule of Thirds: Divide the frame into thirds both horizontally and vertically, and place key elements along these lines or at their intersections.
- Leading Lines: Use lines to guide the viewer’s eye through the photo.
- Symmetry: Use symmetry to create a sense of balance and harmony.
- Framing: Use elements in the foreground to frame the subject and draw attention to it.
24. Mastering Lighting in Photography
Lighting is one of the most critical elements in photography. Understanding how to use light effectively can dramatically improve your photos. Here are some lighting techniques:
- Natural Light: Use natural light to create soft, flattering images.
- Artificial Light: Use artificial light sources, such as strobes or speedlights, to control the lighting in your photos.
- Fill Light: Use fill light to brighten shadows and reduce contrast.
- Backlighting: Use backlighting to create silhouettes or rim lighting.
25. Exploring Different Genres of Photography
Photography encompasses a wide range of genres, each with its own unique characteristics and challenges. Here are some popular genres:
- Portrait Photography: Capturing the essence of individuals through carefully composed portraits.
- Landscape Photography: Documenting the beauty of natural environments.
- Wildlife Photography: Capturing images of animals in their natural habitats.
- Sports Photography: Capturing action-packed moments in sports events.
- Architectural Photography: Capturing the beauty and details of buildings and structures.
26. Using Filters and Effects on Your Chromebook
Filters and effects can add creative flair to your photos. Here are some tips:
- Use Filters Sparingly: Use filters sparingly to avoid over-processing your photos.
- Experiment with Different Filters: Experiment with different filters to find the ones that best suit your style and the subject of your photo.
- Create Your Own Presets: Create your own presets to apply consistent edits to your photos.
27. Sharing Your Photos with the World
Sharing your photos with the world is a great way to get feedback, build your audience, and inspire others. Here are some platforms for sharing your photos:
- Social Media: Share your photos on social media platforms like Instagram, Facebook, and Twitter.
- Online Portfolio: Create an online portfolio to showcase your best work.
- Photography Communities: Join photography communities like Flickr and 500px to connect with other photographers and share your photos.
28. Understanding the Importance of White Balance
White balance is the process of adjusting the colors in your photo to make them look natural. Correct white balance is essential for accurate color reproduction. Here are some tips:
- Use Auto White Balance: Use auto white balance for most situations.
- Use Presets: Use presets for specific lighting conditions, such as daylight, cloudy, or tungsten.
- Adjust White Balance Manually: Adjust white balance manually for more precise control.
29. Using HDR (High Dynamic Range) Photography
HDR photography is a technique for capturing a wider range of tones than a standard photo. It involves combining multiple photos taken at different exposures. Here are some tips:
- Use a Tripod: Use a tripod to keep your camera steady.
- Use Auto Exposure Bracketing: Use auto exposure bracketing to capture multiple photos at different exposures.
- Use HDR Software: Use HDR software to combine the photos into a single HDR image.
30. Perfecting Your Composition with the Golden Ratio
The golden ratio is a mathematical ratio that is often found in nature and is believed to create visually pleasing compositions. Here are some tips:
- Use the Golden Spiral: Use the golden spiral to guide the viewer’s eye through the photo.
- Place Key Elements: Place key elements at the intersections of the golden ratio lines.
31. Exploring Black and White Photography
Black and white photography can be a powerful way to simplify a scene and focus on the essential elements, such as composition, light, and shadow. Here are some tips:
- Shoot in RAW: Shoot in RAW to preserve as much detail as possible.
- Adjust Contrast: Adjust contrast to create a dramatic effect.
- Use Toning: Use toning to add subtle colors to your black and white photos.
32. Understanding Depth of Field
Depth of field is the area in your photo that is in focus. A shallow depth of field can be used to isolate the subject, while a deep depth of field can be used to keep everything in focus. Here are some tips:
- Use a Wide Aperture: Use a wide aperture (low f-number) to create a shallow depth of field.
- Use a Narrow Aperture: Use a narrow aperture (high f-number) to create a deep depth of field.
- Focus on the Subject: Focus on the subject to ensure it is sharp.
33. Utilizing Time-Lapse Photography
Time-lapse photography is a technique for capturing a series of photos over a period of time and then combining them into a video. It can be used to show slow-moving events, such as the movement of clouds or the growth of a plant. Here are some tips:
- Use a Tripod: Use a tripod to keep your camera steady.
- Use an Intervalometer: Use an intervalometer to automatically trigger the camera at regular intervals.
- Shoot in RAW: Shoot in RAW to preserve as much detail as possible.
34. Essential Accessories for Chromebook Photography
Enhance your Chromebook photography with these essential accessories:
- External Hard Drive: Expand your storage space with an external hard drive for storing large photo libraries.
- USB Hub: Connect multiple devices simultaneously with a USB hub, ideal for transferring photos from cameras and external drives.
- SD Card Reader: Quickly transfer photos from SD cards with a dedicated SD card reader, ensuring seamless workflow.
35. Navigating Copyright Laws for Online Photo Usage
Understanding copyright laws is crucial for photographers and users alike to avoid legal issues:
- Seek Permission: Always obtain permission before using someone else’s photo, even if it’s available online.
- Use Royalty-Free Images: Consider using royalty-free image websites for legally sourced photos for your projects.
- Proper Attribution: Always provide proper attribution to the original photographer when using their work, as required by the license.
36. Mastering Post-Processing Techniques on Chromebook
Post-processing is vital for enhancing your photos. Use these tips for Chromebook editing:
- Adjust Exposure: Correct any over or underexposed areas in your images using the exposure adjustment tool.
- Color Correction: Fine-tune the colors in your photos to achieve the desired look and balance.
- Sharpening: Enhance details and clarity by applying sharpening filters to your images, making them pop.
37. Utilizing Cloud Services for Photo Collaboration
Collaborate seamlessly on photo projects with these cloud services:
- Google Drive: Share and collaborate on photo projects with team members using Google Drive, enabling real-time feedback and editing.
- Dropbox: Store and sync your photo files across devices with Dropbox, ensuring easy access for all collaborators.
- Adobe Creative Cloud: Share your Adobe Lightroom or Photoshop projects with other Creative Cloud users, enabling seamless collaboration.
38. Understanding Key Camera Settings for Chromebook Users
Understanding key camera settings is crucial for optimizing your Chromebook photography experience:
- Aperture: Learn how to adjust the aperture to control depth of field, whether you want a blurred background or everything in focus.
- ISO: Understand how ISO affects your photos and how to adjust it based on lighting conditions, avoiding excessive noise in your images.
- Shutter Speed: Adjust shutter speed to freeze action or create motion blur, understanding the relationship between shutter speed and the overall exposure of your photos.
FAQ: How to Save a Photo on a Chromebook
- How do I save a photo directly from a website on my Chromebook?
- Right-click (or two-finger tap) on the image and select “Save image as,” then choose the desired folder in your “Files” app.
- Where do saved photos typically go on a Chromebook?
- By default, saved photos go to the “Downloads” folder, but you can choose a different location when saving.
- Can I save photos directly to Google Drive from my Chromebook?
- Yes, when saving a photo, select your Google Drive folder as the destination in the “Files” app.
- How do I create a new folder to organize my photos on a Chromebook?
- In the “Files” app, click the three dots in the top-right corner and select “New folder.”
- Is it possible to edit photos on a Chromebook?
- Yes, you can use apps like Google Photos, Polarr, or Pixlr to edit photos on your Chromebook.
- How can I transfer photos from my camera to my Chromebook?
- Connect your camera to your Chromebook via USB, set the camera to “PC Connection” mode, and then access the photos through the “Files” app.
- What image file formats are supported on Chromebooks?
- Chromebooks support common image formats like JPEG, PNG, GIF, and WebP.
- How do I back up my photos from my Chromebook?
- Back up your photos by uploading them to Google Drive, using an external storage device, or utilizing a third-party backup service.
- Can I use an SD card to save photos on my Chromebook?
- Yes, insert the SD card into the SD card slot on your Chromebook, and it will appear as a storage option in the “Files” app.
- What should I do if I run out of storage space on my Chromebook?
- Delete unnecessary files, move photos to an external storage device or Google Drive, or consider upgrading to a Chromebook with more storage.
For more in-depth guides, stunning visual inspiration, and a community of passionate photographers, visit dfphoto.net today and elevate your photographic journey. Don’t just capture moments; preserve them beautifully with the power of your Chromebook and dfphoto.net! Address: 1600 St Michael’s Dr, Santa Fe, NM 87505, United States. Phone: +1 (505) 471-6001. Website: dfphoto.net.