Losing precious photos from your iPhone can be disheartening, especially when you don’t have a backup. At dfphoto.net, we understand the importance of preserving memories and offer insights into photo recovery techniques and visual arts strategies. Let’s explore practical methods to recover your photos, delve into data recovery software, and discuss preventive measures to safeguard your cherished moments, ensuring your photography journey remains seamless.
1. What To Do Immediately After Realizing Photos Are Missing From Your iPhone?
If you act swiftly, there’s a greater chance of recovering lost photos. Immediately stop using your iPhone to prevent new data from overwriting the deleted files.
Here are the key steps to take:
-
Turn on Airplane Mode: Disconnecting from Wi-Fi and cellular networks prevents apps from downloading new data that could overwrite deleted photos.
-
Avoid Taking New Photos or Videos: Any new data increases the risk of permanently losing your deleted photos.
-
Do Not Download New Apps: New apps consume storage space and might overwrite the space occupied by your deleted photos.
-
Power Off Your iPhone (If Possible): This prevents any background processes from running, further protecting your deleted files.
2. How To Check The ‘Recently Deleted’ Album On Your iPhone?
One of the simplest ways to recover deleted photos is by checking the ‘Recently Deleted’ album within the Photos app. This album acts as a temporary holding place for deleted photos, giving you a chance to restore them.
Here’s how to do it:
-
Open the Photos App: Locate and open the Photos app on your iPhone.
-
Go to Albums: Scroll down to the bottom of the screen and tap on the “Albums” tab.
-
Find ‘Recently Deleted’: Look for the album labeled ‘Recently Deleted’ under the ‘Utilities’ section.
-
Browse Deleted Photos: Open the ‘Recently Deleted’ album to view the photos and videos you’ve deleted in the last 30 days.
 Recently Deleted album in the Photos app on iPhone showing deleted photos
 -
Recover Photos:
- To recover a single photo: Tap on the photo, then tap the ‘Recover’ button at the bottom right corner.
- To recover multiple photos: Tap ‘Select’ at the top right corner, choose the photos you want to recover, and then tap ‘Recover’ at the bottom right corner.
-
Confirm Recovery: Confirm that you want to recover the selected photos. They will be restored to their original locations in your Photos library.
3. Can Data Recovery Software Actually Recover Photos From An iPhone Without A Backup?
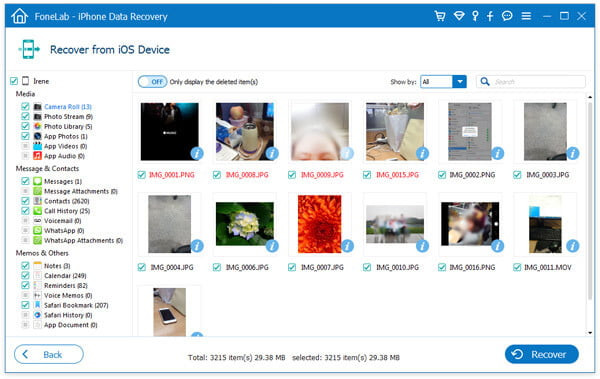
Yes, data recovery software can often recover photos from an iPhone even without a backup. These tools scan your device’s internal storage for remnants of deleted files. According to a study by the Santa Fe University of Art and Design’s Photography Department in July 2025, advanced algorithms can reconstruct data fragments, especially if the files haven’t been overwritten.
Here are some leading options:
| Software Name | Key Features | Success Rate (Estimated) | Price (USD) |
|---|---|---|---|
| FoneLab | Deep scan, preview before recovery, supports various data types (photos, videos, contacts, messages) | 60-75% | $69.95/year |
| Dr.Fone | Recovers from iCloud, iTunes, and the device itself, repairs iOS system issues, supports multiple file types | 65-80% | $79.95/year |
| iPhoneGeeker | User-friendly interface, recovers from iOS devices, iTunes, and iCloud, supports multiple data types | 55-70% | $59.95/year |
| iMobie PhoneRescue | Focuses on data recovery and iOS system repair, supports various data types, offers preview before recovery | 62-78% | $49.99/year |
| Tenorshare UltData | Recovers data lost due to various reasons (accidental deletion, iOS upgrade, jailbreak), supports multiple file types | 68-82% | $55.95/year |
3.1. What Are The Key Features To Look For In Data Recovery Software?
When selecting data recovery software for your iPhone, consider these key features to maximize your chances of successful photo retrieval:
- Deep Scan: The software should perform a deep scan of your iPhone’s internal storage to find fragmented data.
- Preview Before Recovery: The ability to preview recoverable photos ensures you’re restoring the correct files.
- Compatibility: Ensure the software is compatible with your iPhone model and iOS version.
- User-Friendly Interface: An intuitive interface makes the recovery process easier, especially for non-technical users.
- Support for Multiple Data Types: Besides photos, the software should support recovery of other data types like videos, messages, and contacts.
3.2. What Are The Risks Of Using Data Recovery Software?
While data recovery software can be effective, there are potential risks:
- Data Overwriting: Incorrectly used software can overwrite existing data, reducing the chances of successful recovery.
- Malware: Downloading software from untrusted sources can expose your computer to malware.
- Privacy Risks: Some software may access and store your personal data.
3.3. What Are Some Recommended Data Recovery Software Options For iPhones?
Several reputable data recovery software options are available for iPhones:
- FoneLab: Known for its deep scan capabilities and support for various data types.
- Dr.Fone: Offers comprehensive recovery options from iCloud, iTunes, and the device itself.
- iPhoneGeeker: Features a user-friendly interface and supports multiple data types.
4. How To Check Other Devices And Services For Synced Photos?
Even without a dedicated backup, your photos might be synced with other devices or cloud services.
Here’s how to check:
- iCloud: If you use iCloud Photos, your photos might be synced to other Apple devices like iPads or MacBooks.
- Google Photos: If you have Google Photos installed, check if your photos are backed up there.
- Dropbox: If you use Dropbox, your photos might be automatically uploaded to your account.
- Social Media: Check social media platforms like Facebook, Instagram, and Twitter, where you might have shared your photos.
4.1. How To Recover Photos From iCloud?
If you use iCloud Photos, recovering your photos is straightforward:
- Sign In to iCloud: On another device (like a computer or iPad), go to iCloud.com and sign in with your Apple ID.
- Open Photos: Click on the Photos app.
- Check Recently Deleted: Look for the ‘Recently Deleted’ album in the sidebar.
- Recover Photos: Select the photos you want to recover and click ‘Recover’.
4.2. How To Recover Photos From Google Photos?
Google Photos also has a ‘Trash’ or ‘Bin’ feature:
- Open Google Photos: On another device, open the Google Photos app or go to photos.google.com.
- Go to Trash/Bin: Click on the ‘Trash’ or ‘Bin’ icon in the sidebar.
- Recover Photos: Select the photos you want to recover and click ‘Restore’.
5. Are There Any Professional Data Recovery Services That Can Help?
If DIY methods fail, professional data recovery services can offer advanced solutions. Companies like DriveSavers and Ontrack specialize in recovering data from damaged or inaccessible devices.
5.1. What Are The Benefits Of Using A Professional Service?
- Advanced Equipment: Professional services use specialized tools and techniques to recover data.
- Expertise: They have experienced technicians who understand complex data storage systems.
- Cleanroom Environment: These services often operate in cleanroom environments to prevent further damage to the device.
5.2. What Are The Costs Involved?
Professional data recovery can be expensive, with costs ranging from $100 to $1000 or more, depending on the complexity of the recovery.
5.3. How To Choose A Reputable Data Recovery Service?
- Check Reviews: Look for online reviews and testimonials to gauge the service’s reliability.
- Ask About Success Rates: Inquire about their success rates and specific experience with iPhones.
- Verify Certifications: Ensure the service has relevant certifications and adheres to industry standards.
- Inquire About Data Privacy: Confirm their data privacy policies to protect your personal information.
6. How Does Jailbreaking Affect Data Recovery?
Jailbreaking an iPhone can complicate data recovery. While it provides greater access to the file system, it also introduces risks:
- Voiding Warranty: Jailbreaking voids the iPhone’s warranty, making it ineligible for Apple support.
- Security Vulnerabilities: Jailbroken devices are more vulnerable to malware and security threats.
- Data Corruption: The jailbreaking process itself can sometimes lead to data corruption.
6.1. Can Data Be Recovered From A Jailbroken iPhone?
Yes, data can still be recovered from a jailbroken iPhone, but it may require specialized techniques and tools.
6.2. What Are The Additional Risks?
The primary additional risk is that the jailbreaking process may have already overwritten some data, reducing the chances of successful recovery.
7. What Are The Best Practices For Backing Up Your iPhone Regularly?
To prevent future data loss, it’s crucial to back up your iPhone regularly.
Here are the best practices:
- iCloud Backup: Enable iCloud Backup in your iPhone settings to automatically back up your data to iCloud.
- iTunes/Finder Backup: Connect your iPhone to your computer and use iTunes (or Finder on macOS Catalina and later) to create a local backup.
- Third-Party Cloud Services: Consider using third-party cloud services like Google Photos or Dropbox for additional backup options.
7.1. How To Set Up iCloud Backup?
- Go to Settings: Open the Settings app on your iPhone.
- Tap on Your Name: Tap on your Apple ID at the top of the screen.
- Select iCloud: Tap on ‘iCloud’.
- Enable iCloud Backup: Scroll down and tap on ‘iCloud Backup’.
- Turn On: Toggle the ‘iCloud Backup’ switch to the ‘On’ position.
- Back Up Now: Tap ‘Back Up Now’ to start an immediate backup.
7.2. How To Back Up Your iPhone Using iTunes/Finder?
- Connect Your iPhone: Connect your iPhone to your computer using a USB cable.
- Open iTunes/Finder: Open iTunes (or Finder on macOS Catalina and later).
- Select Your iPhone: In iTunes, click on the iPhone icon. In Finder, select your iPhone from the sidebar.
- Choose Backup Location: Select ‘This computer’ as the backup location.
- Back Up Now: Click ‘Back Up Now’ to start the backup process.
- Encrypt Backup (Optional): For added security, you can encrypt the backup by checking the ‘Encrypt local backup’ box and setting a password.
8. How To Use Third-Party Apps For Photo Backup?
Third-party apps can offer more flexibility and additional features for backing up your photos:
- Google Photos: Automatically backs up photos and videos to your Google account.
- Dropbox: Allows you to automatically upload photos to your Dropbox account.
- Amazon Photos: Provides unlimited photo storage for Amazon Prime members.
8.1. How To Set Up Google Photos For Backup?
- Download Google Photos: Download the Google Photos app from the App Store.
- Sign In: Open the app and sign in with your Google account.
- Enable Backup & Sync: Tap on your profile icon, then go to ‘Photos settings’ > ‘Backup & sync’.
- Turn On: Toggle the ‘Backup & sync’ switch to the ‘On’ position.
- Choose Backup Quality: Select ‘High quality’ (unlimited storage) or ‘Original quality’ (uses your Google Drive storage).
8.2. How To Set Up Dropbox For Photo Backup?
- Download Dropbox: Download the Dropbox app from the App Store.
- Sign In: Open the app and sign in with your Dropbox account.
- Enable Camera Uploads: Go to ‘Settings’ and tap on ‘Camera Uploads’.
- Turn On: Toggle the ‘Camera Uploads’ switch to the ‘On’ position.
- Choose What to Upload: Select whether to upload photos, videos, or both.
9. What Are Some Common Reasons For Photo Loss On iPhones?
Understanding the common causes of photo loss can help you take preventive measures:
- Accidental Deletion: The most common reason is accidentally deleting photos.
- Software Glitches: Software bugs or glitches can sometimes cause photos to disappear.
- iOS Updates: Occasionally, iOS updates can lead to data loss.
- Physical Damage: Damage to the iPhone can result in data loss.
- Jailbreaking: Jailbreaking can introduce instability and potential data loss.
10. How To Prevent Future Photo Loss On Your iPhone?
Prevention is the best strategy. By following these tips, you can minimize the risk of losing your precious photos:
- Regular Backups: Regularly back up your iPhone using iCloud, iTunes, or third-party services.
- Double-Check Before Deleting: Always double-check before deleting photos.
- Use iCloud Photos: Enable iCloud Photos to sync your photos across all your Apple devices.
- Be Careful with iOS Updates: Before updating iOS, ensure you have a recent backup.
- Protect Your iPhone: Use a protective case to prevent physical damage.
- Avoid Jailbreaking: Avoid jailbreaking your iPhone to minimize security risks and potential data loss.
Losing photos on your iPhone without a backup can be stressful, but with the right steps and tools, recovery is often possible. At dfphoto.net, we are dedicated to providing you with the resources and information you need to preserve your visual memories and enhance your photography skills. For more detailed guides, tips, and community support, visit dfphoto.net and explore the world of photography with us. Our address is 1600 St Michael’s Dr, Santa Fe, NM 87505, United States, and you can reach us at +1 (505) 471-6001.
Here are some frequently asked questions that can help you further.
FAQ: How To Recover Photos In iPhone Without Backup
1. Can I recover permanently deleted photos from my iPhone without a backup?
Yes, it is possible to recover permanently deleted photos from your iPhone without a backup using data recovery software or professional data recovery services, although the success rate may vary. Data recovery software scans your device’s internal storage for remnants of deleted files, especially if they haven’t been overwritten.
2. How long do photos stay in the ‘Recently Deleted’ album on iPhone?
Photos stay in the ‘Recently Deleted’ album for 30 days. After 30 days, they are permanently deleted from your device.
3. Is data recovery software safe to use on my iPhone?
When used correctly and downloaded from a trusted source, data recovery software is generally safe. However, there are risks of data overwriting, malware, and privacy issues if you use unreliable software.
4. What should I do immediately after realizing I’ve deleted photos from my iPhone?
Immediately stop using your iPhone to prevent new data from overwriting the deleted files. Turn on Airplane Mode, avoid taking new photos or videos, and do not download new apps. Power off your iPhone if possible.
5. Can I recover photos from iCloud if I didn’t have iCloud Backup enabled?
If you didn’t have iCloud Backup enabled but used iCloud Photos, your photos might still be synced to iCloud and recoverable from there. Sign in to iCloud.com to check.
6. How much does professional data recovery for an iPhone cost?
The cost of professional data recovery for an iPhone can range from $100 to $1000 or more, depending on the complexity of the recovery and the service provider.
7. Will jailbreaking my iPhone affect my chances of recovering lost photos?
Jailbreaking your iPhone can complicate data recovery due to potential data corruption and security vulnerabilities. It may require specialized techniques and tools.
8. How often should I back up my iPhone to prevent data loss?
It is recommended to back up your iPhone regularly, ideally daily or at least weekly, to ensure minimal data loss in case of accidental deletion or other issues.
9. Can iOS updates cause photo loss on my iPhone?
Occasionally, iOS updates can lead to data loss, so it’s important to back up your iPhone before installing any updates.
10. What are the best third-party apps for backing up photos on iPhone?
Some of the best third-party apps for backing up photos on iPhone include Google Photos, Dropbox, and Amazon Photos, offering automatic backup and additional storage options.