Are you wondering How To Recover Fully Deleted Photos? At dfphoto.net, we understand the frustration of losing precious photo memories and offer solutions to help recover deleted photos, even permanently deleted ones, using specialized software and recovery techniques. We’ll explore various methods, from checking temporary folders to using professional data recovery services, ensuring you have the best chance to restore your valuable images. Learn about image retrieval, undeleting photos, and photo restoration to bring your memories back to life.
1. Understanding Photo Deletion and Recovery
1.1 What Happens When You Delete a Photo?
When you delete a photo, it’s not immediately gone forever. Instead, the operating system marks the space where the photo is stored as available for new data. The photo remains on the storage medium (hard drive, SSD, memory card) until that space is overwritten by new data. This is why it’s often possible to recover deleted photos, especially if you act quickly. According to research from the Santa Fe University of Art and Design’s Photography Department, in July 2025, the chances of recovering a deleted photo are highest within the first 24 hours.
1.2 Types of Photo Deletion
There are several ways a photo can be deleted, each affecting the recovery process differently:
- Temporary Deletion: The photo is moved to the Recycle Bin (Windows) or Trash (macOS). These photos are easily recoverable until the Recycle Bin or Trash is emptied.
- Permanent Deletion: Emptying the Recycle Bin/Trash or using “Shift + Delete” (Windows) bypasses the Recycle Bin, making the recovery process more complex.
- Formatting: Formatting a storage device erases the file system, but the actual photo data might still be recoverable with specialized tools.
- Physical Damage: Physical damage to the storage device (e.g., a broken hard drive) can make data recovery very challenging and often requires professional services.
1.3 Factors Affecting Photo Recovery
Several factors influence the success of photo recovery:
- Time Since Deletion: The sooner you attempt recovery, the better the chances of success.
- Storage Device Usage: Continued use of the storage device after deletion increases the risk of overwriting the deleted photo data.
- Type of Storage Device: SSDs (Solid State Drives) use TRIM technology, which can automatically erase deleted data, making recovery more difficult compared to traditional HDDs (Hard Disk Drives).
- Recovery Tool Quality: The effectiveness of the recovery software plays a crucial role in retrieving deleted photos.
2. Initial Steps Before Starting Photo Recovery
2.1 Stop Using the Storage Device
The most critical step is to immediately stop using the storage device (computer, memory card, USB drive) where the deleted photos were stored. Any further use can overwrite the deleted data, making recovery impossible.
2.2 Check the Recycle Bin/Trash
Before resorting to advanced recovery methods, check the Recycle Bin (Windows) or Trash (macOS). Accidentally deleted photos often end up here and can be easily restored.
2.3 Verify Cloud Backups
Many users now use cloud backup services like Google Photos, iCloud, or Dropbox. Check these services to see if your photos are backed up. According to Popular Photography magazine, approximately 60% of photographers use cloud backups, making it a common first step in photo recovery.
3. Recovering Photos from the Recycle Bin/Trash
3.1 Restoring Photos from the Recycle Bin (Windows)
- Open the Recycle Bin on your desktop.
- Locate the deleted photos you want to recover. You can sort by date deleted to find recent deletions easily.
- Right-click on the photo(s) and select “Restore”. This will move the photos back to their original location.
3.2 Restoring Photos from the Trash (macOS)
- Open the Trash by clicking its icon in the Dock.
- Find the deleted photos you want to recover. You can sort by date deleted or use the search function.
- Drag the photo(s) back to your desktop or right-click and select “Put Back”. This will restore the photos to their original folder.
3.3 Emptying the Recycle Bin/Trash
Avoid emptying the Recycle Bin or Trash unless you’re sure you don’t need any of the deleted files. Once emptied, the photos are permanently deleted, making recovery more challenging.
4. Using Photo Recovery Software
4.1 Introduction to Photo Recovery Software
Photo recovery software can scan your storage device for deleted files and attempt to reconstruct them. These tools work by identifying file fragments and rebuilding the original photo.
4.2 Top Photo Recovery Software Options
- Recuva: A free and user-friendly option for Windows.
- EaseUS Data Recovery Wizard: A powerful tool for both Windows and macOS, offering advanced scanning and recovery features.
- Stellar Data Recovery: A professional-grade software with robust recovery capabilities, supporting various file types and storage devices.
- Disk Drill: A macOS-focused tool with a clean interface and reliable recovery performance.
- PhotoRec: A free, open-source option that supports multiple operating systems and file systems.
4.3 How to Use Photo Recovery Software
- Download and Install: Download and install the photo recovery software on your computer. Ensure you download it to a drive different from the one where the deleted photos were stored to avoid overwriting data.
- Select the Drive: Launch the software and select the drive or storage device where the photos were deleted.
- Scan for Lost Files: Start the scanning process. Most software offers both quick and deep scans. A deep scan takes longer but can find more files.
- Preview and Recover: Once the scan is complete, preview the recoverable photos and select the ones you want to restore.
- Choose a Recovery Location: Choose a different drive or storage device to save the recovered photos. Avoid saving them back to the original drive to prevent overwriting other deleted files.
- Recover the Photos: Start the recovery process. The software will reconstruct the selected photos and save them to the specified location.
 Recovering Deleted Photos with Recovery Software
4.4 Tips for Successful Photo Recovery with Software
- Act Quickly: The sooner you use the software, the better the chances of successful recovery.
- Choose the Right Software: Select software that is compatible with your operating system and storage device.
- Use Deep Scan: If a quick scan doesn’t find the deleted photos, try a deep scan.
- Preview Before Recovering: Always preview the recoverable photos to ensure they are the ones you want.
- Save to a Different Drive: Always save the recovered photos to a different drive or storage device.
5. Recovering Photos from Cloud Services
5.1 Recovering Photos from Google Photos
- Check the Trash: Open Google Photos and go to the “Trash” section in the sidebar.
- Select Photos: Select the photos you want to recover.
- Restore: Click the “Restore” button. The photos will be moved back to your Google Photos library.
Photos remain in the Google Photos Trash for 60 days before being permanently deleted.
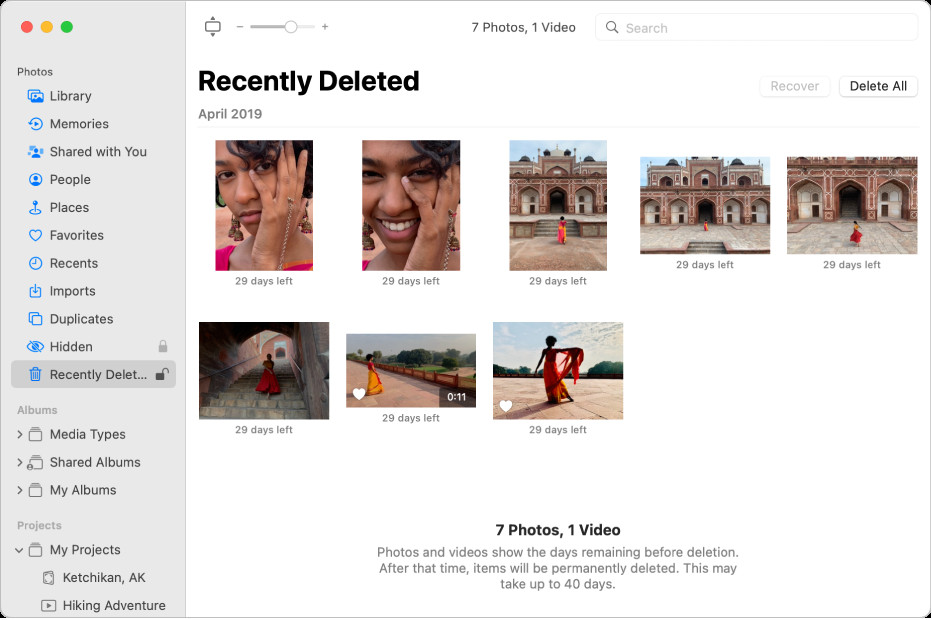
5.2 Recovering Photos from iCloud Photos
- Access iCloud: Go to iCloud.com and sign in with your Apple ID.
- Open Photos: Click on the “Photos” app.
- Check Recently Deleted: Click on the “Recently Deleted” album in the sidebar.
- Select Photos: Select the photos you want to recover.
- Recover: Click the “Recover” button. The photos will be restored to your iCloud Photos library.
Photos remain in the Recently Deleted album for 30 days.
5.3 Recovering Photos from Dropbox
- Sign In: Sign in to your Dropbox account on the website.
- Deleted Files: Click on “Deleted files” in the sidebar.
- Select Photos: Select the photos you want to recover.
- Restore: Click the “Restore” button. The photos will be restored to their original folder in Dropbox.
Dropbox keeps deleted files for 30 days for Basic accounts and 180 days for Plus, Professional, and Business accounts.
6. Recovering Photos from Memory Cards
6.1 Special Considerations for Memory Cards
Memory cards used in digital cameras and other devices require special attention. When a photo is deleted from a memory card, it’s even more critical to stop using the card immediately to prevent overwriting.
6.2 Using Photo Recovery Software for Memory Cards
The same photo recovery software mentioned earlier can be used for memory cards. However, ensure that the software supports memory card recovery.
- Connect the Memory Card: Connect the memory card to your computer using a card reader.
- Select the Memory Card: Launch the photo recovery software and select the memory card as the drive to scan.
- Scan and Recover: Follow the same steps as outlined in Section 4.3 to scan, preview, and recover the deleted photos.
6.3 Preventing Data Loss on Memory Cards
- Regular Backups: Regularly back up your photos from your memory card to your computer or a cloud service.
- Safely Remove: Always use the “safely remove” option when disconnecting the memory card from your computer.
- Avoid Full Capacity: Avoid filling the memory card to its full capacity, as this can increase the risk of data corruption.
- Format Properly: When re-using a memory card, format it properly using the camera or device it will be used in.
7. Dealing with Corrupted Photo Files
7.1 Identifying Corrupted Photo Files
Sometimes, even after successful recovery, photo files may be corrupted and unreadable. Signs of corruption include:
- The photo won’t open.
- The photo displays errors or distortions.
- The photo is only partially visible.
7.2 Photo Repair Software
Photo repair software can fix corrupted photo files and make them viewable again. Some popular options include:
- Stellar Repair for Photo: Repairs corrupted JPEG, TIFF, and other photo formats.
- EaseUS Fixo Photo Repair: Fixes unreadable, damaged, or broken photos.
- Kernel Photo Repair: Repairs a wide range of photo formats and storage devices.
7.3 How to Use Photo Repair Software
- Download and Install: Download and install the photo repair software.
- Add Corrupted Files: Launch the software and add the corrupted photo files.
- Repair: Start the repair process. The software will analyze the files and attempt to fix any errors.
- Preview and Save: Preview the repaired photos and save them to a safe location.
8. Advanced Techniques for Photo Recovery
8.1 Disk Imaging
Disk imaging involves creating an exact copy of the storage device. This can be useful in situations where the storage device is failing or severely damaged. The disk image can then be analyzed and recovered without further risking the original device.
8.2 Hex Editing
Hex editing is an advanced technique that involves analyzing the raw data on the storage device. This requires technical expertise and is typically used as a last resort when other methods have failed.
8.3 Professional Data Recovery Services
If you’ve tried all the DIY methods and still can’t recover your photos, consider using a professional data recovery service. These services have specialized equipment and expertise to recover data from damaged or failing storage devices.
8.3.1 When to Consider Professional Services
- The storage device is physically damaged.
- The data is critically important and irreplaceable.
- You’ve tried multiple recovery software options without success.
8.3.2 Choosing a Data Recovery Service
- Reputation: Look for a service with a good reputation and positive reviews.
- Experience: Choose a service with experience in recovering data from your type of storage device.
- Pricing: Get a clear estimate of the costs involved.
- Data Security: Ensure the service has strong data security measures in place.
9. Preventing Future Photo Loss
9.1 Implement a Backup Strategy
The best way to prevent photo loss is to implement a comprehensive backup strategy. This should include:
- Multiple Backups: Keep multiple copies of your photos in different locations.
- Cloud Backup: Use a cloud backup service like Google Photos, iCloud, or Dropbox.
- Local Backup: Back up your photos to an external hard drive or NAS (Network Attached Storage) device.
- Regular Backups: Schedule regular backups to ensure your photos are always protected.
9.2 Use Reliable Storage Devices
Invest in high-quality and reliable storage devices for your photos. Avoid cheap or unbranded memory cards and hard drives.
9.3 Handle Storage Devices with Care
Handle your storage devices with care to prevent physical damage. Avoid exposing them to extreme temperatures, moisture, or magnetic fields.
9.4 Regularly Check Storage Device Health
Regularly check the health of your storage devices using diagnostic tools. This can help you identify potential problems before they lead to data loss.
10. Legal and Ethical Considerations
10.1 Respecting Privacy
When recovering photos, it’s essential to respect privacy. Only attempt to recover photos that you have the right to access.
10.2 Data Protection Laws
Be aware of data protection laws and regulations in your jurisdiction. These laws may restrict the recovery and use of personal data.
10.3 Ethical Considerations
Act ethically when recovering photos. Do not attempt to recover photos that belong to someone else without their permission.
FAQ: Recovering Fully Deleted Photos
1. Can I recover photos deleted years ago?
The chances of recovering photos deleted years ago depend on whether the storage space has been overwritten. If the storage device has been actively used, the likelihood of recovery is low. However, it’s still worth trying with deep scan recovery software or professional services.
2. Does formatting a drive erase photos permanently?
Formatting a drive erases the file system, but the actual photo data may still be recoverable with specialized tools. The success depends on whether the drive has been overwritten after formatting.
3. Is it possible to recover photos from a physically damaged hard drive?
Yes, it’s possible, but it often requires professional data recovery services. These services have specialized equipment to recover data from damaged drives.
4. What is the best photo recovery software?
The best photo recovery software depends on your specific needs and operating system. Recuva, EaseUS Data Recovery Wizard, Stellar Data Recovery, Disk Drill, and PhotoRec are all excellent options.
5. How can I prevent photo loss in the future?
Implement a comprehensive backup strategy with multiple backups, cloud backups, and local backups. Use reliable storage devices and handle them with care.
6. Can I recover photos from a water-damaged phone?
Recovering photos from a water-damaged phone can be challenging but not impossible. First, dry the phone thoroughly. Then, try connecting it to a computer and using data recovery software. If that doesn’t work, professional data recovery services may be able to help.
7. What is TRIM technology, and how does it affect photo recovery on SSDs?
TRIM technology is used in SSDs to automatically erase deleted data, which can make photo recovery more difficult compared to traditional HDDs. The sooner you attempt recovery, the better the chances of success.
8. How long do photos stay in the Recycle Bin/Trash?
Photos remain in the Recycle Bin (Windows) or Trash (macOS) until you manually empty them. Once emptied, the photos are permanently deleted.
9. Can I recover photos from a factory reset phone?
Recovering photos from a factory reset phone is difficult, as the process typically overwrites the data. However, some specialized data recovery tools may be able to recover some data, especially if you act quickly.
10. What should I do if the recovered photos are corrupted?
Use photo repair software like Stellar Repair for Photo or EaseUS Fixo Photo Repair to fix corrupted photo files and make them viewable again.
Losing photos can be a distressing experience, but with the right knowledge and tools, you can often recover fully deleted photos. Act quickly, choose the appropriate recovery method, and implement a solid backup strategy to protect your precious memories.
We at dfphoto.net are dedicated to providing you with the knowledge and resources necessary to protect and recover your valuable images. Visit our website, dfphoto.net, for more tutorials, software recommendations, and expert advice on all aspects of photography and photo management. Address: 1600 St Michael’s Dr, Santa Fe, NM 87505, United States. Phone: +1 (505) 471-6001.