Putting photos in albums on your iPhone is a fantastic way to organize your visual memories. At dfphoto.net, we understand the importance of keeping your photos organized. This guide provides simple steps to manage and enjoy your photos on your iPhone, enhancing your photography experience. Let’s explore how to create albums, add photos, and utilize various features to enhance your digital photo management skills.
1. Why Organize Photos Into Albums On Your iPhone?
Organizing your photos into albums on your iPhone can bring numerous benefits. It’s more than just tidying up; it’s about enhancing your entire photo experience.
- Better Organization: Grouping photos by event, location, or theme makes them easier to find.
- Enhanced Storytelling: Albums help you relive memories in a structured narrative.
- Efficient Sharing: Easily share entire collections with friends and family.
- Creative Projects: Use albums to gather inspiration for photography projects.
2. How to Create a New Photo Album on Your iPhone
Creating a new photo album on your iPhone is straightforward. Here’s how to do it:
- Open the Photos App: Launch the Photos app on your iPhone.
- Navigate to Albums: Tap the “Albums” tab at the bottom of the screen.
- Create New Album: Tap the plus (+) icon, then select “New Album”.
- Name Your Album: Give your album a descriptive name (e.g., “Vacation 2024”, “Family Portraits”).
- Add Photos: Select the photos and videos you want to include in the album.
- Tap Done: Confirm your selection by tapping “Done” in the upper-right corner.
Now you have a dedicated album for your chosen photos and videos!
3. How To Add Photos To An Existing Album On Your iPhone?
Adding photos to an existing album is just as simple:
- Open the Photos App: Launch the Photos app.
- Select Photos: Tap “Select” in the upper-right corner and choose the photos you want to add.
- Share Menu: Tap the “Share” icon (a square with an arrow pointing up).
- Add to Album: Scroll down and tap “Add to Album”.
- Choose Album: Select the album you want to add the photos to.
Your selected photos are now in the chosen album, making organization a breeze.
4. How To Move Photos Between Albums On Your iPhone?
Moving photos between albums isn’t a direct feature, but here’s a workaround:
- Add to New Album: Add the photos to the new album following the steps in Section 3.
- Delete from Old Album: Go to the original album, select the photos, and tap the “Delete” icon (trash can). Confirm you want to delete them from the album (not the entire library).
This method ensures your photos are moved efficiently.
5. How To Organize Albums Into Folders On Your iPhone?
Folders help you group related albums for even better organization:
- Open the Photos App: Go to the Photos app.
- Navigate to Albums: Tap the “Albums” tab.
- Create New Folder: Tap the plus (+) icon, then select “New Folder”.
- Name Your Folder: Give your folder a descriptive name (e.g., “Travel”, “Family Events”).
- Add Albums: Drag and drop albums into the new folder.
Now your albums are neatly organized within folders.
6. How To Rename An Album On Your iPhone?
Keeping your album names relevant is essential:
- Open the Photos App: Open the Photos app.
- Go to Albums: Tap the “Albums” tab.
- Select Album: Tap the album you want to rename.
- Edit Album: Tap the three dots (•••) in the upper-right corner, then tap “Rename”.
- Enter New Name: Type in the new name and tap “Done”.
Your album now has a new, descriptive name.
7. How To Delete An Album On Your iPhone?
Deleting an album is straightforward, but remember it only deletes the album, not the photos:
- Open the Photos App: Open the Photos app.
- Go to Albums: Tap the “Albums” tab.
- Touch and Hold: Touch and hold the album you want to delete.
- Tap Delete Album: Tap “Delete Album” from the menu that appears.
The album is now removed, but the photos remain in your library.
8. How To Share An Album With Others From Your iPhone?
Sharing albums is a great way to collaborate and share memories:
- Open the Photos App: Open the Photos app.
- Go to Albums: Tap the “Albums” tab.
- Select Album: Tap the album you want to share.
- Share Icon: Tap the “Share” icon.
- Choose Sharing Method: Select how you want to share (e.g., Messages, Mail, AirDrop).
Your friends and family can now enjoy the photos in the album.
9. How To Use Shared Albums On Your iPhone For Collaboration?
Shared Albums allow multiple people to add, comment on, and like photos:
- Create a New Shared Album: Follow the steps in Section 2, but choose “New Shared Album”.
- Invite People: Enter the names or email addresses of people you want to invite.
- Post Photos: Everyone can add photos and videos to the album.
- Interact: Participants can like and comment on photos, creating a collaborative experience.
This feature is perfect for group trips or family events where everyone wants to contribute.
10. How To Change The Key Photo Of An Album On Your iPhone?
The key photo represents the album, so choosing the right one is important:
- Open the Photos App: Launch the Photos app.
- Go to Albums: Tap the “Albums” tab.
- Select Album: Open the album you want to edit.
- Find New Key Photo: Locate the photo you want to use as the key photo.
- Make Key Photo: Touch and hold the photo, then tap “Make Key Photo”.
The selected photo will now represent the album.
11. How Does iCloud Photos Affect Albums On Your iPhone?
iCloud Photos keeps your albums synced across all your Apple devices:
- Automatic Syncing: Any changes you make to albums on your iPhone are automatically reflected on your iPad, Mac, and iCloud.com.
- Storage Optimization: iCloud Photos can save space on your iPhone by storing full-resolution photos in the cloud and keeping smaller, optimized versions on your device.
- Backup: Your photos and albums are safely backed up in iCloud, protecting them from loss or damage.
12. What Are Smart Albums and How Do They Help Organize Photos On Your iPhone?
Smart Albums, available on macOS, automatically organize photos based on criteria you set:
- Criteria-Based Organization: Create albums based on dates, locations, keywords, or people.
- Automatic Updates: As you add new photos to your library, they are automatically added to the appropriate Smart Albums.
- Efficient Management: Simplifies photo management by automating organization.
While iPhones don’t directly have Smart Albums, you can access and manage them via iCloud if created on a Mac.
13. Third-Party Apps For Advanced Album Management On Your iPhone
Several third-party apps offer advanced features for managing albums on your iPhone:
-
Google Photos: Offers unlimited storage (with some compression) and powerful organization tools.
-
Adobe Lightroom Mobile: Provides professional-level editing and organization features.
-
Slidebox: Simplifies photo sorting by allowing you to quickly swipe through and organize photos into albums.
These apps offer features beyond the built-in Photos app.
14. How To Use Keywords and Metadata To Enhance Album Organization On Your iPhone
Keywords and metadata help you find and organize photos more efficiently:
- Add Captions: Add descriptive captions to your photos to provide context.
- Use Keywords: Use keywords to tag photos with relevant terms (e.g., “sunset”, “beach”, “portrait”).
- Edit Date/Time: Correct the date and time information if it’s incorrect.
- Add Locations: Add location data to your photos to group them by place.
Using metadata helps you find specific photos quickly, even without albums.
15. Tips For Creating Themed Photo Albums On Your iPhone
Creating themed albums can make your photo collection more enjoyable:
-
Travel Albums: Document your trips with albums for each destination.
-
Family Albums: Create albums for each family member or family event.
-
Project Albums: Gather inspiration and track progress for your photography projects.
-
Event Albums: Compile photos from parties, weddings, and other special occasions.
Themed albums help you relive specific moments and experiences.
16. How To Backup Your Photo Albums From Your iPhone?
Backing up your photo albums is crucial to prevent data loss:
-
iCloud Backup: Enable iCloud Backup in your iPhone settings to automatically back up your photos and albums.
-
Google Photos: Use Google Photos to back up your photos to the cloud.
-
External Hard Drive: Connect your iPhone to a computer and manually copy your photos to an external hard drive.
-
Cloud Storage Services: Use services like Dropbox or OneDrive to back up your photos.
Regular backups ensure your memories are safe.
17. How To Optimize Photos For Albums On Your iPhone To Save Storage?
Optimizing photos can help you save storage space on your iPhone:
-
Use iCloud Photos: iCloud Photos automatically optimizes storage by keeping smaller versions of photos on your device.
-
Compress Photos: Use apps to compress large photos without significant quality loss.
-
Delete Duplicates: Regularly check for and delete duplicate photos.
-
Convert to HEIF: Use the HEIF format for photos, which offers better compression than JPEG.
Optimizing storage keeps your iPhone running smoothly.
18. How To Create Photo Albums Directly From Other Apps On Your iPhone?
Many apps allow you to create albums directly from their interface:
-
Social Media Apps: Save photos directly to albums from apps like Instagram and Facebook.
-
Photo Editing Apps: Create albums from within photo editing apps like VSCO or Snapseed.
-
Messaging Apps: Save photos from messaging apps like WhatsApp and Telegram directly to albums.
This simplifies the process of organizing photos from different sources.
19. How To Sort Photos Within An Album On Your iPhone?
Sorting photos within an album helps you arrange them in a logical order:
- Open the Photos App: Open the Photos app.
- Go to Albums: Tap the “Albums” tab.
- Select Album: Open the album you want to sort.
- Tap the More Button: Tap the three dots (•••) in the upper-right corner.
- Choose Sort: Select “Sort” and choose your preferred sorting method (e.g., oldest to newest, newest to oldest).
Your photos are now sorted according to your preference.
20. How To Find Specific Photos Within Albums Quickly On Your iPhone?
Finding specific photos quickly is essential for efficient album management:
- Use the Search Bar: Use the search bar in the Photos app to search for photos by date, location, or keyword.
- Scroll and Scan: Quickly scroll through albums to visually scan for the photo you need.
- Use Facial Recognition: The Photos app’s facial recognition feature can help you find photos of specific people.
21. How To Use Live Photos In Albums On Your iPhone?
Live Photos bring your albums to life by adding motion and sound:
- Capture Live Photos: Ensure the Live Photo feature is enabled when taking photos.
- Add to Albums: Add Live Photos to your albums like regular photos.
- Play Live Photos: Touch and hold a Live Photo to play the short video clip.
Live Photos add an extra layer of engagement to your photo albums.
22. How To Print Photos Directly From Albums On Your iPhone?
Printing photos from your albums is a great way to preserve memories:
- Open the Photos App: Launch the Photos app.
- Go to Albums: Tap the “Albums” tab.
- Select Album: Open the album you want to print from.
- Select Photos: Tap the “Share” icon.
- Choose Print: Scroll down and tap “Print”.
- Select Printer: Choose your printer and adjust settings as needed.
- Print: Tap “Print” to start printing your photos.
Tips for Printing Photos from Your iPhone
- Use High-Quality Paper: For best results, use photo paper.
- Adjust Print Settings: Ensure the print settings (e.g., size, quality) match your needs.
- Preview Before Printing: Always preview the print job to avoid wasting paper and ink.
23. How To Create Slideshows From Albums On Your iPhone?
Creating slideshows from your albums is a fun way to view and share your photos:
- Open the Photos App: Open the Photos app.
- Go to Albums: Tap the “Albums” tab.
- Select Album: Open the album you want to create a slideshow from.
- Tap the More Button: Tap the three dots (•••) in the upper-right corner.
- Choose Slideshow: Tap “Slideshow”.
- Adjust Settings: Customize the slideshow settings (e.g., theme, music).
- Play Slideshow: Tap “Start Slideshow” to begin.
Tips for Creating Engaging Slideshows
- Choose Appropriate Music: Select music that matches the mood of your photos.
- Use Transitions: Add transitions to make the slideshow more visually appealing.
- Adjust Timing: Set the timing for each photo to ensure viewers have enough time to see it.
24. How To Use Location Data To Organize Albums On Your iPhone?
Using location data to organize your albums can help you relive your travels and adventures:
- Enable Location Services: Ensure location services are enabled for the Photos app.
- Create Location-Based Albums: Group photos by location to create travel albums.
- Use the Map View: The Photos app’s map view allows you to see where your photos were taken.
Benefits of Using Location Data
- Easy Travel Organization: Quickly create albums for each city or country you visit.
- Memory Recall: Relive your experiences by seeing where each photo was taken.
- Search by Location: Easily find photos from specific locations using the search feature.
25. How To Use Facial Recognition To Organize Albums On Your iPhone?
The Photos app’s facial recognition feature can help you organize albums by identifying people in your photos:
- Enable Facial Recognition: The Photos app automatically scans your library for faces.
- Name Faces: Assign names to the faces it recognizes.
- Create People Albums: The Photos app creates albums for each person, making it easy to find photos of specific individuals.
Tips for Using Facial Recognition
- Correct Misidentifications: If the Photos app misidentifies a face, correct it to improve accuracy.
- Name All Faces: Name as many faces as possible to maximize the effectiveness of the feature.
- Merge Duplicate Profiles: If the Photos app creates duplicate profiles for the same person, merge them into one.
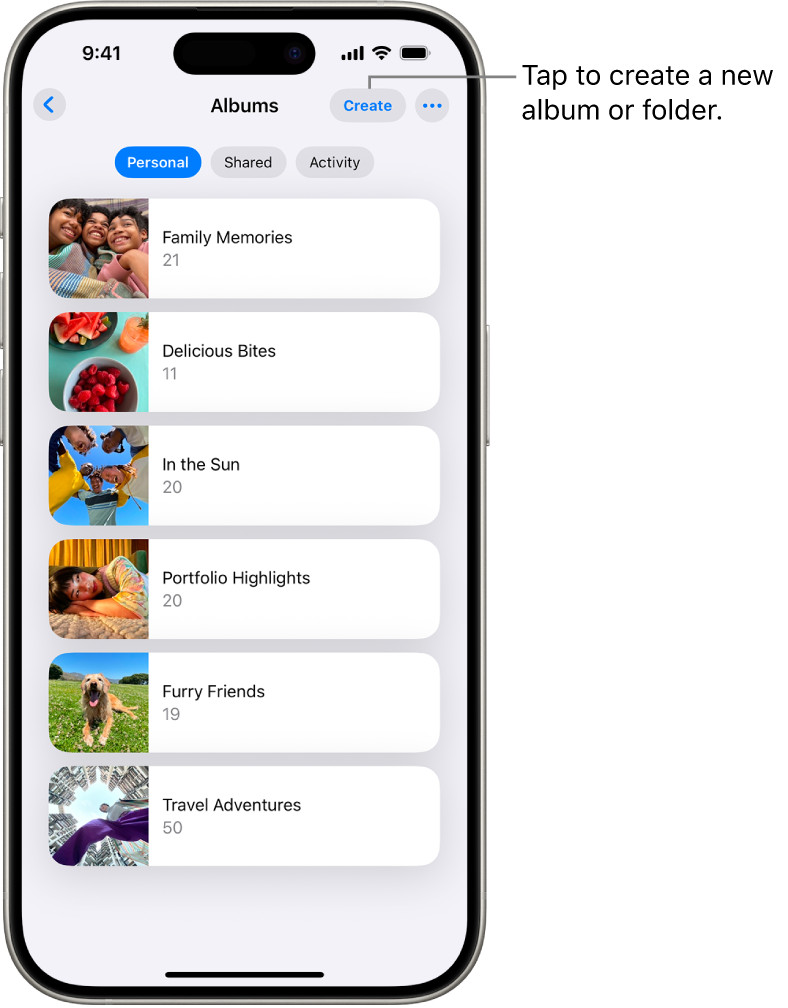 iPhone Photos app displaying albums with a personal tab selected, showcasing a list of various photo albums
26. How to manage duplicate photos in albums on your iPhone?
Duplicate photos can clutter your albums and waste storage space. Here’s how to manage them:
- Identify Duplicates: Use the “Duplicates” album in the Photos app (available in iOS 16 and later) to find duplicate photos and videos.
- Merge Duplicates: Select the duplicates and tap “Merge” to combine them into a single item, keeping the highest quality version.
Tips for Managing Duplicates
- Regularly Check for Duplicates: Make it a habit to check for duplicates periodically to keep your library clean.
- Use Third-Party Apps: If you’re using an older version of iOS, use third-party apps like Gemini Photos or Remo Duplicate Photos Remover to find and delete duplicates.
27. How to share photo albums with non-iPhone users?
Sharing photo albums with friends and family who don’t use iPhones is simple and straightforward:
- iCloud Shared Albums: While primarily for Apple users, you can share a public website link to your iCloud Shared Album. Non-iPhone users can view the photos and videos through this link.
- Google Photos: Share albums via Google Photos, which is accessible on any device with a web browser or the Google Photos app.
- Third-Party Services: Use services like Dropbox, OneDrive, or Flickr to create and share albums with a link.
Tips for Sharing with Non-iPhone Users
- Ensure Privacy: Double-check the privacy settings of your shared albums to control who can view them.
- Provide Clear Instructions: When sharing a link, provide clear instructions on how to access and view the album.
28. How to enhance your iPhone photo album experience with dfphoto.net?
At dfphoto.net, we’re dedicated to helping you enhance your photography skills and enjoyment. Here’s how we can assist:
- Inspiration: Explore our collections of stunning photos for inspiration.
- Education: Learn new techniques and tips from our detailed tutorials and guides.
- Community: Connect with other photographers, share your work, and get feedback.
Explore dfphoto.net
- Visit our website: dfphoto.net
- Address: 1600 St Michael’s Dr, Santa Fe, NM 87505, United States
- Phone: +1 (505) 471-6001
29. How to use the Photos app to create memories and highlights albums?
The Photos app can automatically create “Memories” and “Highlights” albums, which are curated collections of your best photos and videos:
- Memories: The Photos app analyzes your library to create themed collections based on events, locations, and people.
- Highlights: Highlights are similar to Memories, but focus on the best moments from your photos and videos.
Customizing Memories and Highlights
- Add or Remove Photos: You can add or remove photos from automatically generated Memories and Highlights albums.
- Change Titles: Customize the titles to better reflect the content of the album.
- Share with Others: Easily share these curated albums with friends and family.
30. How to create collaborative photography projects using shared albums?
Shared Albums on your iPhone are perfect for collaborative photography projects:
- Theme-Based Projects: Create a shared album with a specific theme (e.g., “Street Photography,” “Nature Shots”) and invite others to contribute.
- Event Documentation: Use shared albums to collaboratively document events like weddings, parties, or vacations.
- Feedback and Critique: Shared albums allow participants to provide feedback and critique on each other’s photos, fostering a learning environment.
Tips for Collaborative Projects
- Set Clear Guidelines: Establish clear guidelines for the project, including the theme, rules, and expectations.
- Encourage Participation: Encourage all participants to actively contribute and engage with each other’s work.
- Provide Constructive Feedback: Offer constructive feedback to help others improve their skills.
31. How to manage photo albums when switching to a new iPhone?
Switching to a new iPhone doesn’t have to be a hassle. Here’s how to ensure your photo albums transfer smoothly:
- iCloud Backup: The easiest way is to use iCloud Backup. Ensure your photos and albums are backed up to iCloud before switching.
- iTunes Backup: You can also create a backup of your old iPhone using iTunes and restore it to your new device.
- Direct Transfer: Use the “Quick Start” feature to directly transfer data from your old iPhone to your new one.
Tips for a Smooth Transition
- Verify Backup: Double-check that your photos and albums are included in the backup before switching.
- Ensure Sufficient Storage: Make sure your new iPhone has enough storage space to accommodate all your photos and videos.
- Test After Transfer: After the transfer is complete, verify that all your albums and photos are intact.
32. How to troubleshoot common issues with photo albums on your iPhone?
Even with the best organization, issues can arise. Here’s how to troubleshoot common problems:
- Photos Not Syncing: Ensure iCloud Photos is enabled and that you’re signed in with the same Apple ID on all devices.
- Missing Albums: Check that you haven’t accidentally deleted the album. If you use iCloud Photos, check iCloud.com to see if the album is there.
- Photos Not Adding to Album: Make sure you have enough storage space on your iPhone and in iCloud.
Additional Troubleshooting Tips
- Restart Your iPhone: Sometimes a simple restart can resolve minor issues.
- Update iOS: Ensure your iPhone is running the latest version of iOS.
- Contact Apple Support: If you’re still experiencing issues, contact Apple Support for assistance.
33. How to create custom album covers on your iPhone?
Personalize your photo albums by creating custom album covers:
- Choose a Key Photo: Select a photo that best represents the album’s content.
- Make Key Photo: Touch and hold the photo, then tap “Make Key Photo.”
Tips for Choosing Album Covers
- Use High-Quality Images: Select photos that are clear and visually appealing.
- Reflect Album Content: Choose images that accurately represent the theme or event of the album.
- Consider Composition: Use photos with good composition and visual balance.
34. How to use Siri to manage photo albums on your iPhone?
Siri can help you manage your photo albums hands-free:
- Create Albums: Use commands like “Hey Siri, create a new album called ‘Vacation 2024’.”
- Add Photos: Say “Hey Siri, add these photos to ‘Vacation 2024’.”
- Find Albums: Ask “Hey Siri, show me the ‘Family Portraits’ album.”
Tips for Using Siri with Photo Albums
- Use Clear Commands: Speak clearly and use specific album names to avoid confusion.
- Confirm Actions: Double-check that Siri has performed the correct action.
35. How to use widgets for photo albums on your iPhone?
Widgets allow you to display your favorite photo albums right on your home screen:
- Add Widget: Touch and hold an empty area on your home screen, then tap the plus (+) icon.
- Select Photos Widget: Search for the Photos widget and select the size you want.
- Choose Album: Choose the album you want to display in the widget.
- Add Widget: Tap “Add Widget” to place it on your home screen.
Tips for Using Photo Widgets
- Choose Favorite Albums: Display albums that you frequently view or want to showcase.
- Use Multiple Widgets: Add multiple widgets to display different albums.
- Customize Widget Size: Adjust the size of the widget to fit your needs and preferences.
36. How to keep your photo albums private and secure on your iPhone?
Protecting the privacy of your photo albums is crucial:
- Use Passcodes: Set a strong passcode or use Face ID/Touch ID to secure your iPhone.
- Hide Photos: Hide sensitive photos in the Hidden album.
- Disable Location Services: Limit location services for the Photos app to prevent geotagging.
- Be Careful When Sharing: Be mindful of who you share your albums with and the privacy settings you use.
Additional Security Tips
- Review App Permissions: Regularly review the permissions granted to the Photos app and revoke any unnecessary access.
- Use Two-Factor Authentication: Enable two-factor authentication for your Apple ID to protect your iCloud account.
- Update Software Regularly: Keep your iPhone and apps updated to patch security vulnerabilities.
37. How to use Live Text with photos in albums on your iPhone?
Live Text allows you to interact with text in your photos:
- Open the Photos App: Launch the Photos app.
- Go to Albums: Tap the “Albums” tab.
- Select Album: Open the album containing the photo with text.
- Select Photo: Choose the photo with text you want to interact with.
- Use Live Text: The Photos app automatically recognizes text in the image. Tap the Live Text icon to interact with the text.
Tips for Using Live Text
- Copy and Paste Text: Easily copy text from photos and paste it into other apps.
- Translate Text: Translate text from one language to another.
- Look Up Information: Look up information about the text using Siri Knowledge.
38. How to use Visual Look Up with photos in albums on your iPhone?
Visual Look Up helps you identify objects, landmarks, and more in your photos:
- Open the Photos App: Launch the Photos app.
- Go to Albums: Tap the “Albums” tab.
- Select Album: Open the album containing the photo you want to analyze.
- Select Photo: Choose the photo with objects or scenes you want to identify.
- Use Visual Look Up: The Photos app analyzes the image and provides information about the objects, landmarks, or breeds.
Tips for Using Visual Look Up
- Identify Plants and Animals: Learn about different species of plants and animals in your photos.
- Recognize Landmarks: Get information about famous landmarks and locations.
- Find Similar Images: Find similar images online for inspiration or research.
Organizing your photos into albums on your iPhone is more than just a way to tidy up; it’s a way to enhance your entire photography experience. From creating themed albums to using advanced features like iCloud Photos and facial recognition, there are countless ways to make your photo collection more enjoyable and manageable. Visit dfphoto.net to discover more tips, tutorials, and inspiration for your photography journey.