Getting deleted photos back on iPad is possible, and dfphoto.net provides expert guidance on photo recovery techniques, ensuring your visual memories are not lost forever. This comprehensive guide will walk you through various methods to retrieve your precious photos, from checking the Recently Deleted album to utilizing iCloud backups and third-party recovery tools, complete with practical tips and tricks for the photography enthusiast and professional alike, offering solutions that keep your photography and visual art accessible with advanced photo retrieval and data restoration tactics.
1. Where To Begin When Looking For Deleted Photos On Your iPad?
The first place to check when looking for deleted photos on your iPad is the Recently Deleted album. Photos and videos stay there for 30 days before permanent deletion, giving you a window to recover them.
1.1 How To Access The Recently Deleted Album On Your iPad?
To access the Recently Deleted album on your iPad:
- Open the Photos app.
- Scroll down to the Utilities section.
- Tap on “Recently Deleted.”
- Use Face ID or your passcode to unlock the album.
1.2 What Are The Steps To Recover Photos From The Recently Deleted Album?
Once you’ve accessed the Recently Deleted album, follow these steps to recover your photos:
- Tap “Select” in the upper right corner.
- Choose the photos or videos you want to recover.
- Tap “Recover” at the bottom.
- Confirm that you want to recover the items.
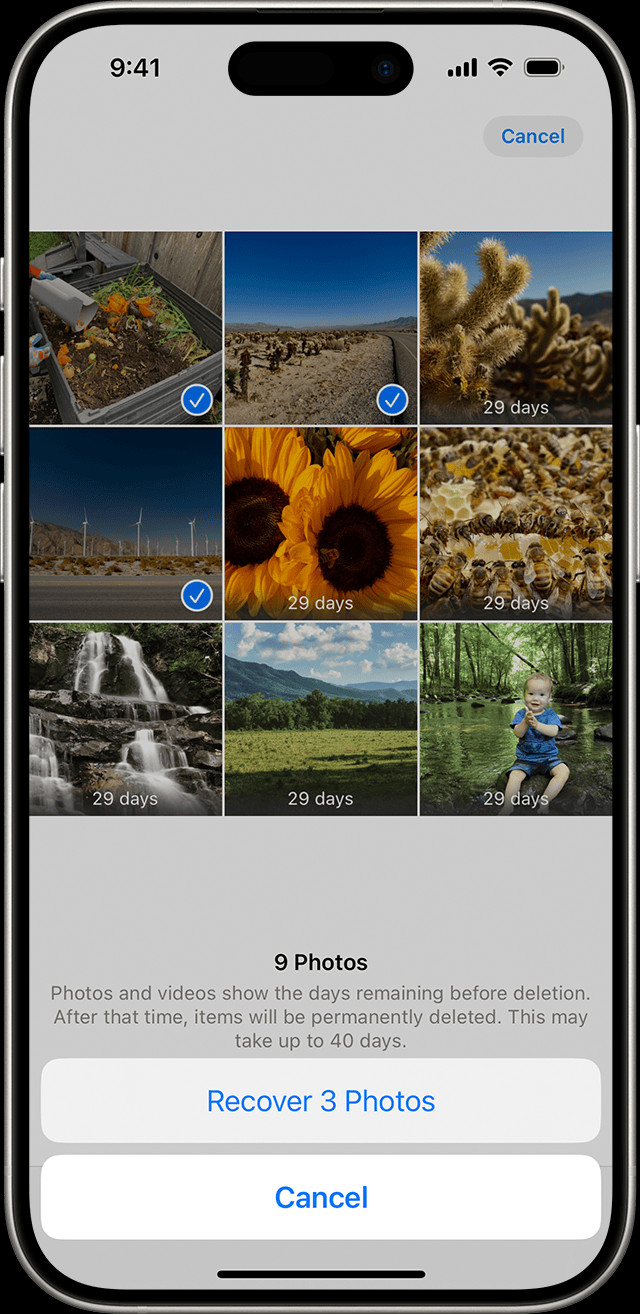 Recovering photos from the Recently Deleted album on an iPad: Select the photos, tap 'Recover', and confirm your choice.
1.3 Is It Possible To Recover Photos After 30 Days From The Deleted Album?
No, it is generally not possible to recover photos directly from the Recently Deleted album after 30 days, as they are permanently deleted from that location. However, there are alternative recovery methods worth exploring that may help restore your photos.
2. How Can Hidden Albums Affect The Visibility Of Your Photos?
Hidden albums can make it seem like your photos are missing when they are actually just hidden from the main view. Photos in the Hidden album are not visible in your regular photo library.
2.1 How To Unhide Photos From The Hidden Album On Your iPad?
To unhide photos from the Hidden album on your iPad:
- Open the Photos app.
- Scroll down to the Utilities section.
- Tap on “Hidden.”
- Use Face ID or your passcode to unlock the album.
- Select the photo or video you want to unhide.
- Tap the More button (three dots).
- Tap “Unhide.”
2.2 How Can You Ensure The Hidden Album Is Visible In The Photos App?
To ensure the Hidden album is visible:
- Open the Settings app.
- Scroll down and tap on “Photos.”
- Make sure the “Hidden Album” toggle is turned on.
2.3 What Happens When You Hide Photos Using iCloud Photos?
If you use iCloud Photos, hiding photos on one device will hide them on all your devices connected to the same iCloud account. Ensure your Hidden album setting is consistent across devices.
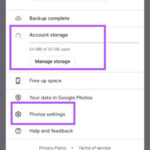
3. Is iCloud Photos An Important Factor In Photo Recovery?
Yes, iCloud Photos is a crucial factor in photo recovery. When enabled, it automatically uploads and stores your photos and videos in iCloud, making them accessible on all your devices.
3.1 How To Check If iCloud Photos Is Enabled On Your iPad?
To check if iCloud Photos is enabled on your iPad:
- Open the Settings app.
- Tap on your name at the top.
- Tap on “iCloud.”
- Tap on “Photos.”
- Make sure the “iCloud Photos” toggle is turned on, which may be labeled as “Sync this iPad.”
3.2 How Can Turning On iCloud Photos Help Retrieve Missing Photos?
Turning on iCloud Photos ensures that all your photos and videos are synced across your devices. If a photo is missing from your iPad, it might still be available in iCloud.
3.3 What Steps Should You Take After Enabling iCloud Photos To Find Your Photos?
After enabling iCloud Photos:
- Connect your iPad to Wi-Fi.
- Wait for a few minutes to allow the photos to sync.
- Check your Photos app to see if the missing photos have reappeared.
4. How Does The iCloud Shared Photo Library Affect Photo Visibility?
The iCloud Shared Photo Library allows you to share photos and videos with up to five other people. Photos might appear only in certain library views depending on how they were shared.
4.1 How To Switch Between Personal Library And Shared Library On Your iPad?
To switch between your Personal Library and Shared Library on your iPad:
- Open the Photos app.
- Tap the profile icon in the upper-right corner.
- Choose “Both Libraries,” “Personal Library,” or “Shared Library.”
4.2 What Visual Cues Indicate Whether A Photo Is In The Shared Library Or Personal Library?
Photos in the Shared Library are marked with the Shared Library icon, while photos in the Personal Library are marked with the Personal Library icon.
4.3 What Happens If A Photo Is Accidentally Moved To The Shared Library?
If a photo is accidentally moved to the Shared Library, it will be visible to all members of that library. You can move it back to your Personal Library if needed, ensuring your photos are accessible and organized according to your preferences.
5. Why Is Using The Same Apple ID Important For Photo Management?
Using the same Apple ID across all your devices ensures that your photos and videos stay up to date on all of them through iCloud.
5.1 How To Verify Which Apple ID Is Being Used On Your iPad?
To verify which Apple ID is being used on your iPad:
- Open the Settings app.
- Tap on your name at the top.
- Your Apple ID (email address) will be displayed.
5.2 What Issues Can Arise From Using Different Apple IDs?
Using different Apple IDs can lead to photos and videos being stored in separate iCloud accounts, making it seem like they are missing from certain devices.
5.3 What Steps Should You Take To Correct Apple ID Discrepancies?
To correct Apple ID discrepancies:
- Sign out of the incorrect Apple ID on your device.
- Sign in with the correct Apple ID that you use for iCloud Photos.
- Allow time for the photos and videos to sync.
6. What Are The Other Methods To Recover Deleted Photos On iPad?
Beyond the standard methods, there are additional strategies to recover deleted photos on your iPad. These include checking iTunes or Finder backups and using third-party recovery software.
6.1 How Can iTunes Or Finder Backups Help In Photo Recovery?
If you regularly back up your iPad to your computer using iTunes (or Finder in macOS Catalina and later), you can restore your device from a backup to recover deleted photos.
6.2 What Are The Steps To Restore Your iPad From An iTunes Or Finder Backup?
To restore your iPad from an iTunes or Finder backup:
- Connect your iPad to your computer.
- Open iTunes or Finder.
- Select your iPad when it appears.
- Click “Restore Backup.”
- Choose the most relevant backup from the list.
- Enter your password if prompted.
- Wait for the restore process to complete.
6.3 What Are The Limitations Of Using iTunes Or Finder Backups For Photo Recovery?
Restoring from a backup will revert your iPad to the state it was in at the time of the backup. Any data created after the backup will be lost, so it’s essential to back up your current data before restoring.
7. What Is The Role Of Third-Party Recovery Software In Retrieving Deleted Photos?
Third-party recovery software can scan your iPad’s storage for recoverable files, including photos that have been deleted but not yet overwritten.
7.1 What Are Some Recommended Third-Party Recovery Software Options?
Some popular third-party recovery software options include:
- EaseUS MobiSaver
- Dr.Fone – Data Recovery (iOS)
- iMobie PhoneRescue
7.2 How To Use Third-Party Recovery Software To Recover Deleted Photos?
To use third-party recovery software:
- Download and install the software on your computer.
- Connect your iPad to your computer.
- Follow the software’s instructions to scan your iPad for deleted photos.
- Preview the recoverable photos.
- Select the photos you want to recover.
- Save the recovered photos to your computer.
7.3 What Are The Risks And Precautions When Using Third-Party Recovery Software?
Risks and precautions when using third-party recovery software:
- Security: Ensure the software is from a reputable source to avoid malware or data breaches.
- Compatibility: Check if the software is compatible with your iPad model and iOS version.
- Overwriting: Avoid using your iPad after realizing photos are missing to prevent overwriting the deleted data.
8. What Preventive Measures Can Be Taken To Avoid Photo Loss On Your iPad?
Taking preventive measures can significantly reduce the risk of photo loss on your iPad. These include regular backups, enabling iCloud Photos, and being cautious when deleting photos.
8.1 How Often Should You Back Up Your iPad?
Ideally, you should back up your iPad regularly, such as weekly or monthly, depending on how frequently you add new photos and data.
8.2 What Are The Best Practices For Backing Up Your iPad?
Best practices for backing up your iPad:
- iCloud Backup: Enable iCloud Backup in Settings to automatically back up your iPad when it is connected to Wi-Fi, locked, and charging.
- iTunes/Finder Backup: Connect your iPad to your computer and create a backup using iTunes or Finder.
- External Storage: Consider using external storage devices to create additional backups of your photos and videos.
8.3 How Does Enabling iCloud Photos Help In Preventing Photo Loss?
Enabling iCloud Photos ensures that your photos and videos are automatically synced to iCloud, providing a secure backup in case your iPad is lost, damaged, or experiences data loss.
9. What Are The Common Scenarios That Lead To Photo Deletion On iPad?
Understanding the common scenarios that lead to photo deletion on iPad can help you avoid these situations and protect your precious memories.
9.1 Accidental Deletion
Accidental deletion is one of the most common reasons for photo loss. It happens when you unintentionally tap the delete button while browsing your photo library.
9.2 Software Glitches
Software glitches or bugs in the Photos app or iOS can sometimes cause photos to disappear or get deleted.
9.3 Failed iOS Updates
Failed iOS updates can occasionally lead to data loss, including photos and videos. Always ensure your iPad is properly charged and connected to a stable Wi-Fi network during updates.
9.4 Hardware Issues
Hardware issues, such as a malfunctioning storage chip, can result in photo loss. If you suspect a hardware problem, contact Apple Support for assistance.
9.5 Syncing Problems
Syncing problems with iCloud can sometimes cause photos to be deleted or not properly synced across your devices.
10. How To Handle Water Damaged iPads To Recover Photos?
Water damage can be devastating to your iPad and the data stored on it. Proper handling is crucial to maximize the chances of recovering your photos.
10.1 Immediate Steps To Take After Water Exposure
Immediate steps to take after water exposure:
- Power Off: Immediately turn off your iPad to prevent short circuits.
- Remove Accessories: Disconnect any accessories, such as headphones or charging cables.
- Dry the Exterior: Gently dry the exterior of your iPad with a soft, absorbent cloth.
- Do Not Charge: Do not attempt to charge your iPad.
- Remove SIM Card: If possible, remove the SIM card tray and dry it.
10.2 What Not To Do When Dealing With A Water Damaged iPad
What not to do when dealing with a water damaged iPad:
- Do Not Turn On: Do not turn on your iPad until it is completely dry.
- Do Not Use a Hair Dryer: Avoid using a hair dryer or other heat sources, as they can cause further damage.
- Do Not Shake: Do not shake your iPad, as this can spread the water internally.
- Do Not Put in Rice: Contrary to popular belief, putting your iPad in rice is not an effective drying method and can introduce dust and debris.
10.3 Professional Data Recovery Services For Water Damaged iPads
Consider using professional data recovery services. These services have specialized equipment and expertise to disassemble your iPad, dry it properly, and attempt to recover your data. dfphoto.net recommends researching reputable services with experience in iPad data recovery.
11. Is There A Way To Recover Photos From A Broken Or Non-Functional iPad?
Recovering photos from a broken or non-functional iPad can be challenging, but it is sometimes possible with the right methods and professional help.
11.1 Options For Recovering Photos From A Broken iPad
Options for recovering photos from a broken iPad:
- Professional Data Recovery Services: These services can attempt to extract data directly from the iPad’s storage chip.
- Logic Board Repair: If the logic board is damaged, a specialized repair service might be able to fix it and allow you to access the data.
11.2 What Factors Determine The Success Of Photo Recovery From A Broken iPad?
Factors that determine the success of photo recovery from a broken iPad:
- Extent of Damage: The severity of the damage affects the likelihood of successful recovery.
- Storage Chip Condition: If the storage chip is intact, data recovery is more likely.
- Professional Expertise: The skill and experience of the data recovery service are crucial.
11.3 When To Seek Professional Help For Data Recovery?
Seek professional help for data recovery when:
- The iPad is severely damaged.
- You are not comfortable disassembling the device yourself.
- The data is critical and worth the cost of professional recovery services.
12. What Are The Data Security Tips To Protect Your Photos On iPad?
Protecting your photos on your iPad involves implementing various data security measures to prevent unauthorized access and data loss.
12.1 Setting Up A Strong Passcode Or Biometric Authentication
Setting up a strong passcode or biometric authentication (Face ID or Touch ID) is the first line of defense against unauthorized access to your photos.
12.2 Enabling Two-Factor Authentication For Your Apple ID
Enabling two-factor authentication for your Apple ID adds an extra layer of security, requiring a verification code from a trusted device when you sign in on a new device.
12.3 How To Use Encryption To Protect Your Photos?
iPads use hardware encryption by default, which protects your data when the device is locked with a passcode.
12.4 Safe Photo Storage Practices
- iCloud Photos: Use iCloud Photos to securely store and sync your photos across devices.
- Regular Backups: Regularly back up your iPad to iCloud or your computer.
- External Storage: Consider using encrypted external storage for additional backups.
13. What Are The Legal Considerations When Recovering Deleted Photos?
Recovering deleted photos can sometimes involve legal considerations, especially when dealing with data that belongs to someone else or was obtained without permission.
13.1 Privacy Laws And Data Recovery
Privacy laws, such as the General Data Protection Regulation (GDPR) in Europe and the California Consumer Privacy Act (CCPA) in the United States, protect individuals’ personal data. Recovering photos that contain personal information without consent can violate these laws.
13.2 Ethical Considerations In Photo Recovery
Ethical considerations in photo recovery:
- Ownership: Ensure you have the right to recover and access the photos.
- Privacy: Respect the privacy of individuals in the photos.
- Consent: Obtain consent before sharing or using recovered photos that contain personal information.
13.3 Potential Legal Issues When Recovering Photos From A Second-Hand iPad
Recovering photos from a second-hand iPad can raise legal issues if the previous owner’s data is still present. It is essential to wipe the device clean before using it to avoid accessing someone else’s personal information without permission.
14. What Are The Best Apps For Managing And Backing Up Photos On iPad?
Using dedicated apps for managing and backing up photos on your iPad can streamline the process and provide additional features for organization and security.
14.1 Recommended Photo Management Apps
Recommended photo management apps:
- Google Photos: Offers unlimited photo storage (with some compression) and excellent organization features.
- Adobe Lightroom Mobile: Provides powerful editing tools and cloud storage for professional photographers.
- Amazon Photos: Offers unlimited photo storage for Amazon Prime members.
14.2 Cloud Storage Solutions For Photo Backup
Cloud storage solutions for photo backup:
- iCloud Photos: Integrated with iOS and offers seamless syncing across Apple devices.
- Dropbox: Provides cloud storage and file sharing capabilities.
- Microsoft OneDrive: Offers cloud storage and integration with Microsoft Office apps.
14.3 Features To Look For In A Photo Backup App
Features to look for in a photo backup app:
- Automatic Backup: Automatically backs up your photos and videos to the cloud.
- Storage Capacity: Offers sufficient storage space for your photo library.
- Organization Tools: Provides tools for organizing and tagging your photos.
- Security: Uses encryption and other security measures to protect your data.
15. How Professional Photo Editing Can Enhance Recovered Photos?
Once you’ve recovered your deleted photos, professional photo editing can enhance their quality and appearance, bringing them back to their original glory or even improving them.
15.1 Best Photo Editing Apps For iPad
- Adobe Photoshop for iPad: A full-featured photo editing app with advanced tools and capabilities.
- Affinity Photo: A professional-grade photo editing app with a wide range of editing tools.
- Snapseed: A free and powerful photo editing app with a user-friendly interface.
15.2 Basic Editing Techniques To Improve Recovered Photos
Basic editing techniques to improve recovered photos:
- Adjust Exposure: Correct the brightness and contrast of the photo.
- Adjust Color Balance: Adjust the color tones to make the photo look more natural.
- Sharpening: Increase the sharpness of the photo to make it look clearer.
- Noise Reduction: Reduce noise or graininess in the photo.
- Cropping: Crop the photo to improve its composition.
15.3 Restoring Color And Detail In Old Or Damaged Photos
- Color Correction: Use color correction tools to restore faded or discolored photos.
- Cloning and Healing: Use cloning and healing tools to remove scratches, blemishes, and other imperfections.
- Detail Enhancement: Use detail enhancement tools to bring out fine details in the photo.
16. Can Dfphoto.Net Assist In Understanding Photo Recovery Techniques?
Yes, dfphoto.net can assist in understanding photo recovery techniques by providing comprehensive guides, tutorials, and resources for photographers of all levels. Whether you are an amateur enthusiast or a seasoned professional, dfphoto.net offers valuable insights and tips for protecting and recovering your precious photos.
16.1 Tutorials And Guides On Photo Recovery On Dfphoto.Net
dfphoto.net offers a variety of tutorials and guides on photo recovery, covering topics such as:
- Recovering deleted photos from various devices and storage media.
- Using photo recovery software.
- Preventing photo loss through regular backups and safe storage practices.
16.2 Community Forums And Expert Advice
dfphoto.net features community forums where you can connect with other photographers, ask questions, and share your experiences with photo recovery. Experts on the site also provide advice and guidance on complex photo recovery issues.
16.3 Resources For Learning About Data Security And Photo Management
dfphoto.net provides resources for learning about data security and photo management, including articles on:
- Protecting your photos from unauthorized access.
- Implementing safe storage practices.
- Using photo management apps to organize and back up your photo library.
By leveraging the resources and expertise available on dfphoto.net, you can enhance your understanding of photo recovery techniques and take proactive steps to protect your valuable photos.
17. How To Prevent Overwriting Deleted Data For Better Recovery Chances?
Preventing overwriting deleted data is crucial for maximizing the chances of successful photo recovery. Once data is overwritten, it becomes much more difficult, if not impossible, to recover.
17.1 Understanding How Data Overwriting Affects Photo Recovery
Data overwriting occurs when new data is written to the same storage location where deleted photos were previously stored. This process effectively replaces the deleted data, making it unrecoverable.
17.2 Immediate Actions To Take After Realizing Photos Are Missing
Immediate actions to take after realizing photos are missing:
- Stop Using the Device: Immediately stop using your iPad to prevent new data from being written to the storage.
- Turn Off Wi-Fi and Cellular Data: Disable Wi-Fi and cellular data to prevent automatic syncing and downloading of new data.
- Do Not Install New Apps: Avoid installing new apps, as they can take up storage space and overwrite deleted data.
- Do Not Take New Photos or Videos: Refrain from taking new photos or videos, as they will be saved to the storage and potentially overwrite deleted data.
17.3 Strategies To Minimize Data Overwriting
Strategies to minimize data overwriting:
- Use Recovery Software Quickly: Use photo recovery software as soon as possible to scan the device for deleted photos before they are overwritten.
- Backup Regularly: Regularly back up your iPad to iCloud or your computer to ensure you have a recent copy of your photos in case of data loss.
18. What Are The Benefits Of Understanding File Systems In Photo Recovery?
Understanding file systems can be highly beneficial in photo recovery as it provides insights into how data is stored and organized on your iPad. This knowledge can help you make more informed decisions during the recovery process and increase your chances of success.
18.1 How File Systems Work On iPads
File systems on iPads, such as Apple File System (APFS), manage the storage and organization of files and directories. Understanding how these file systems work can help you locate and recover deleted photos more efficiently.
18.2 How Knowledge Of File Systems Aids In Data Recovery?
Knowledge of file systems aids in data recovery by:
- Identifying File Locations: Understanding how files are stored and named can help you locate deleted photos that may still be present on the storage medium.
- Recognizing File Types: Knowing the file types of photos (e.g., JPEG, PNG, HEIC) can help you filter and recover specific types of images.
- Analyzing File Metadata: Examining file metadata (e.g., date created, date modified) can provide clues about when and how the photos were deleted.
18.3 Using File System Tools For Advanced Recovery
File system tools can be used for advanced recovery tasks, such as:
- Disk Imaging: Creating a disk image of your iPad’s storage to preserve the data and prevent further damage.
- Hex Editing: Examining the raw data on the storage medium to identify and recover fragmented or corrupted photo files.
19. How To Differentiate Between Soft And Hard Deletion For Photo Recovery?
Differentiating between soft and hard deletion is crucial in photo recovery because it determines the likelihood of successfully retrieving deleted photos.
19.1 Understanding The Concepts Of Soft And Hard Deletion
- Soft Deletion: Soft deletion involves marking a file as deleted without actually erasing the data. The file remains on the storage medium but is no longer visible in the file system.
- Hard Deletion: Hard deletion involves physically erasing the data from the storage medium, making it much more difficult to recover.
19.2 How Soft Deletion Impacts Photo Recovery
Soft deletion makes photo recovery easier because the data is still present on the storage medium and can be retrieved using recovery software.
19.3 Challenges Posed By Hard Deletion For Photo Recovery
Hard deletion poses significant challenges for photo recovery because the data has been physically erased and may be overwritten by new data. In such cases, specialized data recovery services may be required to attempt to retrieve the deleted photos.
20. Why Is Maintaining A Photo Inventory Crucial For Photographers?
Maintaining a photo inventory is crucial for photographers as it helps them keep track of their photos, manage their archives, and protect their valuable work.
20.1 Benefits Of Keeping A Detailed Photo Inventory
Benefits of keeping a detailed photo inventory:
- Organization: Helps you organize your photos and easily locate specific images.
- Management: Simplifies the management of your photo archive, making it easier to backup, transfer, and share your photos.
- Protection: Provides a record of your photos, which can be useful in case of data loss or copyright infringement.
20.2 Tools And Techniques For Creating A Photo Inventory
Tools and techniques for creating a photo inventory:
- Photo Management Software: Use photo management software, such as Adobe Lightroom or Capture One, to catalog and organize your photos.
- Spreadsheets: Create a spreadsheet with columns for file name, date taken, location, subject, keywords, and other relevant information.
- Metadata Tagging: Use metadata tagging to embed information about your photos directly into the image files.
20.3 How A Photo Inventory Aids In Disaster Recovery?
A photo inventory can aid in disaster recovery by:
- Identifying Lost Photos: Helping you identify which photos are missing in case of data loss.
- Restoring Metadata: Providing a record of metadata that can be used to restore information about recovered photos.
- Verifying Backups: Ensuring that your backups are complete and accurate.
By maintaining a detailed photo inventory, photographers can protect their valuable work and ensure that their photos are organized, accessible, and secure.
Address: 1600 St Michael’s Dr, Santa Fe, NM 87505, United States
Phone: +1 (505) 471-6001
Website: dfphoto.net
Ready to safeguard your visual treasures and explore the depths of photography? Visit dfphoto.net today for a wealth of tutorials, stunning galleries, and a vibrant community. Elevate your skills, discover new inspirations, and connect with fellow photography enthusiasts. Don’t wait, your photographic journey awaits!