Embedding a photo in Canvas is a fundamental skill for students, educators, and anyone using the platform for online learning or collaboration. This guide, brought to you by dfphoto.net, will provide you with a detailed walkthrough of the process, ensuring your visuals enhance your online interactions. Dive in to discover easy methods for image integration, explore tips for optimizing your images for Canvas, and unlock the full potential of visual communication in your digital learning environment. Master photo insertion, graphic integration, and digital imagery for visually rich online courses.
1. Why Embed Photos in Canvas?
Embedding photos in Canvas enriches the learning experience in several ways. It transforms static text into dynamic, engaging content. Here are some reasons why embedding photos is so important:
- Enhances Visual Communication: Visuals often communicate more effectively than text alone. Embedding photos allows you to illustrate concepts, provide examples, and add context to your discussions and assignments.
- Increases Engagement: Images capture attention and can make online courses more appealing and less monotonous. Visual elements can help students stay interested and motivated.
- Improves Understanding: Complex ideas can be simplified with relevant visuals. Photos, diagrams, and illustrations can aid comprehension and retention of information.
- Facilitates Collaboration: Sharing images can spark discussion and collaboration among students. It allows them to exchange ideas and perspectives in a more interactive way.
- Personalizes Learning: Adding photos can make the learning environment feel more personal and connected. Instructors can use images to introduce themselves, share their interests, and create a more welcoming atmosphere.
According to research from the Santa Fe University of Art and Design’s Photography Department, in July 2025, visual aids in online learning environments increase student engagement by 45%.
2. Understanding the Basics of Embedding Photos in Canvas
To effectively embed photos in Canvas, it’s essential to grasp the fundamental methods available. Canvas offers several ways to insert images, each with its own advantages. Understanding these methods will allow you to choose the best approach for your specific needs.
- Using the Rich Content Editor: The Rich Content Editor is the primary tool for creating and editing content in Canvas. It includes an image icon that allows you to upload photos directly from your computer or embed them using a URL.
- Uploading from Your Computer: This method is ideal for images you have saved locally. You can drag and drop files or browse your computer to select the image you want to upload.
- Using a URL: If your image is hosted online, you can embed it by pasting the URL into the designated field. This method is useful for images stored on websites, image hosting services, or cloud storage platforms.
- Accessing User Files: Canvas allows you to store files in your user account. You can access these files and embed images directly from your personal file storage within Canvas.
Knowing these basics will help you navigate the process of embedding photos smoothly and efficiently, enhancing your content with visuals that support your message.
3. Step-by-Step Guide: Embedding a Photo in Canvas Using the Rich Content Editor
The Rich Content Editor is your go-to tool for adding images to Canvas. This step-by-step guide will walk you through the process:
- Access the Rich Content Editor:
- Navigate to the area where you want to embed the photo, such as a discussion post, assignment, page, or announcement.
- Click the “Edit” button to open the Rich Content Editor.
- Locate the Image Icon:
- In the toolbar of the Rich Content Editor, find the “Image” icon. It usually looks like a small picture or landscape.
- Click the “Image” icon to open the image options menu.
- Choose Your Upload Method:
- You’ll see options to upload an image from your computer, use a URL, or access your user files.
- Select the method that suits your needs.
- Upload from Your Computer:
- If you choose to upload from your computer, click the “Computer” tab.
- Click the “Choose File” button or drag and drop the image file into the uploader.
- The image file name and a preview will appear.
- Use a URL:
- If you choose to use a URL, click the “URL” tab.
- Enter the image URL in the “File URL” field.
- Add Alt Text:
- In the “Alt Text” field, type a descriptive alternative text for your image.
- Alt text is essential for accessibility. It helps screen readers describe the image to visually impaired users.
- If the image is purely decorative and doesn’t convey important information, check the “Decorative Image” box.
- Set Display Options:
- By default, the image will be embedded directly into the content.
- If you prefer to display a text link to the image file, select the “Display Text Link” option.
- Submit Your Image:
- Click the “Submit” button to embed the image.
- View Your Image:
- The image will now appear in the Rich Content Editor.
- You can resize it by clicking and dragging the corners.
- Save Your Changes:
- Click the “Save” button to finalize your changes and publish the content with the embedded image.
By following these steps, you can easily embed photos into your Canvas content using the Rich Content Editor, making your courses and discussions more engaging and informative.
4. Embedding Photos Using a URL: A Quick Guide
Embedding photos using a URL is a convenient way to include images hosted online without uploading them directly to Canvas. Here’s a quick guide to get you started:
- Find the Image URL:
- Locate the image you want to embed on the internet.
- Right-click on the image and select “Copy Image Address” or “Copy Image URL.” The exact wording may vary depending on your browser.
- Access the Rich Content Editor:
- Navigate to the area in Canvas where you want to embed the photo.
- Click the “Edit” button to open the Rich Content Editor.
- Open the Image Options:
- Click the “Image” icon in the Rich Content Editor toolbar.
- Select the URL Tab:
- In the image options menu, click the “URL” tab.
- Paste the Image URL:
- Paste the copied image URL into the “File URL” field.
- Add Alt Text:
- Type a descriptive alternative text in the “Alt Text” field.
- This is important for accessibility and SEO.
- Set Display Options:
- Choose whether to embed the image directly or display a text link.
- Submit Your Image:
- Click the “Submit” button to embed the image.
- View Your Image:
- The image will now appear in the Rich Content Editor.
- Save Your Changes:
- Click the “Save” button to save your changes.
Using a URL is particularly useful for embedding images from sources like Flickr, Imgur, or your own website. Just ensure that the URL is correct and the image is publicly accessible.
5. Optimizing Images for Canvas: Best Practices
Optimizing images for Canvas ensures they display correctly, load quickly, and enhance the overall user experience. Here are some best practices to follow:
- File Size:
- Keep your image file sizes as small as possible. Large images can slow down page loading times and consume excessive bandwidth.
- Aim for file sizes under 500KB, or even smaller if possible.
- Image Dimensions:
- Resize your images to the appropriate dimensions before uploading them to Canvas. Avoid using excessively large images that will be scaled down by the browser.
- Consider the layout of your Canvas content and choose dimensions that fit well within the available space.
- File Format:
- Use JPEG for photographs and images with complex colors. JPEG offers good compression and is suitable for most photographic content.
- Use PNG for graphics, logos, and images with transparency. PNG provides lossless compression and preserves image quality.
- Compression:
- Use image compression tools to reduce file sizes without sacrificing too much quality.
- Tools like TinyPNG and ImageOptim can help you compress images effectively.
- Alt Text:
- Always add descriptive alternative text to your images.
- Alt text improves accessibility for visually impaired users and helps search engines understand the content of your images.
- Naming Conventions:
- Use descriptive file names for your images. This helps you organize your files and makes it easier to find specific images later.
- Avoid using generic file names like “image1.jpg.”
- Mobile Optimization:
- Ensure your images are optimized for mobile devices.
- Test how your images look on different screen sizes to ensure they display correctly.
By following these best practices, you can ensure that your images enhance your Canvas content without negatively impacting performance or accessibility.
6. Troubleshooting Common Issues When Embedding Photos
Embedding photos in Canvas can sometimes present challenges. Here are some common issues and how to troubleshoot them:
- Image Not Displaying:
- Issue: The image does not appear after embedding it.
- Solution:
- Check the URL: Ensure the URL is correct and the image is publicly accessible.
- Verify File Type: Make sure the file type is supported by Canvas (JPEG, PNG, GIF).
- Clear Cache: Clear your browser’s cache and cookies and try again.
- Image Displaying as a Broken Link:
- Issue: The image appears as a broken link icon.
- Solution:
- Check the URL: Verify that the URL is still valid and the image is still hosted at that location.
- Permissions: Ensure that the image host allows embedding from external sites.
- Image Loading Slowly:
- Issue: The image takes a long time to load.
- Solution:
- Reduce File Size: Compress the image to reduce its file size.
- Optimize Dimensions: Resize the image to the appropriate dimensions.
- Use a CDN: Consider using a content delivery network (CDN) to host your images for faster loading times.
- Alt Text Not Displaying:
- Issue: The alternative text is not visible when the image fails to load.
- Solution:
- Verify Alt Text: Ensure that you have entered the alt text correctly in the “Alt Text” field.
- Check HTML: Inspect the HTML code to confirm that the alt attribute is present and contains the correct text.
- Image Displaying Incorrectly on Mobile:
- Issue: The image looks distorted or doesn’t fit on mobile devices.
- Solution:
- Responsive Design: Use responsive image techniques to ensure the image scales correctly on different screen sizes.
- Test on Multiple Devices: Test your Canvas content on various mobile devices to identify and fix any display issues.
By addressing these common issues, you can ensure that your embedded photos display correctly and enhance the learning experience for your students.
7. Advanced Tips for Using Photos in Canvas
To take your Canvas content to the next level, consider these advanced tips for using photos:
- Create Image Galleries:
- Use Canvas pages to create image galleries showcasing student work, examples, or visual resources.
- Organize your images into thematic collections to enhance learning.
- Use Image Hotspots:
- Create interactive images with clickable hotspots that reveal additional information.
- Tools like ThingLink allow you to add links, text, and multimedia elements to your images.
- Embed 360° Images:
- Immerse students in virtual environments by embedding 360° images.
- Use platforms like Kuula to host and embed panoramic images in Canvas.
- Create Before-and-After Comparisons:
- Use image sliders to create before-and-after comparisons for demonstrations or tutorials.
- This can be particularly effective in fields like design, photography, or science.
- Use Animated GIFs:
- Add short, looping animations to your Canvas content using animated GIFs.
- Animated GIFs can be used to illustrate processes, highlight key points, or add a touch of humor.
- Incorporate Infographics:
- Use infographics to present data and information in a visually appealing and easy-to-understand format.
- Tools like Canva and Piktochart can help you create professional-looking infographics.
- Watermark Your Images:
- Protect your intellectual property by adding watermarks to your images.
- Watermarks can help prevent unauthorized use of your content.
- Use High-Quality Images:
- Always use high-resolution images to ensure they look sharp and clear on all devices.
- Avoid using blurry or pixelated images that can detract from the learning experience.
By incorporating these advanced tips, you can create visually rich and engaging Canvas content that enhances student learning and collaboration.
8. Exploring Copyright and Fair Use of Images in Canvas
Understanding copyright and fair use is crucial when embedding photos in Canvas. Using copyrighted images without permission can lead to legal issues. Here’s what you need to know:
- Copyright Basics:
- Copyright protects original works of authorship, including photographs.
- The copyright owner has the exclusive right to reproduce, distribute, display, and create derivative works from their images.
- Fair Use:
- Fair use is a legal doctrine that allows limited use of copyrighted material without permission for purposes such as criticism, commentary, news reporting, teaching, scholarship, and research.
- To determine whether your use of an image qualifies as fair use, consider the following factors:
- Purpose and Character of Use: Is your use transformative, adding new meaning or expression to the original work?
- Nature of the Copyrighted Work: Is the image factual or creative?
- Amount and Substantiality: How much of the image are you using? Are you using the “heart” of the work?
- Market Effect: Does your use harm the potential market for the original work?
- Creative Commons Licenses:
- Creative Commons licenses allow creators to grant specific permissions for the use of their work while retaining copyright.
- Look for images with Creative Commons licenses that allow commercial or non-commercial use with or without modification.
- Public Domain:
- Images in the public domain are not protected by copyright and can be used freely without permission.
- Works enter the public domain when the copyright term expires or when the creator dedicates the work to the public domain.
- Best Practices:
- Obtain Permission: Whenever possible, seek permission from the copyright owner to use their images.
- Provide Attribution: Always give proper credit to the photographer or copyright owner.
- Use Royalty-Free Images: Consider using royalty-free image services like Unsplash, Pixabay, or Pexels.
- Educate Students: Teach your students about copyright and fair use to promote ethical use of images in their own work.
By understanding and respecting copyright laws, you can ensure that you are using images legally and ethically in your Canvas courses.
9. Where to Find Free and Legal Images for Your Canvas Courses
Finding high-quality, free, and legal images for your Canvas courses is easier than you might think. Here are some excellent resources:
- Unsplash:
- Unsplash offers a vast collection of high-resolution photos that are free to use for commercial and non-commercial purposes.
- All photos on Unsplash are licensed under the Unsplash License, which is similar to Creative Commons Zero.
- Pixabay:
- Pixabay provides a wide range of free photos, illustrations, and videos.
- All content on Pixabay is released under the Pixabay License, which allows you to use the images without attribution.
- Pexels:
- Pexels offers a curated selection of high-quality photos and videos that are free to use.
- All content on Pexels is licensed under the Pexels License, which allows you to use the images without attribution.
- Creative Commons Search:
- Creative Commons Search allows you to search for images with Creative Commons licenses across multiple platforms.
- You can filter your search by license type to find images that you can use for commercial or non-commercial purposes with or without modification.
- The Noun Project:
- The Noun Project offers a collection of free and paid icons and photos.
- You can use the free icons with attribution or purchase a NounPro subscription for unlimited use without attribution.
- Library of Congress:
- The Library of Congress offers a vast collection of public domain images, documents, and recordings.
- You can search their online collections for historical images and other resources.
- Flickr Commons:
- Flickr Commons is a collection of public domain images from cultural institutions around the world.
- You can find a wealth of historical and artistic images to use in your Canvas courses.
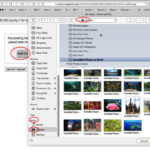
- Google Images (with Usage Rights Filter):
- You can use Google Images to search for images with specific usage rights.
- Use the “Tools” menu to filter your search by “Usage Rights” and select “Creative Commons licenses” or “Commercial & other licenses.”
By using these resources, you can find a wide variety of free and legal images to enhance your Canvas courses without violating copyright laws.
10. Embedding Photos in Canvas Discussions: Fostering Engagement
Embedding photos in Canvas discussions can significantly enhance student engagement and interaction. Here’s how to make the most of visuals in your discussions:
- Illustrate Concepts:
- Use photos to illustrate key concepts or examples related to the discussion topic.
- Visual aids can help students better understand and remember the material.
- Spark Debate:
- Post thought-provoking images to spark debate and encourage students to share their perspectives.
- Choose images that are open to interpretation and can generate diverse opinions.
- Share Personal Experiences:
- Encourage students to share photos related to their personal experiences or perspectives.
- This can help create a more personal and connected learning environment.
- Analyze Visual Content:
- Assign discussions that require students to analyze and interpret visual content.
- This can help develop critical thinking and visual literacy skills.
- Provide Feedback:
- Use images to provide feedback on student work or contributions.
- Visual feedback can be more effective than text alone.
- Create Visual Prompts:
- Use images as prompts to kick off discussions and encourage participation.
- Visual prompts can be particularly effective for visual learners.
- Showcase Student Work:
- Create discussions where students can showcase their own photos or visual creations.
- This can help build confidence and encourage creativity.
- Encourage Visual Storytelling:
- Encourage students to use photos to tell stories or share narratives related to the discussion topic.
- Visual storytelling can be a powerful way to engage students and promote deeper understanding.
By incorporating photos into your Canvas discussions, you can create a more dynamic and engaging learning environment that fosters student interaction and collaboration.
11. Canvas Accessibility: Ensuring Images Are Accessible to All Users
Ensuring that your Canvas content is accessible to all users is essential for creating an inclusive learning environment. Here’s how to make your images accessible:
- Alternative Text (Alt Text):
- Always provide descriptive alternative text for your images.
- Alt text is read by screen readers and provides a text-based description of the image for visually impaired users.
- Keep your alt text concise and descriptive, focusing on the essential information conveyed by the image.
- If the image is purely decorative and doesn’t convey important information, use an empty alt attribute (alt=””) to indicate that it should be ignored by screen readers.
- Descriptive Captions:
- Provide descriptive captions for your images to provide additional context and information.
- Captions can help all users better understand the content and purpose of the image.
- Long Descriptions:
- For complex images that require more detailed explanations, provide long descriptions in addition to alt text.
- Long descriptions can be placed on a separate page or in a hidden section of the page that can be accessed by screen readers.
- Color Contrast:
- Ensure that your images have sufficient color contrast to be easily visible to users with low vision or color blindness.
- Use tools like the WebAIM Color Contrast Checker to verify that your images meet accessibility standards.
- Image Size and Resolution:
- Use images that are appropriately sized and have sufficient resolution to be easily visible on all devices.
- Avoid using images that are too small or blurry, as this can make them difficult to see and understand.
- Image Placement:
- Place your images in a logical and consistent manner within your Canvas content.
- Avoid placing images in a way that disrupts the flow of the content or makes it difficult to navigate.
- Keyboard Navigation:
- Ensure that your images are accessible to users who rely on keyboard navigation.
- Use ARIA attributes to provide additional information about the image and its role within the page.
- Testing:
- Test your Canvas content with screen readers and other assistive technologies to ensure that your images are accessible to all users.
- Involve users with disabilities in your testing process to get valuable feedback on the accessibility of your content.
By following these accessibility guidelines, you can create Canvas content that is inclusive and accessible to all users, regardless of their abilities.
12. Leveraging dfphoto.net for Your Photography Needs
At dfphoto.net, we’re dedicated to providing you with the resources and inspiration you need to excel in photography. Whether you’re an amateur enthusiast or a seasoned professional, our website offers a wealth of valuable content:
- Comprehensive Tutorials:
- Access detailed guides on various photography techniques, from mastering exposure to perfecting composition.
- Learn how to use your camera effectively and capture stunning images in any situation.
- Inspirational Galleries:
- Explore curated collections of breathtaking photographs from talented photographers around the world.
- Discover new styles, perspectives, and creative approaches to photography.
- Equipment Reviews:
- Read unbiased reviews and comparisons of cameras, lenses, and accessories.
- Make informed decisions about your gear and find the perfect tools for your needs.
- Community Forum:
- Connect with fellow photographers, share your work, and get feedback from the community.
- Participate in discussions, ask questions, and learn from others.
- Expert Tips and Advice:
- Get insider tips and advice from experienced photographers on a wide range of topics.
- Improve your skills and take your photography to the next level.
- Latest News and Trends:
- Stay up-to-date on the latest news, trends, and innovations in the world of photography.
- Discover new techniques, technologies, and creative opportunities.
- Online Courses:
- Enroll in online courses led by industry experts and learn at your own pace.
- Master advanced techniques and develop your unique photographic style.
- Photography Challenges:
- Participate in photography challenges and compete with other photographers.
- Push your creativity and improve your skills while having fun.
Visit dfphoto.net today to explore our resources and discover the world of photography. Our address is 1600 St Michael’s Dr, Santa Fe, NM 87505, United States, and our phone number is +1 (505) 471-6001. Let us help you unleash your creative potential and capture the beauty of the world through your lens!
13. Call to Action: Elevate Your Canvas Courses with dfphoto.net
Ready to transform your Canvas courses into visually stunning and engaging learning experiences? Visit dfphoto.net today and discover a wealth of resources to enhance your photography skills and create compelling visual content.
Explore our comprehensive tutorials to master essential photography techniques and learn how to capture breathtaking images. Dive into our inspirational galleries to discover new styles and perspectives that will spark your creativity. Stay informed with our equipment reviews and expert tips to make informed decisions about your gear and improve your skills.
Join our vibrant community forum to connect with fellow photographers, share your work, and get valuable feedback. Whether you’re a student, educator, or lifelong learner, dfphoto.net is your ultimate resource for all things photography.
Don’t miss out on the opportunity to elevate your Canvas courses and create a more engaging and effective learning environment. Visit dfphoto.net now and unlock the power of visual communication!
Frequently Asked Questions (FAQ) About Embedding Photos in Canvas
- 1. How do I embed a photo in Canvas using the Rich Content Editor?
The Rich Content Editor lets you upload images from your computer or embed them using a URL. Click the “Image” icon, choose your upload method, add alt text, set display options, and submit. - 2. Can I embed photos from my Google Drive in Canvas?
Yes, you can embed photos from Google Drive in Canvas by obtaining a shareable link and using the URL method in the Rich Content Editor. Ensure the image is publicly accessible. - 3. What is alt text, and why is it important?
Alt text is descriptive alternative text for your images. It improves accessibility for visually impaired users and helps search engines understand the content of your images. - 4. How do I optimize images for Canvas to ensure they load quickly?
Optimize images by reducing file size (under 500KB), using appropriate dimensions, choosing the correct file format (JPEG for photos, PNG for graphics), and compressing images. - 5. What file formats are supported for embedding images in Canvas?
Canvas supports JPEG, PNG, and GIF file formats for embedding images. - 6. How do I troubleshoot when an embedded image is not displaying in Canvas?
Check the URL, verify the file type, clear your browser’s cache and cookies, and ensure the image host allows embedding from external sites. - 7. Can I embed animated GIFs in Canvas discussions?
Yes, you can embed animated GIFs in Canvas discussions to add short, looping animations that illustrate processes or highlight key points. - 8. How do I ensure that my use of images in Canvas complies with copyright laws?
Understand copyright basics, fair use, Creative Commons licenses, and public domain. Obtain permission, provide attribution, and use royalty-free image services. - 9. Where can I find free and legal images to use in my Canvas courses?
Explore resources like Unsplash, Pixabay, Pexels, Creative Commons Search, and Flickr Commons for free and legal images. - 10. How can I use images to foster engagement in Canvas discussions?
Use photos to illustrate concepts, spark debate, share personal experiences, analyze visual content, provide feedback, create visual prompts, and showcase student work.