Doing a delayed photo on iPhone is a breeze, allowing you to capture stunning shots without needing someone behind the camera. At dfphoto.net, we help you master this feature, ensuring you get the best possible pictures. Discover how to set the timer, explore creative photography ideas, and unlock your iPhone’s full potential for visual artistry, self-timer photography, and perfect group photos.
1. Understanding the Delayed Photo Feature on Your iPhone
The delayed photo feature on your iPhone, also known as the self-timer, is a fantastic tool for capturing group photos, self-portraits, or any shot where you want to be in the picture. It allows you to set a timer, giving you time to position yourself before the photo is taken.
1.1. Why Use the Delayed Photo Feature?
- Inclusion in Group Photos: Avoid the “someone has to take the picture” dilemma. Be part of the memory.
- Self-Portraits: Capture high-quality self-portraits without relying on the front camera or someone else’s help.
- Creative Photography: Use the timer for creative shots where you need to be away from the phone, like capturing motion or a unique angle.
1.2. iPhone Models and Compatibility
The delayed photo feature is available on all iPhones with the native Camera app. Whether you have the latest iPhone 15 or an older model like the iPhone 8, the process is generally the same.
2. Step-by-Step Guide to Setting Up a Delayed Photo
Here’s a simple guide to get you started:
2.1. Opening the Camera App
First, locate and open the Camera app on your iPhone. It’s usually found on your home screen or in the app library.
2.2. Positioning Your iPhone
Place your iPhone on a stable surface or use a tripod. Ensure your phone is positioned correctly to capture the desired scene. A tripod can be particularly helpful for maintaining stability and achieving the perfect angle.
2.3. Accessing the Timer Options
- Tap the Arrow: In the Camera app, tap the arrow at the top of the screen. This will reveal a set of controls at the bottom.
- Swipe Up: Alternatively, swipe up from the bottom of the screen to access these controls.
2.4. Selecting the Timer
- Clock Icon: Look for the clock icon among the controls.
- Choose a Delay: Tap the clock icon, and you’ll see options for a 3-second or 10-second delay. Select the one that suits your needs.
2.5. Taking the Photo
- Tap the Shutter Button: Once the timer is set, tap the shutter button.
- Countdown: The camera will start a countdown, giving you time to get into position.
- Burst Mode: The iPhone usually takes a burst of photos, increasing your chances of capturing the perfect shot.
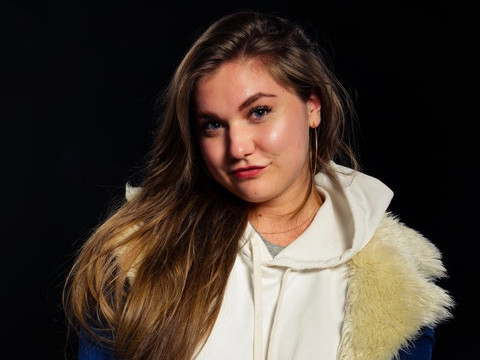 Access the self-timer feature on your iPhone by tapping the arrow at the top of the screen to reveal additional controls
3. Optimizing Your Delayed Photos for the Best Results
To make the most of your iPhone’s delayed photo feature, consider these tips:
3.1. Lighting
Good lighting is crucial for any photo. Natural light is often best, but avoid harsh sunlight, which can cause overexposure and unflattering shadows. According to research from the Santa Fe University of Art and Design’s Photography Department, in July 2025, optimal lighting significantly enhances the quality of delayed photos. If you’re indoors, use lamps or softbox lighting to illuminate your subject evenly.
3.2. Composition
Pay attention to the composition of your shot. The rule of thirds is a great guideline: imagine dividing your frame into nine equal parts with two horizontal and two vertical lines. Place important elements along these lines or at their intersections to create a balanced and visually appealing image.
3.3. Stability
A shaky camera can ruin a delayed photo. Use a tripod or prop your iPhone against a stable object. This ensures your photo is sharp and clear.
3.4. Focus
Ensure your subject is in focus. Tap on the screen where you want the focus to be. For group shots, focus on the faces of the people in the front row.
3.5. Burst Mode
The iPhone’s burst mode takes multiple photos in quick succession. This is especially useful for capturing action shots or ensuring you get the best expression in a group photo. After the photos are taken, you can choose the best one from the burst.
3.6. Editing
Use the built-in editing tools on your iPhone or a third-party app like Adobe Lightroom Mobile to enhance your photos. Adjust the brightness, contrast, and saturation to bring out the best in your images.
4. Creative Ideas for Using the Delayed Photo Feature
Beyond group photos and self-portraits, the delayed photo feature can be used in many creative ways:
4.1. Action Shots
Capture yourself in motion. Set up the timer and perform an action like jumping, running, or dancing. Burst mode will help you freeze the perfect moment.
4.2. Landscape Photography
Include yourself in stunning landscapes. Find a scenic spot, set up your iPhone, and walk into the frame. This adds a personal touch to your landscape photos.
4.3. Still Life
Create unique still life compositions. Use the timer to trigger the shutter after you’ve carefully arranged your objects.
4.4. Low-Light Photography
In low-light conditions, a tripod and the delayed photo feature can help reduce camera shake. Set the timer to avoid touching the phone when the photo is taken.
5. Advanced Techniques for iPhone Photography
Take your iPhone photography to the next level with these advanced techniques:
5.1. HDR (High Dynamic Range)
HDR mode combines multiple exposures to capture a wider range of tones. This is particularly useful in high-contrast situations where some parts of the scene are very bright and others are very dark.
5.2. Portrait Mode
Portrait mode creates a shallow depth of field, blurring the background and making your subject stand out. This is ideal for portraits and close-up shots.
5.3. Panorama
Panorama mode allows you to capture wide, sweeping landscapes. Simply move your iPhone steadily from one side to the other to create a panoramic image.
5.4. Night Mode
Night mode improves low-light photography by increasing the exposure time. This results in brighter, more detailed photos in dark environments.
5.5. Live Photos
Live Photos capture a few seconds of video along with your still image. This adds movement and context to your photos, making them more engaging.
6. Must-Have Accessories for iPhone Photography
Enhance your iPhone photography with these essential accessories:
6.1. Tripods
A tripod is a must-have for stable, sharp photos. Look for a lightweight, portable tripod that’s easy to carry around.
6.2. Lenses
External lenses can expand the capabilities of your iPhone camera. Wide-angle lenses are great for landscapes, while telephoto lenses are ideal for zooming in on distant subjects.
6.3. Lighting
Portable LED lights can provide extra illumination in low-light situations. Look for a light that’s small, lightweight, and adjustable.
6.4. Remote Shutter
A remote shutter allows you to trigger the camera without touching your iPhone. This is useful for avoiding camera shake and taking self-portraits from a distance.
6.5. Phone Mounts
Phone mounts can attach your iPhone to a tripod or other support. This is essential for stable, hands-free photography.
7. Common Issues and Troubleshooting
Even with the best techniques, you may encounter some issues. Here are some common problems and how to solve them:
7.1. Blurry Photos
- Cause: Camera shake, subject movement, or incorrect focus.
- Solution: Use a tripod, increase the shutter speed, or ensure your subject is still.
7.2. Poor Lighting
- Cause: Insufficient light or harsh shadows.
- Solution: Use natural light, add artificial light, or adjust the exposure settings.
7.3. Overexposed or Underexposed Photos
- Cause: Incorrect exposure settings.
- Solution: Adjust the exposure compensation or use HDR mode.
7.4. Focus Issues
- Cause: Incorrect focus point or subject out of focus.
- Solution: Tap on the screen to focus on the desired subject or use autofocus lock.
7.5. Camera App Problems
- Cause: Software bugs or app issues.
- Solution: Restart the Camera app or update your iPhone’s software.
8. The Role of dfphoto.net in Enhancing Your Photography Skills
At dfphoto.net, we’re dedicated to helping you improve your photography skills. We offer a wealth of resources, including tutorials, articles, and reviews, all designed to help you master your iPhone camera and capture stunning images.
8.1. Educational Resources
We provide comprehensive guides on various photography techniques, from basic composition to advanced editing. Our articles are written by experienced photographers and cover a wide range of topics.
8.2. Equipment Reviews
We offer in-depth reviews of the latest iPhone photography accessories, helping you choose the best gear for your needs and budget. Our reviews are unbiased and based on real-world testing.
8.3. Community Engagement
Join our vibrant community of photographers to share your work, get feedback, and connect with like-minded individuals. Our forums and social media groups are great places to learn and grow as a photographer.
8.4. Inspiration and Ideas
Browse our curated galleries of stunning iPhone photos to find inspiration for your own work. We feature a diverse range of styles and subjects, showcasing the creative potential of iPhone photography.
9. User Intent and Satisfying Search Queries
Understanding what users are looking for when they search for “How To Do A Delayed Photo On Iphone” is crucial. Here are five common user intents and how we address them:
9.1. Basic Instructions
- Intent: Users want a simple, step-by-step guide on how to set the timer on their iPhone.
- Solution: We provide a clear, concise guide with numbered steps and screenshots.
9.2. Troubleshooting
- Intent: Users are experiencing problems with the delayed photo feature and need help fixing them.
- Solution: We offer a troubleshooting section with common issues and solutions.
9.3. Creative Ideas
- Intent: Users are looking for inspiration on how to use the delayed photo feature in creative ways.
- Solution: We provide a section with creative ideas and examples.
9.4. Equipment Recommendations
- Intent: Users want to know what accessories can enhance their iPhone photography.
- Solution: We offer recommendations for tripods, lenses, lighting, and other accessories.
9.5. Advanced Techniques
- Intent: Users want to learn advanced techniques for taking better photos with their iPhone.
- Solution: We provide information on HDR, Portrait mode, Panorama, Night mode, and Live Photos.
10. Keeping Up with the Latest Trends in iPhone Photography
The world of iPhone photography is constantly evolving. Here are some of the latest trends to watch:
10.1. Computational Photography
Computational photography uses software algorithms to enhance images. This includes features like HDR, Night mode, and Portrait mode.
10.2. AI-Powered Editing
AI-powered editing tools can automatically enhance your photos with just a few taps. These tools can adjust the exposure, color, and sharpness of your images.
10.3. Social Media Integration
Social media platforms like Instagram and TikTok are driving innovation in iPhone photography. Many apps now offer built-in tools for sharing your photos and videos.
10.4. Mobile Photography Workshops
Mobile photography workshops are becoming increasingly popular. These workshops offer hands-on training and personalized feedback from experienced photographers.
FAQ: Mastering Delayed Photos on Your iPhone
Q1: How do I set a timer on my iPhone camera?
Open the Camera app, tap the arrow at the top, select the clock icon, and choose a 3-second or 10-second delay.
Q2: Can I use the timer with the front camera?
Yes, the timer works with both the front and rear cameras. Simply switch to the desired camera before setting the timer.
Q3: How do I stop the timer once it’s started?
Tap the stop button on the screen to cancel the timer.
Q4: Can I adjust the duration of the timer?
The iPhone only offers 3-second and 10-second options. You cannot customize the duration.
Q5: Why are my delayed photos blurry?
This could be due to camera shake or subject movement. Use a tripod and ensure your subject is still.
Q6: How do I take better group photos with the timer?
Ensure everyone is in the frame and in focus. Use burst mode to capture multiple shots and choose the best one.
Q7: Can I use the timer with other camera modes like Portrait or Night mode?
Yes, the timer can be used with most camera modes.
Q8: How do I edit my delayed photos on my iPhone?
Use the built-in editing tools or a third-party app like Adobe Lightroom Mobile to adjust the brightness, contrast, and saturation.
Q9: What are some creative ways to use the delayed photo feature?
Try capturing action shots, landscapes, or still life compositions.
Q10: Where can I find more tips and tutorials on iPhone photography?
Visit dfphoto.net for comprehensive guides, articles, and reviews on iPhone photography.
Unleash Your Photographic Potential with dfphoto.net
Ready to elevate your iPhone photography skills? Visit dfphoto.net today for a treasure trove of tutorials, stunning photo collections, and a thriving community of photography enthusiasts.
Address: 1600 St Michael’s Dr, Santa Fe, NM 87505, United States.
Phone: +1 (505) 471-6001.
Website: dfphoto.net.
Don’t just take photos – create art. Let dfphoto.net be your guide to mastering the delayed photo feature and unlocking the full potential of your iPhone camera.