Clearing your photo library on your iPhone can free up storage space and declutter your digital life, and dfphoto.net can guide you. This article will provide a detailed guide on how to delete photos, recover accidentally deleted images, and manage your photo storage effectively, with tips and best practices for photographers. Optimize your iPhone photo management with techniques for photo organization and iOS storage solutions.
1. Why Should I Clear My Photo Library on My iPhone?
Clearing your photo library on your iPhone can provide numerous benefits, including freeing up storage space, improving device performance, and better organizing your memories.
- Free Up Storage Space: Deleting unnecessary photos and videos can significantly increase available storage on your iPhone.
- Improve Device Performance: A cluttered photo library can slow down your device. Regularly clearing it can help maintain optimal performance.
- Organize Memories: Deleting unwanted or duplicate photos makes it easier to find and enjoy your favorite memories.
- Enhance Privacy: Removing sensitive or personal photos ensures your privacy is protected.
- Streamline Backup: A smaller photo library means faster and more efficient backups to iCloud or other storage services.
2. How to Delete a Single Photo or Video on iPhone
Deleting individual photos or videos is straightforward and can be done in just a few steps.
-
Open the Photos App: Locate and open the Photos app on your iPhone.
-
Select the Photo or Video: Browse your photo library and tap on the specific photo or video you wish to delete.
-
Tap the Trash Icon: Look for the trash can icon (usually located at the bottom right or bottom left corner of the screen) and tap it.
-
Confirm Deletion: A pop-up will appear asking you to confirm the deletion. Tap “Delete Photo” or “Delete Video” to proceed.
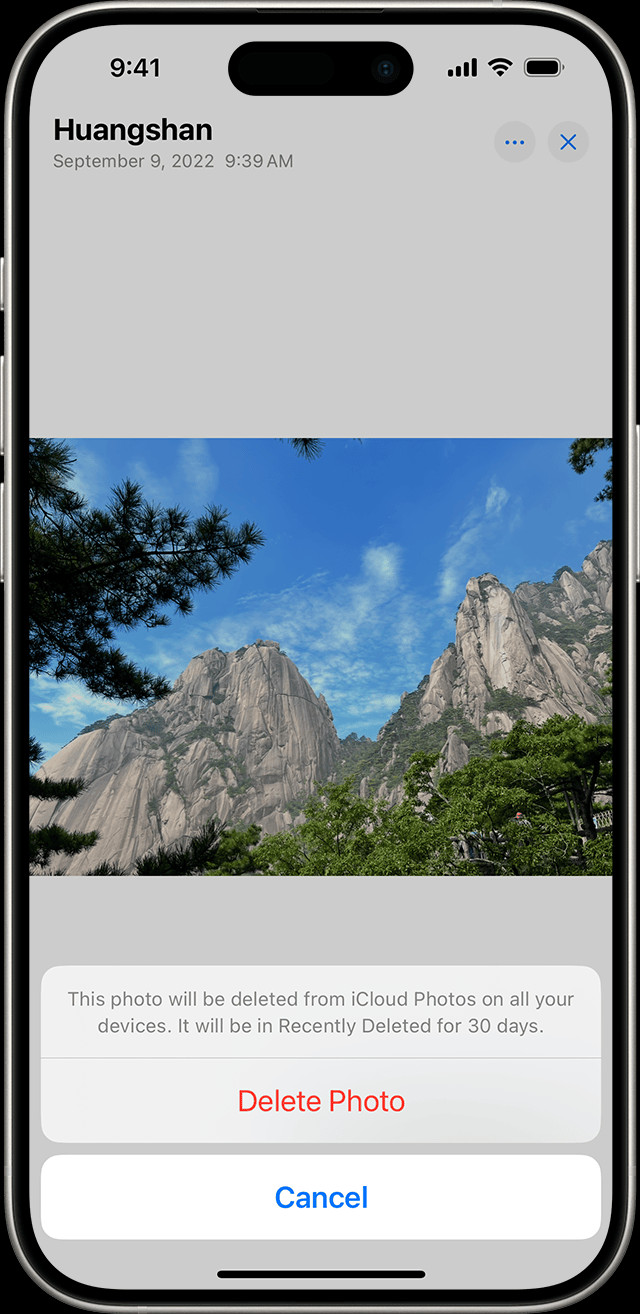 iPhone showing Delete Photo option
3. How to Delete Multiple Photos and Videos on iPhone
Deleting multiple photos at once saves time and effort. Here’s how to do it:
-
Open the Photos App: Open the Photos app on your iPhone.
-
Tap Select: In the upper-right corner of the screen, tap the “Select” button.
-
Select Multiple Items: Tap on each photo or video you want to delete. A checkmark will appear on each selected item. Alternatively, you can slide your finger across multiple photos to select them quickly.
-
Tap the Trash Icon: Tap the trash can icon at the bottom right or bottom left corner of the screen.
-
Confirm Deletion: Confirm that you want to delete the selected items.
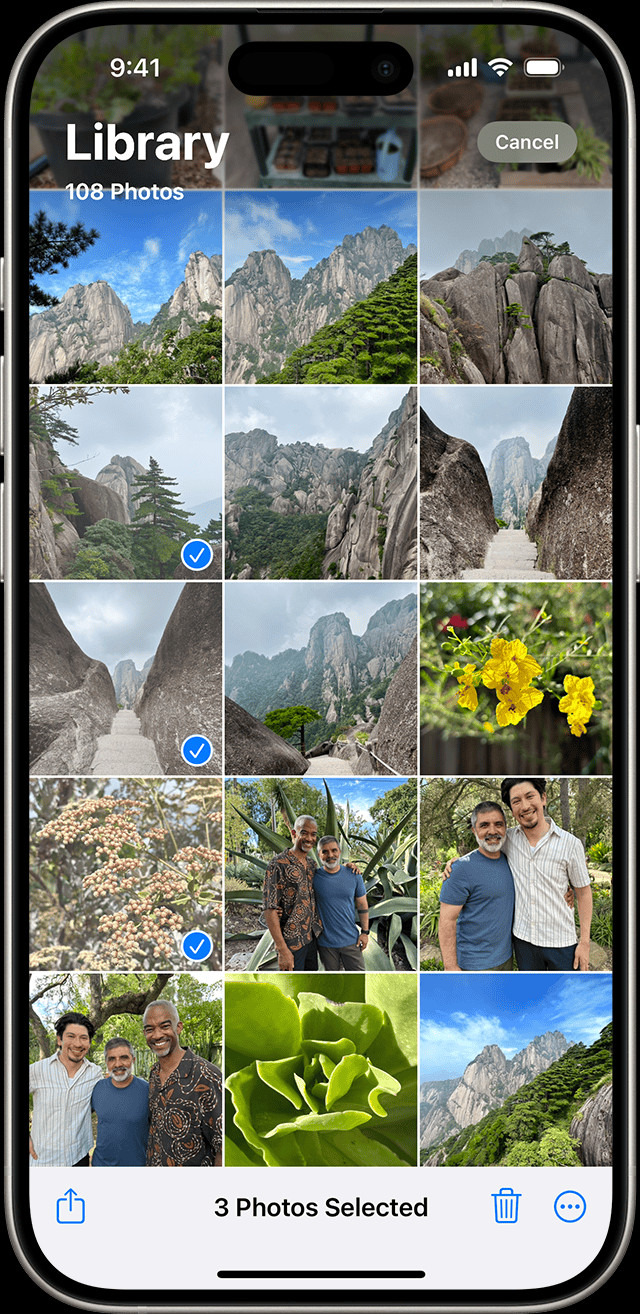 iPhone showing multiple photos selected in the Photos app
4. What Happens After You Delete Photos and Videos?
When you delete photos and videos on your iPhone, they are not immediately and permanently removed. Instead, they are moved to the “Recently Deleted” album within the Photos app. This album acts as a temporary holding place, similar to a recycle bin on a computer. Items in the “Recently Deleted” album remain there for 30 days, giving you a chance to recover them if you change your mind. After 30 days, the photos and videos are automatically and permanently deleted from your device. This feature is designed to prevent accidental data loss and provides a safety net for users who might inadvertently delete important memories.
5. How to Recover Deleted Photos and Videos from the “Recently Deleted” Album
Accidentally deleting a cherished photo or video can be distressing, but the “Recently Deleted” album offers a straightforward recovery process.
- Open the Photos App: Open the Photos app on your iPhone.
- Go to Albums: Scroll down and tap on the “Albums” tab at the bottom of the screen.
- Find “Recently Deleted”: Scroll down to the “Utilities” section and tap on “Recently Deleted.” You may need to use Face ID or Touch ID to unlock this album.
- Select Items to Recover: Tap “Select” in the upper-right corner, then tap on each photo or video you want to recover.
- Tap Recover: Tap the “Recover” button (usually at the bottom right or bottom left), then confirm by tapping “Recover Photo” or “Recover Video.”
If you want to recover all the photos and videos in the album, tap “Recover All.”
6. How to Permanently Delete Photos and Videos on iPhone
If you want to permanently delete photos and videos before the 30-day period, follow these steps:
- Open the Photos App: Open the Photos app on your iPhone.
- Go to Albums: Scroll down and tap on the “Albums” tab.
- Find “Recently Deleted”: Scroll down to the “Utilities” section and tap on “Recently Deleted.” You may need to use Face ID or Touch ID to unlock this album.
- Select Items to Delete: Tap “Select” in the upper-right corner, then tap on each photo or video you want to permanently delete.
- Tap Delete: Tap the “Delete” button, then confirm by tapping “Delete Photo” or “Delete Video.”
If you want to delete all the photos and videos in the album, tap “Delete All.”
7. How to Delete Duplicate Photos and Videos on iPhone
Duplicate photos and videos can take up valuable storage space. iOS 16 and later versions offer a built-in feature to identify and merge or delete duplicates.
- Open the Photos App: Open the Photos app on your iPhone.
- Go to Albums: Tap the “Albums” tab.
- Find “Duplicates”: Scroll down to the “Utilities” section and tap on “Duplicates.” This album is available on iOS 16, iPadOS 16.1, and later.
- Merge or Delete Duplicates: The phone will display sets of duplicate photos and videos. Tap “Merge” to combine the highest quality and relevant data into one photo, and the other duplicates will be moved to the “Recently Deleted” album.
To merge multiple sets or all duplicates, tap “Select,” then tap “Select” on each set or tap “Select All,” then tap “Merge.”
8. Managing iCloud Photos and Deleting
If you use iCloud Photos, deleting a photo or video on one device will delete it on all devices signed in with the same Apple ID. Here’s how to manage iCloud Photos effectively:
- Enable iCloud Photos: Go to Settings > Photos and turn on iCloud Photos.
- Understand Syncing: Changes made on one device will sync across all devices.
- Check Storage: Regularly check your iCloud storage to ensure you have enough space. Go to Settings > [Your Name] > iCloud > Manage Storage.
- Deleting on iCloud: When you delete a photo or video from the Photos app on your iPhone, it will also be deleted from iCloud and any other devices using iCloud Photos.
9. How to Stop Syncing Photos from Computer to iPhone
If you add photos to your iPhone by connecting it to your computer, you can’t delete them directly from your device in the Photos app. The Trash button will be grayed out. To resolve this, you need to stop syncing photos from your computer.
- Open Finder: Connect your iPhone to your computer and open Finder.
- Select Your Device: Select your iPhone in the Finder sidebar.
- Go to Photos: Click on the “Photos” tab.
- Uncheck “Sync Photos”: Uncheck the box next to “Sync Photos.”
- Remove Photos: Choose to remove the photos from your iPhone.
- Apply Changes: Click “Apply” to save the changes.
10. How to Back Up Your Photos Before Deleting
Before clearing your photo library, it’s crucial to back up your photos to avoid losing precious memories. Here are several backup options:
iCloud Backup
- Enable iCloud Backup: Go to Settings > [Your Name] > iCloud > iCloud Backup and turn on iCloud Backup.
- Back Up Now: Tap “Back Up Now” to start an immediate backup. Ensure you are connected to Wi-Fi.
Google Photos
- Download Google Photos: Download the Google Photos app from the App Store.
- Sign In: Sign in with your Google account.
- Enable Backup & Sync: Turn on Backup & Sync to automatically back up your photos and videos to Google Photos.
External Hard Drive
- Connect to Computer: Connect your iPhone to your computer using a USB cable.
- Transfer Photos: Open Finder (on Mac) or File Explorer (on Windows) and locate your iPhone.
- Copy Photos: Copy the photos and videos from your iPhone to an external hard drive.
Third-Party Cloud Services
- Choose a Service: Select a cloud storage service like Dropbox, OneDrive, or Amazon Photos.
- Install the App: Download and install the app on your iPhone.
- Upload Photos: Follow the app’s instructions to upload your photos and videos to the cloud.
11. Tips for Managing Your iPhone Photo Library
Effective management of your iPhone photo library involves more than just deleting photos. Here are some tips to help you keep your library organized and efficient:
- Regularly Review and Delete: Make it a habit to review your photos and videos regularly. Delete duplicates, blurry shots, and unwanted images as soon as possible.
- Use Albums: Create albums to categorize your photos by event, date, location, or subject. This makes it easier to find specific photos later.
- Utilize Smart Albums: Take advantage of smart albums, which automatically organize photos based on criteria like people, places, and dates.
- Favorite Important Photos: Mark your favorite photos to quickly access them later.
- Hide Sensitive Photos: Use the “Hide” feature to keep sensitive or personal photos out of your main library view.
- Use Photo Editing Apps: Edit your photos directly on your iPhone using built-in tools or third-party apps to enhance their quality before saving them.
- Optimize Storage: Enable “Optimize iPhone Storage” in Settings > Photos to store full-resolution photos in iCloud and keep smaller, device-optimized versions on your iPhone.
- Turn Off Live Photos: If you don’t need Live Photos, turn them off to save storage space.
- Disable HDR: Disable HDR (High Dynamic Range) if you don’t need it, as HDR photos take up more storage space.
- Clear Cache: Regularly clear the cache of your Photos app to free up storage space.
12. Understanding iCloud Shared Photo Library
In iOS 16.1, iPadOS 16.1, and later, you can start an iCloud Shared Photo Library and invite up to five contacts. This feature allows you to share photos and videos with family and friends, but it also has implications for deleting and managing photos.
- Shared Access: Anyone in the Shared Library can add, edit, or delete items.
- Deletion Impact: If someone deletes a photo or video from the Shared Library, it no longer appears for you either.
- Recovery Permissions: Only the person who added the photo or video to the Shared Library can permanently delete or recover it from the Recently Deleted folder.
- 30-Day Recovery: You have 30 days to recover a photo or video from your Recently Deleted album.
13. How to Make the “Recently Deleted” Album Unlocked by Default
For added convenience, you can make the “Recently Deleted” album unlocked by default, though this may compromise security.
- Open Settings: Open the Settings app on your iPhone.
- Tap Photos: Scroll down and tap on “Photos.”
- Turn Off Use Face ID: Turn off the “Use Face ID” option.
Note that this will also unlock the “Hidden” album by default.
14. Addressing Common Issues
Photos Not Deleting
If photos aren’t deleting from your iPhone, it could be due to several reasons:
- iCloud Syncing Issues: Ensure iCloud Photos is syncing properly. Go to Settings > [Your Name] > iCloud > Photos and check the status.
- Insufficient Storage: If your iCloud storage is full, syncing may be paused. Manage your storage or upgrade your iCloud plan.
- Software Glitches: Restart your iPhone to resolve temporary software issues.
- Corrupted Files: Corrupted photo files may not delete properly. Try transferring them to a computer and then deleting them.
Photos Reappearing
If deleted photos reappear, it’s likely due to iCloud syncing. Here’s how to address it:
- Check iCloud Status: Ensure your iPhone is connected to Wi-Fi and iCloud Photos is active.
- Wait for Sync: Allow sufficient time for the changes to sync across all your devices.
- Force Sync: Try manually syncing your photos by closing and reopening the Photos app.
- Disable and Re-enable iCloud Photos: As a last resort, turn off iCloud Photos, restart your iPhone, and then re-enable iCloud Photos.
15. The Role of dfphoto.net in Your Photography Journey
At dfphoto.net, we understand the passion and dedication that goes into capturing the perfect shot. Whether you’re an amateur enthusiast or a seasoned professional, our platform offers a wealth of resources to help you elevate your photography skills.
- Comprehensive Tutorials: Access detailed guides on various photography techniques, from mastering exposure settings to understanding composition rules.
- Gear Reviews: Stay up-to-date with the latest camera equipment, lenses, and accessories through our in-depth reviews.
- Inspiration Gallery: Explore stunning images from talented photographers around the globe and find inspiration for your next project.
- Community Forum: Connect with fellow photographers, share your work, and receive constructive feedback in our vibrant community forum.
- Expert Insights: Learn from industry experts through interviews, articles, and behind-the-scenes stories.
16. Mastering Photography Techniques with dfphoto.net
Our platform offers a range of tutorials covering essential photography techniques.
- Exposure: Learn how to control aperture, shutter speed, and ISO to achieve the perfect exposure in any lighting conditions.
- Composition: Discover the rules of composition, such as the rule of thirds, leading lines, and symmetry, to create visually appealing images.
- Lighting: Understand the different types of lighting and how to use them to your advantage, whether it’s natural light, artificial light, or studio lighting.
- Focus: Master the art of focusing to capture sharp, detailed images, whether you’re shooting portraits, landscapes, or macro photography.
- Post-Processing: Learn how to edit your photos using software like Adobe Photoshop and Lightroom to enhance their colors, contrast, and sharpness.
17. Exploring the Latest Gear with dfphoto.net
Stay informed about the latest camera equipment and accessories with our comprehensive gear reviews.
- Cameras: Read our reviews of the latest DSLR, mirrorless, and compact cameras from top brands like Canon, Nikon, Sony, and Fujifilm.
- Lenses: Explore our lens guides and find the perfect lens for your photography style, whether it’s a wide-angle lens, a telephoto lens, or a prime lens.
- Accessories: Discover essential accessories like tripods, filters, flashes, and bags to enhance your photography experience.
18. Finding Inspiration on dfphoto.net
Immerse yourself in a world of captivating images and find inspiration for your photography projects in our inspiration gallery.
- Diverse Styles: Explore a wide range of photography styles, including portrait, landscape, street, wildlife, and macro photography.
- Global Perspectives: Discover images from photographers around the globe and gain insights into different cultures and perspectives.
- Curated Collections: Browse our curated collections of themed images, such as black and white photography, travel photography, and nature photography.
19. Engaging with the Community on dfphoto.net
Connect with fellow photographers, share your work, and receive constructive feedback in our vibrant community forum.
- Portfolio Reviews: Get feedback on your photography portfolio from experienced photographers.
- Photo Challenges: Participate in our photo challenges and test your skills with different themes and subjects.
- Q&A Sessions: Ask questions and get answers from industry experts in our Q&A sessions.
- Networking Opportunities: Connect with potential clients, collaborators, and mentors in our community forum.
20. Learning from the Experts on dfphoto.net
Gain valuable insights from industry experts through our interviews, articles, and behind-the-scenes stories.
- Interviews: Read interviews with renowned photographers and learn about their creative process, career path, and advice for aspiring photographers.
- Articles: Explore our articles on various photography topics, from business tips to creative techniques.
- Behind-the-Scenes Stories: Get a glimpse into the making of iconic photographs and learn about the challenges and triumphs behind them.
21. Additional Tips and Tricks
- Use Third-Party Apps: Consider using third-party apps like Gemini Photos to help identify and delete duplicate photos more efficiently.
- Automate Deletion: Some apps offer features to automatically delete screenshots or blurry photos after a certain period.
- Cloud Storage: Regularly transfer your photos to cloud storage services like Google Photos, Dropbox, or OneDrive to free up space on your iPhone.
- Optimize Camera Settings: Adjust your camera settings to reduce the file size of your photos and videos without sacrificing quality.
- Stay Updated: Keep your iPhone’s software updated to ensure you have the latest features and bug fixes related to photo management.
22. Understanding Photo Storage Options
- Internal Storage: Your iPhone’s internal storage is limited, so it’s important to manage it effectively. Regularly delete unnecessary photos and videos to free up space.
- iCloud Storage: iCloud provides a convenient way to store your photos in the cloud, but it comes with limited free storage. Consider upgrading to a paid plan if you have a large photo library.
- External Storage: You can use external storage devices like USB drives or portable hard drives to back up your photos and free up space on your iPhone and iCloud.
- Cloud Services: Cloud services like Google Photos, Dropbox, and OneDrive offer additional storage options for your photos and videos.
23. Using Photo Editing Software
- Built-In Editor: The Photos app on your iPhone has a built-in editor that allows you to adjust exposure, contrast, colors, and more.
- Third-Party Apps: There are many third-party photo editing apps available on the App Store, such as Adobe Lightroom Mobile, VSCO, and Snapseed, which offer more advanced editing features.
- Desktop Software: For more serious editing, consider using desktop software like Adobe Photoshop or Lightroom on your computer.
24. Backing Up Your Photo Library
- Regular Backups: Make it a habit to back up your photo library regularly to prevent data loss.
- Multiple Backups: Consider having multiple backups in different locations, such as iCloud, an external hard drive, and a cloud service.
- Test Your Backups: Periodically test your backups to ensure they are working properly and that you can restore your photos if needed.
25. Protecting Your Privacy
- Review Your Photos: Before sharing your photos online, review them carefully to ensure they don’t contain any sensitive information.
- Adjust Privacy Settings: Adjust the privacy settings on your social media accounts to control who can see your photos.
- Use Encryption: Consider using encryption to protect your photos if you are storing them on a computer or external hard drive.
26. Optimizing Your iPhone for Photography
- Clean Your Lens: Regularly clean your iPhone’s camera lens to ensure your photos are sharp and clear.
- Adjust Camera Settings: Adjust your camera settings to suit the lighting conditions and the type of photos you are taking.
- Use a Tripod: Use a tripod to stabilize your iPhone when taking photos in low light or when using a long exposure.
- Use a Remote Shutter: Use a remote shutter to avoid camera shake when taking photos with a tripod.
27. Troubleshooting Common Issues
- Photos Not Syncing: If your photos are not syncing between your iPhone and iCloud, check your internet connection and ensure that iCloud Photos is enabled.
- Photos Not Opening: If your photos are not opening, try restarting your iPhone or updating to the latest version of iOS.
- Photos Corrupted: If your photos are corrupted, try restoring them from a backup.
- Photos Missing: If your photos are missing, check the Recently Deleted album and your iCloud account.
28. The Future of iPhone Photography
- AI-Powered Features: Future iPhones are likely to feature more AI-powered photography features, such as automatic scene recognition, object tracking, and enhanced image processing.
- Improved Camera Hardware: Future iPhones are likely to feature improved camera hardware, such as larger sensors, wider apertures, and more powerful zoom lenses.
- Enhanced Connectivity: Future iPhones are likely to feature enhanced connectivity options, such as 5G and Wi-Fi 6E, which will allow you to share your photos and videos more quickly and easily.
29. Embracing the Art of iPhone Photography
- Experiment with Different Styles: Don’t be afraid to experiment with different photography styles, such as portrait, landscape, street, wildlife, and macro photography.
- Find Your Niche: Find a niche that you are passionate about and focus on developing your skills in that area.
- Share Your Work: Share your work with the world by posting it on social media, entering it in photography contests, and submitting it to photography magazines.
- Learn from Others: Learn from other photographers by studying their work, attending workshops, and joining photography clubs.
30. Stay Connected with dfphoto.net
To further enhance your photography journey, we invite you to explore dfphoto.net and discover a wealth of resources, including tutorials, gear reviews, and community forums. Connect with us today and unleash your creative potential!
Address: 1600 St Michael’s Dr, Santa Fe, NM 87505, United States
Phone: +1 (505) 471-6001
Website: dfphoto.net
FAQ: Clearing Your Photo Library on iPhone
1. How do I quickly delete multiple photos on my iPhone?
To quickly delete multiple photos, open the Photos app, tap “Select” in the upper-right corner, then tap on each photo you want to delete. Finally, tap the trash can icon.
2. Where do deleted photos go on my iPhone?
Deleted photos are moved to the “Recently Deleted” album, where they remain for 30 days before being permanently deleted.
3. How can I recover a photo I accidentally deleted from my iPhone?
Open the Photos app, go to “Albums,” tap “Recently Deleted,” select the photo, and tap “Recover.”
4. How do I permanently delete photos from my iPhone?
Go to the “Recently Deleted” album, tap “Select,” choose the photos, and tap “Delete.”
5. How do I find and delete duplicate photos on my iPhone?
In iOS 16 and later, open the Photos app, go to “Albums,” tap “Duplicates,” and then merge or delete the duplicates.
6. What happens if I delete a photo from iCloud Photos?
Deleting a photo from iCloud Photos will delete it from all devices signed in with the same Apple ID.
7. How do I stop my computer from syncing photos to my iPhone?
Connect your iPhone to your computer, open Finder, select your device, go to “Photos,” and uncheck “Sync Photos.”
8. How do I back up my photos before deleting them from my iPhone?
You can back up your photos to iCloud, Google Photos, an external hard drive, or third-party cloud services like Dropbox.
9. How do I manage my iPhone photo library effectively?
Regularly review and delete unwanted photos, use albums to categorize photos, and enable “Optimize iPhone Storage” in Settings.
10. How do I protect my privacy when sharing photos from my iPhone?
Review photos for sensitive information, adjust privacy settings on social media, and use encryption when storing photos.