Adding text to your photos on an iPad can significantly enhance their storytelling potential. Are you looking to personalize your images, create engaging social media content, or add informative captions? This guide will walk you through various methods to seamlessly integrate text into your iPad photos, ensuring your images stand out. At dfphoto.net, we aim to provide you with the best tips and tricks to master photo editing on your iPad, from basic annotations to advanced typography. Let’s explore the world of visual narratives and photo enhancements.
1. Why Add Text to Photos on Your iPad?
Adding text to photos on your iPad opens a world of creative and practical possibilities. It transforms simple images into powerful communication tools.
1.1. Personalization and Branding
Text overlays allow you to personalize your photos with captions, quotes, or watermarks. For businesses, this is a great way to reinforce brand identity by adding logos, slogans, or website URLs to images, making them instantly recognizable and shareable.
1.2. Storytelling and Context
Words can provide context to an image, telling a story that might not be immediately apparent. Captions can explain the background, emotions, or significance of a photo, turning it into a more compelling narrative. This is particularly useful for sharing memories, documenting events, or creating visual journals.
1.3. Call to Action and Engagement
In marketing and social media, adding text such as “Shop Now,” “Visit Our Website,” or “Learn More” can prompt viewers to take action. Clear and concise text can drive engagement, whether it’s directing traffic to a website, promoting a product, or encouraging interaction on social media platforms.
1.4. Educational and Informative Purposes
Text can be used to label parts of an image, provide instructions, or highlight key information. Educational content, such as diagrams or tutorials, can benefit significantly from text annotations that clarify complex concepts and guide viewers through the material.
1.5. Creative Expression and Artistic Flair
Adding stylized text can turn an ordinary photo into a work of art. Experimenting with different fonts, colors, and layouts can add visual interest and emotional depth to your images. Whether it’s a motivational quote, a poetic verse, or a simple greeting, text can transform the mood and impact of a photo.
2. Native iPad Tools for Adding Text
The iPad comes equipped with built-in tools that allow you to add text directly to your photos without needing additional apps. These tools are convenient for quick and simple annotations.
2.1. Using Markup in Photos App
The Photos app on your iPad has a Markup feature that lets you draw and add text to images. It’s a straightforward tool perfect for basic annotations.
How to Access Markup
- Open the Photos app and select the photo you want to edit.
- Tap “Edit” in the upper-right corner.
- Tap the Markup button (the pen icon) in the upper-right corner.
Adding Text with Markup
- Once in Markup mode, tap the “+” button at the bottom-right corner.
- Select “Text” from the options.
- A text box will appear on your photo. Double-tap the text box to start typing.
- Use the formatting options at the bottom to change the font, size, alignment, and color of your text.
- Drag the text box to position it where you want on the photo.
Markup Tools
- Pen, Pencil, and Highlighter: For freehand drawing and writing.
- Eraser: To remove any unwanted marks.
- Lasso: To select and move specific parts of your drawing or text.
- Color Palette: To choose different colors for your text and drawings.
- Magnifier: To zoom in on specific areas for detailed editing.
- Shapes: Add predefined shapes like circles, squares, and arrows.
Pros and Cons of Using Markup
- Pros:
- Easy to access and use.
- No need to download additional apps.
- Good for quick annotations and simple text overlays.
- Cons:
- Limited font options and text customization.
- Not ideal for complex text layouts or artistic typography.
2.2. Markup in Mail App
You can also use Markup within the Mail app to add text to photos before sending them. This is useful for providing context or instructions when sharing images via email.
How to Use Markup in Mail
- Open the Mail app and start a new email or reply to an existing one.
- Tap inside the body of your email, then tap the gray arrow icon or Return to open the format bar.
- Tap the Camera button or the Document button, then select the photo you want to attach.
- Tap the attachment, then tap the gray arrow icon. Tap the Markup button to add your markup. Tap the plus button to add text.
- Tap Done, then send your email.
Benefits of Using Mail Markup
- Convenient for adding quick notes or explanations directly to photos before sending.
- Saves time by avoiding the need to switch between apps.
2.3. Markup in Messages App
The Messages app also supports Markup, allowing you to add text and drawings to photos before sending them in a text message.
How to Use Markup in Messages
- Open Messages and start a new conversation or go to an existing one.
- Tap the Plus button, then tap Photos.
- Select a photo.
- Tap the photo in the message, then tap Markup. From here, you can add a sketch to the photo, or tap the plus button for other Markup options.
- Tap Save, then tap Done.
- Tap the Send button.
Advantages of Messages Markup
- Quickly annotate photos with relevant information or fun messages.
- Enhances communication by adding visual context to your texts.
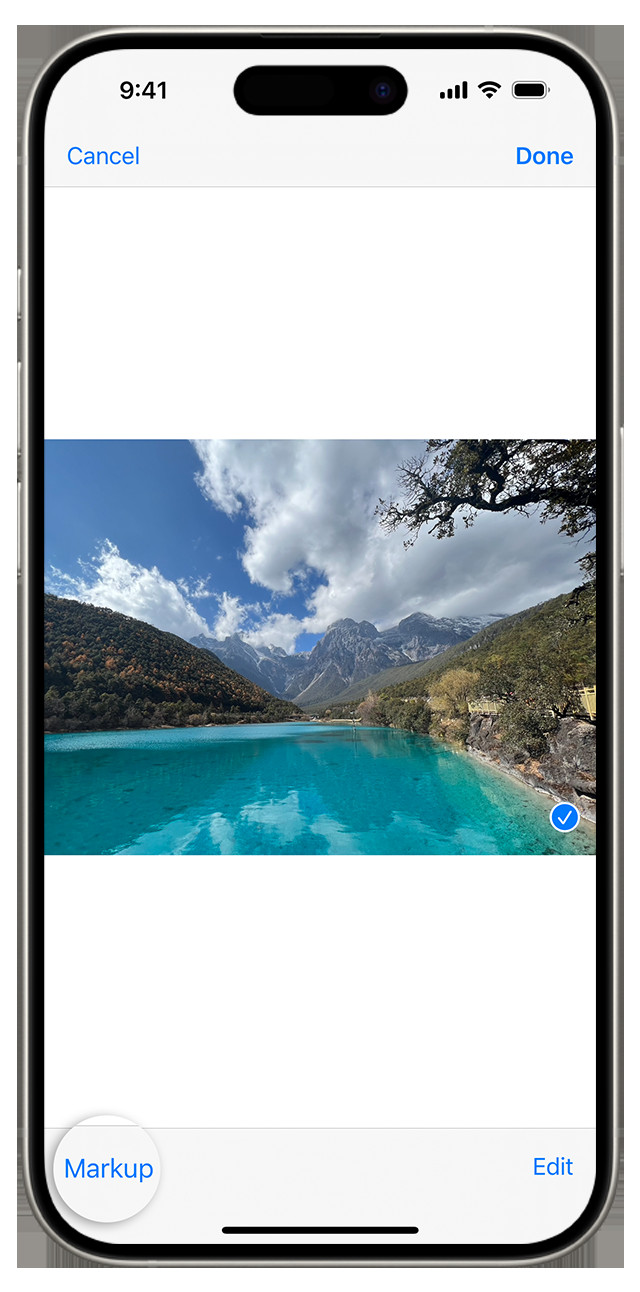 Add text to photos in iMessage using Markup feature for visual communication, enhancing message context and engagement
3. Third-Party Apps for Advanced Text Editing
For more sophisticated text editing, numerous third-party apps offer advanced features and greater control over typography and design.
3.1. Phonto
Phonto is a free app specifically designed for adding text to photos. It offers a wide range of fonts and customization options, making it a favorite among social media enthusiasts and designers.
Key Features of Phonto
- Extensive Font Library: Access over 400 fonts and the ability to install custom fonts.
- Text Customization: Adjust font size, color, shadow, stroke, and background.
- Text Styling: Rotate, curve, and adjust line spacing and letter spacing.
- Backgrounds and Filters: Add backgrounds and apply filters to enhance your photos.
How to Add Text with Phonto
- Open Phonto and load the photo you want to edit.
- Tap anywhere on the photo to add text.
- Type your text and choose a font from the available options.
- Customize the text using the various styling options.
- Save the edited photo to your iPad.
Benefits of Using Phonto
- Large selection of fonts for diverse design needs.
- Detailed customization options for precise text styling.
- User-friendly interface for easy navigation and editing.
3.2. Canva
Canva is a versatile graphic design app that allows you to create stunning visuals with text overlays. It’s perfect for creating social media posts, marketing materials, and personalized graphics.
Key Features of Canva
- Templates: Choose from thousands of professionally designed templates.
- Design Elements: Access a vast library of images, icons, and illustrations.
- Font Combinations: Use pre-designed font pairings for harmonious typography.
- Customization: Adjust colors, layouts, and text styles to match your brand.
- Collaboration: Share your designs and collaborate with others in real-time.
How to Add Text with Canva
- Open Canva and select a design template or upload your own photo.
- Tap the “+” button to add elements to your design.
- Choose “Text” from the options and select a text style.
- Type your text and customize it using the formatting options.
- Drag and resize the text box to position it on your photo.
- Save your design to your iPad or share it directly to social media.
Advantages of Using Canva
- Professional-quality templates for various design needs.
- Extensive library of design elements and fonts.
- User-friendly interface with drag-and-drop functionality.
- Collaboration features for team projects.
3.3. Adobe Photoshop Express
Adobe Photoshop Express is a mobile version of the popular desktop software, offering powerful photo editing tools and text overlay capabilities.
Key Features of Adobe Photoshop Express
- Photo Editing: Adjust exposure, contrast, highlights, shadows, and more.
- Filters: Apply a variety of filters to enhance your photos.
- Text Tool: Add text with customizable fonts, colors, and styles.
- Collages: Create photo collages with different layouts and backgrounds.
- Healing Brush: Remove blemishes and imperfections from your photos.
How to Add Text with Adobe Photoshop Express
- Open Adobe Photoshop Express and load the photo you want to edit.
- Tap the “Text” tool at the bottom of the screen.
- Choose a font and type your text.
- Customize the text using the formatting options.
- Drag and resize the text box to position it on your photo.
- Save the edited photo to your iPad.
Benefits of Using Adobe Photoshop Express
- Powerful photo editing tools for professional-quality results.
- Wide range of fonts and text customization options.
- User-friendly interface with intuitive controls.
- Integration with Adobe Creative Cloud for seamless workflow.
3.4. Over
Over is an app designed for creating stunning graphics with text overlays. It offers a variety of templates, fonts, and design elements to help you create eye-catching visuals.
Key Features of Over
- Templates: Choose from a wide selection of customizable templates.
- Fonts: Access a library of professionally designed fonts.
- Graphics: Add graphics, icons, and illustrations to your photos.
- Text Effects: Apply text effects such as shadows, outlines, and gradients.
- Brand Kits: Create and save your brand colors, fonts, and logos for consistent branding.
How to Add Text with Over
- Open Over and select a template or upload your own photo.
- Tap the “+” button to add elements to your design.
- Choose “Text” from the options and select a text style.
- Type your text and customize it using the formatting options.
- Drag and resize the text box to position it on your photo.
- Save your design to your iPad or share it directly to social media.
Advantages of Using Over
- Professionally designed templates for various design needs.
- Extensive library of fonts and graphics.
- User-friendly interface with intuitive controls.
- Brand kit feature for consistent branding.
4. Tips for Effective Text Placement and Design
Adding text to photos isn’t just about typing words; it’s about creating a visually appealing and impactful design. Here are some tips to help you create effective text placements and designs:
4.1. Choose the Right Font
The font you choose can significantly impact the message and feel of your photo. Consider the following:
- Readability: Select fonts that are easy to read, especially for longer captions.
- Style: Match the font to the overall style of your photo. A playful font might work well for a casual snapshot, while a more elegant font might be better for a formal portrait.
- Contrast: Ensure the font contrasts well with the background to improve readability.
4.2. Consider Text Size and Spacing
Text size and spacing are crucial for readability and visual appeal.
- Size: Use a text size that is large enough to be easily read but not so large that it overwhelms the photo.
- Spacing: Adjust the line spacing (leading) and letter spacing (tracking) to improve readability. Too little spacing can make the text look cramped, while too much can make it look disjointed.
4.3. Use Colors Wisely
Color can evoke emotions and draw attention to your text.
- Contrast: Choose colors that contrast well with the background. White or light text on a dark background and vice versa are usually effective.
- Harmony: Use colors that complement the overall color scheme of your photo.
- Emphasis: Use color to highlight important words or phrases.
4.4. Placement Matters
The placement of your text can influence how viewers perceive your photo.
- Rule of Thirds: Position your text along the lines or at the intersections of the rule of thirds grid for a balanced composition.
- Negative Space: Use negative space (empty areas) in your photo to place your text without obscuring important elements.
- Hierarchy: Create a visual hierarchy by placing the most important text in a prominent position and using different sizes and styles to differentiate between elements.
4.5. Add Visual Elements
Enhance your text with visual elements such as shapes, icons, and lines.
- Shapes: Use shapes to create backgrounds for your text or to highlight specific words or phrases.
- Icons: Add icons to illustrate your text or to add visual interest.
- Lines: Use lines to separate text elements or to guide the viewer’s eye.
4.6. Keep It Simple
While it’s tempting to add lots of text and design elements, simplicity is often more effective.
- Less is More: Use only the necessary text to convey your message.
- Avoid Clutter: Don’t overcrowd your photo with too many elements.
- Focus: Keep the focus on your photo and use text to enhance, not distract from, the image.
5. Advanced Techniques for Text on Photos
For those looking to take their text editing skills to the next level, here are some advanced techniques to explore.
5.1. Text Masks
A text mask involves using text to reveal parts of an image behind it. This technique can create a visually striking effect that draws attention to your text.
How to Create a Text Mask
- Open your photo in a photo editing app that supports layers and masks, such as Adobe Photoshop Express or Procreate.
- Add a text layer and type your desired text.
- Position the text where you want the masked area to appear.
- Create a mask from the text layer, revealing the image behind the text.
- Adjust the position and size of the text mask to achieve the desired effect.
5.2. Text Effects
Experiment with different text effects to add depth and dimension to your text.
Common Text Effects
- Shadows: Add a shadow to create the illusion that your text is floating above the photo.
- Outlines: Add an outline to make your text stand out against the background.
- Gradients: Use gradients to add color transitions to your text.
- Textures: Apply textures to give your text a unique and tactile appearance.
5.3. Typography
Typography is the art of arranging text in a visually appealing way. Mastering typography can significantly enhance the impact of your text overlays.
Key Typography Principles
- Hierarchy: Create a visual hierarchy by using different font sizes, styles, and weights to differentiate between text elements.
- Contrast: Use contrasting fonts to create visual interest and emphasize important information.
- Alignment: Align your text consistently to create a clean and organized layout.
- Kerning: Adjust the spacing between letters to improve readability.
5.4. Integrating Text with the Photo
The best text overlays seamlessly integrate with the photo, enhancing its overall aesthetic.
Tips for Integration
- Match the Mood: Ensure your text aligns with the mood and tone of the photo.
- Use Natural Elements: Incorporate natural elements from the photo into your text design.
- Create Depth: Use shadows and highlights to create the illusion that your text is part of the scene.
6. Use Cases for Adding Text to Photos
Understanding different use cases can inspire you to creatively add text to your photos.
6.1. Social Media Posts
Adding text to social media posts can increase engagement and convey important information.
Examples
- Quotes: Share inspirational quotes with beautiful background photos.
- Promotions: Announce sales and promotions with eye-catching text overlays.
- Events: Promote events with dates, times, and locations on engaging visuals.
- Tutorials: Provide step-by-step instructions with clear text annotations.
6.2. Marketing Materials
Text overlays are essential for creating effective marketing materials.
Examples
- Advertisements: Design compelling advertisements with persuasive text and visuals.
- Brochures: Create informative brochures with detailed text and high-quality images.
- Flyers: Design eye-catching flyers with attention-grabbing text and graphics.
6.3. Personalized Gifts
Adding text to photos can turn them into unique and meaningful gifts.
Examples
- Photo Albums: Create personalized photo albums with captions and annotations.
- Greeting Cards: Design custom greeting cards with heartfelt messages and images.
- Wall Art: Create personalized wall art with quotes, names, and special dates.
6.4. Educational Content
Text annotations can enhance the clarity and effectiveness of educational content.
Examples
- Diagrams: Label parts of diagrams with clear and concise text.
- Infographics: Create informative infographics with data and visuals.
- Presentations: Enhance presentations with text overlays and engaging images.
7. Best Practices for Saving and Sharing Photos with Text
Once you’ve added text to your photos, it’s important to save and share them in the best possible way.
7.1. Choose the Right File Format
The file format you choose can affect the quality and size of your image.
Common File Formats
- JPEG: Ideal for photos with complex colors and details.
- PNG: Best for images with text, graphics, and transparent backgrounds.
- TIFF: High-quality format suitable for professional printing and archiving.
7.2. Optimize for Web
If you’re sharing your photos online, optimize them for web to reduce file size and improve loading times.
Optimization Tips
- Resize: Reduce the dimensions of your photo to the recommended size for the platform you’re using.
- Compress: Use a compression tool to reduce the file size without sacrificing too much quality.
- Use a CDN: Use a content delivery network (CDN) to deliver your images faster to users around the world.
7.3. Watermark Your Photos
Adding a watermark can help protect your photos from unauthorized use.
Watermarking Tips
- Use a Subtle Watermark: Choose a watermark that is visible but doesn’t distract from the photo.
- Position Strategically: Place your watermark in a location that is difficult to remove.
- Use a Transparent Watermark: Use a transparent watermark to minimize its impact on the photo.
7.4. Share on Social Media
When sharing your photos on social media, follow these best practices.
Social Media Tips
- Use Relevant Hashtags: Add relevant hashtags to increase the visibility of your photos.
- Write Engaging Captions: Write captions that provide context and encourage interaction.
- Tag People and Brands: Tag relevant people and brands to increase reach.
- Use High-Quality Images: Share high-quality images to make a good impression.
8. Frequently Asked Questions (FAQs)
8.1. How can I add text to a photo on my iPad for free?
You can use the built-in Markup tool in the Photos app, Mail app, or Messages app. These tools allow you to add basic text overlays without needing to download additional apps.
8.2. What are the best apps for adding text to photos on iPad?
Some of the best apps for adding text to photos on iPad include Phonto, Canva, Adobe Photoshop Express, and Over. These apps offer a wide range of fonts, customization options, and design elements.
8.3. How do I change the font of the text I add to a photo on my iPad?
In the Markup tool, tap the text box and use the formatting options at the bottom to change the font. In third-party apps like Phonto and Canva, you can select a font from the available options and customize its appearance.
8.4. Can I add a shadow to the text on my iPad photos?
Yes, many third-party apps like Phonto, Canva, and Adobe Photoshop Express allow you to add shadows to your text. Look for the shadow option in the text styling settings.
8.5. How do I curve text on my iPad photos?
Apps like Phonto and Canva offer features to curve text. In Phonto, you can use the “Curve” option in the text styling settings. In Canva, you can use the “Effects” option to curve your text.
8.6. What is the best file format for saving photos with text on my iPad?
JPEG is ideal for photos with complex colors and details, while PNG is best for images with text, graphics, and transparent backgrounds. Choose the format that best suits your needs.
8.7. How do I make my text stand out on a photo with a busy background?
Use colors that contrast well with the background, add a shadow or outline to the text, or place the text on a solid-colored shape to improve readability.
8.8. Can I add my own fonts to the apps on my iPad?
Yes, some apps like Phonto allow you to install custom fonts. You can download fonts from the internet and import them into the app.
8.9. How do I create a watermark for my photos on iPad?
You can use apps like Canva or Adobe Photoshop Express to create a watermark with your logo or name. Add the watermark to your photos before sharing them online to protect your work.
8.10. How do I ensure my text is readable on different devices?
Use clear and readable fonts, choose colors that contrast well with the background, and optimize the text size for web. Test your photos on different devices to ensure the text is legible.
9. Conclusion
Adding text to your iPad photos is a versatile way to enhance their impact and communicate your message effectively. Whether you’re using the native Markup tools or exploring advanced third-party apps, the possibilities are endless. Remember to choose the right fonts, colors, and placements to create visually appealing designs that capture your audience’s attention. Visit dfphoto.net for more tips and inspiration on mastering photo editing and visual storytelling. Unleash your creativity and transform your photos into captivating visual narratives today.
Address: 1600 St Michael’s Dr, Santa Fe, NM 87505, United States.
Phone: +1 (505) 471-6001.
Website: dfphoto.net.