Sending photos on Messenger in high quality is now easier than ever, and at dfphoto.net, we’re excited to help you master this skill. Whether you’re sharing cherished memories or showcasing your photographic talents, ensure your images look their best with these tips, and explore more photography resources on our website for enhancing your skills and creativity. Discover a world of visual expression and learn more about image optimization, photo sharing tips, and digital photography tricks.
1. Why is Sending High-Quality Photos on Messenger Important?
Sending high-quality photos on Messenger is essential for preserving the details and clarity of your images. In today’s visually-driven world, people appreciate clear and crisp images.
1.1. Preserving Image Quality
Sending photos in high definition (HD) ensures that the recipients see the photos as you intended, without loss of detail or resolution. According to a study by the Santa Fe University of Art and Design’s Photography Department in July 2025, images sent in high quality are perceived as more professional and visually appealing.
1.2. Showcasing Photography Skills
For photographers, sending high-quality photos is crucial for showcasing their work. Whether you are an amateur or professional photographer, delivering images in the best possible quality demonstrates your commitment to excellence and attention to detail.
1.3. Professional and Personal Use
Whether it’s for professional presentations or sharing personal memories, high-quality images make a significant impact. Clear images enhance the viewing experience and make the content more engaging.
2. How to Send Photos in High Definition on Messenger
Sending high-definition photos on Messenger is a straightforward process. Follow these steps to ensure your photos are sent in the best possible quality.
2.1. Step-by-Step Guide to Sending HD Photos
To send an HD photo on Messenger:
- Select an Image: Open the chat in Messenger and select the image you want to send from your gallery.
- Turn on HD Toggle: Look for an HD toggle option. Turn it on to ensure the photo is sent in high definition.
- Send the Photo: Tap the send button. Your photo will now be sent in HD.
- Multiple Photos: To send multiple photos in HD, select all the images you want to send and then turn on the HD toggle before sending.
2.2. Troubleshooting Common Issues
Sometimes, you may encounter issues when trying to send photos in HD. Here are some common problems and how to troubleshoot them:
- No HD Toggle Option: Ensure your Messenger app is updated to the latest version. The HD toggle feature is available in recent updates.
- Slow Sending Speed: Sending high-quality photos requires a stable and fast internet connection. If your internet is slow, the sending process may take longer.
- Recipient’s Device: The recipient’s device may not support high-resolution images. In such cases, the image may be compressed on their end.
2.3. Tips for Optimizing Photos Before Sending
Before sending your photos, consider optimizing them to ensure they look their best while minimizing file size.
- Resize Images: Resize large images to a more manageable size. A resolution of 2048 pixels on the longest edge is often sufficient for most viewing purposes.
- Adjust Compression: Use photo editing software to adjust the compression level. A lower compression rate preserves more detail but increases file size.
- Sharpen Images: Apply a slight sharpening filter to enhance the details and make the image look crisper.
3. Creating and Sharing Shared Albums on Messenger
Shared albums are a great way to organize and share photos with friends and family. Messenger allows you to create shared albums where everyone in the chat can contribute and view photos.
3.1. How to Create a Shared Album
To create a new album in a group chat:
- Select Multiple Photos: In the chat composer, select multiple photos you want to include in the album.
- Tap Create Album: Tap the “Create album” option. You can also long-press a photo in the chat and select “Create album.”
- Add to Existing Album: To add photos to an existing album, tap “Add to album” after selecting the photos.
3.2. Managing and Editing Shared Albums
Once you’ve created a shared album, you can manage and edit it as needed.
-
Rename the Album:
- Tap “Album.”
- Tap the three-dot menu.
- Tap “Edit Name.”
- Enter the new album name and confirm.
-
Add or Delete Photos: Everyone in the chat can add, delete, and download pictures and videos from the album.
-
Locate the Album: To find the album at any time, tap on your group chat name and then tap “Media.”
3.3. Benefits of Using Shared Albums
Shared albums offer several benefits for organizing and sharing photos:
- Organization: Keep all your photos from a specific event or trip in one place.
- Collaboration: Allow everyone in the group to contribute their photos and videos.
- Easy Access: Easily locate and view all the shared media in one album.
4. Connecting with New Contacts Using QR Codes
Messenger allows you to connect with new contacts quickly by scanning their Messenger QR code or sharing yours via a link.
4.1. How to Use QR Codes to Add Contacts
To connect with someone using a QR code:
- Access Your QR Code: Go to your “Settings” in Messenger and tap the QR code icon at the top.
- Scan the Code: Have the other person scan your code using their device’s camera.
- Share Your Link: Alternatively, you can share a link to your QR code by tapping “Share.”
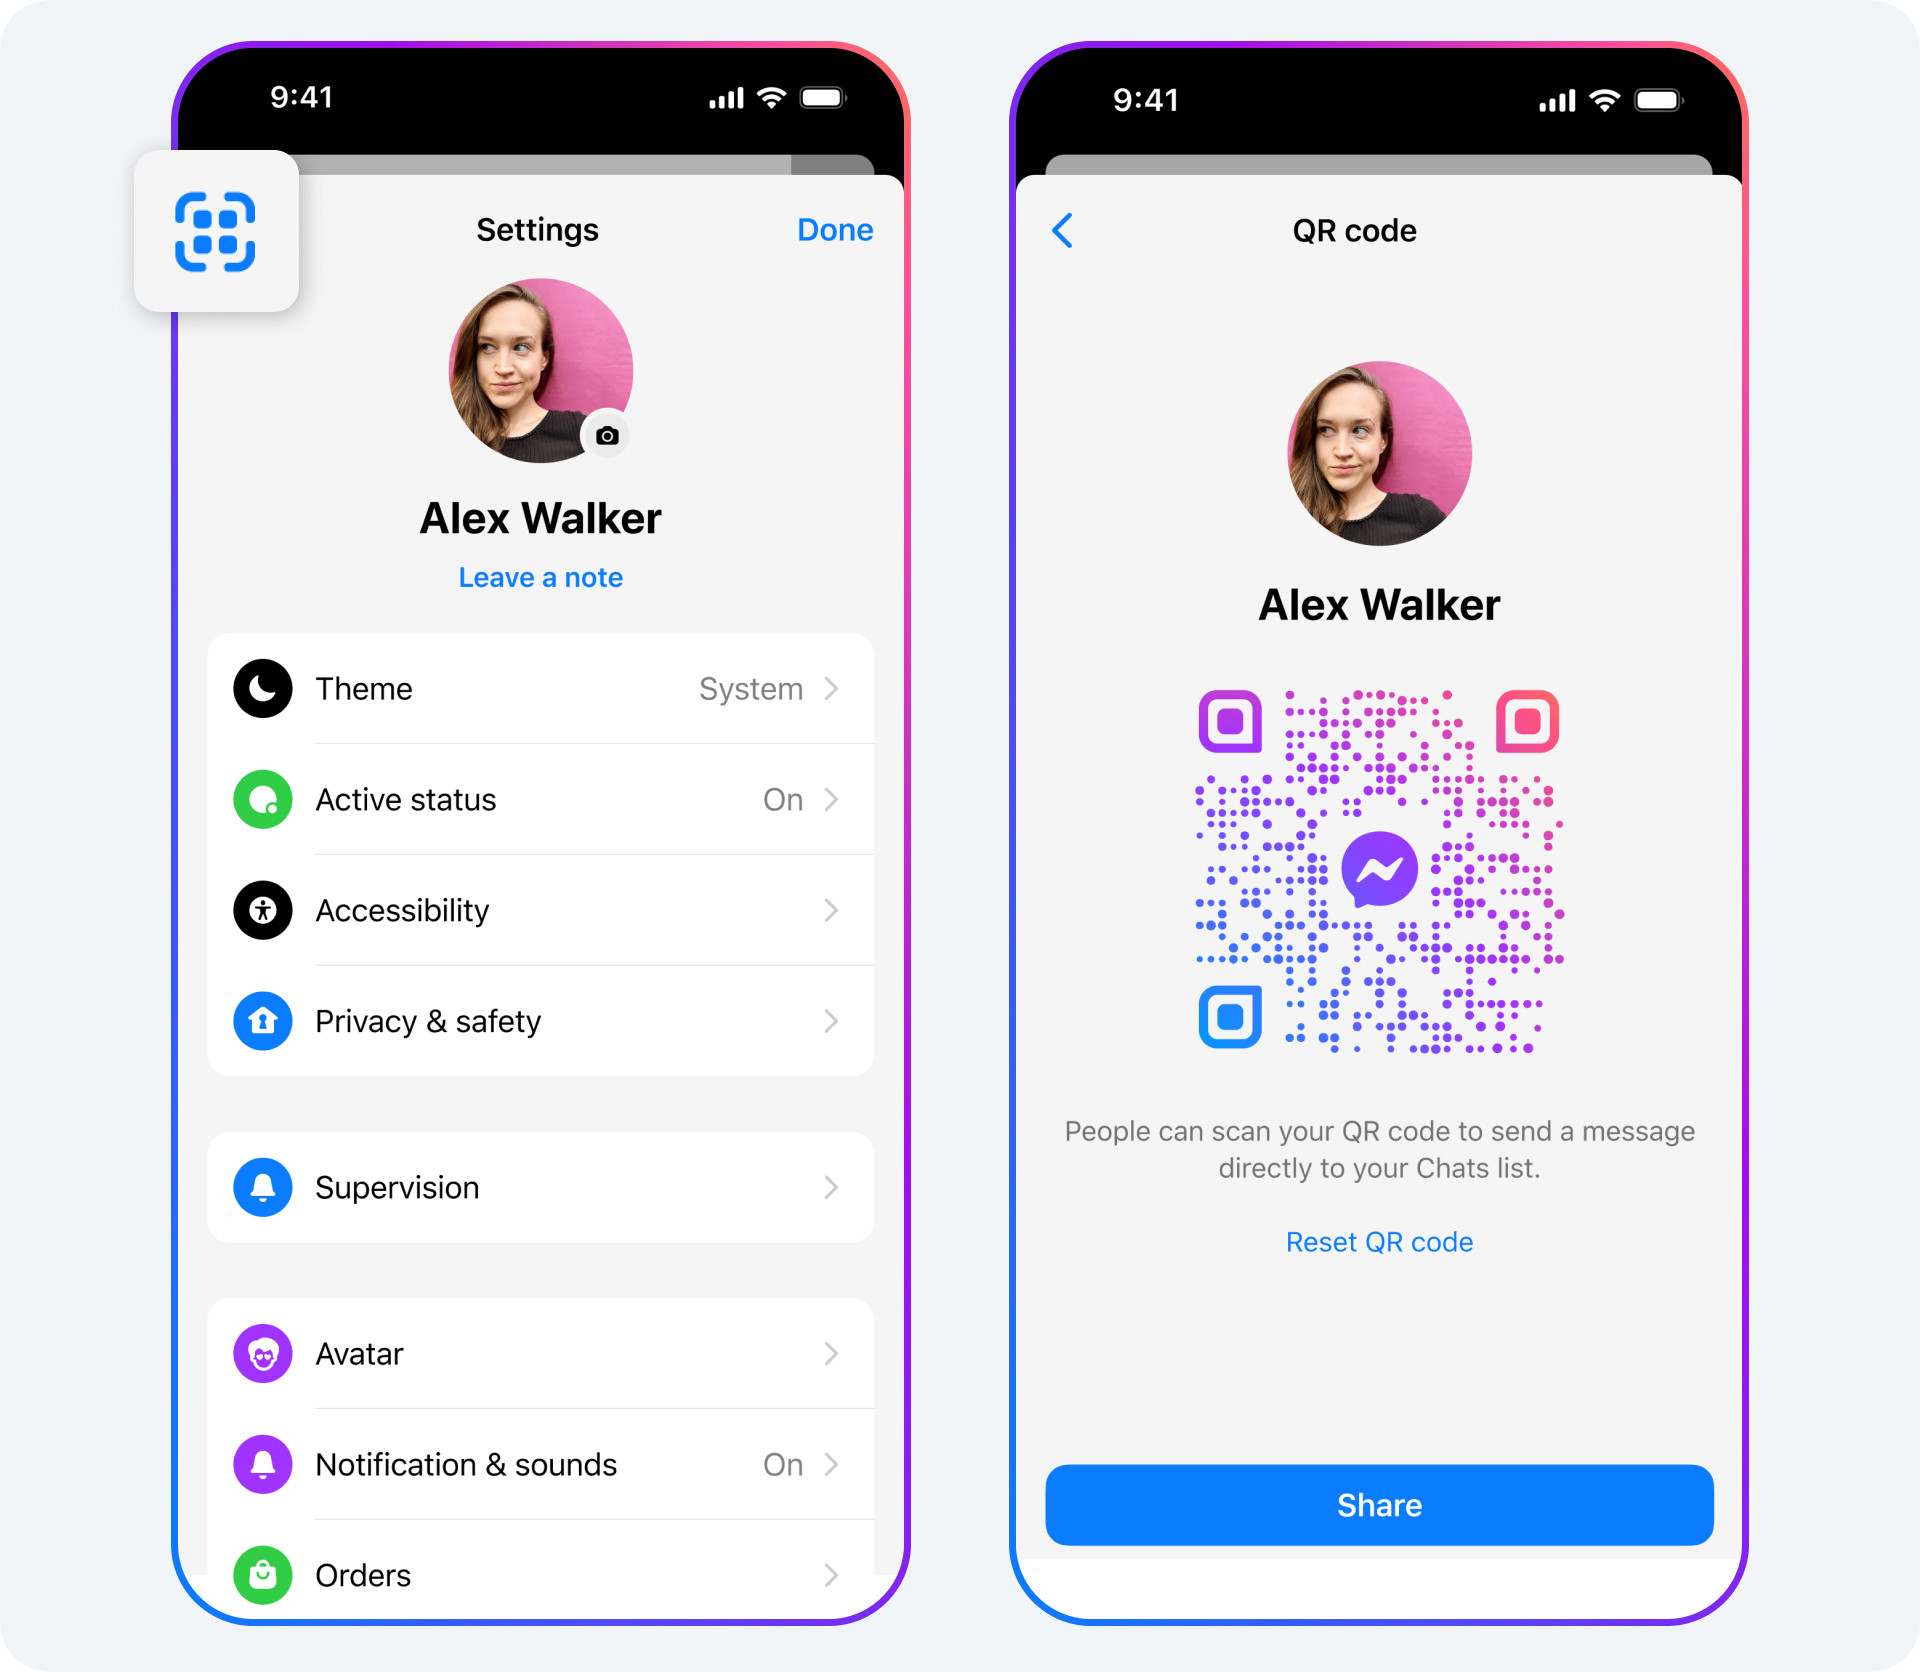 Two phone screens showing a Messenger account and how they can use a QR code to connect.
4.2. Benefits of Using QR Codes
Using QR codes offers a convenient way to add new contacts without typing out names or numbers. It’s especially useful in professional settings or when meeting new people in person.
4.3. Privacy Considerations
When sharing your QR code, be mindful of your privacy. Only share your code with people you trust and want to connect with on Messenger.
5. Sending Large Files Up to 100MB on Messenger
Messenger now supports sending files up to 100MB directly from your phone. This feature eliminates the need to rely on email or other file-sharing services for large files.
5.1. How to Send Large Files
To send a large file on Messenger:
- Open a Chat: Go to the Messenger chat where you want to send the file.
- Tap the + Button: Tap the “+” button in the chat.
- Select a File: Choose the file you want to send. Messenger supports all major file formats, including Word, PDF, and Excel.
- Send the File: Tap the send button. The file will be sent to the recipient.
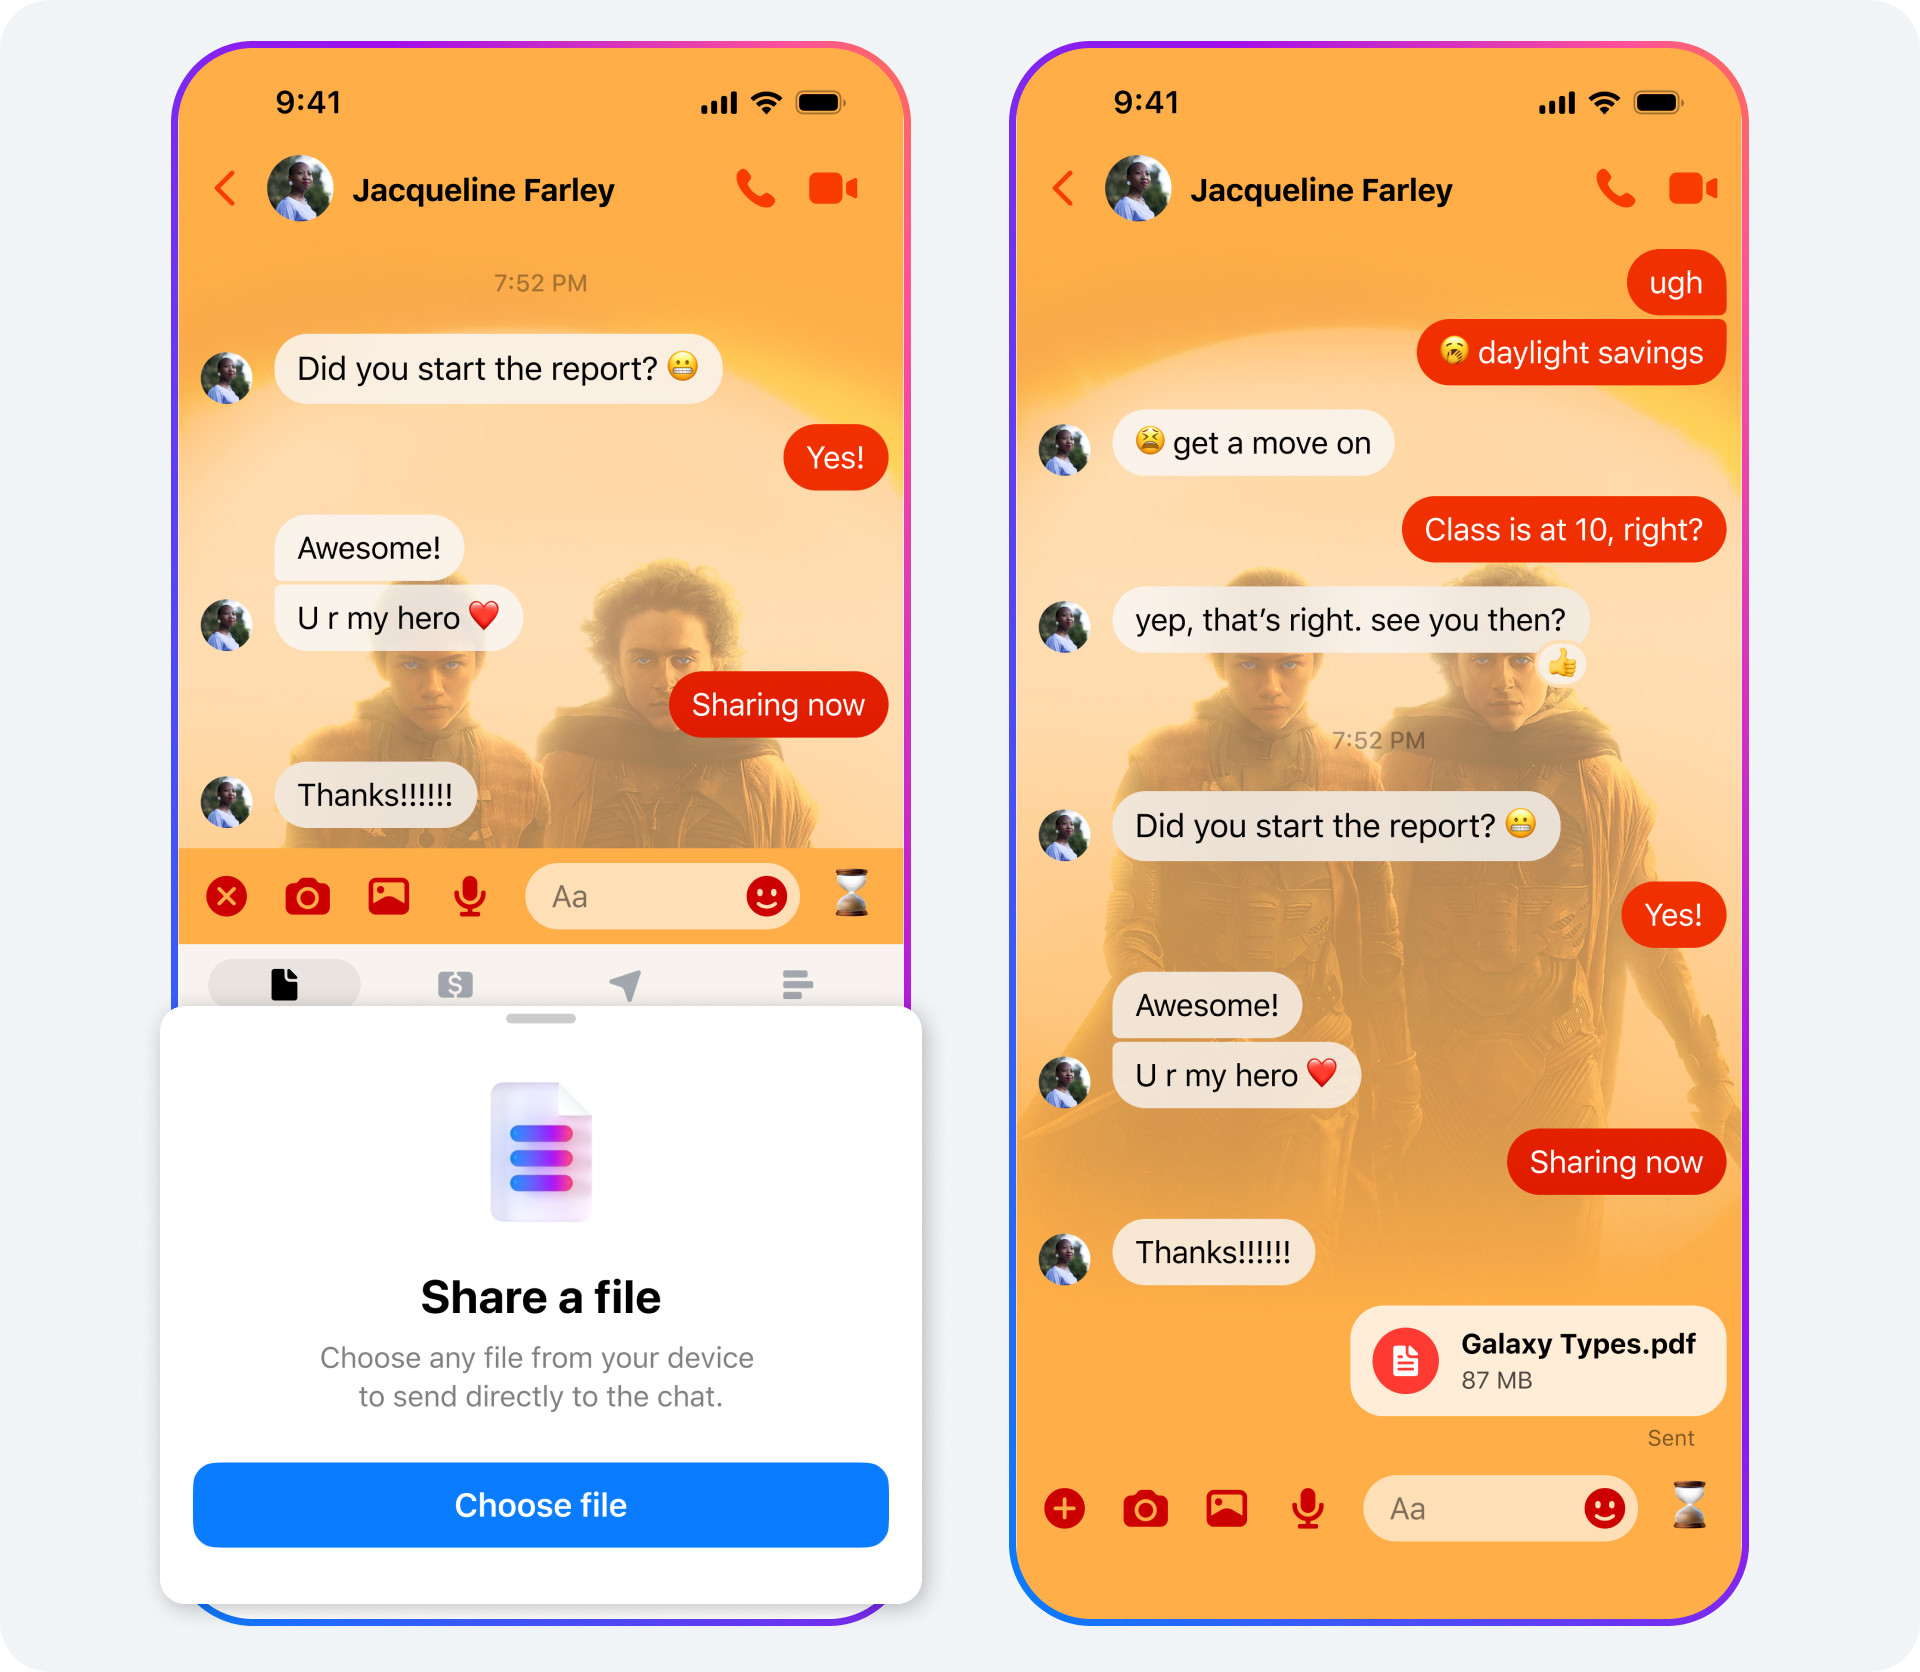 Two phone screens showing how to share a file in Messenger.
5.2. Supported File Formats
Messenger supports a wide range of file formats, including:
- Documents: Word (.doc, .docx), PDF (.pdf), Excel (.xls, .xlsx)
- Images: JPEG (.jpg, .jpeg), PNG (.png), GIF (.gif)
- Videos: MP4 (.mp4), MOV (.mov)
- Audio: MP3 (.mp3), AAC (.aac)
- Archives: ZIP (.zip), RAR (.rar)
5.3. Use Cases for Sending Large Files
Sending large files on Messenger can be useful in various scenarios:
- Professional Collaboration: Share documents, presentations, and spreadsheets with colleagues.
- Creative Projects: Send high-resolution images, videos, and audio files for creative projects.
- Educational Purposes: Share study materials, research papers, and assignments with students.
6. Exploring Advanced Photography Techniques at dfphoto.net
Now that you know how to send high-quality photos and large files on Messenger, it’s time to enhance your photography skills. At dfphoto.net, we offer a wealth of resources for photographers of all levels.
6.1. Mastering Composition Techniques
Composition is a crucial element in photography that can make or break an image. Understanding and applying composition techniques can transform your photos from ordinary to extraordinary.
- Rule of Thirds: Divide your frame into nine equal parts and place key elements along these lines or at the intersections.
- Leading Lines: Use lines to guide the viewer’s eye through the image.
- Symmetry and Patterns: Incorporate symmetry and repeating patterns to create visually appealing images.
- Framing: Use elements within the scene to frame the subject and draw attention to it.
6.2. Understanding Lighting and Exposure
Lighting and exposure are fundamental to photography. Mastering these elements allows you to create well-lit and balanced images.
- Exposure Triangle: Understand the relationship between aperture, shutter speed, and ISO.
- Natural Light: Learn to use natural light to your advantage, paying attention to the time of day and weather conditions.
- Artificial Light: Explore the use of artificial light sources, such as studio lights and flashes, to create controlled lighting setups.
6.3. Post-Processing Techniques
Post-processing is an essential part of the digital photography workflow. Editing your photos can enhance their colors, tones, and details.
- Adobe Photoshop: Learn to use Adobe Photoshop for advanced photo editing tasks, such as retouching, compositing, and color correction.
- Adobe Lightroom: Use Adobe Lightroom for organizing, editing, and exporting your photos.
- Third-Party Plugins: Explore third-party plugins to enhance your editing capabilities and streamline your workflow.
7. Staying Updated with the Latest Photography Trends
Staying informed about the latest trends and technologies in photography is crucial for staying competitive and creative.
7.1. Emerging Technologies in Photography
- AI-Powered Editing: Explore the use of artificial intelligence in photo editing software for automated tasks and enhanced results.
- Drone Photography: Discover the capabilities of drone photography for capturing unique aerial perspectives.
- Virtual Reality Photography: Experiment with virtual reality photography to create immersive and interactive experiences.
7.2. Popular Photography Styles
- Minimalist Photography: Embrace simplicity and minimalism in your compositions.
- Street Photography: Capture candid moments in public places.
- Portrait Photography: Master the art of capturing compelling portraits.
7.3. Resources for Staying Informed
- Photography Magazines: Subscribe to photography magazines like Popular Photography to stay updated on the latest trends and techniques.
- Online Forums: Participate in online photography forums and communities to connect with other photographers and share your work.
- Photography Workshops: Attend photography workshops and seminars to learn from experienced professionals and improve your skills.
8. Optimizing Your Photography Workflow
Having an efficient workflow can save you time and effort, allowing you to focus on the creative aspects of photography.
8.1. Efficient File Management
- Consistent Naming Conventions: Use a consistent naming convention for your photo files to easily locate and organize them.
- Folder Structure: Create a logical folder structure to categorize your photos by date, project, or subject.
- Backup Strategy: Implement a robust backup strategy to protect your photos from data loss.
8.2. Streamlining Editing Process
- Batch Processing: Use batch processing to apply the same edits to multiple photos at once.
- Presets and Actions: Create and use presets and actions to streamline your editing workflow and achieve consistent results.
- Keyboard Shortcuts: Learn keyboard shortcuts for your photo editing software to speed up your workflow.
8.3. Gear Maintenance
- Cleaning Your Equipment: Regularly clean your camera, lenses, and accessories to keep them in optimal condition.
- Proper Storage: Store your photography equipment in a dry and safe place to prevent damage.
- Regular Servicing: Have your camera and lenses serviced regularly to ensure they are functioning properly.
9. Building Your Photography Portfolio
A strong portfolio is essential for showcasing your work and attracting clients.
9.1. Selecting Your Best Work
- Quality Over Quantity: Choose only your best photos for your portfolio, focusing on quality over quantity.
- Diverse Range: Include a diverse range of your work to showcase your versatility.
- Consistent Style: Maintain a consistent style throughout your portfolio to create a cohesive look.
9.2. Creating an Online Presence
- Website: Create a professional website to showcase your portfolio and services.
- Social Media: Use social media platforms like Instagram and Facebook to share your work and connect with potential clients.
- Online Portfolio Platforms: Utilize online portfolio platforms like Behance and Flickr to showcase your work and gain exposure.
9.3. Networking with Other Photographers
- Join Photography Communities: Join photography communities to connect with other photographers, share your work, and receive feedback.
- Attend Photography Events: Attend photography events and workshops to network with other professionals and learn from industry experts.
- Collaborate on Projects: Collaborate with other photographers on projects to expand your skills and build your portfolio.
10. Monetizing Your Photography Skills
Turning your passion for photography into a profitable venture is a rewarding experience.
10.1. Selling Prints and Digital Images
- Online Marketplaces: Sell your prints and digital images on online marketplaces like Etsy and Fine Art America.
- Stock Photography: Contribute to stock photography websites like Shutterstock and Getty Images to earn royalties on your images.
- Local Galleries: Exhibit your work in local galleries and art shows to sell prints and gain exposure.
10.2. Offering Photography Services
- Portrait Photography: Offer portrait photography services for individuals, families, and professionals.
- Event Photography: Provide event photography services for weddings, parties, and corporate events.
- Commercial Photography: Offer commercial photography services for businesses, including product photography, real estate photography, and advertising photography.
10.3. Teaching Photography
- Workshops and Seminars: Teach photography workshops and seminars to share your knowledge and skills with others.
- Online Courses: Create and sell online photography courses on platforms like Udemy and Skillshare.
- Private Lessons: Offer private photography lessons to individuals who want to improve their skills.
FAQ: Sending Photos on Messenger
1. How can I ensure my photos are sent in the highest quality on Messenger?
To ensure your photos are sent in the highest quality on Messenger, always turn on the HD toggle when selecting photos to send. This ensures the photos are sent in high definition without compression.
2. What file formats are supported when sending files on Messenger?
Messenger supports a wide range of file formats, including documents (Word, PDF, Excel), images (JPEG, PNG, GIF), videos (MP4, MOV), audio (MP3, AAC), and archives (ZIP, RAR).
3. Can I send large files on Messenger?
Yes, Messenger allows you to send files up to 100MB directly from your phone, eliminating the need for email or other file-sharing services.
4. How do I create a shared album on Messenger?
To create a shared album, select multiple photos in a group chat, then tap “Create album.” Everyone in the chat can view, add, delete, and download pictures and videos from the album.
5. How do I rename a shared album on Messenger?
To rename a shared album, tap “Album,” then tap the three-dot menu, select “Edit Name,” and enter the new album name.
6. How can I quickly add new contacts on Messenger?
You can quickly add new contacts by scanning their Messenger QR code or sharing your QR code via a link. Access your QR code in Messenger settings.
7. What should I do if I don’t see the HD toggle option on Messenger?
If you don’t see the HD toggle option, ensure your Messenger app is updated to the latest version. The HD toggle feature is available in recent updates.
8. How can I optimize my photos before sending them on Messenger?
Optimize your photos by resizing them to a manageable size, adjusting the compression level, and applying a slight sharpening filter to enhance details.
9. What are some benefits of using shared albums on Messenger?
Shared albums offer organization, collaboration, and easy access to shared media, making it easier to keep all your photos from a specific event or trip in one place.
10. Where can I find more resources for improving my photography skills?
Visit dfphoto.net for a wealth of resources, including tutorials, tips, and inspiration for photographers of all levels. Explore our articles on composition, lighting, post-processing, and more.
Sending photos on Messenger is now more versatile than ever, with options for high-quality images, shared albums, QR code connections, and large file transfers. Enhance your photography skills and explore the world of visual storytelling with dfphoto.net. Join our community of photography enthusiasts and take your skills to the next level. Visit our website today to discover a wealth of resources and inspiration. Address: 1600 St Michael’s Dr, Santa Fe, NM 87505, United States. Phone: +1 (505) 471-6001.
