Attaching photos to an email on your iPhone is a simple yet essential skill in today’s digital age. This dfphoto.net guide will walk you through the process, ensuring you can share your visual stories and photographic art with ease. We’ll cover everything from attaching existing photos to scanning documents and even creating drawings to send as attachments, perfect for photography enthusiasts and professionals alike. Dive in and master the art of emailing photos from your iPhone, enhancing your visual communication skills and photography workflow, focusing on photo attachments and email integration.
1. Understanding the Basics of Email Attachments on iPhone
What is the process of attaching photos to an email on an iPhone?
Attaching photos to an email on your iPhone involves a few simple steps. First, open the Mail app and start a new email or reply to an existing one. Then, tap in the body of the email where you want to insert the photo. You’ll typically see an option to insert a photo or attachment. This will give you access to your photo library, allowing you to select the images you want to include.
Understanding the fundamentals ensures a smooth experience when sharing your visual content. The iPhone’s native Mail app, along with other email clients like Gmail and Outlook, offers straightforward ways to attach images and documents. Whether you’re a seasoned photographer or a casual user, knowing how to navigate these features is essential.
1.1. Why Attach Photos to Emails on iPhone?
Why should I bother attaching photos to emails on my iPhone?
Attaching photos to emails on your iPhone allows you to quickly share visual content with friends, family, or colleagues. It’s a convenient way to showcase your photography, share memories, or provide visual information in a professional context.
The ability to attach photos to emails directly from your iPhone offers numerous benefits:
- Instant Sharing: Share moments as they happen, directly from your phone.
- Professional Communication: Send visual aids, project updates, or marketing materials efficiently.
- Personal Connection: Share memories and experiences with loved ones, no matter where they are.
1.2. Common Challenges When Attaching Photos
What are the common issues people face when attaching photos to emails?
Some common challenges include file size limits, which can prevent you from sending high-resolution images, and confusion about how to access your photo library from within the email app. Understanding these issues can help you troubleshoot effectively.
Overcoming these challenges can significantly improve your email experience:
- File Size Limits: Many email providers have restrictions on the size of attachments. Compressing images or using cloud storage services can help.
- Finding Photos: Navigating your photo library within the email app can be tricky. Familiarize yourself with the interface and use search functions to locate images quickly.
- Formatting Issues: Sometimes, images may not display correctly on the recipient’s end. Ensure your photos are in a compatible format like JPEG or PNG.
2. Step-by-Step Guide to Attaching Photos
What is the exact process for attaching a photo to an email on an iPhone?
To attach a photo, open the Mail app and start a new email. Tap in the message body, then look for an icon that allows you to insert a photo or attachment (often a paperclip or a plus sign). This will open your photo library, where you can select the desired images and tap “Choose” or “Add”.
This detailed process will ensure you can attach photos seamlessly:
- Open the Mail App: Start by opening the Mail app on your iPhone.
- Compose a New Email: Tap the compose button to start a new email or reply to an existing one.
- Tap in the Message Body: Tap in the area where you want to insert the photo.
- Find the Attachment Icon: Look for an icon that indicates attachment options (usually a paperclip or a plus sign).
- Access Your Photo Library: Tap the attachment icon to open your photo library.
- Select the Photo(s): Browse your photos and select the ones you want to attach.
- Tap “Choose” or “Add”: After selecting your photos, tap the “Choose” or “Add” button to insert them into your email.
2.1. Attaching from the Mail App
How do I attach a photo directly from the Mail app?
In the Mail app, tap in the message body, tap the expand toolbar button above the keyboard, then tap the insert photo or video icon. Choose your photo and tap “Done”. The image will be attached to your email.
Here’s a more detailed breakdown:
- Open the Mail App: Start by opening the Mail app on your iPhone.
- Compose a New Email: Tap the compose button to start a new email or reply to an existing one.
- Tap in the Message Body: Tap in the area where you want to insert the photo.
- Expand Toolbar: Tap the expand toolbar button above the keyboard.
- Insert Photo or Video Icon: Tap the icon that allows you to insert a photo or video.
- Choose Your Photo: Browse your photos and select the one you want to attach.
- Tap “Done”: After selecting your photo, tap the “Done” button to insert it into your email.
2.2. Attaching from the Photos App
Can I attach a photo to an email directly from the Photos app?
Yes, open the Photos app, select the photo you want to send, tap the share icon, choose “Mail,” and a new email will open with the photo attached. Add the recipient’s email address and send.
Here’s a more detailed guide:
- Open the Photos App: Start by opening the Photos app on your iPhone.
- Select the Photo: Browse your photos and select the one you want to attach.
- Tap the Share Icon: Tap the share icon (usually a square with an arrow pointing upwards).
- Choose “Mail”: Scroll through the share options and select “Mail.” This will open a new email with the photo attached.
- Add Recipient’s Email Address: Enter the recipient’s email address in the “To” field.
- Send the Email: Add a subject and any additional text, then tap the send button to send the email with the attached photo.
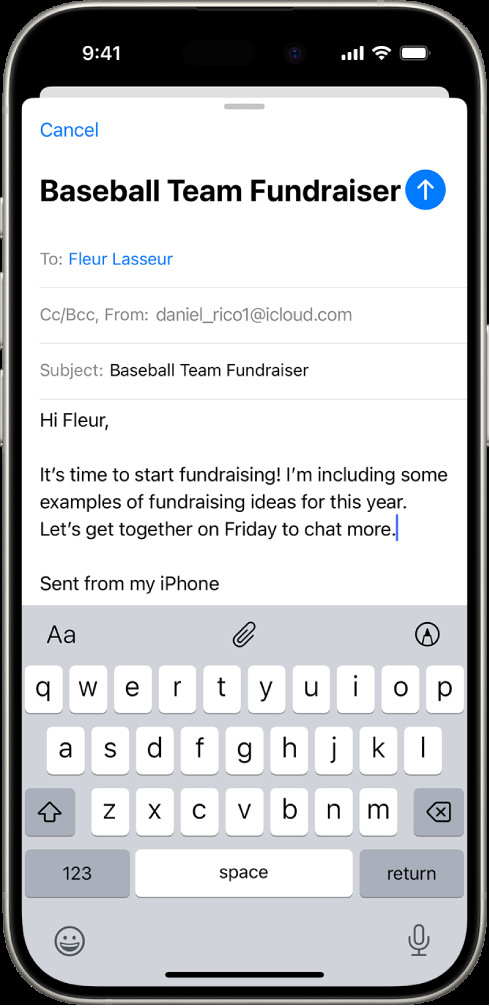 A draft email being composed with the attachment options above the keyboard.
3. Dealing with Large Files
What can I do if my photo file is too large to attach to an email?
If your photo file is too large, you can compress the image, use Mail Drop (if available), or upload the photo to a cloud storage service like Google Drive or Dropbox and share the link in the email.
Here’s a detailed explanation of each option:
-
Compress the Image:
- Using iPhone’s Built-In Feature: When sending an image, the Mail app may offer to reduce the size of the image. Choose a smaller size option to compress the image before sending.
- Using Third-Party Apps: Several apps in the App Store can compress images without significant loss of quality.
-
Use Mail Drop:
- Availability: Mail Drop is an Apple service that allows you to send large files via iCloud.
- How it Works: If your file is too large, the Mail app will automatically offer to send it using Mail Drop. The recipient will receive a link to download the file.
-
Upload to Cloud Storage:
- Google Drive, Dropbox, iCloud Drive: Upload the photo to a cloud storage service.
- Share the Link: Create a shareable link and paste it into your email. The recipient can click the link to view and download the photo.
3.1. Compressing Photos on iPhone
How do I compress photos on my iPhone to reduce their file size?
You can use third-party apps like “Image Size” or “Compress Photos” from the App Store to compress photos. Alternatively, when sending an image, the Mail app may offer to reduce the size of the image automatically.
Using these methods ensures your photos are email-friendly:
- Using Third-Party Apps:
- Download an App: Go to the App Store and download a photo compression app.
- Select Photos: Open the app and select the photos you want to compress.
- Choose Compression Level: Choose a compression level that balances file size and image quality.
- Save Compressed Photos: Save the compressed photos to your photo library or directly to your email.
- Using iPhone’s Built-In Feature:
- Attach Photo to Email: Start composing an email and attach the photo.
- Automatic Compression: The Mail app may offer to reduce the size of the image.
- Choose Size Option: Select a smaller size option to compress the image before sending.
3.2. Using Mail Drop
What is Mail Drop and how can I use it to send large photo files?
Mail Drop is an Apple service that allows you to send large files (up to 5 GB) via iCloud. If your file is too large to attach directly, the Mail app will automatically offer to use Mail Drop. The recipient receives a link to download the file, which is available for 30 days.
Leveraging Mail Drop simplifies sending large files:
- Automatic Offer:
- Attach a Large File: When you try to attach a file that exceeds the email size limit, the Mail app will automatically offer to use Mail Drop.
- Sending via Mail Drop:
- Confirm Use of Mail Drop: Confirm that you want to use Mail Drop to send the file.
- File Upload: The file will be uploaded to iCloud.
- Recipient Experience:
- Download Link: The recipient will receive an email with a link to download the file.
- Availability: The file is available for download for 30 days.
4. Alternative Methods for Sharing Photos
Are there other ways to share photos from my iPhone besides email?
Yes, you can use cloud storage services, social media platforms, messaging apps, or AirDrop to share photos from your iPhone. Each method has its advantages depending on the context and recipient.
Exploring these alternatives can provide more flexibility in how you share your photos:
- Cloud Storage Services:
- Google Drive, Dropbox, iCloud Drive: Upload photos to these services and share a link.
- Advantages: Suitable for large files, easy to manage permissions.
- Social Media Platforms:
- Instagram, Facebook, Twitter: Share photos directly on social media.
- Advantages: Great for public sharing and engagement.
- Messaging Apps:
- WhatsApp, Telegram, Signal: Send photos directly to contacts.
- Advantages: Quick and convenient for personal sharing.
- AirDrop:
- Apple’s Wireless Transfer: Share photos with nearby Apple devices.
- Advantages: Fast and secure for local sharing.
4.1. Sharing via Cloud Storage
How do I share photos using cloud storage services like Google Drive or Dropbox?
Upload your photos to Google Drive or Dropbox, create a shareable link, and then paste the link into an email or message. Ensure you set the appropriate permissions (e.g., “Anyone with the link can view”) for the recipient.
Here’s a step-by-step guide:
- Upload Photos:
- Open Google Drive or Dropbox: Open the app on your iPhone.
- Upload Photos: Upload the photos you want to share to the cloud storage service.
- Create a Shareable Link:
- Find the Photo: Locate the uploaded photo in the app.
- Generate Link: Tap the options menu (usually three dots) and select “Share” or “Get Link.”
- Set Permissions: Choose the appropriate permissions (e.g., “Anyone with the link can view”).
- Share the Link:
- Copy Link: Copy the shareable link to your clipboard.
- Paste in Email or Message: Paste the link into an email or message and send it to the recipient.
4.2. Using Social Media Platforms
Can I share my photos directly to social media from my iPhone?
Yes, open the Photos app, select the photo, tap the share icon, and choose the social media platform you want to use (e.g., Instagram, Facebook). The app will open with the photo ready to be posted.
Sharing photos on social media is straightforward:
- Open Photos App:
- Select Photo: Open the Photos app on your iPhone and select the photo you want to share.
- Tap Share Icon:
- Share Options: Tap the share icon (usually a square with an arrow pointing upwards).
- Choose Social Media Platform:
- Select App: Scroll through the share options and select the social media platform you want to use.
- Post Photo:
- App Opens: The selected social media app will open with the photo ready to be posted.
- Add Caption: Add a caption and any relevant hashtags.
- Post: Tap the “Post” button to share the photo on your social media feed.
5. Scanning and Attaching Documents
How do I scan a document and attach it to an email on my iPhone?
Open the Mail app, tap in the message body, tap the expand toolbar button above the keyboard, then tap the scan document icon. Position your iPhone over the document, and it will automatically scan. Adjust the scan if necessary, then tap “Save” to attach it as a PDF.
Scanning and attaching documents is a useful feature:
- Open Mail App:
- Compose Email: Open the Mail app and start a new email or reply to an existing one.
- Tap in Message Body:
- Expand Toolbar: Tap in the area where you want to insert the scanned document, then tap the expand toolbar button above the keyboard.
- Tap Scan Document Icon:
- Select Scan: Tap the scan document icon.
- Position iPhone:
- Automatic Scan: Position your iPhone over the document. The iPhone will automatically scan the document.
- Adjust Scan:
- Edit Scan: Adjust the scan by cropping or adjusting the perspective if necessary.
- Save as PDF:
- Save: Tap “Save” to attach the scanned document as a PDF to your email.
5.1. Using the Notes App for Scanning
Can I use the Notes app to scan documents and then attach them to an email?
Yes, open the Notes app, create a new note, tap the camera icon, choose “Scan Documents,” and follow the prompts to scan your document. Once scanned, tap the share icon and choose “Mail” to attach it to an email.
Using the Notes app offers another convenient method:
- Open Notes App:
- Create New Note: Open the Notes app on your iPhone and create a new note.
- Tap Camera Icon:
- Scan Documents: Tap the camera icon within the note and choose “Scan Documents.”
- Scan Document:
- Follow Prompts: Follow the prompts to scan your document. Position your iPhone over the document, and it will automatically scan.
- Adjust Scan:
- Edit Scan: Adjust the scan by cropping or adjusting the perspective if necessary.
- Share via Mail:
- Tap Share Icon: Tap the share icon (usually a square with an arrow pointing upwards).
- Choose Mail: Select “Mail” from the share options to attach the scanned document to an email.
5.2. Editing Scanned Documents
How can I edit a scanned document on my iPhone before attaching it to an email?
After scanning a document, tap the scan to open it. You can then use the built-in editing tools to crop, rotate, apply filters, or adjust the color. Once you’re satisfied, tap “Done” and then “Save” to attach the edited document.
Editing scanned documents ensures they look professional:
- Open Scanned Document:
- Tap Scan: After scanning the document, tap the scan to open it.
- Use Editing Tools:
- Crop: Crop the image to remove any unnecessary edges.
- Rotate: Rotate the image if it’s not oriented correctly.
- Apply Filters: Apply filters to enhance the contrast and clarity.
- Adjust Color: Adjust the color and brightness to improve readability.
- Save Edited Document:
- Tap Done: Once you’re satisfied with the edits, tap “Done.”
- Tap Save: Tap “Save” to save the edited document and attach it to your email.
6. Creating and Attaching Drawings
Can I create a drawing and attach it to an email on my iPhone?
Yes, in the Mail app, tap in the message body, tap the expand toolbar button above the keyboard, then tap the insert drawing icon. Use the Markup tools to create your drawing, then tap “Done” and “Insert Drawing” to attach it.
Creating and attaching drawings can add a personal touch:
- Open Mail App:
- Compose Email: Open the Mail app and start a new email or reply to an existing one.
- Tap in Message Body:
- Expand Toolbar: Tap in the area where you want to insert the drawing, then tap the expand toolbar button above the keyboard.
- Tap Insert Drawing Icon:
- Select Drawing: Tap the insert drawing icon to open the Markup toolbar.
- Create Drawing:
- Use Markup Tools: Use the Markup tools to create your drawing. You can choose different pens, colors, and tools to create your illustration.
- Insert Drawing:
- Tap Done: Once you’re finished, tap “Done.”
- Tap Insert Drawing: Tap “Insert Drawing” to attach the drawing to your email.
6.1. Using Markup Tools
What kind of Markup tools are available for creating drawings on iPhone?
The Markup tools include various pens, pencils, highlighters, erasers, a lasso tool for selecting and moving parts of your drawing, and a color palette. These tools allow you to create detailed and expressive drawings directly within your email.
These tools offer a range of options for creating detailed drawings:
- Pens and Pencils:
- Different Styles: Use different pens and pencils to create various line thicknesses and textures.
- Highlighters:
- Highlight Text: Use the highlighter to emphasize specific parts of your drawing or text.
- Eraser:
- Correct Mistakes: Use the eraser to correct any mistakes or unwanted marks.
- Lasso Tool:
- Select and Move: Use the lasso tool to select and move parts of your drawing.
- Color Palette:
- Choose Colors: Use the color palette to choose different colors for your drawing.
6.2. Adding Text to Drawings
Can I add text to my drawings on the iPhone before sending them?
Yes, when using Markup tools, there is an option to add text boxes to your drawings. You can type in your text, adjust the font, size, and color, and then position it within your drawing.
Adding text can enhance your drawings:
- Open Markup Tools:
- Start Drawing: Open the Markup tools in the Mail app or Notes app.
- Add Text Box:
- Select Text Tool: Select the text tool from the Markup options.
- Create Text Box: Tap on the drawing area to create a text box.
- Enter Text:
- Type Text: Type in your text using the keyboard.
- Adjust Text:
- Font, Size, Color: Adjust the font, size, and color of the text to match your drawing.
- Position Text:
- Drag Text Box: Drag the text box to position it within your drawing.
7. Troubleshooting Attachment Issues
What should I do if I’m having trouble attaching photos to my email?
First, check your internet connection to ensure it’s stable. Then, verify the file size of the photo to ensure it doesn’t exceed your email provider’s limit. Try compressing the photo or using a different sharing method if necessary. Restarting the Mail app or your iPhone can also resolve some issues.
Troubleshooting ensures a smooth experience:
- Check Internet Connection:
- Stable Connection: Ensure you have a stable internet connection, either through Wi-Fi or cellular data.
- Verify File Size:
- Exceeds Limit: Check the file size of the photo to ensure it doesn’t exceed your email provider’s limit.
- Compress Photo:
- Reduce Size: Try compressing the photo to reduce its file size.
- Use Different Sharing Method:
- Cloud Storage: Use cloud storage services like Google Drive or Dropbox to share the photo.
- Restart Mail App:
- Close and Reopen: Close the Mail app and reopen it.
- Restart iPhone:
- Reboot Device: Restart your iPhone to resolve any underlying issues.
7.1. Common Error Messages
What do common error messages mean when attaching photos, and how can I fix them?
Common error messages include “File size exceeds limit,” “Unable to attach file,” or “Connection error.” To fix these, compress the file, use Mail Drop, check your internet connection, or try again later.
Understanding error messages helps you resolve issues quickly:
- File Size Exceeds Limit:
- Meaning: The photo file is too large to be attached to the email.
- Fix: Compress the photo, use Mail Drop, or share via cloud storage.
- Unable to Attach File:
- Meaning: There may be a temporary issue preventing the file from being attached.
- Fix: Check your internet connection, restart the Mail app, or try again later.
- Connection Error:
- Meaning: There is a problem with your internet connection.
- Fix: Check your Wi-Fi or cellular data connection, and try again once the connection is stable.
7.2. Contacting Support
When should I contact Apple Support for help with email attachments?
Contact Apple Support if you’ve tried all troubleshooting steps and are still unable to attach photos, or if you encounter persistent error messages. They can provide further assistance and diagnose any underlying issues with your device or email account.
Knowing when to seek professional help is important:
- Tried All Steps:
- Exhausted Options: If you’ve tried all the troubleshooting steps and are still unable to attach photos.
- Persistent Errors:
- Recurring Issues: If you encounter persistent error messages that you can’t resolve.
- Underlying Issues:
- Device Problems: If you suspect there may be an underlying issue with your device or email account.
Address: 1600 St Michael’s Dr, Santa Fe, NM 87505, United States. Phone: +1 (505) 471-6001. Website: dfphoto.net.
8. Tips for Better Photo Sharing
What are some tips for sharing photos via email effectively?
To share photos effectively, compress large files, use descriptive subject lines, include a brief message explaining the context of the photos, and ensure the recipient has the necessary software to view the images.
These tips ensure your photos are well-received:
- Compress Large Files:
- Reduce Size: Compress large photo files to make them easier to download.
- Descriptive Subject Lines:
- Clear Context: Use descriptive subject lines to give the recipient a clear idea of what the email is about.
- Brief Message:
- Explain Context: Include a brief message explaining the context of the photos.
- Ensure Compatibility:
- Necessary Software: Ensure the recipient has the necessary software to view the images.
8.1. Choosing the Right Photo Format
Which photo format is best for emailing from an iPhone?
JPEG is generally the best format for emailing photos from an iPhone because it offers a good balance between file size and image quality. PNG is better for images with text or graphics, but it results in larger file sizes.
Understanding photo formats helps you optimize your sharing:
- JPEG:
- Best Balance: JPEG offers a good balance between file size and image quality.
- Compatibility: It is widely compatible with most devices and email clients.
- PNG:
- Text and Graphics: PNG is better for images with text or graphics.
- Larger File Sizes: It results in larger file sizes compared to JPEG.
8.2. Optimizing Photos for Email
How can I optimize my photos for email to ensure they look good without being too large?
Reduce the image dimensions using a photo editing app, adjust the compression settings to balance quality and size, and save the photo in JPEG format. Preview the photo to ensure it still looks good before sending.
Optimizing ensures your photos look great without being too large:
- Reduce Image Dimensions:
- Photo Editing App: Use a photo editing app to reduce the image dimensions.
- Smaller Size: Reducing the dimensions can significantly reduce the file size.
- Adjust Compression Settings:
- Balance Quality: Adjust the compression settings to balance quality and size.
- JPEG Format: Save the photo in JPEG format for the best balance.
- Preview Photo:
- Ensure Quality: Preview the photo to ensure it still looks good before sending.
9. Advanced Techniques
Are there any advanced techniques for attaching and sharing photos on iPhone?
Yes, you can use Shortcuts to automate the process of compressing and emailing photos, use third-party email clients with advanced attachment options, or integrate cloud storage services directly into your email workflow.
These advanced techniques can streamline your photo-sharing process:
- Use Shortcuts:
- Automate Process: Use Shortcuts to automate the process of compressing and emailing photos.
- Third-Party Email Clients:
- Advanced Options: Use third-party email clients with advanced attachment options.
- Integrate Cloud Storage:
- Direct Workflow: Integrate cloud storage services directly into your email workflow.
9.1. Automating with Shortcuts
How can I use the Shortcuts app to automate photo attachment tasks?
You can create a Shortcut that automatically resizes photos, creates a new email, and attaches the resized photos to the email. This can save time and effort, especially when sharing multiple photos regularly.
Automating with Shortcuts can streamline your workflow:
- Create New Shortcut:
- Open Shortcuts App: Open the Shortcuts app on your iPhone.
- Create New Shortcut: Tap the plus icon to create a new shortcut.
- Add Actions:
- Select Photos: Add an action to select photos from your photo library.
- Resize Photos: Add an action to resize the selected photos.
- Create Email: Add an action to create a new email.
- Attach Photos: Add an action to attach the resized photos to the email.
- Run Shortcut:
- Tap Play: Tap the play button to run the shortcut and automate the photo attachment process.
9.2. Third-Party Email Clients
Are there third-party email clients that offer better photo attachment features than the default Mail app?
Yes, apps like Spark and Outlook offer advanced features such as built-in compression, cloud storage integration, and more flexible attachment options. These can provide a smoother experience for sharing photos.
Third-party email clients offer enhanced features:
- Spark:
- Built-In Compression: Spark offers built-in compression for large attachments.
- Cloud Storage Integration: It integrates with cloud storage services like Google Drive and Dropbox.
- Outlook:
- Advanced Options: Outlook provides advanced attachment options, including the ability to share files directly from OneDrive.
- Flexible Attachments: It offers more flexible attachment options compared to the default Mail app.
10. Security and Privacy
What are the security and privacy considerations when emailing photos from my iPhone?
Be mindful of the content you’re sharing and who you’re sharing it with. Avoid sending sensitive or personal photos via email, and consider encrypting your emails for added security.
Security and privacy are crucial:
- Content Awareness:
- Sensitive Information: Be mindful of the content you’re sharing and avoid sending sensitive or personal photos via email.
- Recipient Awareness:
- Trusted Contacts: Be careful about who you’re sharing your photos with and ensure they are trusted contacts.
- Email Encryption:
- Added Security: Consider encrypting your emails for added security, especially when sending sensitive information.
10.1. Protecting Your Photos
How can I protect my photos from being misused when sharing them via email?
Add a watermark to your photos, reduce the resolution to make them less suitable for printing, and inform recipients that the photos are for their personal use only and should not be distributed further.
Protecting your photos can prevent misuse:
- Add Watermark:
- Copyright Protection: Add a watermark to your photos to protect your copyright.
- Reduce Resolution:
- Printing Limitations: Reduce the resolution of your photos to make them less suitable for printing.
- Inform Recipients:
- Personal Use Only: Inform recipients that the photos are for their personal use only and should not be distributed further.
10.2. Avoiding Phishing Scams
How can I avoid phishing scams when receiving photo attachments via email?
Be cautious of emails from unknown senders, especially if they contain unexpected photo attachments. Verify the sender’s identity before opening any attachments, and avoid clicking on links within the email unless you’re sure they’re legitimate.
Avoiding phishing scams is essential:
- Unknown Senders:
- Be Cautious: Be cautious of emails from unknown senders, especially if they contain unexpected photo attachments.
- Verify Identity:
- Check Sender: Verify the sender’s identity before opening any attachments.
- Avoid Clicking Links:
- Legitimate Sources: Avoid clicking on links within the email unless you’re sure they’re legitimate.
Attaching photos to emails on your iPhone is a versatile skill that enhances your ability to share and communicate visually. Whether you’re a photography enthusiast or a professional, mastering these techniques can significantly improve your workflow and communication.
Ready to elevate your photography skills and stay updated with the latest trends? Visit dfphoto.net for comprehensive guides, stunning photo collections, and a vibrant community of photographers. Explore new techniques, find inspiration, and connect with fellow enthusiasts today! Check out our tutorials, view breathtaking galleries, and join our community to share your own work. Your journey to photographic excellence starts here. Visit dfphoto.net now and transform your passion into expertise!
FAQ
1. How do I attach multiple photos to an email on my iPhone?
To attach multiple photos, follow the same steps as attaching a single photo, but select multiple images from your photo library before tapping “Choose” or “Add.”
2. Why is my iPhone not letting me attach photos to emails?
This could be due to a poor internet connection, file size limits, or software glitches. Check your connection, compress the photos, and restart your Mail app or iPhone.
3. Can I change the size of the attached photos before sending?
Yes, when you attach a photo, the Mail app often gives you options to choose a smaller size. You can also use third-party apps to compress the photos before attaching them.
4. How do I know if the recipient has received the attached photos?
There is no built-in feature to confirm receipt. However, you can request a read receipt or simply ask the recipient to confirm when they’ve received the photos.
5. What is the maximum file size for email attachments on iPhone?
The maximum file size depends on your email provider. Generally, it’s around 20-25 MB. If your file is larger, use Mail Drop or cloud storage.
6. How do I access the attachment options in the Mail app?
Tap in the message body, then look for an icon that allows you to insert a photo or attachment (often a paperclip or a plus sign) above the keyboard.
7. Can I attach other types of files besides photos and videos?
Yes, you can attach documents, PDFs, and other file types. Tap the attachment icon and select the file you want to attach from Files or other locations.
8. Is it possible to attach photos to an email using Siri?
While you can’t directly attach photos with Siri, you can ask Siri to open a new email to a specific contact, and then manually attach the photos.
9. How do I detach a photo from an email on my iPhone before sending it?
Tap and hold the attached photo in the email, then select “Remove Attachment” from the options that appear.
10. Are there any security risks associated with emailing photos?
Yes, be cautious of who you’re sending photos to and avoid sending sensitive or personal images via email. Also, be wary of phishing scams when receiving photo attachments from unknown senders.