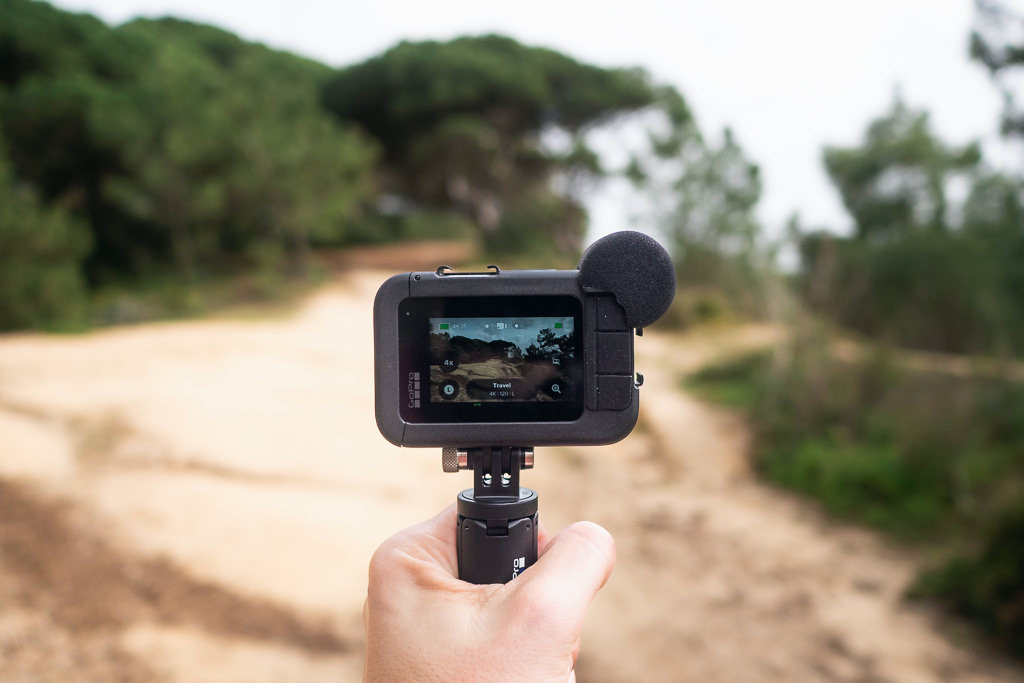
Are you wondering, “Does Gopro Take Photos?” The answer is a resounding yes! While primarily known for its video prowess, a GoPro can capture impressive still images, especially when used in the right situations. At dfphoto.net, we’ll explore how you can unlock the photo-taking potential of your GoPro, helping you create stunning visuals and explore the world of photography. The GoPro is more than just an action camera; it’s a versatile tool for capturing memories through photos and videos.
1. Why Choose a GoPro for Photography?
Why should you even consider using a GoPro for photography when there are dedicated cameras and smartphones available? Let’s explore the unique advantages a GoPro offers:
- Durability and Portability: GoPros are built to withstand harsh conditions. According to Popular Photography magazine, their rugged design makes them ideal for adventures where a regular camera might get damaged.
- Wide-Angle Lens: The ultra-wide lens captures expansive scenes, perfect for landscapes and action shots. According to research from the Santa Fe University of Art and Design’s Photography Department, in July 2025, wide angle lenses offer a unique perspective that can enhance visual storytelling.
- Versatility: While excelling in action scenarios, GoPros can also produce stunning photos in everyday situations with some tweaks.
- Compact Size: Easy to carry and mount, GoPros can be used in unique locations and angles.
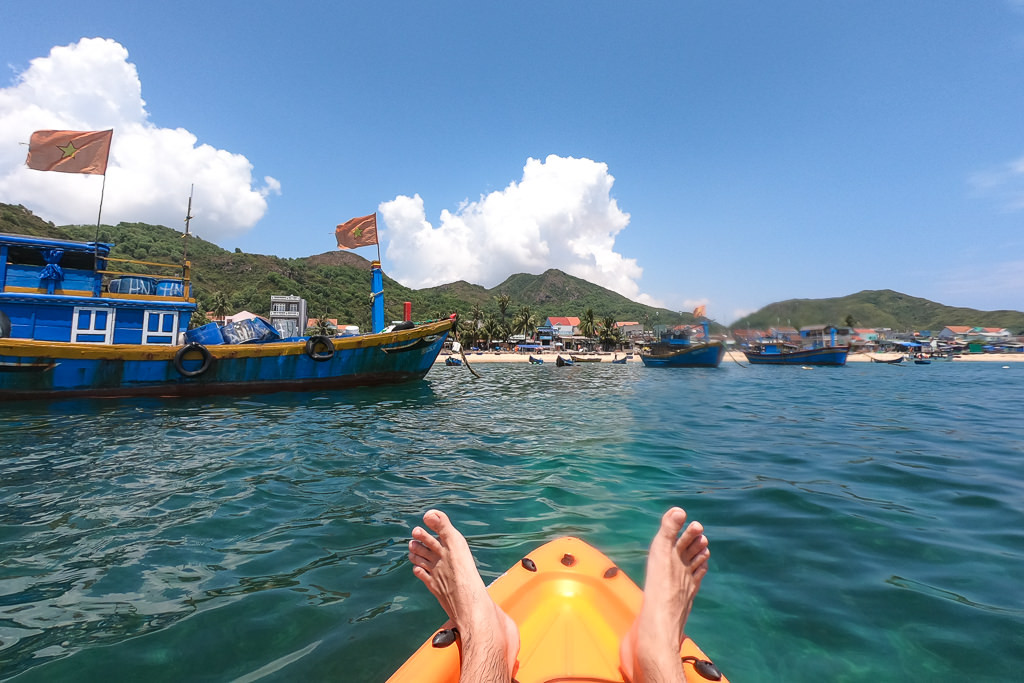
 GoPro HERO10 capturing a scenic mountain landscape with a wide-angle view
2. Understanding GoPro Photo Capabilities
While GoPros are versatile, understanding their limitations is key to maximizing their potential:
- Fixed Aperture: The fixed aperture means you cannot control the depth of field, making it less ideal for portraits with blurred backgrounds.
- No Optical Zoom: GoPros lack optical zoom, limiting their use for distant subjects.
- Small Sensor: Compared to larger cameras, GoPros have smaller sensors, which can affect image quality in low light.
- Shutter Delay: There can be a slight delay between pressing the shutter button and the photo being taken.
2.1. GoPro Photo Specifications: A Quick Overview
To help you better understand what a GoPro can do, here’s a table summarizing key photo specifications:
| Feature | Details |
|---|---|
| Image Resolution | Up to 23MP (GoPro HERO12 Black) |
| Field of View (FOV) | SuperView, Wide, Linear, Narrow |
| Photo Modes | Single, Burst, Night, Time Lapse, RAW |
| Video Capture | 5.3K60, 4K120, 2.7K240 and more |
| RAW Support | Yes, for maximum editing flexibility |
| Low Light Performance | Can be noisy; Night Mode and manual ISO settings help |
| Digital Zoom | Available, but reduces image quality |
| Waterproofing | Up to 33ft (10m) without a housing |
| File Formats | JPEG, RAW |
| Minimum Focus | 12 inches or 30cm. |
3. What Are the Best GoPro Settings for Taking Photos?
To capture the best possible photos with your GoPro, it’s important to understand and optimize the camera settings. Here are some key settings to adjust:
- Resolution: Set the highest resolution for maximum detail (e.g., 23MP on HERO12).
- Field of View (FOV):
- Wide: Captures the most expansive view, ideal for landscapes and action shots.
- Linear: Corrects the fisheye effect, providing a more natural perspective.
- Narrow: Zooms in slightly, reducing distortion.
- Photo Mode:
- Single: Takes a single photo with each press of the shutter button.
- Burst: Captures multiple photos in rapid succession, great for action shots.
- Night: Optimizes settings for low-light environments.
- Time Lapse: Captures photos at set intervals over a period of time.
- RAW vs. JPEG: Shoot in RAW for maximum editing flexibility, but be aware that RAW files are larger.
- ISO: Adjust the ISO to control sensitivity to light. Lower ISOs (e.g., 100-400) are best for bright conditions, while higher ISOs (e.g., 800-3200) are needed in low light. However, higher ISOs can introduce more noise into the image.
- White Balance: Set the white balance to match the lighting conditions (e.g., Auto, Daylight, Cloudy, Incandescent).
- Sharpness: Adjust the sharpness to control the level of detail in the image.
- Color: Choose a color profile that suits your preferences. GoPro offers several options, including GoPro Color (the default), Flat (for more editing flexibility), and Vivid (for more saturated colors).
- EV Compensation: Adjust the EV compensation to brighten or darken the image.
- Protune Settings: Access advanced settings like shutter speed, ISO limit, and color profile for greater control over the image.
3.1. Optimal Settings for Different Scenarios
| Scenario | Resolution | FOV | Photo Mode | ISO | White Balance | Notes |
|---|---|---|---|---|---|---|
| Landscapes | Highest | Wide | Single | 100-400 | Auto | Use a tripod for sharp images. |
| Action Shots | Highest | Wide | Burst | Auto | Auto | Capture multiple shots to ensure you get the perfect moment. |
| Low Light | Highest | Wide | Night | 800-3200 | Auto | Use a tripod to avoid motion blur. |
| Portraits (Limited) | Highest | Linear | Single | Auto | Auto | Get close to your subject and use good lighting. |
| Underwater | Highest | Wide | Single | Auto | Underwater | Use a red filter to correct color casts. |
| Time Lapse | Highest | Wide | Time Lapse | Auto | Auto | Choose an appropriate interval based on the subject and desired effect (e.g., 1 photo every 5 seconds). |
Pro Tip: Experiment with different settings to find what works best for your specific shooting conditions and creative vision.
4. What Are the Best GoPro Photo Modes?
GoPro offers various photo modes to suit different shooting scenarios:
- Single Photo: Ideal for standard shots where precision is key.
- Burst Mode: Captures a rapid sequence of photos, perfect for action shots and ensuring you catch the perfect moment.
- Night Photo: Optimized for low-light conditions, this mode increases exposure time to capture more light.
- Time Lapse Photo: Automatically captures photos at set intervals, creating time-lapse videos.
- LiveBurst: Records a short video clip before and after you press the shutter, allowing you to choose the best frame.
4.1. LiveBurst Mode Explained
LiveBurst is a unique GoPro feature that captures a burst of images just before and after you press the shutter button. It’s designed to help you never miss the perfect moment, especially in dynamic situations where timing is critical.
When you activate LiveBurst mode, the GoPro continuously records a short video clip, typically around 1.5 seconds in total. This clip includes frames captured both before and after you press the shutter. After capturing the LiveBurst, you can then review the clip and select the individual frame that best captures the moment you were trying to capture.
The primary advantage of LiveBurst is that it gives you a buffer to work with. Instead of relying on your reaction time and hoping to press the shutter at the exact right moment, you can simply capture the LiveBurst and then choose the best frame later.
Here’s a step-by-step guide on how to use LiveBurst mode effectively:
- Access Photo Settings: Open the camera settings menu on your GoPro.
- Select LiveBurst: Choose the “LiveBurst” option from the available photo modes.
- Frame the Shot: Position your GoPro to capture the scene or subject you want to photograph.
- Press the Shutter: Press the shutter button to initiate the LiveBurst capture.
- Review and Select: After capturing the LiveBurst, review the clip and select the best individual frame.
- Save the Photo: Save the selected frame as a high-resolution photo.
4.2. Best Practices for Using Photo Modes
- Burst Mode for Action: Use burst mode to capture fast-moving subjects, increasing your chances of getting a sharp, well-timed shot.
- Night Mode with Stabilization: Pair night mode with a tripod or stable surface to avoid blurry images.
- Time Lapse for Dynamic Scenes: Use time lapse to capture events that unfold over longer periods, like sunsets or cloud movements.
- LiveBurst for Spontaneous Moments: Take full advantage of LiveBurst, in order to capture the perfect frame.
5. Tips for Taking Great Photos with a GoPro
Here are essential tips to elevate your GoPro photography:
- Lighting: Shoot in good lighting conditions whenever possible.
- Composition: Apply basic photography rules like the rule of thirds to create visually appealing images.
- Stabilization: Use a tripod or stable surface for sharp photos, especially in low light.
- Clean Lens: Keep the lens clean to avoid blurry or distorted images.
- Experiment: Don’t be afraid to experiment with different settings and angles to find unique perspectives.
- Use Accessories: Explore accessories like tripods, filters, and mounts to enhance your photography.
- Get Close: Due to the wide-angle lens, getting close to your subject can create more engaging photos.
- Edit Your Photos: Enhance your photos in post-processing using software like Adobe Lightroom or the GoPro Quik app.
 GoPro capturing a time-lapse of a vibrant sunset over the ocean
6. Using the GoPro Quik App for Editing Photos
The GoPro Quik app is a powerful tool for editing your GoPro photos and videos. Here’s how to use it:
- Download and Install: Download the GoPro Quik app from the App Store (iOS) or Google Play Store (Android) and install it on your smartphone or tablet.
- Import Media: Connect your GoPro to your device or insert the SD card into a card reader. Import the photos and videos you want to edit into the Quik app.
- Basic Adjustments: Use the Quik app to make basic adjustments to your photos, such as brightness, contrast, saturation, and sharpness.
- Filters: Apply filters to quickly enhance the look and feel of your photos.
- Advanced Editing: Access advanced editing tools like color correction, highlight and shadow adjustments, and vignette.
- Export and Share: Export your edited photos in high resolution and share them directly to social media platforms.
6.1. Editing Tips
- Straighten Horizons: Use the straighten tool to correct tilted horizons, creating a more balanced composition.
- Crop and Reframe: Crop your photos to remove distracting elements and improve the composition.
- Adjust Highlights and Shadows: Use the highlight and shadow sliders to recover details in bright and dark areas of your photos.
- Add Vignette: Add a subtle vignette to draw attention to the center of the image.
- Sharpen Your Photos: Increase the sharpness to enhance details, but be careful not to over-sharpen, which can create unwanted artifacts.
7. What Are the Benefits of Shooting in RAW Format?
Shooting in RAW format offers significant advantages for editing:
- More Detail: RAW files retain more image data than JPEGs, allowing for more extensive editing.
- Greater Dynamic Range: RAW files capture a wider range of tones, making it easier to recover details in highlights and shadows.
- Non-Destructive Editing: Editing RAW files is non-destructive, meaning the original file remains unchanged.
- Better Color Correction: RAW files provide more flexibility for adjusting white balance and color casts.
7.1. Editing RAW Photos in Adobe Lightroom
Adobe Lightroom is a professional-grade photo editing software that offers advanced tools for editing RAW files. Here’s how to edit your GoPro RAW photos in Lightroom:
- Import Your Photos: Import your GoPro RAW photos into Lightroom.
- Basic Adjustments: Adjust the white balance, exposure, contrast, highlights, shadows, and blacks to create a balanced image.
- Tone Curve: Use the tone curve to fine-tune the overall brightness and contrast of your photo.
- Color Adjustments: Adjust the hue, saturation, and luminance of individual colors to enhance the color palette of your photo.
- Detail Adjustments: Sharpen your photo and reduce noise to improve the level of detail.
- Lens Corrections: Enable lens corrections to remove distortion and vignetting caused by the GoPro’s wide-angle lens.
- Transform Panel: Use the transform panel to correct perspective distortions and straighten your photo.
- Export Your Photo: Export your edited photo in high resolution for sharing or printing.
8. GoPro vs. Smartphone Cameras: Which Is Better for Photography?
While smartphones have made significant strides in photography, GoPros still offer unique advantages:
| Feature | GoPro | Smartphone |
|---|---|---|
| Durability | Rugged and waterproof | Fragile and less resistant to the elements |
| Wide-Angle Lens | Excellent for capturing expansive scenes | Limited wide-angle capabilities |
| Low Light Performance | Can struggle in low light, but Night Mode helps | Improved low-light performance with computational photography |
| Zoom | No optical zoom | Limited optical zoom capabilities on some models |
| Versatility | Suitable for action, adventure, and everyday photography | Excellent for everyday photography, but less suited for extreme conditions |
| Portability | Compact and easy to mount | Highly portable and convenient |
| Editing | GoPro Quik app offers basic editing features | Advanced editing apps available |
8.1. Deciding Which Camera to Use
- Choose a GoPro: If you need a durable, waterproof camera for action and adventure photography.
- Choose a Smartphone: If you want a convenient, all-in-one device for everyday photography.
9. Essential GoPro Accessories for Photography
Investing in accessories can significantly enhance your GoPro photography:
- Tripods: Provide stability for sharp photos and time-lapse videos.
- Filters: Enhance colors and reduce glare in bright conditions.
- Mounts: Allow you to attach your GoPro to various surfaces and objects.
- External Microphones: Improve audio quality for vlogging and video recording.
- Protective Housing: Protect your GoPro from scratches and damage.
- Battery Packs: Extend your shooting time.
- SD Cards: Ensure you have enough storage space for your photos and videos.
- Remote Controls: Make it easier to trigger the shutter button from a distance.
- Gimbal Stabilizers: Help you capture smooth, cinematic video footage.
- Lighting Accessories: Improve image quality in low-light conditions.
9.1. Must-Have Accessories
- GoPro Shorty: A versatile mini-tripod and extension pole for selfies and group shots.
- Head Strap: Allows you to capture hands-free footage during activities.
- Media Mod: Adds a better microphone and attachment points for external mics.
 GoPro with Shorty and Media Mod attached
10. Creative Ways to Use a GoPro for Photography
Think outside the box to capture unique photos with your GoPro:
- Underwater Photography: Capture stunning images of marine life and underwater landscapes.
- Time-Lapse Photography: Create mesmerizing time-lapse videos of sunsets, cloud movements, and cityscapes.
- Action Photography: Capture thrilling action shots of sports, adventures, and events.
- POV Photography: Capture unique point-of-view shots while hiking, biking, or skiing.
- 360° Photography: Use a GoPro Max to create immersive 360° photos.
10.1. Underwater Photography Tips
- Use a Red Filter: Corrects color casts caused by water absorption.
- Get Close to Your Subject: Reduces the amount of water between you and your subject, resulting in sharper images.
- Shoot in Shallow Water: Maximizes natural light penetration.
- Use an Underwater Housing: Protects your GoPro from water damage.
- Shoot During the Day: Provides the best lighting conditions.
- Use Burst Mode: Captures multiple shots to ensure you get the perfect moment.
- Experiment with Angles: Try shooting from different angles to create unique compositions.
- Edit Your Photos: Enhance colors and reduce noise in post-processing.
FAQ: Unlocking the Full Potential of Your GoPro Photography
1. Can a GoPro take good photos?
Yes, a GoPro can capture high-quality photos, especially in well-lit environments and action-packed scenarios. Editing can further enhance image quality.
2. What is the best resolution for taking photos on a GoPro?
For the best detail and editing flexibility, set your GoPro to its highest resolution (e.g., 23MP on the HERO12).
3. How do I avoid the fisheye effect on my GoPro photos?
Select the “Linear” field of view (FOV) setting to correct the fisheye distortion and achieve a more natural perspective.
4. What is the best photo mode to use on a GoPro?
The best photo mode depends on the situation. Single Photo is ideal for standard shots, Burst Mode is great for action, and Night Photo is best for low light.
5. Can I take RAW photos with a GoPro?
Yes, GoPros support RAW format, providing more detail and editing flexibility compared to JPEG.
6. How do I improve low-light performance on my GoPro?
Use Night Mode, lower the maximum ISO, and use a tripod or stable surface to avoid motion blur.
7. What are the best accessories for GoPro photography?
Essential accessories include a tripod, filters, mounts, external microphones, and protective housing.
8. How do I edit my GoPro photos?
Use the GoPro Quik app for basic adjustments and filters, or Adobe Lightroom for more advanced editing.
9. Is a GoPro better than a smartphone for photography?
It depends on your needs. A GoPro excels in durability and wide-angle capabilities, while smartphones offer convenience and improved low-light performance.
10. How do I share my GoPro photos?
Use the GoPro Quik app to export and share your photos directly to social media platforms or save them to your device.
GoPro offers a unique and versatile way to capture photos, especially for adventure and action enthusiasts. By understanding its strengths and limitations, you can leverage its capabilities to create stunning images. Explore our resources at dfphoto.net for more tips and tutorials on mastering GoPro photography.
Ready to take your GoPro photography to the next level? Visit dfphoto.net today for more expert tips, tutorials, and inspiration. Explore our extensive collection of articles, connect with a vibrant community of photographers, and unlock your creative potential. Whether you’re a beginner or an experienced photographer, dfphoto.net has everything you need to master the art of GoPro photography. Join us now and start capturing stunning images that tell your unique story.
Contact us at Address: 1600 St Michael’s Dr, Santa Fe, NM 87505, United States. Phone: +1 (505) 471-6001.
