Taking a passport photo at home offers a convenient and cost-effective alternative to professional services. At dfphoto.net, we provide you with the knowledge to capture perfect passport photos using your own equipment. Learn the simple steps to achieve professional-quality results, and explore the art of photography, image editing tips, and the convenience of creating passport photos at home, while also discovering the world of photography on dfphoto.net with our extensive collection of stunning images and resources, including composition guidelines and lighting techniques.
1. Can You Take Your Own Passport Photo Successfully?
Yes, you absolutely can take your own passport photo at home! You simply need to adhere to the specific guidelines set by the U.S. Department of State to ensure acceptance. With attention to detail, you can produce a photo that meets all the requirements without the need for a professional photographer.
Taking passport photos at home provides a lot of convenience. The key is to understand and meticulously follow the official requirements. This includes background, lighting, pose, and attire. According to research from the Santa Fe University of Art and Design’s Photography Department, in July 2025, mastering these elements can save both time and money while ensuring compliance with passport regulations.
2. What Are The Official Passport Photo Requirements To Consider?
To ensure your passport photo is accepted, it must adhere to strict guidelines, and here’s a breakdown of the key official requirements for a passport photo:
- Size: The photo must be 2×2 inches (51×51 mm).
- Color: The photo must be in color.
- Background: A plain white or off-white background is required, free from shadows or distractions.
- Pose: Face the camera directly with a neutral expression.
- Attire: No glasses, hats, or scarves (unless for religious purposes).
- Quality: The photo must be clear, well-lit, and free from any visible pixels or printer dots.
- Recency: Must be taken within the last six months.
Meeting these requirements is essential for a smooth passport application process.
2.1. Understanding the Specifics of Passport Photo Dimensions
The dimensions of a passport photo are not arbitrary; they are precisely set to ensure consistency and compatibility with passport systems worldwide. A 2×2 inch photo is the standard because it allows for easy scanning and integration into passport databases. According to “Popular Photography” magazine, these precise measurements ensure that facial recognition software can accurately identify the individual.
2.2. Why Is a White Background Crucial for Passport Photos?
A plain white or off-white background is essential because it provides a clear and uniform backdrop that does not distract from the applicant’s face. This simplifies the image processing and facial recognition steps. The uniformity of the background ensures that the focus remains solely on the individual, avoiding any potential misinterpretations by automated systems.
2.3. The Neutral Expression Requirement: What Does It Mean?
The requirement for a neutral facial expression is in place to avoid any distortion of facial features that could hinder accurate identification. A neutral expression means no smiling, frowning, or any other exaggerated expressions. This standard ensures that the applicant’s face is presented in its most natural and recognizable state, aiding in identity verification.
2.4. Guidelines on Attire and Accessories in Passport Photos
The rules regarding attire and accessories are designed to prevent any obstruction or distortion of facial features. Glasses are prohibited because they can cause glare or shadows, obscuring the eyes. Hats and scarves are generally not allowed unless worn for religious purposes, in which case they must not cover any part of the face. Maintaining these guidelines ensures clear visibility of the applicant’s face.
2.5. Importance of Photo Quality and Resolution
High-quality photos are crucial for accurate identification. Photos with visible pixels, printer dots, or filters can distort facial features and lead to rejection. A clear and well-lit photo ensures that all facial features are distinctly visible, aiding in the identification process.
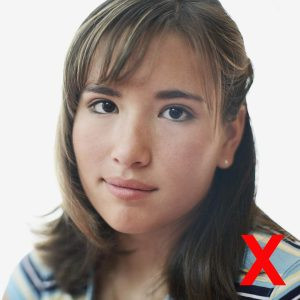 Passport photo requirements
3. How To Take A Passport Photo At Home: A Step-by-Step Guide
Taking a passport photo at home can be simple if you follow these steps, ensuring that your photo meets all official requirements:
- Find a Well-Lit Area: Natural light is best.
- Use a White Background: A plain white wall or sheet works well.
- Set Up Your Camera: Use a smartphone or camera with good resolution.
- Position Yourself Correctly: Face the camera directly, ensuring your face is centered.
- Maintain a Neutral Expression: Keep your mouth closed and avoid smiling.
- Take Multiple Shots: Take several photos to choose the best one.
- Review and Adjust: Crop the photo to meet the 2×2 inch size requirement.
- Use a Photo Tool: Online tools can help verify compliance.
By following these steps, you can create a passport photo at home that meets all necessary guidelines.
3.1. Selecting the Right Location and Lighting
Choosing the right location and lighting is critical for a successful passport photo. Natural light is ideal, so position yourself near a window during daylight hours. If natural light is insufficient, use artificial lighting to ensure your face is evenly lit without shadows. The goal is to eliminate harsh shadows and provide uniform illumination.
3.2. Setting Up Your Camera or Smartphone for the Perfect Shot
Most modern smartphones have cameras with sufficient resolution for passport photos. Set your camera to the highest resolution to capture as much detail as possible. Use a tripod or have someone else take the photo to avoid blurriness. Ensure the camera is positioned at eye level and is perpendicular to your face.
3.3. Achieving the Correct Pose and Facial Expression
Maintaining the correct pose and facial expression is vital. Face the camera directly, with your head centered in the frame. Keep your eyes open and visible, and maintain a neutral expression. Avoid smiling, frowning, or raising your eyebrows. The aim is to present your face in a natural and easily recognizable manner.
3.4. Taking Multiple Photos: Why It’s Important
Taking multiple photos increases your chances of capturing the perfect shot. Small variations in lighting, pose, and expression can make a big difference. By taking several photos, you can choose the one that best meets the official requirements.
3.5. Cropping and Adjusting Your Photo to Meet Size Requirements
Once you have taken your photos, you need to crop and adjust the image to meet the 2×2 inch size requirement. Use photo editing software or online tools to resize the image accurately. Ensure that your head size is within the specified range, typically between 1 inch and 1 3/8 inches from the bottom of your chin to the top of your head.
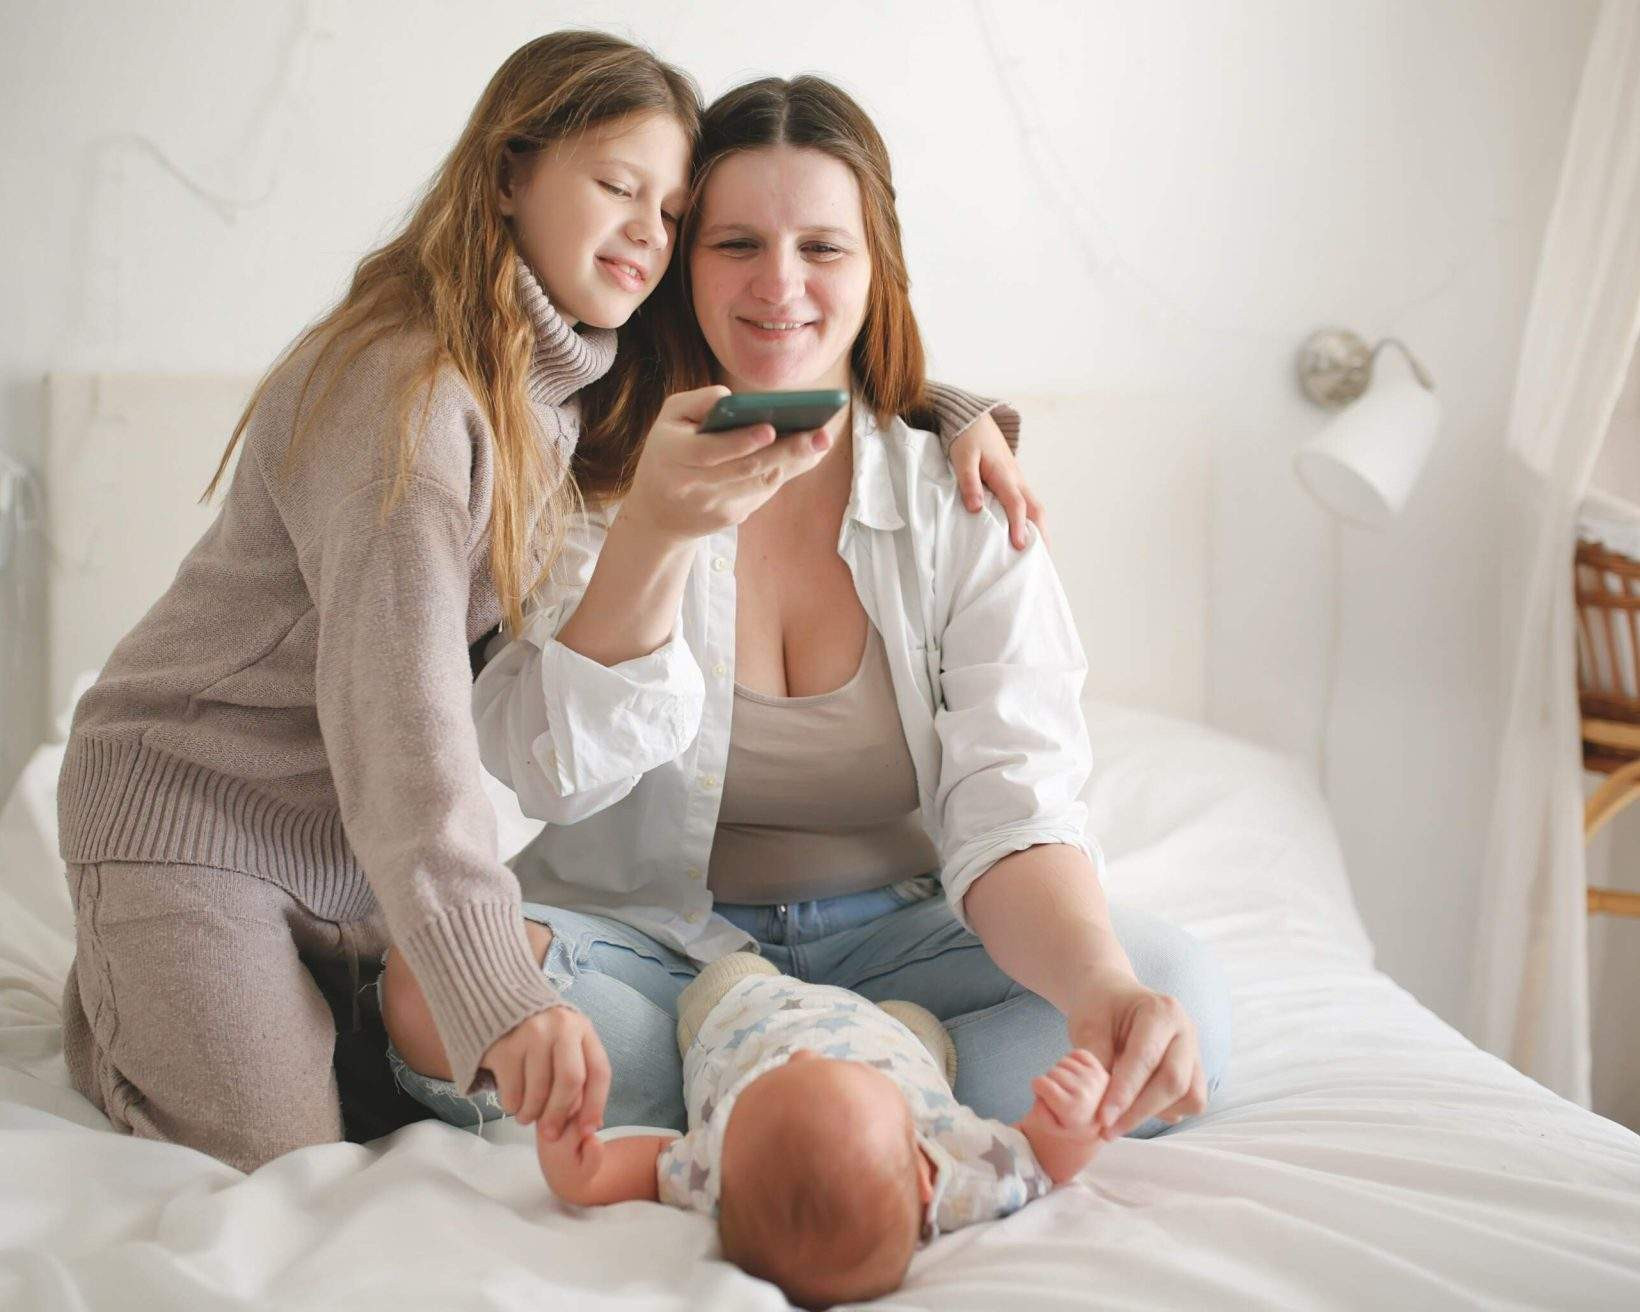
 Taking passport photo at home
4. Can I Use My Phone To Take A Passport Photo?
Yes, you can absolutely use your phone to take a passport photo. Smartphones today have high-resolution cameras that are more than capable of capturing acceptable passport photos. Just be sure to follow all the guidelines regarding background, lighting, and pose. Avoid selfies by using a tripod or asking someone else to take the photo for you.
Using your phone offers unparalleled convenience. With the right technique, you can produce high-quality photos that meet all passport requirements. Plus, there are numerous apps available that can assist with resizing and verifying compliance.
4.1. The Advantages of Using a Smartphone Camera
Smartphones offer several advantages for taking passport photos. They are readily available, easy to use, and often equipped with high-resolution cameras. Additionally, there are numerous photo editing apps available that can help you crop and adjust your photo to meet the required specifications.
4.2. Setting Up Your iPhone or Android Device for Optimal Results
To get the best results with your smartphone, start by cleaning the camera lens to ensure a clear image. Set the camera to its highest resolution and use natural lighting whenever possible. Use a tripod or prop your phone up to keep it steady, and ask someone else to take the photo to avoid selfies.
4.3. Resizing and Formatting Your Passport Photo on Your Phone
Resizing your passport photo on your phone is easy with the right apps. Apps like “Passport Photo Maker” or “ID PhotoPrint” allow you to crop and resize your photo to the 2×2 inch specification. These apps also often include tools to check for compliance with other requirements, such as background color and head size.
4.4. Recommended Apps for Passport Photo Creation on Mobile Devices
Several apps are designed specifically for creating passport photos on mobile devices. Some of the most popular include:
- Passport Photo Maker: Available on both iOS and Android, this app helps you resize, crop, and format your photo to meet passport requirements.
- ID PhotoPrint: A versatile app that offers templates for various ID photos, including passports.
- PhotoAid: An AI-powered app that checks your photo for compliance and offers editing tools to make necessary adjustments.
These apps make it easy to create compliant passport photos from the convenience of your smartphone.
 Taking passport photo with phone
5. What Should I Wear For My Passport Photo At Home?
Choosing the right attire for your passport photo is important. While there are no strict rules, it’s best to wear something you would typically wear daily, avoiding uniforms or clothing that could obscure your face. Opt for solid colors to contrast with the white background, ensuring your face stands out.
Your clothing should present a neat and professional appearance. Avoid anything too distracting or revealing, as the focus should be on your face. Simple, everyday attire is the best choice for a hassle-free application process.
5.1. Recommended Clothing Choices for Passport Photos
For optimal results, consider the following clothing choices:
- Solid Colors: Choose solid-colored tops to contrast with the white background.
- Everyday Attire: Wear clothing you would typically wear on a daily basis.
- Neat and Professional: Ensure your clothing is clean and well-maintained.
Avoid wearing anything too flashy or distracting, as the focus should remain on your face.
5.2. Jewelry and Accessories: What Is Acceptable?
Jewelry and accessories should be kept to a minimum. Small necklaces, earrings, and studs are generally acceptable as long as they do not obscure your face. Avoid wearing anything that could cause glare or shadows. Facial piercings are usually allowed if they do not cover any significant portion of your face.
5.3. Clothing to Avoid When Taking a Passport Photo
Certain types of clothing should be avoided to ensure compliance with passport photo requirements:
- Uniforms: Do not wear uniforms or camouflage clothing.
- Strapless Tops: Avoid strapless tops or tank tops.
- High-Necked Shirts: Clothes that cover the neck, such as turtlenecks or high-necked shirts, should be avoided.
- Headwear: Unless worn for religious purposes, hats and head coverings are not allowed.
5.4. Makeup and Hairstyling Tips for a Passport Photo
Makeup should be minimal and natural. Avoid heavy makeup that could distort your facial features. Style your hair neatly in a way that does not obscure your face. Ensure that your forehead and ears are visible, and avoid hairstyles that could cast shadows on your face.
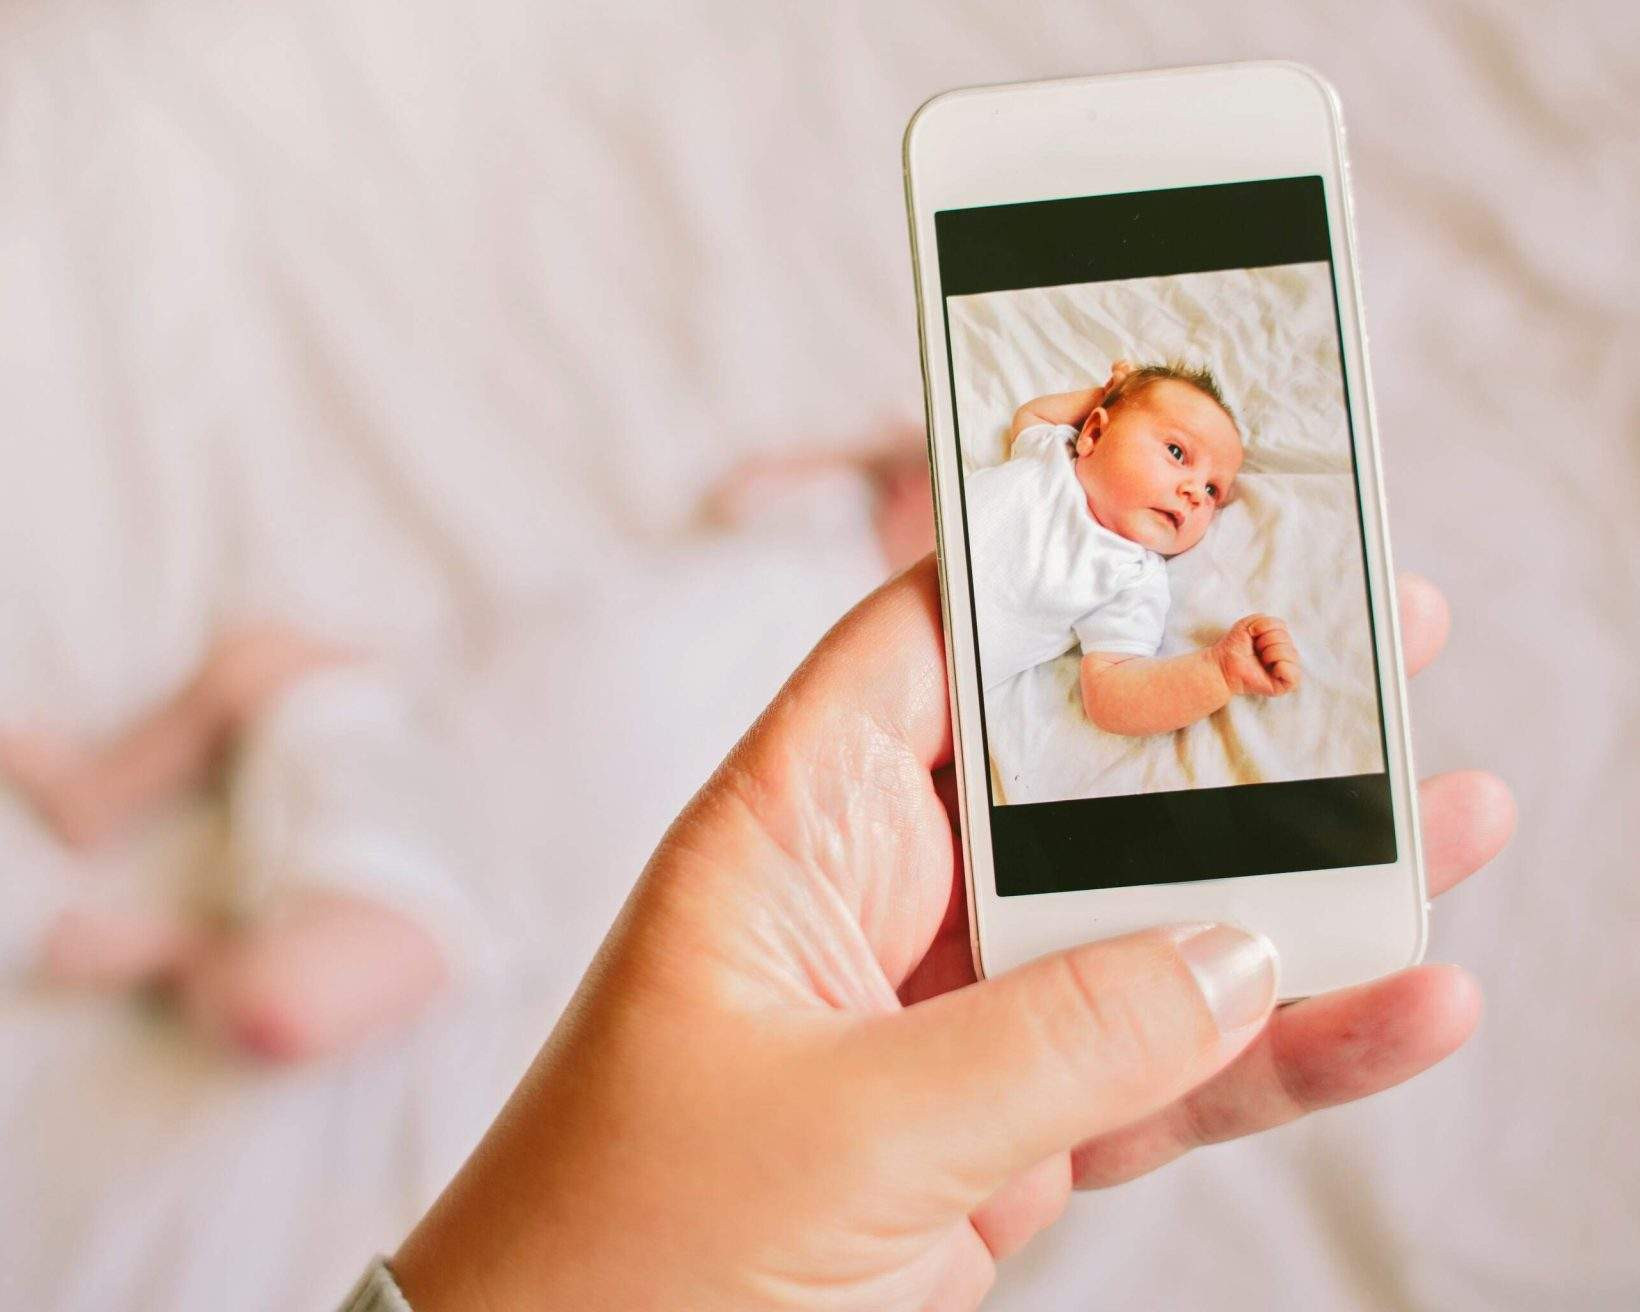
6. How To Take A Toddler or Baby’s Passport Photo At Home
Taking a passport photo of a toddler or baby at home requires patience and a few extra steps. Ensure no one else is in the frame and use a plain white or off-white sheet as a background. You can lay the baby on their back or use a car seat covered with a sheet for additional support.
Lighting is key, so try to use natural light and avoid shadows on the baby’s face. Take multiple shots to increase your chances of capturing a perfect, passport-worthy expression.
6.1. Ensuring the Baby Is Alone in the Frame
One of the most important considerations is ensuring that the baby is alone in the frame. Do not hold the baby or have someone else assist. This requires some creativity and patience, but it is essential for compliance with passport photo requirements.
6.2. Getting Your Child’s Attention for the Photo
Getting a toddler or baby to focus on the camera can be challenging. Use a beloved toy or make playful sounds to capture their attention. Be prepared to act quickly and take multiple shots to capture that perfect moment.
6.3. Using a Car Seat or Laying the Baby Down for the Photo
For infants, laying them on their back on a plain white sheet is often the easiest approach. For toddlers, using a car seat covered with a white sheet can provide additional support and help them stay in position. Ensure the background is free of shadows and distractions.
6.4. Lighting and Shadow Considerations for Baby Passport Photos
Lighting is crucial for a good baby passport photo. Natural light is best, so position the baby near a window. Be aware of shadows, especially when taking a photo from above. Adjust your angle and lighting to minimize shadows on the baby’s face.
 Taking baby passport photo
7. Common Mistakes To Avoid When Taking Passport Photo At Home
Avoiding common mistakes can save you time and prevent delays in your passport application. Be aware of the following pitfalls:
- Low Resolution: Using a low-resolution camera.
- Poor Lighting: Insufficient light exposure and shadows.
- Incorrect Size: Wrong dimensions.
- Smiling: Smiling or other exaggerated expressions.
- Filters: Using filters commonly used on social media.
- Closed Eyes: Eyes are closed.
- Non-White Background: Using a non-white background.
- Inappropriate Clothing: Wearing inappropriate clothing.
- Glasses or Headwear: Wearing glasses or headwear (unless for religious purposes).
- Wrong Posture: Incorrect posture or head position.
7.1. Using a Low-Resolution Camera
Using a low-resolution camera can result in a blurry or pixelated photo that is not acceptable for a passport. Ensure your camera is set to the highest resolution to capture as much detail as possible.
7.2. Insufficient Light Exposure and Shadows
Poor lighting can create shadows that obscure facial features, leading to rejection. Use natural light or artificial lighting to ensure your face is evenly lit without harsh shadows.
7.3. Incorrect Passport Photo Dimensions
Submitting a photo with the wrong dimensions is a common mistake. The photo must be 2×2 inches (51×51 mm). Use photo editing software or online tools to resize the image accurately.
7.4. Smiling or Making Expressions in the Photo
Passport photos require a neutral facial expression. Smiling, frowning, or raising your eyebrows can distort your facial features and lead to rejection.
7.5. Using Filters Commonly Used on Social Media
Filters can alter your facial features and make it difficult to accurately identify you. Avoid using any filters when taking your passport photo.
7.6. Wearing Glasses or Headwear
Glasses and headwear are generally not allowed in passport photos unless worn for religious purposes. Ensure that your face is fully visible and that no part of your face is obscured.
8. Passport Photo Tools and Resources
Utilize online passport photo tools to ensure your photo meets all the necessary requirements. These tools can help you crop, resize, and verify compliance with official guidelines.
- U.S. Department of State Photo Tool: Use the official photo tool to confirm compliance.
- Online Photo Editors: Use Fotor Online Passport Photo Maker, IDPhoto4You, and PhotoAid for easy resizing.
These resources can help you create a perfect passport photo from the comfort of your home.
8.1. Online Passport Photo Editors and Resizers
Online passport photo editors and resizers are invaluable tools for ensuring your photo meets all the required specifications. These tools allow you to crop, resize, and format your photo with ease.
8.2. Government Resources for Passport Photo Guidelines
The U.S. Department of State provides comprehensive resources for passport photo guidelines. Consult their website for detailed information on all requirements and specifications.
8.3. AI-Powered Passport Photo Checkers
AI-powered passport photo checkers use artificial intelligence to analyze your photo and verify compliance with all official guidelines. These tools can identify issues such as incorrect background color, improper lighting, and non-compliant facial expressions.
8.4. Printing Your Passport Photo at Home or at a Local Store
Once you have created your passport photo, you will need to print it. You can print your photo at home using a color printer and photo paper, or you can have it printed at a local store such as Walgreens or CVS. Ensure that the printed photo meets all size and quality requirements.
9. Why Choose dfphoto.net for Your Photography Needs?
At dfphoto.net, we are dedicated to providing you with the best resources and information for all your photography needs. Whether you’re a beginner or a professional, our website offers a wealth of knowledge to help you improve your skills and create stunning images.
Visit dfphoto.net to discover:
- Comprehensive Tutorials: Learn various photography techniques.
- Inspiration Galleries: View amazing photos and get inspired.
- Equipment Reviews: Stay updated on the latest cameras and accessories.
- Community Forum: Connect with other photographers and share your work.
Explore dfphoto.net today and take your photography to the next level. Address: 1600 St Michael’s Dr, Santa Fe, NM 87505, United States. Phone: +1 (505) 471-6001.
9.1. Explore Comprehensive Tutorials and Photography Techniques on dfphoto.net
dfphoto.net offers a wide range of tutorials covering various photography techniques. Whether you’re interested in learning about composition, lighting, or post-processing, our tutorials provide step-by-step instructions and expert tips to help you improve your skills.
9.2. Get Inspired by Stunning Photography in Our Galleries
Our galleries feature stunning photography from talented artists around the world. Browse our collections to find inspiration for your own work and discover new styles and perspectives.
9.3. Stay Updated with Equipment Reviews and Recommendations
Choosing the right equipment is essential for achieving your photography goals. dfphoto.net provides in-depth reviews and recommendations for cameras, lenses, and accessories to help you make informed decisions.
9.4. Connect With a Vibrant Photography Community
Join our community forum to connect with other photographers, share your work, and get feedback. Our forum is a great place to ask questions, exchange ideas, and build relationships with fellow photography enthusiasts.
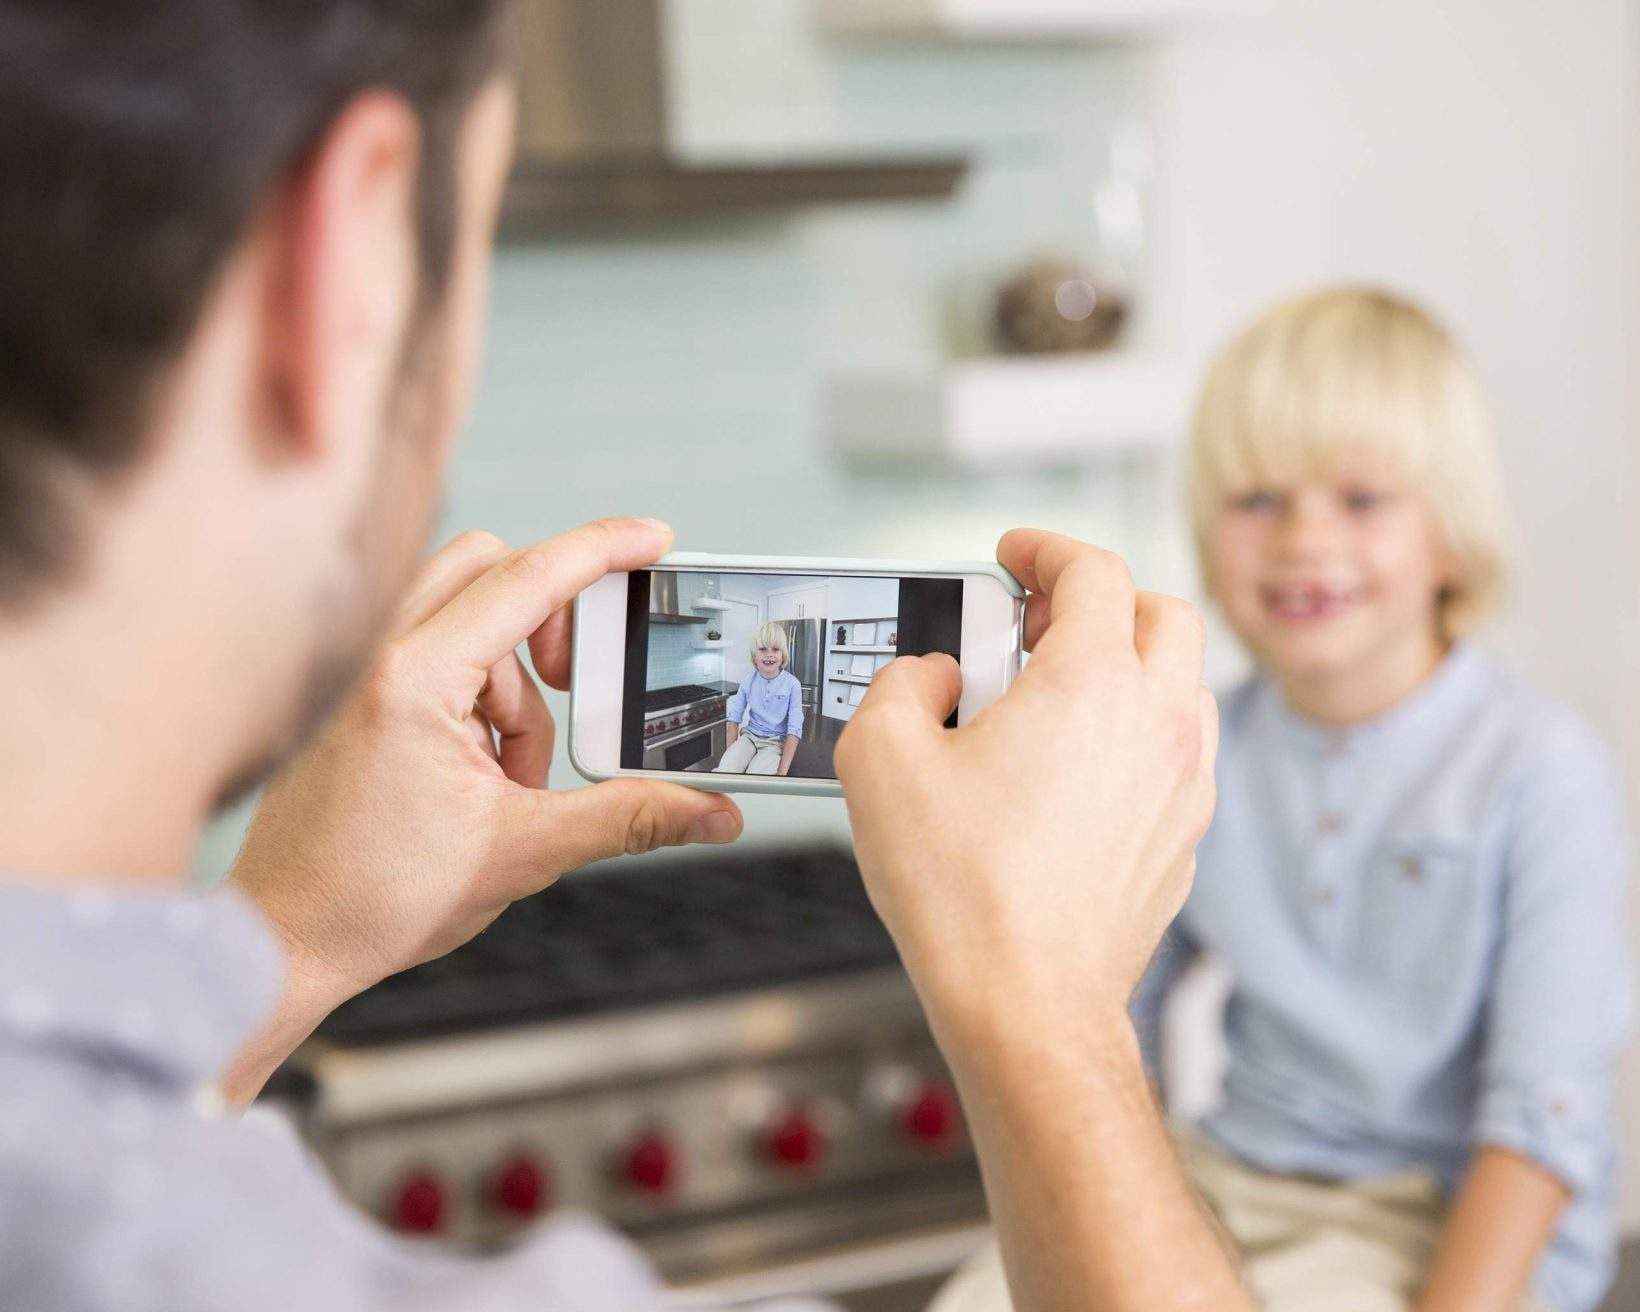 Father taking photo of child at home
10. FAQs About Taking Passport Photos At Home
10.1. Is It Cheaper to Take a Passport Photo at Home?
Yes, taking a passport photo at home is generally cheaper than using a professional service. You only need a camera or smartphone and access to a printer or local print shop.
10.2. How Can I Ensure My Home Passport Photo Is Accepted?
Ensure your photo meets all official requirements: correct size, plain white background, neutral expression, appropriate attire, and good lighting. Use online tools to verify compliance.
10.3. What If My Passport Photo Is Rejected?
If your passport photo is rejected, review the feedback and identify the issue. Retake the photo, addressing the problem areas, and resubmit.
10.4. Can I Wear Makeup in My Passport Photo?
Yes, you can wear makeup, but it should be minimal and natural. Avoid heavy makeup that could distort your facial features.
10.5. What Is the Best Lighting for a Passport Photo?
Natural light is best. Position yourself near a window during daylight hours. If natural light is insufficient, use artificial lighting to ensure your face is evenly lit without shadows.
10.6. Can I Smile a Little in My Passport Photo?
No, you must maintain a neutral expression with your mouth closed.
10.7. Do I Need to Print My Passport Photo on Photo Paper?
Yes, it is best to print your passport photo on photo paper to ensure the highest quality and durability.
10.8. Can I Edit My Passport Photo?
You can edit your passport photo to crop and resize it, but avoid making any other alterations that could distort your facial features.
10.9. How Often Do Passport Photo Requirements Change?
Passport photo requirements do not change frequently, but it is always a good idea to check the latest guidelines on the U.S. Department of State website before taking your photo.
10.10. Where Can I Find More Information on Passport Photo Requirements?
You can find more information on passport photo requirements on the U.S. Department of State website, or by visiting dfphoto.net for comprehensive tutorials and resources.
Conclusion
Taking a passport photo at home is convenient and cost-effective if you follow the official guidelines. Remember the requirements for size, background, pose, and attire. Utilize online tools and resources to verify compliance. For more photography tips, techniques, and inspiration, visit dfphoto.net. Unlock your creative potential and explore the world of photography with us. Happy shooting!