Switching from Android to iPhone can be exciting, but many users worry about bringing their precious memories along. Specifically, transferring photos is often a top priority. While Apple offers the “Move to iOS” app, it’s not always feasible or preferred. This guide provides you with comprehensive methods on How To Transfer Photos From Android To Iphone manually, ensuring you don’t lose a single snapshot.
Moving Your Photos and Videos Manually: Step-by-Step
While automated apps simplify the process, transferring photos and videos manually gives you more control and can be useful in various situations. Here’s how to do it using a computer as an intermediary:
-
Connect Your Android to Your Computer and Locate Your Media:
Begin by connecting your Android device to your computer using a USB cable. Once connected, your computer should recognize it as a media device. Navigate to your Android’s file system. Typically, photos and videos are stored in the “DCIM” folder, often within a subfolder named “Camera”. You might also find photos in other folders depending on your Android device and apps you use (e.g., screenshots, downloaded images).
-
Select and Copy Photos and Videos to Your Computer:
Browse through the folders and select all the photos and videos you wish to transfer to your iPhone. Create a new folder on your computer (e.g., named “Android Photos”) and drag and drop the selected files into this folder. This creates a backup of your photos on your computer and prepares them for transfer to your iPhone. Alternatively, on a Mac, you can use applications like Image Capture or the Photos app to import photos and videos from your connected Android device.
-
Disconnect Android and Connect Your iPhone to Your Computer:
Safely disconnect your Android device from your computer. Now, connect your iPhone to your computer using its USB cable.
-
Sync Photos to Your iPhone Using Your Computer:
The method for syncing photos to your iPhone depends on your computer’s operating system:
-
Mac with macOS Catalina or later: Open Finder. Your iPhone should appear in the sidebar under “Locations”. Click on your iPhone’s name. At the top of the Finder window, you’ll see different tabs; select the “Photos” tab. Check the box next to “Sync Photos to your device from” and choose the folder you created earlier (“Android Photos”). You can choose to sync “All photos and albums” or “Selected albums”. Click “Apply” in the bottom right corner to start the sync process.
-
Mac with macOS Mojave or earlier: Open iTunes. Click on the iPhone icon when it appears near the top left of the iTunes window. In the sidebar on the left, under “Settings”, click “Photos”. Check the box next to “Sync Photos” and choose the folder “Android Photos”. Select whether to sync all photos or selected albums and then click “Apply” or “Sync” to begin the transfer.
-
PC with Windows: Apple recommends using the Apple Devices app which can be downloaded from the Microsoft Store. Alternatively, you can use iTunes. Once installed, open either the Apple Devices app or iTunes. Similar to macOS, select your connected iPhone, navigate to the “Photos” sync options, choose the “Android Photos” folder, and initiate the sync.
After syncing, your transferred photos and videos will be accessible in the Photos app on your iPhone under Albums.
-
 An iPhone showing the settings for a connected Gmail account at Settings > Apps > Mail > Accounts > Gmail.
Exploring Other Transfer Methods
While using a computer is a reliable method, you might be looking for alternatives. Here are a few other approaches to transfer photos from Android to iPhone:
Cloud Storage Services
Cloud services like Google Photos, Dropbox, Google Drive, and OneDrive offer a convenient way to transfer photos across platforms.
-
Using Google Photos: If you already use Google Photos to back up your Android photos, simply install the Google Photos app on your iPhone and sign in with the same Google account. Your photos will be readily available on your iPhone. This method is excellent for ongoing syncing and access across devices.
-
Other Cloud Services (Dropbox, Google Drive, OneDrive): Upload your photos from your Android device to your chosen cloud service app. Then, install the same app on your iPhone and download the photos. These services usually offer free storage up to a certain limit, which might be sufficient for transferring photos.
Email or Messaging Apps
For transferring a smaller number of photos, you can email them to yourself or use messaging apps like WhatsApp or Telegram. Simply attach the photos to an email or message on your Android and then open the email or messaging app on your iPhone to save the photos. However, this method is not practical for large photo libraries due to file size limitations and the cumbersome nature of sending photos one by one or in small batches.
Considerations and Tips for Photo Transfer
-
Photo Resolution and Quality: Generally, transferring photos manually or via cloud services preserves the original resolution and quality. However, be mindful of any compression settings within cloud services if you are concerned about maintaining the absolute highest quality.
-
Transfer Time: The transfer time depends on the number and size of photos and videos you are moving and the speed of your connection (USB or internet for cloud services). Transferring directly via USB to a computer is usually faster for large amounts of data compared to cloud-based methods, especially if you have a slower internet connection.
-
Organizing Photos After Transfer: After transferring photos, take some time to organize them within the Photos app on your iPhone. You can create albums, add captions, and utilize iPhone’s built-in photo editing tools.
-
Move to iOS App Limitations: While the “Move to iOS” app is designed for seamless transfer, it requires setting up your iPhone as new. If you’ve already set up your iPhone, manual methods or cloud services are more suitable.
Conclusion
Transferring photos from Android to iPhone doesn’t have to be a daunting task. By understanding these manual methods and alternative approaches like cloud services, you can confidently move your cherished photo memories to your new iPhone. Whether you choose the computer-based syncing for large libraries or cloud services for ongoing accessibility, you have the tools to ensure a smooth transition and enjoy your photos on your new Apple device.
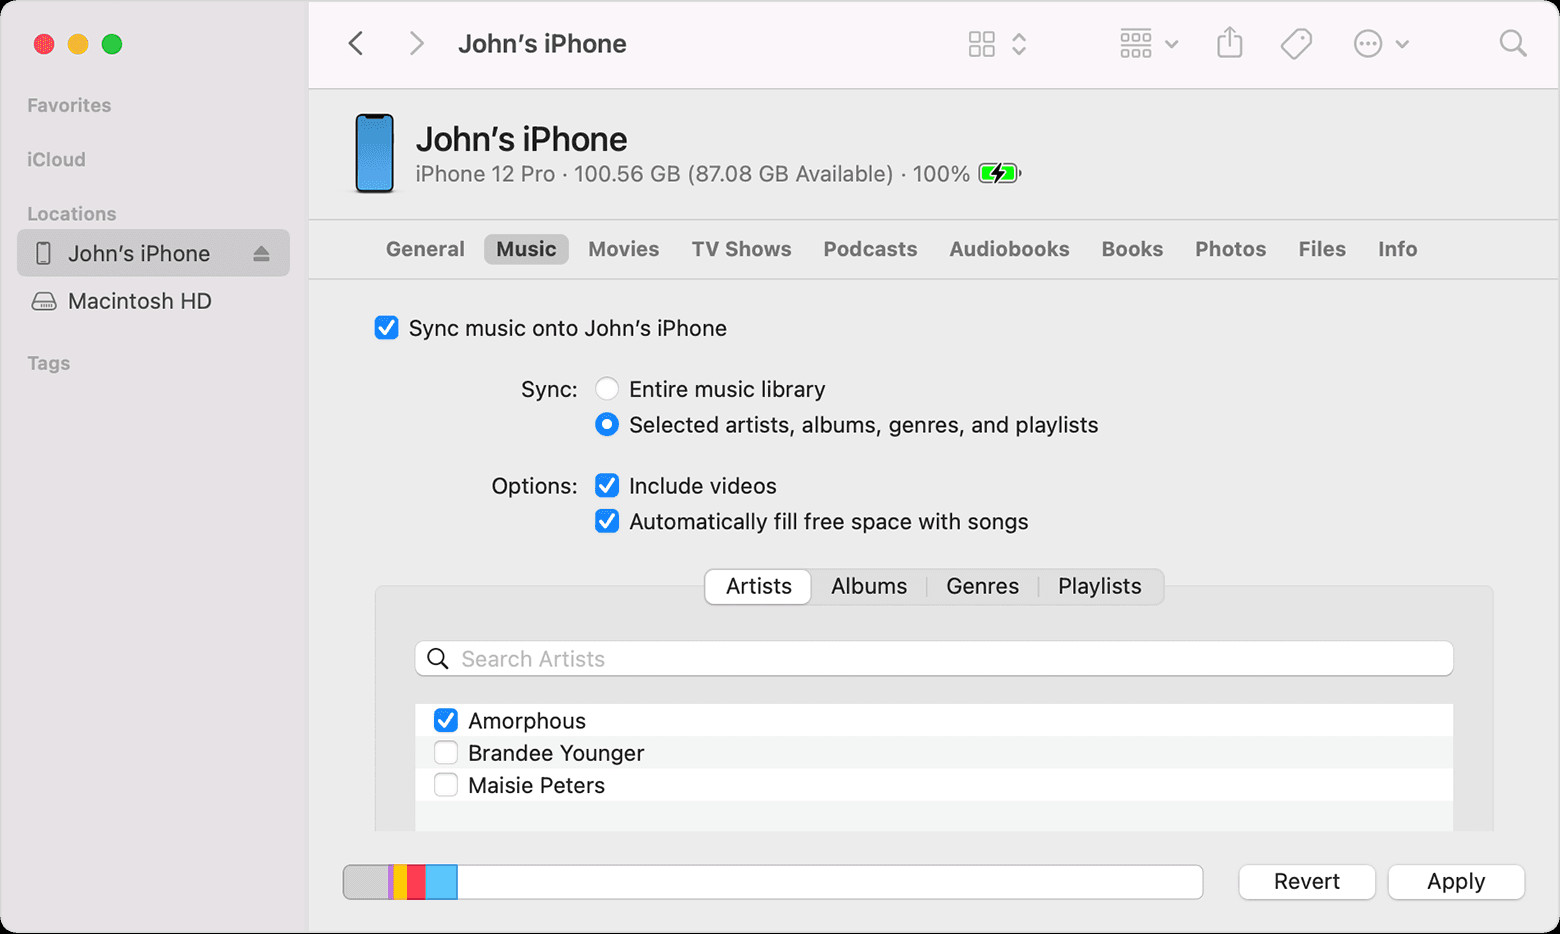 With the Finder on macOS Monterey, you can sync your music from your phone to your computer.
