Have you ever taken a photo that was almost perfect, only to find it’s just too dark? Don’t let underexposed images ruin your memories! If you thought those shadowy concert selfies or dimly lit dinner photos were destined for the digital trash, think again. The PicMonkey mobile app is packed with user-friendly tools to rescue your dark photos and bring them back to life.
Ready to learn how to brighten a photo directly on your phone or iPad? Let’s explore four straightforward methods to brighten even the most stubbornly dark pictures and transform them into shareable masterpieces. Say goodbye to discarding precious moments – let’s dive in!
Download PicMonkey App from App Store
Download PicMonkey App from Google Play Store
Quick Brightening Steps:
1. Launch your photo in the PicMonkey app.
2. Tap Adjust in the bottom menu, then select Levels.
3. Adjust the slider to achieve your desired brightness. It’s that simple!
Four Effective Ways to Brighten Your Images
For those who want to delve a bit deeper into photo enhancement, PicMonkey offers a range of options beyond just a quick fix. If you’re new to photo editing, it’s understandable to worry about making your photos look artificial or “washed out.” Fear not! We’ll provide a complete walkthrough of Levels, Brightness, Saturation, and the Lush effect. These tools will help you brighten your photos effectively while preserving beautiful color and detail.
1. Utilizing Levels to Brighten a Picture
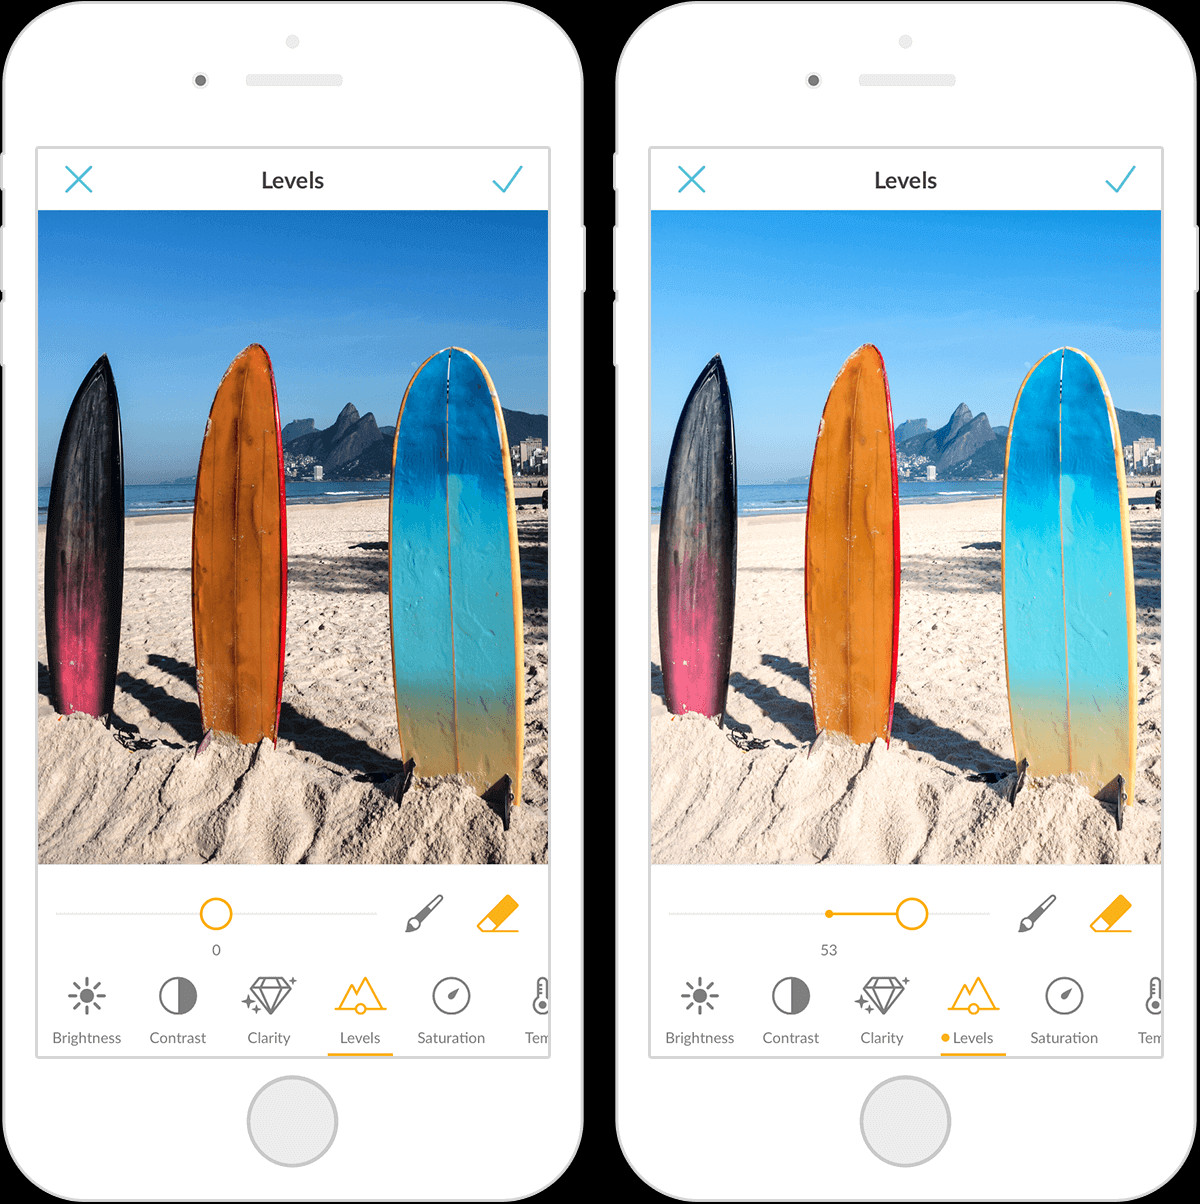 Screenshot of PicMonkey mobile app Levels adjustment tool interface.
Elevate your photo editing game with Levels! This adjustment should be your first port of call, and often, it’s all you’ll need to perfectly brighten your photo. The mobile version of this powerful feature focuses primarily on adjusting midtones. When you manipulate the Levels slider, you’re specifically targeting the middle range of grays in your image, making them lighter.
The brilliance of Levels lies in its balanced approach. As midtones brighten, the rest of the colors in your photo adjust harmoniously. This intelligent adjustment ensures your image brightens without losing color vibrancy or becoming washed out – a common pitfall with simpler brightening tools.
To access Levels in the PicMonkey mobile app, navigate to Adjust > Levels. Experiment with the slider until you achieve the ideal brightness for your photo.
Once you’ve brightened your image with Levels, consider enhancing it further by using PicMonkey’s diverse templates. Whether you’re creating an Instagram post, a Facebook update, or branding materials, a well-lit photo is sure to capture attention. Share your newly brightened creations directly to social media and watch the engagement soar!
2. Brighten a Photo Instantly with Brightness
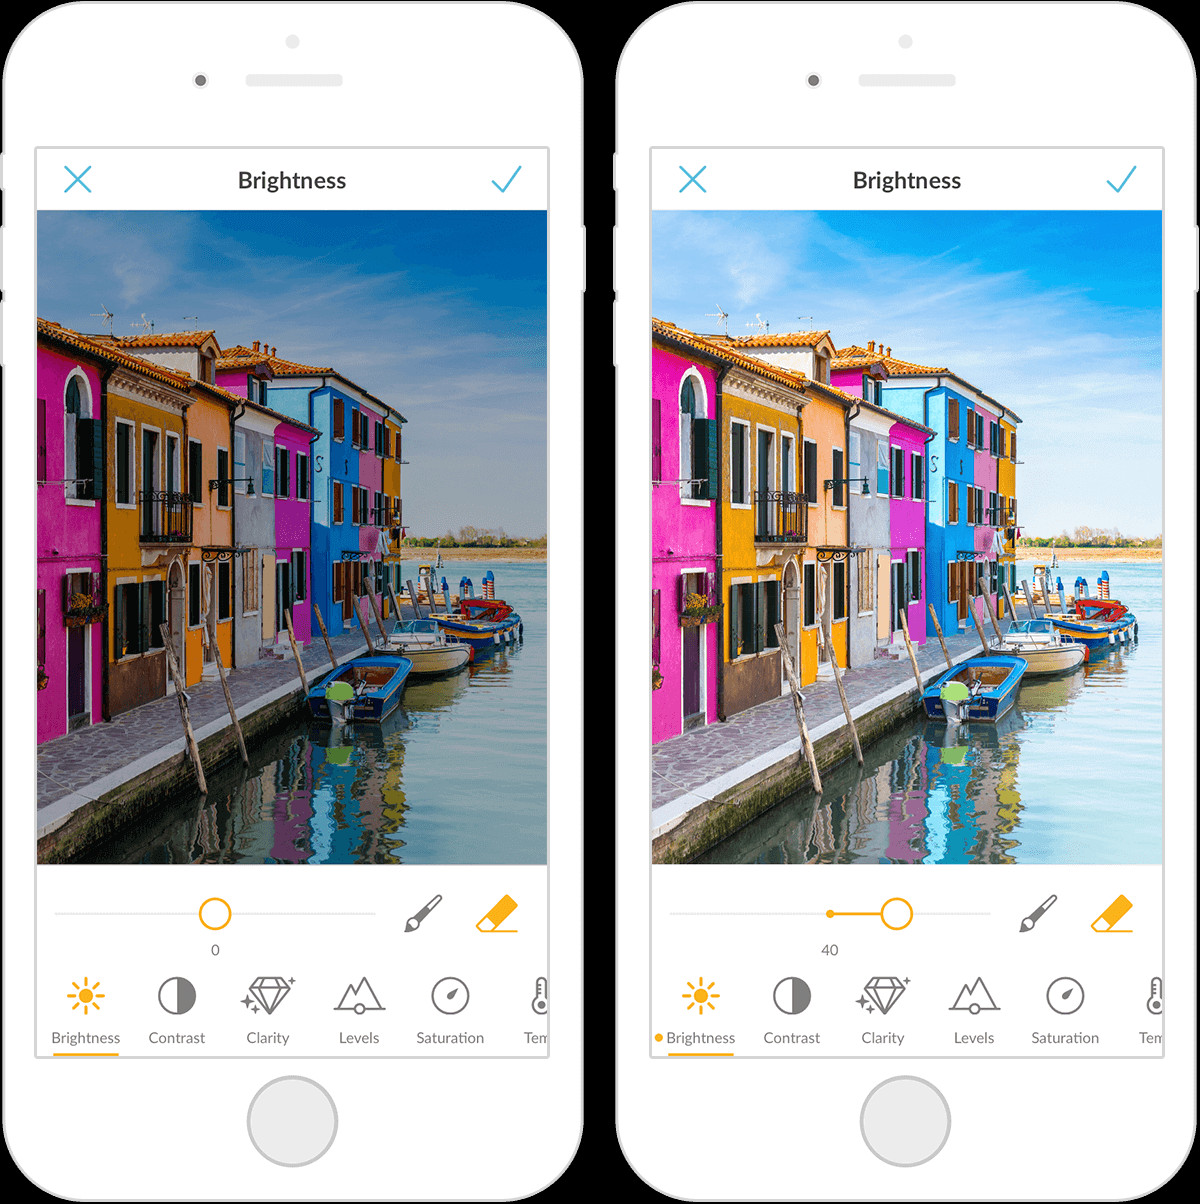 Image showing the Brightness adjustment tool in the PicMonkey mobile app.
The Brightness tool is the quintessential solution when you need to know how to make a dark picture lighter, quickly and effectively. Its name says it all – it’s straightforward and delivers a one-tap brightening solution, particularly useful when you didn’t quite capture the perfect lighting conditions initially.
PicMonkey’s Brightness adjustment works by uniformly adding light across your entire image. Simply tap the Brightness button, and witness the immediate transformation! Unlike Levels, Brightness doesn’t selectively adjust midtones; instead, it brightens all tones evenly. This makes it a fantastic option for quickly lightening an overall dark photo.
After perfecting your photo’s brightness, why not use it to personalize your devices? Turn your enhanced image into a custom phone wallpaper or use it as a striking Pinterest pin, a compelling Facebook cover, or an attention-grabbing YouTube thumbnail. A bright, clear image can significantly enhance your online presence.
Pro Tip: Don’t wait until you have a problem to learn how to brighten photos. Being proactive and familiar with these tools allows you to make swift adjustments whenever inspiration strikes. Whether you’re eager to post on social media, create a vision board, or craft a personalized scrapbook as a gift, knowing how to brighten a picture quickly is an invaluable skill that will benefit you time and time again.
3. Enhance Vibrancy and Light with Saturation
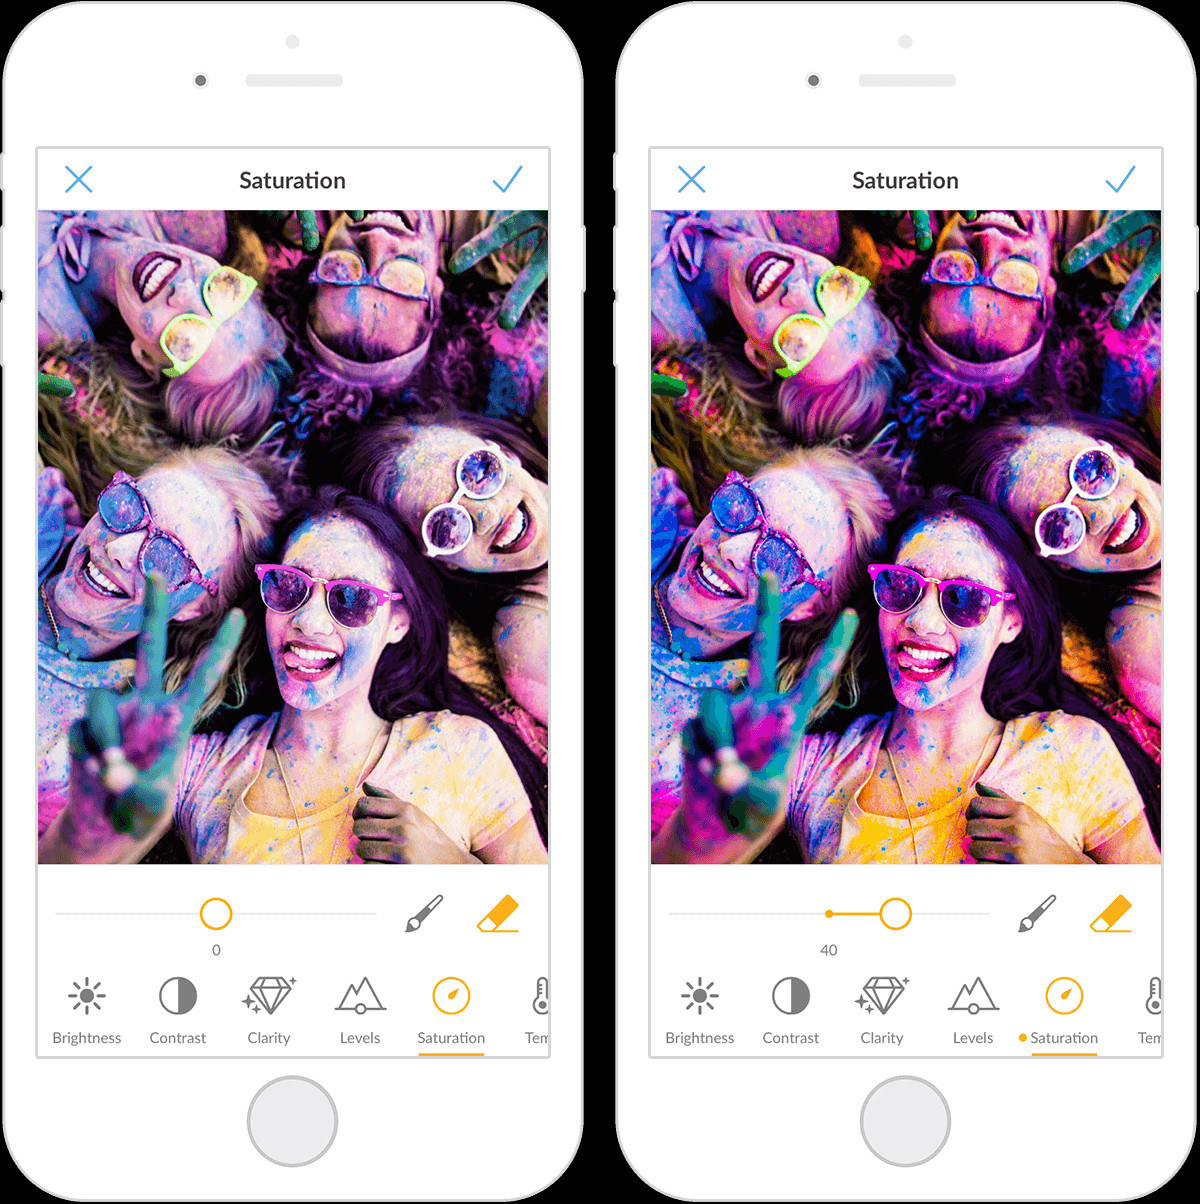 Example of the Saturation adjustment slider in PicMonkey app interface.
Remember that incredible concert you photographed last night? Feeling like the pictures don’t quite capture the energy of the event due to dim lighting? Saturation is your answer.
Saturation works uniquely by adjusting the intensity of colors in your photo, which can indirectly contribute to perceived brightness and overall image appeal. It’s particularly useful if your photo appears slightly washed out after brightening it, or if you’re torn between different adjustments – you can use saturation to fine-tune the color vibrancy. Consider combining your brightened and saturated images into a photo collage or create personalized photo cards to share with friends who attended the concert with you.
To use Saturation, simply tap Saturation in the Adjust menu. Moving the slider to the left mutes the colors, creating a more subdued look, while moving it to the right intensifies the colors, making them more vivid and vibrant. You can also subtly adjust saturation to warm up or cool down the overall tone of your image. Once you’ve achieved the perfect color balance, consider adding a watermark to your pic to protect and brand your creative work.
4. Achieve Richness and Brightness with Lush
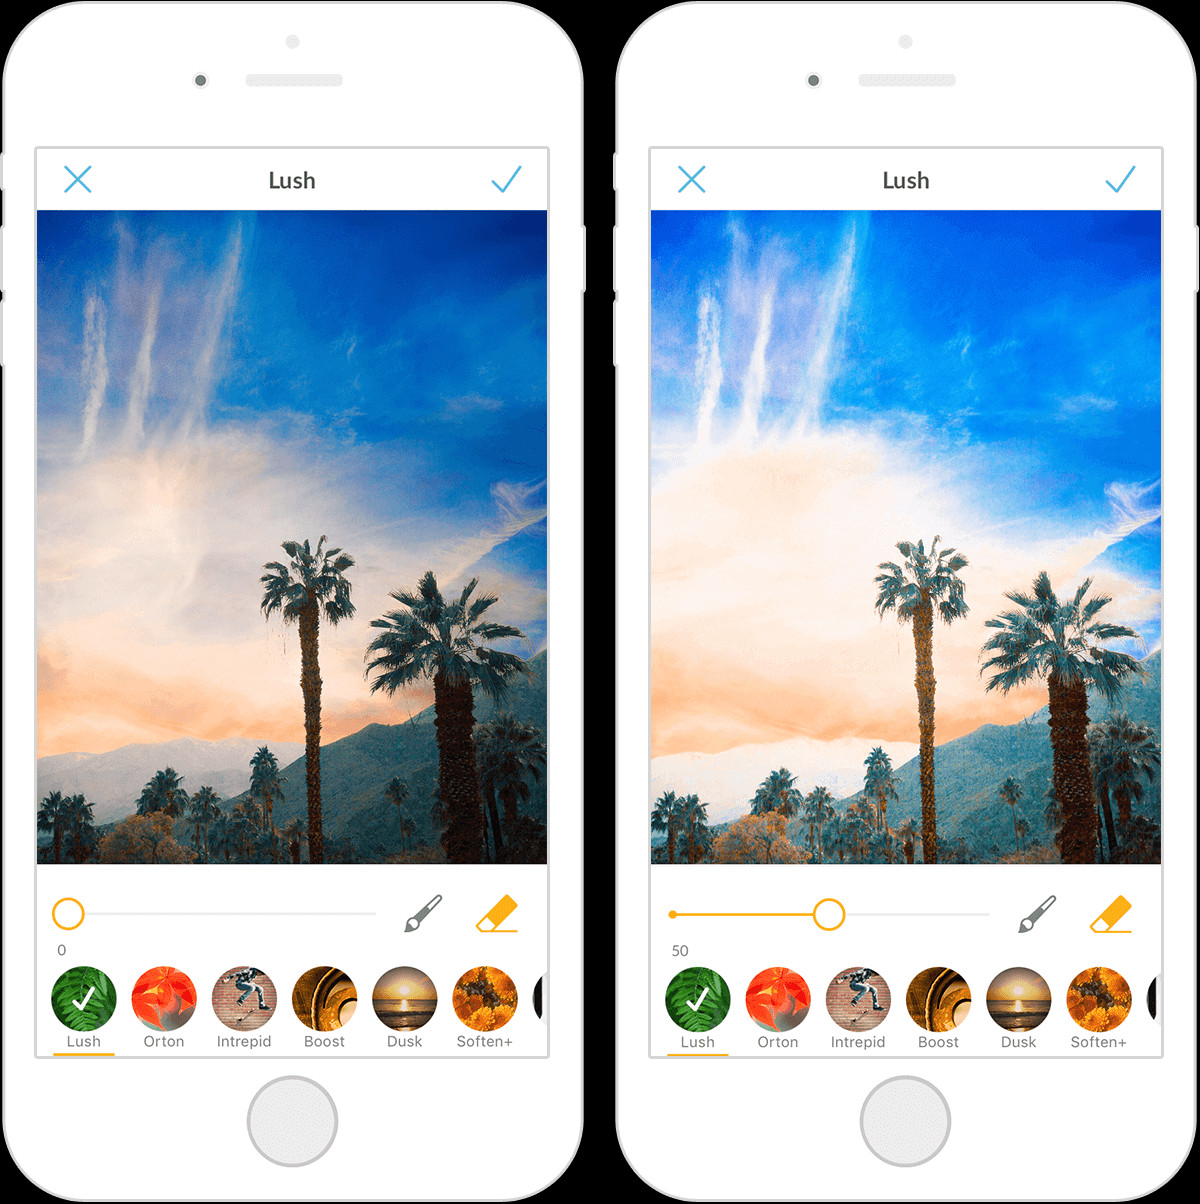 Screenshot of the Lush effect option within PicMonkey mobile app effects menu.
Embrace the Lush effect! There are countless reasons to love this tool. Lush not only enhances the richest colors in your image, making them pop with intensity, but it also unexpectedly excels at fixing dark photos, particularly those with uneven lighting.
Lush is particularly effective at detecting and enhancing contrast. This makes it ideal for photos that are inconsistently lit – perhaps dark in one area and bright in another. The moment you apply Effects > Lush, you’ll likely experience an “aha!” moment. It imparts a unique richness and depth to photos, providing that extra oomph that can transform a dull image into a captivating one.
Pro Tip: Even professional photographers sometimes struggle with lighting and need to brighten photos. Learning how to make a dark picture lighter is a universally beneficial skill, regardless of your photography expertise. As the creator, you are in control. Feel free to experiment with these tools; there’s no single “right” way to brighten a photo, and the best approach is often the one that achieves your artistic vision.
Additional Techniques to Lighten Your Photos
While the above methods are primary tools for brightening, don’t hesitate to combine them with classic adjustments like contrast, shadows, and highlights for even finer control. If you have the time, exploring these secondary adjustments can significantly refine your photo editing skills. The more you learn about PicMonkey’s comprehensive photo editing capabilities, the more proficient you’ll become at achieving your desired look.
Contrast
Adjusting contrast alters the range of tones within a photo. When you navigate to Adjust > Contrast, observe how different areas of your image become more or less defined as you move the slider. Increasing contrast can make bright areas brighter and dark areas darker, which can sometimes enhance the perceived brightness or make the image pop.
Shadows
You might wonder, “How can adjusting shadows help when I’m trying to brighten a photo taken at night?” Shadows are most effective after you’ve already lightened the overall image using methods like Levels or Brightness. Adjusting shadows adds nuance, depth, and balance.
It’s easy to mistakenly categorize dark photos as “bad” and light photos as “good,” but in reality, both light and shadow are essential elements in photography. Subtly adding shadows in certain areas can complement the light, creating a more visually interesting and balanced image.
Highlights
The term “highlights” itself suggests light, making this adjustment a natural ally in brightening photos. The Highlights effect specifically targets and enhances the lightest parts of your photo. Often used in conjunction with Shadows, simply select Highlights and experiment with the slider to find the perfect intensity to balance the light areas with the shadows you’ve adjusted.
Lighten a Photo Like a Pro: Local Adjustments
Every dark photo presents unique challenges, so continuous experimentation is key to finding the ideal editing combination. If specific areas of your image require extra brightening or color correction, PicMonkey’s “paint-on” feature allows you to apply adjustments precisely where you need them.
Paint adjustments onto your photo in these four simple steps:
- Choose your preferred brightening method (Levels, Brightness, etc.) and zoom into the specific area you want to adjust using your fingers. Alternatively, keep the photo at full view to apply the effect to the entire image.
- Tap the Paintbrush icon, then tap the plus (+) sign to increase the brush size or the minus (-) sign to decrease it, tailoring the brush to the area you want to paint.
- Use your finger to carefully apply the chosen effect or adjustment to the designated spot.
- To correct or undo a paint-on adjustment, tap the Eraser icon to remove the effect from specific areas, or tap the X in the upper-left corner to discard all unapplied paint edits.
Dealing with a particularly stubborn photo? Try applying an adjustment or effect multiple times. Tap the checkmark to apply your changes, then re-enter the same adjustment tool and apply it again for a more pronounced effect.
Once your photo looks just right, press and hold on the image to see a before-and-after transformation and appreciate your newfound mobile photo editing prowess.
Unlock on-the-go photo editing magic – download the PicMonkey mobile app today:
Download PicMonkey App from Apple App Store
Download PicMonkey App from Google Play Store
Explore More Creative Tools:
Stock Photos
Templates
Graphics
Photo Editor
Fonts
Colors
Curved text
Logos