Transferring photos from your iPad to your computer can be done quickly and easily using several methods. Whether you prefer a wired connection or a wireless approach, there’s an option that suits your needs. This article outlines the most common and effective ways to get your photos from your iPad to your PC or Mac.
Using a USB Cable and the Photos App
A direct connection between your iPad and your computer offers a reliable way to transfer photos. Here’s how:
- Connect Your iPad: Use a USB cable to connect your iPad to your computer.
- Unlock Your iPad: If prompted, unlock your iPad using your passcode or Face ID.
- Trust This Computer: You might see a message on your iPad asking if you trust this computer. Tap “Trust” to proceed.
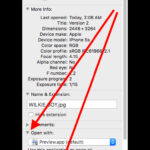
- Open the Photos App (Mac): On a Mac, the Photos app should open automatically. If not, launch it manually. You’ll see an import screen displaying the photos and videos on your iPad. You can select specific photos or import all new photos.
 Mac screen showing the photos available for import
 - Import Photos and Videos (Windows): On a Windows PC, you’ll need to install the Apple Devices app from the Microsoft Store. After connecting your iPad, open the app to access and import your photos. Microsoft provides detailed instructions on their website for importing photos using this method.
Transferring Photos Wirelessly with iCloud Photos
iCloud Photos offers a seamless way to access your photos across all your Apple devices and even on a PC.
- Enable iCloud Photos: On your iPad, go to Settings > [your name] > iCloud > Photos and turn on iCloud Photos.
- Choose Storage Options: Select “Optimize iPad Storage” to save space on your device while keeping full-resolution photos in iCloud. Alternatively, choose “Download and Keep Originals” to store full-resolution photos on both your iPad and in iCloud.
- Access Photos on Your Computer: On a Mac, open the Photos app. Your iPad photos will automatically sync. On a Windows PC, download iCloud for Windows from Apple’s website. This allows you to access your iCloud Photos through File Explorer.
Other Transfer Methods
Besides using a USB cable and iCloud Photos, you can explore other ways to move your pictures:
- AirDrop (Mac): For quick transfers to a Mac, AirDrop provides a convenient wireless option.
- Email or Messaging: Sending individual photos via email or messaging apps works well for sharing a small number of images.
- Cloud Storage Services: Third-party cloud storage services like Google Drive or Dropbox can be used to upload photos from your iPad and then download them on your computer.
Choosing the Best Method for You
The best method for transferring photos from your iPad to your computer depends on your specific needs and setup:
- For Speed and Reliability: A direct USB connection is generally the fastest and most reliable method, especially when transferring a large number of photos.
- For Seamless Access Across Devices: iCloud Photos is ideal if you want your photos readily available on all your devices.
- For Quick Sharing of a Few Photos: AirDrop, email, or messaging apps are suitable for transferring small batches of photos quickly.
By understanding these options, you can efficiently transfer your precious memories from your iPad to your computer for safekeeping, editing, or sharing.