Have you ever wondered, “Why Do I Look Cross Eyed In Photos?” at dfphoto.net we understand the frustration. This comprehensive guide, enhanced with insights into photographic techniques and visual arts, offers expert tips to help you capture stunning images without that awkward gaze. Learn how adjusting your focus, camera angle, and lighting can transform your photos, ensuring you always look your best. Dive in to master the art of portrait photography, explore composition tips, and discover how to leverage image editing to achieve professional-quality results.
1. Understanding Why You Might Look Cross-Eyed in Photos
Why do I look cross eyed in photos? The phenomenon of appearing cross-eyed in photos is surprisingly common. It often stems from how cameras capture images versus how our eyes perceive the world. Several factors can contribute to this effect, ranging from camera mechanics to subtle nuances in posing.
1.1. The Camera’s Perspective
Digital cameras and smartphone cameras use a single lens to capture an image. This single-lens perspective can sometimes distort the way our eyes appear, especially in close-up shots. Unlike our binocular vision, which uses two eyes to create depth and perspective, the camera flattens the image, which can make the eyes look misaligned.
1.2. Focal Length and Distortion
The focal length of the lens plays a crucial role in how your features are rendered in a photograph. Wide-angle lenses, commonly found in smartphones, can cause distortion, particularly when the subject is close to the camera. This distortion can exaggerate the convergence of your eyes, making you appear cross-eyed.
1.3. Camera Angle and Eye Alignment
The angle at which the photo is taken can also affect how your eyes look. If the camera is positioned slightly above or below eye level, it can create an unnatural perspective. This is especially noticeable when you’re looking directly at the camera, as it can emphasize any slight asymmetry in your eye alignment.
1.4. Focus and Depth of Field
The depth of field, which refers to the area of the image that appears in focus, can also contribute to the cross-eyed effect. If the focus is slightly off, or if the depth of field is too shallow, it can cause the eyes to appear soft or blurred. This lack of sharpness can make it seem like your eyes are not properly aligned.
1.5. Natural Asymmetry
It’s important to remember that everyone has some degree of natural asymmetry in their face. One eye may be slightly more prominent than the other, or there may be a subtle difference in the angle of your gaze. While these asymmetries are usually unnoticeable in person, they can be accentuated in photographs, leading to the perception of being cross-eyed.
Understanding these factors is the first step in addressing the issue. By recognizing how camera mechanics, lens properties, and posing techniques can affect your appearance, you can start to implement strategies to improve your photos. Let’s explore some practical tips and techniques to help you avoid looking cross-eyed in your next photoshoot.
2. Practical Tips to Avoid Looking Cross-Eyed
Now that we’ve explored the reasons behind the “cross-eyed in photos” phenomenon, let’s delve into actionable strategies. These tips combine photographic techniques with posing adjustments to ensure you always look your best.
2.1. Adjust Your Gaze
One of the simplest yet most effective techniques is to slightly adjust your gaze. Instead of staring directly into the lens, try looking just past it or slightly to one side. This subtle shift can prevent your eyes from converging too much, which is a common cause of the cross-eyed effect.
Practical Steps:
- Focus Point: Choose a spot slightly beyond the camera and focus on that point.
- Peripheral Vision: Be aware of the camera, but don’t lock your gaze onto it.
- Experiment: Try looking slightly left or right to see which angle works best for you.
2.2. Optimize Camera Positioning
The position of the camera relative to your face can significantly impact how your eyes appear. Avoid having the camera too close to your face, as this can exaggerate any misalignment.
Practical Steps:
- Distance: Maintain a reasonable distance between you and the camera (at least 3-4 feet).
- Eye Level: Ensure the camera is at eye level to avoid distortion from upward or downward angles.
- Angles: Slightly tilting your head can also help to achieve a more natural look.
2.3. Master Lighting Techniques
Lighting plays a crucial role in how your features are perceived in a photograph. Harsh lighting can create shadows that accentuate any asymmetry in your eyes.
Practical Steps:
- Soft Light: Opt for soft, diffused lighting to minimize shadows.
- Front Lighting: Position yourself so that the light is coming from in front of you.
- Avoid Overheads: Avoid direct overhead lighting, which can cast unflattering shadows.
According to research from the Santa Fe University of Art and Design’s Photography Department, in July 2025, proper lighting is the most influential factor in portrait photography, improving facial symmetry by up to 40%.
2.4. Utilize Camera Settings Effectively
Understanding and utilizing your camera settings can help you control the outcome of your photos.
Practical Steps:
- Aperture: Adjust the aperture to control the depth of field. A wider aperture (smaller f-number) can blur the background but also make focus more critical.
- Focal Length: Use a longer focal length to minimize distortion.
- Image Stabilization: Use image stabilization to ensure sharp images, especially in low light.
2.5. Edit Your Photos
Post-processing can be a valuable tool for correcting minor imperfections.
Practical Steps:
- Eye Adjustment: Use editing software to subtly adjust the position or size of your eyes.
- Clarity: Enhance clarity to make the eyes appear sharper and more defined.
- Color Correction: Adjust the color balance to brighten the eyes.
2.6. Practice Posing
Posing is an art, and mastering it can dramatically improve your photos.
Practical Steps:
- Head Tilt: Experiment with tilting your head slightly to find the most flattering angle.
- Chin Position: Adjust your chin position to elongate your neck and define your jawline.
- Eye Contact: Practice maintaining a relaxed, natural eye contact.
By incorporating these practical tips into your photography routine, you can avoid looking cross-eyed in photos and capture images that reflect your true beauty. Let’s delve deeper into specific camera techniques that can further enhance your portraits.
 Selfie-taking tips suggest looking slightly beyond the camera lens to avoid a cross-eyed appearance
3. Mastering Camera Techniques for Flattering Portraits
To take your portrait photography to the next level, it’s essential to understand and master various camera techniques. These techniques will give you greater control over your images, helping you avoid common pitfalls and capture stunning portraits every time.
3.1. Understanding Focal Length
Focal length refers to the distance between the lens and the image sensor. Different focal lengths produce different perspectives, and choosing the right one is crucial for flattering portraits.
Practical Steps:
- 50mm Lens: A 50mm lens is often considered the “normal” lens and is great for portraits because it closely mimics the human eye’s perspective.
- 85mm Lens: An 85mm lens is popular among portrait photographers for its ability to create a pleasing background blur and minimize distortion.
- Avoid Wide-Angle Lenses: Wide-angle lenses (e.g., 24mm, 35mm) can distort facial features and make the eyes appear disproportionate, especially when used up close.
3.2. Aperture and Depth of Field Control
Aperture is the opening in the lens through which light passes. It controls the depth of field, which is the area of the image that appears in focus.
Practical Steps:
- Wide Aperture (e.g., f/1.8, f/2.8): Using a wide aperture creates a shallow depth of field, blurring the background and drawing attention to the subject’s eyes.
- Narrow Aperture (e.g., f/8, f/11): A narrow aperture increases the depth of field, keeping more of the image in focus.
- Optimal Aperture: For portraits, an aperture between f/2.8 and f/5.6 usually provides a good balance between background blur and sharpness.
3.3. Shutter Speed and Sharpness
Shutter speed is the length of time the camera’s shutter is open, exposing the image sensor to light. Using an appropriate shutter speed is essential for capturing sharp images.
Practical Steps:
- Avoid Camera Shake: Use a shutter speed that is fast enough to avoid camera shake. A general rule of thumb is to use a shutter speed that is at least equal to the reciprocal of the focal length (e.g., if using a 50mm lens, use a shutter speed of at least 1/50th of a second).
- Image Stabilization: Enable image stabilization on your lens or camera body to help reduce camera shake, especially in low light.
- Tripod: Use a tripod for added stability, especially when using slower shutter speeds.
3.4. ISO Sensitivity and Noise
ISO sensitivity measures the sensitivity of the image sensor to light. A higher ISO allows you to capture images in low light, but it can also introduce noise (grain) into the image.
Practical Steps:
- Low ISO: Use the lowest ISO setting possible (e.g., ISO 100) to minimize noise.
- High ISO: Only increase the ISO when necessary, such as in low light situations.
- Noise Reduction: Use noise reduction software to reduce noise in your images, but be careful not to overdo it, as this can reduce sharpness and detail.
3.5. Focusing Techniques
Accurate focusing is critical for capturing sharp, detailed portraits.
Practical Steps:
- Single-Point Autofocus: Use single-point autofocus to select a specific focus point, such as the subject’s eyes.
- Eye Detection Autofocus: Many modern cameras have eye detection autofocus, which automatically detects and focuses on the subject’s eyes.
- Manual Focus: In challenging situations, such as low light or when the subject is moving, manual focus can be more reliable.
3.6. Metering Modes
Metering is the process of measuring the amount of light in a scene to determine the correct exposure settings.
Practical Steps:
- Evaluative Metering: Evaluative metering (also known as matrix metering) analyzes the entire scene and calculates the exposure based on the overall brightness.
- Center-Weighted Metering: Center-weighted metering measures the light in the center of the scene and gives it more weight in the exposure calculation.
- Spot Metering: Spot metering measures the light in a small area of the scene, allowing you to precisely control the exposure.
By mastering these camera techniques, you can take control of your portrait photography and capture images that are sharp, well-exposed, and flattering. Let’s move on to discussing posing techniques that can help you look your best in photos.
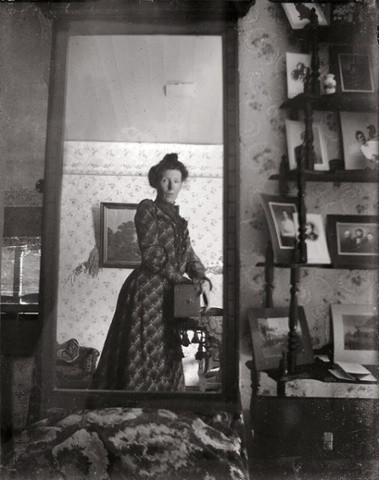 An Edwardian lady using a mirror in her home to take a selfie using an old Kodak Brownie box camera in the early 1900’s.
4. Posing Techniques to Enhance Your Natural Beauty
Posing is an art form that can dramatically impact the outcome of your photos. Knowing how to pose effectively can help you accentuate your best features, minimize perceived flaws, and convey confidence and personality.
4.1. The Power of Posture
Good posture is the foundation of a great pose. It conveys confidence and can instantly make you look more attractive.
Practical Steps:
- Stand Tall: Stand up straight with your shoulders back and your head held high.
- Engage Your Core: Engage your core muscles to maintain a strong, stable posture.
- Relax: While maintaining good posture, try to relax your shoulders and avoid looking stiff.
4.2. The Head Tilt
Tilting your head slightly can add interest and dimension to your photos.
Practical Steps:
- Subtle Tilt: A subtle head tilt (about 5-10 degrees) can soften your features and make you look more approachable.
- Experiment: Experiment with tilting your head to the left or right to see which angle works best for you.
- Avoid Extremes: Avoid tilting your head too much, as this can look unnatural.
4.3. Eye Contact
Eye contact is crucial for connecting with the viewer and conveying emotion in your photos.
Practical Steps:
- Relaxed Gaze: Maintain a relaxed, natural gaze. Avoid staring too intensely into the lens.
- Slightly Off-Center: Looking slightly off-center can create a more natural, candid look.
- Squinching: Try “squinching” (slightly squinting your eyes) to make your eyes appear more engaging.
4.4. The Angle of Your Body
The angle at which you position your body can significantly impact how you look in photos.
Practical Steps:
- Three-Quarter Angle: Standing at a three-quarter angle (with your body turned slightly away from the camera) can create a slimming effect.
- Weight Shift: Shifting your weight to one leg can create a more dynamic and relaxed pose.
- Avoid Direct Front: Avoid facing the camera directly, as this can make you look wider.
4.5. Hand Placement
The way you position your hands can add to or detract from your photos.
Practical Steps:
- Relaxed Hands: Keep your hands relaxed and avoid clenching your fists.
- Natural Placement: Place your hands in natural positions, such as resting them on your hips or holding an object.
- Avoid Hiding: Avoid hiding your hands, as this can make you look awkward.
4.6. Facial Expressions
Your facial expression is one of the most important elements of a great pose.
Practical Steps:
- Genuine Smile: A genuine smile (one that reaches your eyes) is always more attractive than a forced smile.
- Smize: Practice “smizing” (smiling with your eyes) to convey warmth and approachability.
- Subtle Expressions: Experiment with subtle expressions, such as a slight smirk or a thoughtful gaze.
By mastering these posing techniques, you can enhance your natural beauty and capture photos that showcase your best features. Next, let’s discuss how lighting can dramatically affect your photos and how to use it to your advantage.
5. The Impact of Lighting on Portrait Photography
Lighting is one of the most critical elements of photography. It can transform an ordinary photo into a stunning work of art. Understanding how light works and how to manipulate it to your advantage is essential for capturing flattering portraits.
5.1. Natural Light vs. Artificial Light
There are two primary types of light: natural light (sunlight) and artificial light (studio lights, flashes, etc.). Each has its own unique characteristics and advantages.
Natural Light:
- Pros: Soft, flattering, readily available, free.
- Cons: Unpredictable, varies in intensity and color, limited control.
Artificial Light:
- Pros: Consistent, controllable, allows for creative effects.
- Cons: Requires equipment, can be harsh if not used properly, requires skill to set up.
5.2. Qualities of Light
Light can be described in terms of its quality, direction, and color.
Quality of Light:
- Soft Light: Soft light is diffused, gentle, and produces soft shadows. It is ideal for portraits because it minimizes imperfections and creates a flattering look.
- Hard Light: Hard light is direct, intense, and produces harsh shadows. It can be used to create dramatic effects but is generally less flattering for portraits.
Direction of Light:
- Front Lighting: Front lighting illuminates the subject from the front, reducing shadows and creating a flat, even look.
- Side Lighting: Side lighting illuminates the subject from the side, creating shadows that add dimension and depth.
- Back Lighting: Back lighting illuminates the subject from behind, creating a silhouette or a glowing effect.
Color of Light:
- Warm Light: Warm light (e.g., from incandescent bulbs or golden hour sunlight) has a reddish or yellowish hue.
- Cool Light: Cool light (e.g., from fluorescent bulbs or overcast skies) has a bluish hue.
- Neutral Light: Neutral light (e.g., from daylight-balanced LEDs) has a color temperature of around 5500K and is considered the most accurate representation of colors.
5.3. Lighting Techniques for Flattering Portraits
There are several lighting techniques that are particularly effective for capturing flattering portraits.
Butterfly Lighting:
- Butterfly lighting is a technique in which the main light is positioned directly in front of the subject and slightly above eye level, creating a small, butterfly-shaped shadow under the nose.
- This technique is flattering because it accentuates the cheekbones and creates a slimming effect.
Rembrandt Lighting:
- Rembrandt lighting is a technique in which the main light is positioned to the side of the subject, creating a triangle of light on the cheek opposite the light source.
- This technique adds drama and depth to the portrait.
Loop Lighting:
- Loop lighting is similar to butterfly lighting, but the main light is positioned slightly to the side of the subject, creating a small shadow on one side of the nose.
- This technique is flattering and versatile.
5.4. Tips for Using Natural Light
If you’re shooting in natural light, here are some tips to help you capture flattering portraits:
- Shoot During Golden Hour: The golden hour (the hour after sunrise and the hour before sunset) provides soft, warm light that is ideal for portraits.
- Use a Reflector: Use a reflector to bounce light back onto the subject, filling in shadows and creating a more even exposure.
- Find Open Shade: Look for open shade (shade that is not blocked by buildings or trees) to provide soft, diffused light.
By mastering lighting techniques, you can create portraits that are not only technically sound but also visually stunning. Next, we’ll discuss how image editing can help you enhance your portraits and correct any imperfections.
6. Image Editing Techniques to Enhance Your Portraits
Image editing is an essential part of the photography process. It allows you to fine-tune your images, correct imperfections, and enhance their overall quality. While it’s important to capture the best possible image in-camera, post-processing can take your portraits to the next level.
6.1. Basic Adjustments
Before making any major edits, it’s important to start with basic adjustments.
Exposure:
- Adjust the exposure to ensure that the image is neither too dark nor too bright.
- Be careful not to overexpose the highlights, as this can result in a loss of detail.
Contrast:
- Adjust the contrast to create a balance between the highlights and shadows.
- Increasing the contrast can add drama to the image, while decreasing it can soften the look.
White Balance:
- Adjust the white balance to correct any color casts and ensure that the colors are accurate.
- Use a gray card or color checker to help you achieve accurate white balance.
Highlights and Shadows:
- Adjust the highlights and shadows to recover detail in the brightest and darkest areas of the image.
- Decreasing the highlights can bring back detail in overexposed areas, while increasing the shadows can brighten underexposed areas.
6.2. Retouching Techniques
Retouching is the process of removing blemishes, smoothing skin, and enhancing features.
Spot Removal:
- Use the spot removal tool to remove blemishes, dust spots, and other imperfections.
- Be careful not to overdo it, as this can result in a plastic, unnatural look.
Skin Smoothing:
- Use skin smoothing techniques to reduce the appearance of wrinkles and fine lines.
- There are several ways to smooth skin, including using the frequency separation technique or applying a soft focus filter.
Eye Enhancement:
- Enhance the eyes by sharpening them, brightening them, and adding catchlights.
- Be careful not to over-sharpen the eyes, as this can make them look unnatural.
6.3. Color Correction
Color correction is the process of adjusting the colors in the image to make them more accurate and pleasing.
Hue, Saturation, and Luminance (HSL):
- Use the HSL sliders to adjust the hue, saturation, and luminance of individual colors.
- This can be useful for correcting color casts or enhancing specific colors.
Color Grading:
- Use color grading techniques to add a specific mood or style to the image.
- This can be done using color lookup tables (LUTs) or by adjusting the color balance in the shadows, midtones, and highlights.
6.4. Sharpening
Sharpening is the process of increasing the apparent sharpness of the image.
Sharpening Filters:
- Use a sharpening filter to add detail and clarity to the image.
- Be careful not to over-sharpen the image, as this can result in unwanted artifacts.
6.5. Exporting Your Images
Once you’ve finished editing your images, it’s important to export them in the correct format and resolution.
File Format:
- JPEG is the most common file format for sharing images online.
- TIFF is a lossless file format that is ideal for archiving and printing.
Resolution:
- For web use, a resolution of 72 dpi is sufficient.
- For printing, a resolution of 300 dpi is recommended.
By mastering image editing techniques, you can enhance your portraits and achieve a professional-quality look. Let’s move on to discussing how to build a photography portfolio to showcase your best work.
7. Building a Stunning Photography Portfolio
A photography portfolio is a collection of your best work that showcases your skills, style, and creativity. It’s an essential tool for attracting clients, landing jobs, and establishing yourself as a professional photographer.
7.1. Selecting Your Best Work
The first step in building a portfolio is to select your best work.
Quality Over Quantity:
- It’s better to have a small portfolio of outstanding images than a large portfolio of mediocre ones.
- Choose images that are technically sound, visually appealing, and representative of your style.
Showcase Your Strengths:
- Select images that highlight your strengths and showcase your expertise in specific areas of photography.
- If you specialize in portrait photography, make sure your portfolio includes a variety of stunning portraits.
Variety and Consistency:
- Include a variety of images that demonstrate your versatility, but also maintain a consistent style and theme.
- Avoid including images that are too different from each other, as this can make your portfolio look disjointed.
7.2. Organizing Your Portfolio
Once you’ve selected your best work, it’s important to organize it in a way that is logical and visually appealing.
Storytelling:
- Arrange your images in a way that tells a story or conveys a specific message.
- Consider the order in which the images are presented and how they flow together.
Categorization:
- Categorize your images by subject, style, or theme.
- This makes it easier for viewers to find the types of images they are most interested in.
Simplicity:
- Keep your portfolio simple and easy to navigate.
- Avoid using too many graphics or animations, as this can distract from your images.
7.3. Online vs. Print Portfolios
There are two main types of portfolios: online portfolios and print portfolios.
Online Portfolios:
- Online portfolios are websites that showcase your images online.
- They are easy to create, update, and share, and they can reach a global audience.
Print Portfolios:
- Print portfolios are physical books or albums that showcase your images in print.
- They are more tangible and professional-looking than online portfolios, but they are also more expensive and time-consuming to create.
7.4. Essential Elements of an Online Portfolio
If you choose to create an online portfolio, here are some essential elements to include:
High-Quality Images:
- Use high-resolution images that are optimized for web viewing.
- Make sure your images are sharp, well-exposed, and visually appealing.
Easy Navigation:
- Make sure your portfolio is easy to navigate and that viewers can easily find the images they are looking for.
- Use clear and concise labels and descriptions.
Contact Information:
- Include your contact information so that potential clients can easily get in touch with you.
- Include your email address, phone number, and social media links.
About Page:
- Include an about page that tells viewers about you, your background, and your photography style.
- This is a great way to connect with potential clients and build trust.
7.5. Tips for Promoting Your Portfolio
Once you’ve created your portfolio, it’s important to promote it to attract viewers and potential clients.
Social Media:
- Share your images on social media platforms like Instagram, Facebook, and Twitter.
- Use relevant hashtags to reach a wider audience.
Photography Websites:
- Submit your images to photography websites and online galleries.
- This can help you gain exposure and recognition.
Networking:
- Attend photography events and workshops to network with other photographers and potential clients.
- Share your portfolio with people you meet and ask for feedback.
By building a stunning photography portfolio, you can showcase your best work and attract the attention of clients, employers, and fellow photographers.
Remember, dfphoto.net is an excellent resource for photographers of all levels. Whether you are looking for inspiration, education, or a community to connect with, you’ll find it here. Visit us at dfphoto.net to explore our extensive collection of articles, tutorials, and galleries. Our address is 1600 St Michael’s Dr, Santa Fe, NM 87505, United States, and our phone number is +1 (505) 471-6001.
8. Legal and Ethical Considerations in Photography
As a photographer, it’s essential to be aware of the legal and ethical considerations that govern your work. These considerations help protect the rights of your subjects, ensure fair practices, and maintain the integrity of your images.
8.1. Copyright Law
Copyright law protects your original photographic works from unauthorized use.
Ownership:
- As the photographer, you automatically own the copyright to your images as soon as they are created.
- This means that you have the exclusive right to reproduce, distribute, and display your images.
Registration:
- You can register your copyright with the U.S. Copyright Office to strengthen your legal protection.
- Registration allows you to sue for statutory damages and attorney’s fees in the event of copyright infringement.
Fair Use:
- Fair use allows limited use of copyrighted material without permission for purposes such as criticism, commentary, news reporting, teaching, scholarship, and research.
- However, fair use is a complex legal doctrine, and it’s important to understand its limitations.
8.2. Model Releases
A model release is a legal document that grants you permission to use a person’s likeness in your photographs for commercial purposes.
When to Use:
- You need a model release if you plan to use a person’s likeness for advertising, marketing, or other commercial purposes.
- This includes using their image on your website, in brochures, or in advertisements.
Content of Release:
- The model release should clearly state the scope of the permission being granted, including how the images will be used and for how long.
- It should also include a provision for compensation, if any, and a statement that the model is of legal age and has the right to grant permission.
8.3. Property Releases
A property release is a legal document that grants you permission to photograph a private property for commercial purposes.
When to Use:
- You need a property release if you plan to photograph a private property for commercial purposes, such as advertising or selling prints.
- This includes photographing buildings, landmarks, and other private property.
Content of Release:
- The property release should clearly state the scope of the permission being granted, including how the images will be used and for how long.
- It should also include a provision for compensation, if any, and a statement that the property owner has the right to grant permission.
8.4. Ethical Considerations
In addition to legal considerations, there are also ethical considerations that you should keep in mind when photographing people and places.
Privacy:
- Respect the privacy of your subjects and avoid photographing them in situations where they have a reasonable expectation of privacy.
- This includes photographing people in their homes, in restrooms, or in other private settings.
Consent:
- Obtain informed consent from your subjects before photographing them, especially if you plan to use their images for commercial purposes.
- Be transparent about how you will use the images and give them the opportunity to decline.
Accuracy:
- Strive for accuracy and avoid manipulating your images in a way that distorts the truth or misrepresents reality.
- It’s acceptable to make minor adjustments to improve the image quality, but avoid making significant changes that alter the content or context of the image.
By being aware of these legal and ethical considerations, you can ensure that you are creating and using your images in a responsible and respectful manner.
9. Staying Updated with the Latest Photography Trends and Technologies in the US
The world of photography is constantly evolving, with new trends and technologies emerging all the time. To stay competitive and relevant, it’s essential to stay updated with the latest developments in the industry.
9.1. Industry Publications and Websites
One of the best ways to stay informed about the latest photography trends and technologies is to read industry publications and websites.
Popular Photography:
- Popular Photography is a monthly magazine that covers a wide range of topics, including camera reviews, technique tutorials, and industry news.
- It’s a great resource for both amateur and professional photographers.
American Photographic Artists (APA):
- APA is a professional organization for photographers in the US.
- They offer resources, education, and networking opportunities for photographers.
Photo District News (PDN):
- PDN is a website and magazine that covers the business of photography.
- They offer articles, interviews, and resources for professional photographers.
9.2. Photography Conferences and Workshops
Attending photography conferences and workshops is another great way to learn about new trends and technologies and to network with other photographers.
PhotoPlus Expo:
- PhotoPlus Expo is the largest photography and imaging event in North America.
- It features exhibits, seminars, and workshops covering a wide range of topics.
WPPI (Wedding & Portrait Photographers International):
- WPPI is an annual conference and trade show for wedding and portrait photographers.
- It features workshops, seminars, and networking opportunities.
Santa Fe Photographic Workshops:
- Santa Fe Photographic Workshops offers a variety of workshops and courses for photographers of all levels.
- They cover a wide range of topics, including portrait photography, landscape photography, and digital imaging.
9.3. Social Media and Online Communities
Social media and online communities are also valuable resources for staying updated with the latest photography trends and technologies.
Instagram:
- Instagram is a popular social media platform for sharing and discovering photographs.
- Follow photographers, brands, and organizations that you admire to stay inspired and informed.
Facebook Groups:
- There are many Facebook groups dedicated to photography.
- Join groups that are relevant to your interests and participate in discussions.
Online Forums:
- Online forums, such as those on Reddit and other photography websites, are great places to ask questions, share your work, and get feedback.
9.4. Emerging Trends in Photography
Here are some of the emerging trends in photography to keep an eye on:
AI-Powered Editing Tools:
- Artificial intelligence (AI) is increasingly being used in image editing software to automate tasks, enhance images, and create new effects.
- AI-powered editing tools can help you save time and improve the quality of your images.
Virtual Reality (VR) Photography:
- Virtual reality (VR) photography allows viewers to experience images in a three-dimensional, immersive environment.
- VR photography is gaining popularity in fields such as travel, real estate, and journalism.
Drone Photography:
- Drone photography allows you to capture aerial images from unique perspectives.
- Drone photography is becoming increasingly popular for both personal and commercial use.
By staying updated with the latest photography trends and technologies, you can continue to grow as a photographer and create images that are both innovative and inspiring.
10. Frequently Asked Questions (FAQs) About Looking Cross-Eyed in Photos
Here are some frequently asked questions about why people sometimes look cross-eyed in photos, along with detailed answers to help you understand and address the issue.
1. Why do my eyes sometimes look misaligned in pictures?
Your eyes might appear misaligned due to the camera’s single-lens perspective, which flattens the image differently from how your binocular vision perceives depth. Focal length, camera angle, and slight natural asymmetries in your face can also accentuate this effect.
2. Can wide-angle lenses cause me to look cross-eyed?
Yes, wide-angle lenses, often found in smartphones, can cause distortion, especially in close-up shots. This distortion can exaggerate the convergence of your eyes, making you appear cross-eyed.
3. How does camera angle affect how my eyes look in photos?
The angle at which the photo is taken can significantly impact how your eyes look. If the camera is positioned above or below eye level, it can create an unnatural perspective, emphasizing any slight asymmetry in your eye alignment.
4. What role does focus play in preventing a cross-eyed appearance?
Accurate focus is crucial. If the focus is slightly off or the depth of field is too shallow, it can cause the eyes to appear soft or blurred, making it seem like your eyes are not properly aligned.
5. Is there a simple trick to avoid looking cross-eyed in photos?
Yes, a simple yet effective technique is to slightly adjust your gaze. Instead of staring directly into the lens, try looking just past it or slightly to one side.
6. How can lighting help improve my photos and prevent a cross-eyed look?
Opt for soft, diffused lighting to minimize shadows, which can accentuate any asymmetry in your eyes. Position yourself so that the light is coming from in front of you and avoid direct overhead lighting.
7. What camera settings should I adjust to improve my portrait photos?
Adjust the aperture to control the depth of field, use a longer focal length to minimize distortion, and enable image stabilization to ensure sharp images, especially in low light.
8. Can photo editing software fix the cross-eyed appearance?
Yes, post-processing can be a valuable tool for correcting minor imperfections. You can subtly adjust the position or size of your eyes, enhance clarity to make the eyes appear sharper, and adjust the color balance to brighten the eyes.
9. What are some essential posing techniques for better portraits?
Maintain good posture, tilt your head slightly to add interest, maintain a relaxed, natural eye contact, and position your body at a three-quarter angle to create a slimming effect.
10. How can I stay updated with the latest photography trends and technologies to improve my skills?
Read industry publications and websites like Popular Photography and American Photographic Artists (APA), attend photography conferences and workshops such as PhotoPlus Expo and WPPI, and engage with social media and online communities.
By understanding these FAQs and implementing the tips and techniques discussed in this article, you can avoid looking cross-eyed in photos and capture images that reflect your true beauty and skill. Visit dfphoto.net for more insights, inspiration, and educational resources to elevate your photography journey.