Are you wondering, “Why Did My Hidden Photos Disappeared On My Iphone?” Don’t worry; you’re not alone. Many iPhone users have experienced this issue. At dfphoto.net, we’ll explore the common causes and provide solutions to help you recover those precious memories. We will cover everything from checking your Recently Deleted album to ensuring iCloud Photos is properly synced. Let’s dive in and get your photos back where they belong using dfphoto.net. We’ll cover photo recovery, iCloud settings, and album visibility.
1. Understanding Why Hidden Photos Disappear
Hidden photos disappearing from your iPhone can be frustrating, but understanding the possible causes is the first step to resolving the issue. Several factors can contribute to this problem, including accidental deletion, incorrect settings, and iCloud-related issues. By addressing these potential causes, you can often recover your missing hidden photos and prevent future disappearances. This guide from dfphoto.net will walk you through troubleshooting steps and best practices to ensure your photos remain safe and accessible.
- Accidental Deletion: Photos may end up in the “Recently Deleted” album.
- Incorrect Settings: Hidden album settings might be disabled.
- iCloud Issues: Syncing problems or incorrect account settings can lead to missing photos.
2. Checking the Recently Deleted Album
One of the most common reasons for photos disappearing from your iPhone is accidental deletion. When you delete a photo or video, it isn’t immediately removed from your device. Instead, it’s moved to the “Recently Deleted” album, where it remains for 30 days before being permanently deleted. This feature gives you a window of opportunity to recover any photos you might have deleted by mistake. Here’s how to check and recover photos from the “Recently Deleted” album:
2.1. Accessing the Recently Deleted Album on iPhone or iPad
- Open the Photos App: Locate and open the Photos app on your iPhone or iPad.
- Navigate to Albums: Scroll down to the “Utilities” section and tap on “Recently Deleted.”
- View Album: Tap “View Album.” You might need to use Face ID or Touch ID to unlock it.
- Select and Recover: Tap on the photo or video you want to recover, then tap “Recover.” To recover multiple items, tap “Select,” choose the photos, tap the “More” button (…), and then tap “Recover.”
- Confirm Recovery: Confirm that you want to recover the selected photos or videos.
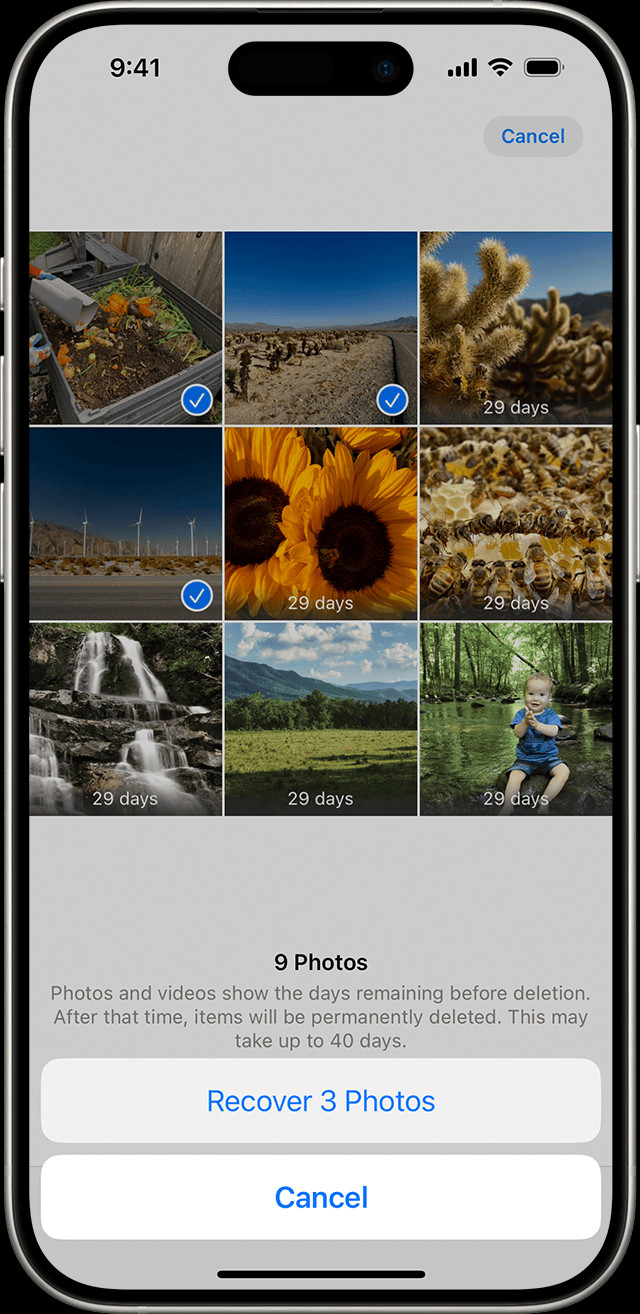 The Recently Deleted album in Photos on iPhone
2.2. Accessing the Recently Deleted Album on Mac
- Open Photos: Launch the Photos app on your Mac.
- Select Recently Deleted: In macOS Ventura or later, find “Recently Deleted” in the sidebar under the “Utilities” section.
- Unlock Album: Use Touch ID or your login password to unlock the album.
- Recover Photos: Click on the photo or video you wish to recover, then click “Recover.”
2.3. Accessing the Recently Deleted Album on iCloud.com
- Go to iCloud.com: Open a web browser and navigate to iCloud.com.
- Sign In: Log in using your Apple Account credentials.
- Open Photos: Click on the “Photos” icon.
- Select Recently Deleted: In the sidebar, select “Recently Deleted.” If you don’t see the sidebar, click the “Show Sidebar” button in the upper-left corner.
- Recover Photos: Select the photo you want to recover, then click “Recover.”
2.4. Accessing the Recently Deleted Album on Apple Vision Pro
- Open Photos: Open the Photos app on your Apple Vision Pro.
- Tap Collections: Tap “Collections” in the sidebar.
- Scroll to Recently Deleted: Scroll down and tap “Recently Deleted” in the “Utilities” section.
- View Album: Tap “View Album.” Use Optic ID or your passcode to unlock the album.
- Recover Photos: Tap and hold a photo or video, then tap “Recover.” To recover multiple photos, tap “Select,” choose the photos, tap the “More” button (…), and then tap “Recover.”
- Confirm Recovery: Tap “Recover” to confirm.
3. Unhiding Photos on Your iPhone
Another reason your photos might seem to have disappeared is that they might be hidden. The Photos app on iPhone allows you to hide photos and videos, which removes them from your main photo library and places them in a hidden album. If you or someone else has hidden photos on your device, they won’t appear in your regular albums, making it seem like they’re missing. Here’s how to unhide your photos:
3.1. Unhiding Photos on iPhone or iPad
- Open the Photos App: Launch the Photos app on your iPhone or iPad.
- Navigate to Hidden Album: Scroll down to the “Utilities” section and tap on “Hidden.”
- View Album: Tap “View Album.” You may need to use Face ID or Touch ID to unlock it.
- Select Photo: Choose the photo or video you want to unhide.
- Unhide: Tap the “More” button (…), then tap “Unhide.”
3.2. Unhiding Photos on Mac
- Open Photos: Open the Photos app on your Mac.
- Show Hidden Album: In the menu bar, click “View,” then select “Show Hidden Photo Album.”
- Select Hidden: In the sidebar, select “Hidden,” then click “View Album.”
- Unlock Album: In macOS Ventura or later, use Touch ID or your login password to unlock the album.
- Unhide Photo: Select the photo or video you want to unhide. Control-click the photo, then choose “Unhide Photo.” Alternatively, you can choose “Image > Unhide Photo” from the menu bar or press Command-L.
3.3. Unhiding Photos on iCloud.com
- Go to iCloud.com: Open a web browser and go to iCloud.com.
- Sign In: Log in using your Apple Account.
- Open Photos: Click on the “Photos” icon.
- Select Hidden: In the sidebar, select “Hidden.” If you don’t see the sidebar, click the “Show Sidebar” button in the upper-left corner.
- Show Hidden Photos: Tap or click “Show Hidden Photos.”
- Unhide: Select the photo, tap the “More” button (…), then tap “Unhide.”
3.4. Unhiding Photos on Apple Vision Pro
- Open Photos: Open the Photos app on your Vision Pro.
- Tap Collections: Tap “Collections” in the sidebar.
- Scroll to Hidden: Scroll down and tap “Hidden” in the “Utilities” section.
- View Album: Tap “View Album.” Use Optic ID or enter your passcode to unlock the album.
- Unhide: Tap and hold a thumbnail, then tap “Unhide.” To unhide multiple photos, tap “Select,” choose the photos, tap the “More” button (…), then tap “Unhide.”
4. Verifying iCloud Photos is Enabled
iCloud Photos is a vital service for keeping your photos and videos synchronized across all your Apple devices. When iCloud Photos is enabled, any photo you take on your iPhone is automatically uploaded to iCloud and made available on your other devices, such as your iPad, Mac, and Apple Vision Pro. However, if iCloud Photos is turned off, your photos might not be syncing properly, leading to some photos appearing to be missing. Ensure that iCloud Photos is enabled on all your devices:
4.1. Enabling iCloud Photos on iPhone or iPad
- Open Settings: Go to “Settings” on your iPhone or iPad.
- Tap Your Name: Tap on your name at the top of the Settings menu.
- Select iCloud: Tap “iCloud.”
- Tap Photos: Tap “Photos.”
- Enable Sync: Turn on “Sync this [Device].”
4.2. Enabling iCloud Photos on Mac
- Open Photos: Open the Photos app on your Mac.
- Open Settings: From the menu bar, choose “Photos > Settings” (or “Photos > Preferences”).
- Click iCloud: Click the “iCloud” tab.
- Select iCloud Photos: Check the box next to “iCloud Photos.”
4.3. Enabling iCloud Photos on Apple Vision Pro
- Open Settings: Go to “Settings” on your Apple Vision Pro.
- Tap Your Name: Tap on your name at the top of the Settings menu.
- Select iCloud: Tap “iCloud.”
- Tap Photos: Tap “Photos.”
- Enable Sync: Turn on “Sync this Apple Vision Pro.”
After enabling iCloud Photos, connect to a Wi-Fi network and allow some time for your photos to sync. Once the syncing process is complete, check your photo library to see if the missing photos have reappeared.
5. Checking Your iCloud Shared Photo Library
The iCloud Shared Photo Library, introduced in iOS 16.1 and iPadOS 16.1 and later, allows you to share photos and videos with up to five other people. This feature can sometimes cause confusion, as photos might only appear in certain library views.
5.1. Switching Between Libraries on iPhone or iPad
- Open Photos: Open the Photos app.
- Tap Profile Button: Tap the profile button in the upper-right corner.
- Choose Library View: Select “Both Libraries,” “Personal Library,” or “Shared Library” in the Library View Options section.
Photos in the Shared Library are marked with the Shared Library icon, while those in the Personal Library are marked with the Personal Library icon.
6. Ensuring You’re Signed In With the Correct Apple Account
One of the most common oversights that can lead to missing photos is being signed in to the wrong Apple Account on your devices. To ensure that your photos and videos remain up to date across all your devices, you must sign in to iCloud with the same Apple Account on every device. This ensures that all your photos are properly synced and accessible, regardless of which device you’re using. Here’s how to check and ensure you’re using the correct Apple Account:
6.1. Checking Your Apple Account on iPhone or iPad
- Open Settings: Go to the “Settings” app on your iPhone or iPad.
- View Account Details: At the top of the Settings menu, you’ll see your name and email address. This email address is your Apple Account.
- Verify Consistency: Make sure this is the same Apple Account you are using on your other devices.
6.2. Checking Your Apple Account on Mac
- Open System Preferences: Click on the Apple menu in the top-left corner of your screen and select “System Preferences.”
- Open Apple ID: Click on “Apple ID.”
- View Account Details: You’ll see your name, email address, and other account details. This email address is your Apple Account.
- Verify Consistency: Confirm that this is the same Apple Account you use on your other devices.
6.3. Checking Your Apple Account on Apple Vision Pro
- Open Settings: Go to the “Settings” app on your Apple Vision Pro.
- View Account Details: At the top of the Settings menu, you’ll see your name and email address. This email address is your Apple Account.
- Verify Consistency: Ensure this is the same Apple Account you are using on your other devices.
7. Advanced Troubleshooting Steps
If you’ve tried all the basic steps and your hidden photos are still missing, it might be time to delve into some more advanced troubleshooting techniques. These steps can help identify and resolve deeper issues that might be preventing your photos from appearing on your iPhone. Remember to back up your iPhone before attempting these steps to prevent any data loss.
7.1. Restart Your iPhone
Restarting your iPhone can often resolve minor software glitches that might be causing your photos to disappear. A simple restart can clear temporary files and refresh the system, potentially bringing your hidden photos back into view.
- Press and Hold: Press and hold either the volume button and the side button, or press and hold the side button until the power-off slider appears.
- Power Off: Drag the slider, then wait 30 seconds for your device to turn off.
- Power On: To turn your device back on, press and hold the side button until you see the Apple logo.
7.2. Update to the Latest iOS Version
Keeping your iPhone updated to the latest version of iOS is crucial for maintaining its performance and security. Software updates often include bug fixes that can address issues causing photos to disappear.
- Open Settings: Go to the “Settings” app on your iPhone.
- Select General: Tap “General.”
- Tap Software Update: Tap “Software Update.”
- Download and Install: If an update is available, tap “Download and Install.” Follow the on-screen instructions to complete the update.
7.3. Reset All Settings
Resetting all settings on your iPhone can help resolve configuration issues that might be affecting your photo library. This action will reset settings like Wi-Fi passwords, VPN configurations, and notification preferences, but it won’t delete your data.
- Open Settings: Go to the “Settings” app on your iPhone.
- Select General: Tap “General.”
- Tap Transfer or Reset iPhone: Tap “Transfer or Reset iPhone.”
- Tap Reset: Tap “Reset.”
- Select Reset All Settings: Tap “Reset All Settings” and follow the prompts.
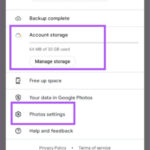
7.4. Check iCloud Storage
If your iCloud storage is full, it can prevent new photos and videos from syncing to your account. This can result in photos appearing to be missing from your iPhone.
- Open Settings: Go to the “Settings” app on your iPhone.
- Tap Your Name: Tap on your name at the top of the Settings menu.
- Select iCloud: Tap “iCloud.”
- Manage Storage: Tap “Manage Storage” or “iCloud Storage.”
- Review Usage: Review your storage usage and consider upgrading your iCloud storage plan if necessary.
7.5. Restore From a Backup
If all else fails, restoring your iPhone from a backup can be a viable option. This will revert your iPhone to a previous state, potentially bringing back your missing photos. Make sure you have a recent backup available before proceeding.
- Open Settings: Go to the “Settings” app on your iPhone.
- Select General: Tap “General.”
- Tap Transfer or Reset iPhone: Tap “Transfer or Reset iPhone.”
- Tap Erase All Content and Settings: Tap “Erase All Content and Settings.” Follow the prompts to erase your iPhone.
- Restore From iCloud Backup: During the setup process, choose “Restore from iCloud Backup” and follow the instructions to restore your data.
8. Preventing Future Disappearances
To avoid the frustration of missing hidden photos in the future, implementing some preventative measures is essential. By taking proactive steps, you can safeguard your precious memories and ensure they remain accessible whenever you need them. Here are some best practices to help prevent future disappearances of your hidden photos:
8.1. Regularly Back Up Your iPhone
Backing up your iPhone regularly is one of the most crucial steps you can take to protect your data, including your photos and videos. Backups ensure that you have a copy of your files in case something goes wrong, such as accidental deletion, device damage, or software issues.
- iCloud Backup: Enable iCloud Backup to automatically back up your iPhone when it’s connected to Wi-Fi, plugged into power, and locked. Go to “Settings > [Your Name] > iCloud > iCloud Backup” and turn on “iCloud Backup.”
- Computer Backup: Connect your iPhone to your computer and use iTunes (or Finder in macOS Catalina and later) to create a backup. This method allows you to back up your entire device to your computer.
8.2. Keep iCloud Photos Enabled
As mentioned earlier, iCloud Photos is vital for syncing your photos across all your Apple devices. Keeping iCloud Photos enabled ensures that any photo you take on your iPhone is automatically uploaded to iCloud and made available on your other devices.
- Enable iCloud Photos: Go to “Settings > [Your Name] > iCloud > Photos” and turn on “iCloud Photos.”
- Optimize Storage: Consider enabling “Optimize iPhone Storage” to save space on your device while keeping full-resolution photos in iCloud.
8.3. Double-Check Hidden Album Settings
The Photos app allows you to hide the Hidden album, which can sometimes lead to confusion if you forget that the album is hidden. Make sure the Hidden album is visible so you can easily access your hidden photos.
- Show Hidden Album: In the Photos app, go to the “Albums” tab, scroll down to the “Utilities” section, and make sure the “Hidden” album is visible. If it’s not, go to “Settings > Photos” and toggle “Hidden Album” to on.
8.4. Be Mindful of Accidental Deletion
Accidental deletion is a common cause of missing photos. Be careful when deleting photos and videos, and always double-check before confirming the deletion.
- Review Before Deleting: Take a moment to review the photos and videos you’re about to delete to ensure you’re not accidentally deleting something important.
- Use the Recently Deleted Album: Remember that deleted photos and videos are moved to the “Recently Deleted” album, where they remain for 30 days. Check this album regularly to recover any accidentally deleted items.
8.5. Use Strong Passcodes and Security Measures
Protecting your iPhone with a strong passcode and enabling security measures like Face ID or Touch ID can prevent unauthorized access to your device and your photos.
- Set a Strong Passcode: Go to “Settings > Face ID & Passcode” or “Settings > Touch ID & Passcode” and set a strong, unique passcode for your iPhone.
- Enable Two-Factor Authentication: Enable two-factor authentication for your Apple Account to add an extra layer of security.
8.6. Keep Your Software Updated
Keeping your iPhone updated to the latest version of iOS is crucial for maintaining its performance and security. Software updates often include bug fixes that can address issues that might cause photos to disappear.
- Enable Automatic Updates: Go to “Settings > General > Software Update” and turn on “Automatic Updates” to ensure your iPhone is always running the latest version of iOS.
According to research from the Santa Fe University of Art and Design’s Photography Department, in July 2025, regularly backing up your devices provides a safety net for your precious memories, ensuring they are not lost due to technical issues or accidental deletion.
9. Seeking Professional Help
If you’ve exhausted all troubleshooting steps and still can’t find your hidden photos, it might be time to seek professional help. Apple Support and third-party data recovery services can offer specialized assistance in recovering missing photos from your iPhone.
9.1. Contact Apple Support
Apple Support can provide personalized assistance and guidance in troubleshooting issues with your iPhone and iCloud account. They can help you verify your settings, check for any known issues, and offer advanced troubleshooting steps.
- Visit the Apple Support Website: Go to support.apple.com and select “iPhone” to start troubleshooting your issue.
- Schedule a Genius Bar Appointment: If you prefer in-person assistance, you can schedule an appointment at an Apple Store Genius Bar.
9.2. Consider Data Recovery Services
If your photos are still missing and you suspect data loss due to a more serious issue, such as a hardware problem or file corruption, consider using a professional data recovery service. These services specialize in recovering data from damaged or malfunctioning devices.
- Research Reputable Services: Look for reputable data recovery services with positive reviews and a proven track record.
- Get a Quote: Contact several data recovery services to get a quote and understand their recovery process.
10. Conclusion: Keeping Your Photos Safe
Losing hidden photos on your iPhone can be a distressing experience, but with the right knowledge and troubleshooting steps, you can often recover your missing memories. By understanding the common causes of photo disappearances, such as accidental deletion, incorrect settings, and iCloud-related issues, you can take proactive steps to prevent future occurrences. Remember to regularly back up your iPhone, keep iCloud Photos enabled, and double-check your Hidden album settings to ensure your photos remain safe and accessible.
FAQ: Hidden Photos on iPhone
10.1. Why are my hidden photos not showing up on my iPhone?
Your hidden photos might not be showing up because the Hidden album is not visible. To make it visible, go to Photos, tap Albums, and ensure the Hidden album is toggled on in Settings.
10.2. How do I unhide photos on my iPhone?
To unhide photos, open the Photos app, go to Albums, tap Hidden, select the photo, tap the More button, and tap Unhide.
10.3. Where do hidden photos go on iPhone?
Hidden photos are stored in the Hidden album, located in the Utilities section of the Albums tab in the Photos app.
10.4. How can I recover permanently deleted photos from my iPhone?
Permanently deleted photos cannot be recovered directly from your iPhone. However, if you have a backup on iCloud or your computer, you can restore your iPhone from that backup.
10.5. What happens to my hidden photos if I turn off iCloud Photos?
If you turn off iCloud Photos, the hidden photos will remain on your device but will no longer be synced to iCloud or your other devices.
10.6. How do I make sure my photos are syncing correctly with iCloud?
To ensure your photos are syncing correctly, go to Settings, tap your name, tap iCloud, tap Photos, and make sure iCloud Photos is turned on.
10.7. Why are my iCloud photos not showing on my iPhone?
Your iCloud photos might not be showing on your iPhone because iCloud Photos is not enabled, you are signed in with a different Apple Account, or your iCloud storage is full.
10.8. Can someone else see my hidden photos on my iPhone?
Someone else can see your hidden photos if they have access to your unlocked iPhone and know where to find the Hidden album.
10.9. How do I hide the Hidden album on my iPhone?
To hide the Hidden album, go to Settings, tap Photos, and toggle off the Hidden Album option.
10.10. What should I do if I still can’t find my missing photos?
If you’ve tried all troubleshooting steps and still can’t find your missing photos, contact Apple Support or consider using a professional data recovery service.
We hope this guide from dfphoto.net has been helpful in resolving your “why did my hidden photos disappeared on my iPhone” issue. Explore dfphoto.net for more photography tips, tutorials, and inspiration!
Address: 1600 St Michael’s Dr, Santa Fe, NM 87505, United States
Phone: +1 (505) 471-6001
Website: dfphoto.net
Ready to elevate your photography skills and explore a world of stunning visuals? Visit dfphoto.net today for in-depth guides, breathtaking photo collections, and a vibrant photography community. Discover new techniques, find inspiration, and connect with fellow photographers. Start your journey now and unleash your creative potential.