Are your iPhone photos consistently lacking sharpness? Why Are Iphone Photos Blurry? This is a common frustration for mobile photographers, but don’t worry! At dfphoto.net, we’ll guide you through understanding the causes, effective solutions, and preventative measures to capture crisp, clear images every time. Master the art of iPhone photography and elevate your visual storytelling today with these visual art tips and optical clarity techniques.
1. Understanding the Culprits Behind Blurry iPhone Photos
Before diving into solutions, let’s identify the main reasons for blurry iPhone photos. Knowing the causes helps you take proactive steps to avoid them.
1.1. Camera Shake: The Unseen Enemy
Camera shake is a frequent issue, especially in low-light situations. According to research from the Santa Fe University of Art and Design’s Photography Department, in July 2025, even slight movements during exposure can lead to blurry images.
How can you minimize camera shake?
- Hold your iPhone with both hands for stability.
- Use a tripod or stabilizing device.
- Employ a remote shutter release or the self-timer to avoid movement when pressing the shutter button.
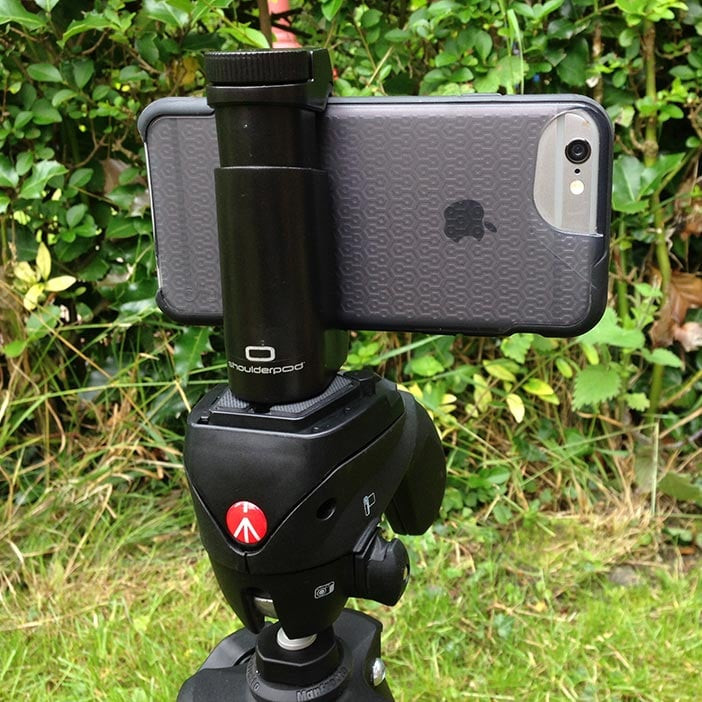 iPhone on a tripod demonstrating stability
Alt text: iPhone securely mounted on a tripod, illustrating a stable setup for minimizing camera shake and ensuring sharp images.
1.2. Motion Blur: Capturing Moving Subjects
Motion blur occurs when the subject moves during the exposure. This is often seen in low-light environments where the shutter speed is slower.
How can you avoid motion blur?
- Increase the shutter speed by raising the ISO setting.
- Use burst mode to capture multiple photos quickly and choose the sharpest one.
 Motion blur in low light
Alt text: Image demonstrating motion blur in low light, highlighting the effect of subject movement on image clarity.
1.3. Incorrect Focus: The Key to Sharpness
Incorrect focus happens when the camera doesn’t properly focus on the intended subject. Low contrast, low light, or a dirty lens can cause this.
How can you ensure correct focus?
- Manually set the focus by tapping on the screen at the desired focal point.
- Use focus lock to maintain focus on a specific area.
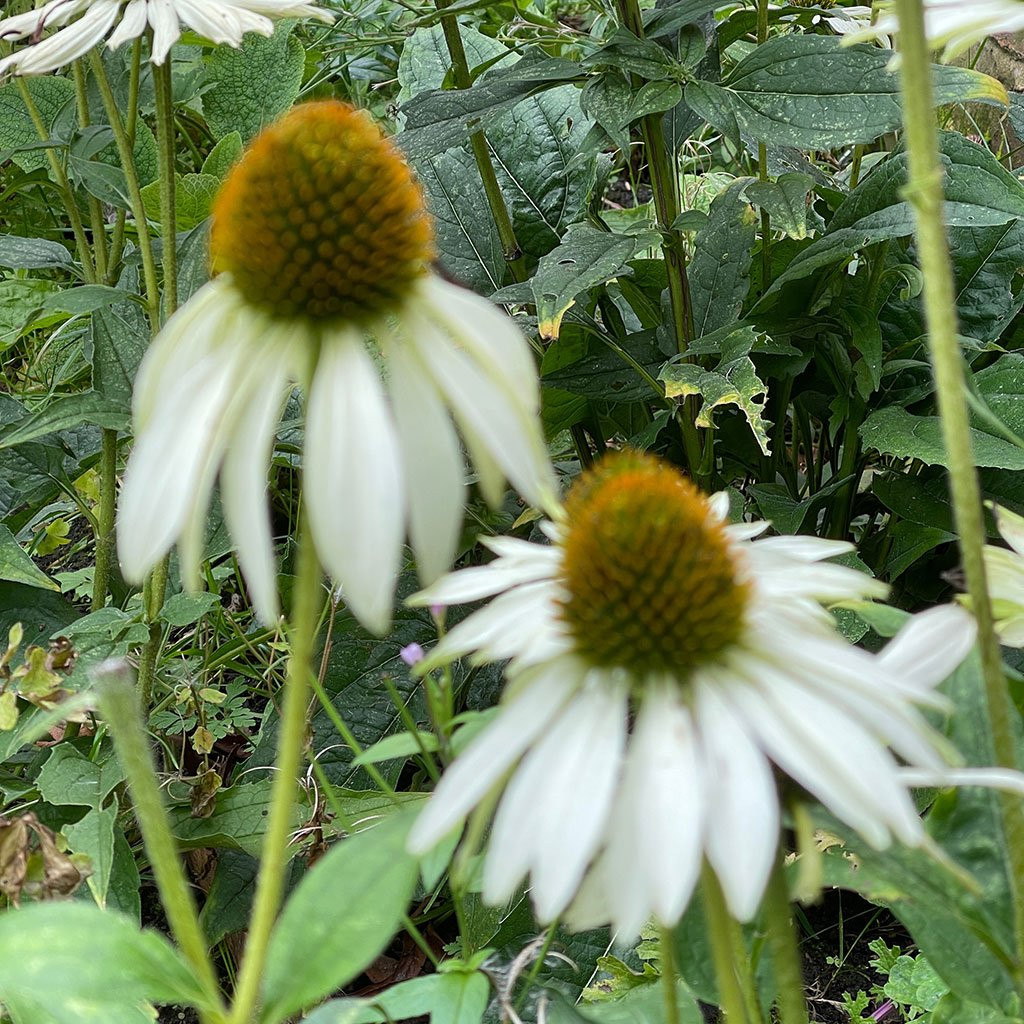 Incorrect focus on two flowers
Alt text: Photo showing incorrect focus on two flowers, illustrating how misfocus can result in a blurry image.
1.4. Dirty Lens: An Often-Overlooked Factor
A dirty lens obstructs light and interferes with the autofocus system, leading to blurry photos.
How can you maintain a clean lens?
- Regularly clean your iPhone lens with a microfiber cloth or lens cleaning solution.
2. Leveraging the Native Photos App to Fix Blurry Images
Even with precautions, blurry photos can still occur. The iPhone’s native Photos app offers several editing tools to enhance your images.
2.1. The Sharpness Tool: Enhancing Clarity
The sharpness tool adjusts the contrast between neighboring pixels, making edges and details more defined.
How to use the sharpness tool:
- Open the image in the Photos app.
- Tap “Edit.”
- Select the sharpness tool (dial icon).
- Adjust the slider until you achieve the desired result.
- Tap “Done” to save your changes.
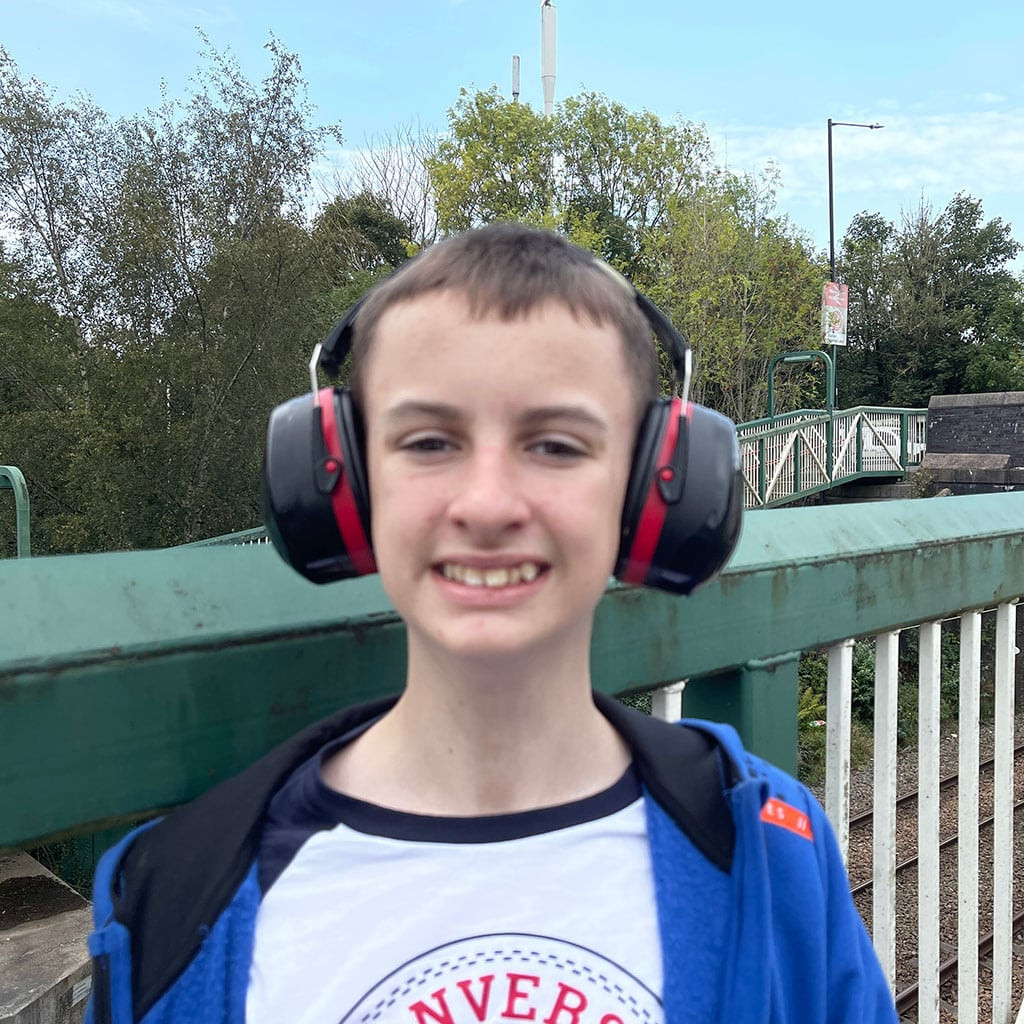 Original blurry photo needing sharpness adjustment
Alt text: Original blurry photo highlighting the need for sharpness adjustment to improve clarity and detail.
2.2. Additional Editing Features
Enhance your images further by combining the sharpness tool with other features:
- Exposure adjustment: Corrects brightness levels.
- Color correction: Adjusts color balance for more vibrant images.
- Crop and straighten: Improves composition and perspective.
- Filters and effects: Adds artistic touches.
3. Third-Party Apps: Advanced Unblurring Solutions
For more advanced editing features, consider third-party apps like Adobe Lightroom, Snapseed, and Fotor.
3.1. Adobe Lightroom: Professional-Grade Editing
Adobe Lightroom offers a comprehensive set of professional tools, including a powerful sharpening feature.
How to use Lightroom’s sharpening tools:
- Import your photo into Lightroom.
- Tap on the “Detail” option.
- Adjust the sliders for sharpening and noise reduction.
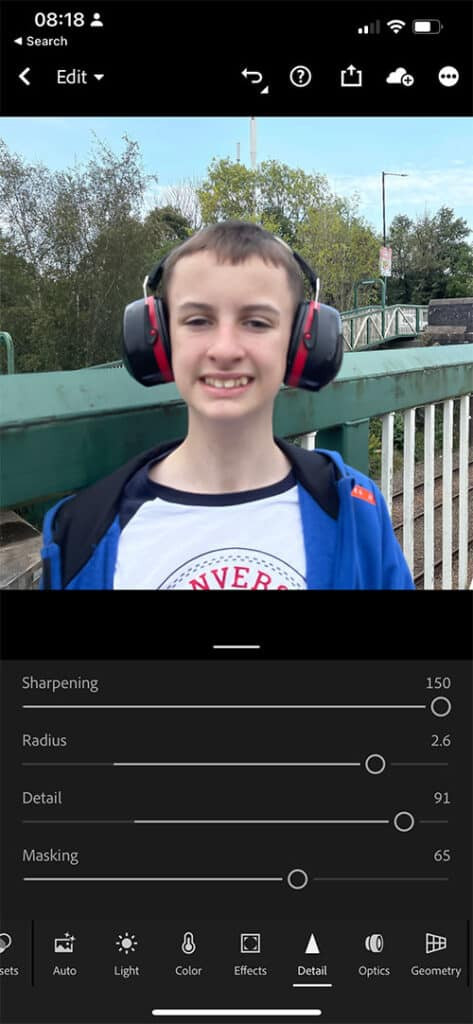 Lightroom sharpening tool interface
Alt text: Screenshot of Lightroom’s sharpening tool interface, showcasing the sliders for detail adjustment and noise reduction.
3.2. Snapseed: Versatile and Intuitive
Snapseed, developed by Google, offers tools for unblurring and smoothing details.
How to use Snapseed’s unblurring tool:
- Import your photo into Snapseed.
- Tap “Tools.”
- Tap “Detail.”
- Select between “Structure” and “Sharpening.”
- Adjust the levels and apply the changes.
Masking in Snapseed:
- Tap the “Edit History” icon, then “View Edits.”
- Tap the “Detail” option, then the “Mask” icon.
- Paint over areas to exclude from sharpening.
- Invert the mask and apply the changes.
 Snapseed masking tool in action
Alt text: Demonstration of Snapseed’s masking tool, showing how to selectively apply sharpening adjustments to specific areas of an image.
3.3. Fotor: AI-Powered Enhancements
Fotor offers AI-driven features like AI Enlarger and photo deblurring.
How to unblur photos using Fotor:
- Open your blurry image in Fotor.
- Select the “Face Unblur” option.
- Let Fotor’s AI technology analyze and remove the blur.
 Fotor unblur screenshot showing AI-enhanced clarity
Alt text: Screenshot of Fotor’s unblur feature, illustrating AI-enhanced clarity and sharpness improvement.
 Result after using Fotor Unblur
Alt text: Final result after using Fotor Unblur, showcasing a clear and crisp image with smooth skin tones.
4. Online Tools: Quick and Easy Fixes
If you prefer not to download apps, online tools like PicWish offer a quick way to unblur your iPhone photos. Simply upload your photo, adjust the enhancement slider, and download the improved image.
5. Proactive Tips for Capturing Clearer iPhone Photos
Prevention is better than cure. Adopt these best practices to minimize blurry images:
5.1. Keep the Lens Clean
Regularly clean your iPhone lens with a microfiber cloth to prevent obstructions.
5.2. Use a Tripod for Stability
Use a tripod to reduce camera shake, especially in low light.
5.3. Master Camera Settings
Experiment with your iPhone’s camera settings to optimize for different conditions:
- Focus: Manually set the focus by tapping and holding the screen.
- Exposure: Adjust exposure to prevent blown-out highlights.
- Gridlines: Enable gridlines to compose your image and ensure a level horizon.
- Portrait mode: Use portrait mode to add depth and blur the background.
6. Troubleshooting Common iPhone Camera Issues
If you’re still experiencing blurry photos, troubleshoot common issues:
- Restart the camera app or iPhone.
- Remove the case if it’s obstructing the lens.
- Contact Apple Support for further assistance.
7. Elevate Your Photography with dfphoto.net
Ready to take your iPhone photography to the next level? At dfphoto.net, we offer comprehensive resources to help you master your craft:
- Detailed tutorials: Learn advanced techniques for capturing stunning images.
- Inspiring photo galleries: Discover beautiful photos and find creative inspiration.
- A vibrant community: Connect with fellow photographers, share your work, and learn from others.
Visit dfphoto.net today to explore our rich collection of articles, tutorials, and galleries. Join our community of passionate photographers and unlock your creative potential.
Address: 1600 St Michael’s Dr, Santa Fe, NM 87505, United States
Phone: +1 (505) 471-6001
Website: dfphoto.net
8. Call to Action
Don’t let blurry photos hold you back. Explore dfphoto.net to discover expert guides, stunning images, and a supportive community. Elevate your iPhone photography skills and capture the world in breathtaking clarity. Start your journey today and see the difference for yourself!
9. Frequently Asked Questions (FAQs)
9.1. Why Do Photos Get Blurry on iPhone?
Photos can become blurry due to various reasons such as dust, dirt, or fingerprints on the lens, shooting in low light, incorrect use of portrait mode, zooming, or improper focusing. Cleaning the lens and restarting the device can often resolve the issue, but if problems persist, contacting Apple Support is advisable.
9.2. Can I Fix Blurry Photos Using the Native Photos App on My iPhone?
Yes, you can enhance blurry photos using the native Photos app. Utilize the sharpness tool and other available editing features to improve clarity.
9.3. How Do I Unblur an Image?
Unblurring an image is straightforward with apps like Adobe Lightroom, Snapseed, or Fotor. Import the photo into your chosen app and use tools like the sharpening tool in Lightroom, the ‘Detail’ tool in Snapseed, or Fotor’s AI-driven ‘Photo Sharpen’ tool. Adjust the level of sharpness using the slider until you achieve the desired clarity, and then save the improved image.
9.4. What is the Best Way to Stabilize My iPhone for Photos?
To stabilize your iPhone, hold it with both hands, use a tripod, or lean against a stable surface. Enabling the gridlines in the camera settings can also help you align shots and maintain stability.
9.5. How Does Low Light Affect iPhone Photo Quality?
Low light can significantly reduce photo quality by increasing noise and blur. In these conditions, the iPhone may use a longer shutter speed, which can result in motion blur if the camera or subject moves.
9.6. Should I Use the Digital Zoom on My iPhone?
Digital zoom can degrade image quality, resulting in pixelation and blurriness. It’s generally better to crop the photo later to avoid losing detail. If possible, move closer to your subject instead of using digital zoom.
9.7. How Often Should I Clean My iPhone Camera Lens?
Clean your iPhone camera lens regularly, especially if you notice smudges or dirt. A microfiber cloth is ideal for gently removing debris without scratching the lens.
9.8. What are Some Good Third-Party Camera Apps for iPhone?
Popular third-party camera apps include ProCamera, Camera+, and Halide. These apps offer more manual controls and advanced features compared to the native Camera app.
9.9. Can Protective Cases Affect Photo Quality?
Yes, some protective cases can obstruct the camera lens, leading to blurry or distorted photos. Ensure your case doesn’t cover the lens or interfere with the camera’s performance.
9.10. How Can I Reduce Noise in My iPhone Photos?
To reduce noise, shoot in well-lit conditions and use the iPhone’s built-in noise reduction features or third-party apps like Adobe Lightroom or Snapseed. Avoid using high ISO settings, which can increase noise in your photos.
