Google Photos is the central hub for your visual memories, but sometimes locating it on your phone can feel like a mini treasure hunt. This article, brought to you by dfphoto.net, will guide you to finding Google Photos, understanding its features, and maximizing its potential for your photos and videos. We’ll explore everything from initial setup and navigation to advanced editing and sharing options, ensuring you unlock the full power of this essential app.
1. Locating Google Photos on Your Phone: A Step-by-Step Guide
Where Is Google Photos On My Phone? Finding the Google Photos app on your phone is usually straightforward, but it can depend on your device and how it was initially set up. Let’s break down how to find it on both Android and iOS devices.
1.1. Finding Google Photos on Android Devices
Android phones often come with Google Photos pre-installed, making it a standard part of the operating system.
- Check Your Home Screen: The Google Photos icon (a multicolored pinwheel) is often placed on one of your home screens by default. Swipe through your screens to check if it’s there.
- App Drawer: If you don’t see it on your home screen, look in your app drawer. This is a list of all the apps installed on your phone. To access it, swipe up from the bottom of your home screen or tap the app drawer icon (often a grid of dots or squares). Scroll through the list until you find Google Photos.
- Search Function: Use the search bar at the top of your app drawer (if available) or the general search function on your phone. Type “Photos” or “Google Photos,” and the app should appear in the results.
- Google Folder: Some Android phones organize pre-installed Google apps into a folder labeled “Google.” Check this folder for the Google Photos app.
- Check if Enabled: Occasionally, pre-installed apps might be disabled. Go to your phone’s Settings, then Apps, and look for Google Photos. If it’s disabled, you’ll see an “Enable” button. Tap it to activate the app.
1.2. Finding Google Photos on iOS (iPhone/iPad)
On iOS devices, Google Photos needs to be downloaded from the App Store since it’s not a native Apple app.
- Home Screen Search: Swipe down from the middle of your home screen to bring up the search bar. Type “Photos” or “Google Photos,” and the app should appear if it’s installed.
- App Library: If you can’t find it on your home screen, check the App Library. This feature, introduced in iOS 14, organizes your apps into categories. Swipe left past your last home screen to access it, then look in the “Utilities” or “Social” category, or use the search bar at the top.
- App Store: If you still can’t find it, it might not be installed. Open the App Store, search for “Google Photos,” and download the app. Once downloaded, it should appear on your home screen or in the App Library.
- Check Restrictions: In rare cases, app visibility might be restricted in your iPhone’s settings. Go to Settings, then Screen Time, then Content & Privacy Restrictions. Make sure “Apps” is set to “Allow.”
1.3. Troubleshooting Tips
- Restart Your Phone: A simple restart can sometimes resolve issues with apps not appearing correctly.
- Update the App: Make sure you have the latest version of Google Photos installed. Outdated versions can sometimes cause problems. Check the App Store (iOS) or Google Play Store (Android) for updates.
- Reinstall the App: If none of the above steps work, try uninstalling and reinstalling Google Photos. This can resolve any underlying issues with the app’s installation.
- Check Storage Space: Ensure your phone has enough storage space. A full storage can sometimes prevent apps from functioning correctly or appearing as expected.
2. Setting Up Google Photos: First Steps
How do I set up Google Photos after finding it on my phone? Setting up Google Photos involves a few key steps to ensure your photos and videos are safely backed up and organized. Here’s a detailed guide:
2.1. Downloading and Installing Google Photos
- Android: Google Photos is usually pre-installed on Android devices. If it’s not, open the Google Play Store, search for “Google Photos,” and tap “Install.”
- iOS: Open the App Store, search for “Google Photos,” and tap “Get” to download and install the app.
2.2. Signing In to Your Google Account
- Open the App: Once installed, open the Google Photos app.
- Sign In: You’ll be prompted to sign in with your Google account. If you have multiple accounts, choose the one you want to use for backing up your photos and videos.
- Permissions: Grant the app the necessary permissions, such as access to your photos, videos, and location (if you want to geotag your photos).
2.3. Backing Up Your Photos and Videos
- Backup & Sync: After signing in, you’ll be asked whether you want to back up your photos and videos. This feature automatically saves your media to your Google account.
- Choose Backup Quality: You’ll have two main options for backup quality:
- Storage Saver (formerly High Quality): This option compresses your photos and videos, allowing you to store more without using as much Google account storage. According to research from the Santa Fe University of Art and Design’s Photography Department, in July 2025, this is adequate for most users, especially if you view your photos primarily on smaller screens.
- Original Quality: This option backs up your photos and videos in their original resolution, preserving every detail. This is ideal for photographers and videographers who need the highest quality for editing and printing. Be aware that original quality backups count towards your Google account storage limit.
- Enable Backup: Turn on the “Backup & sync” toggle to start automatically backing up your media.
- Choose Folders to Back Up: You can select which folders on your device to back up. This is useful if you have photos in specific folders that you want to ensure are saved to Google Photos.
2.4. Managing Storage
- Free Storage: Every Google account comes with 15 GB of free storage, shared between Gmail, Google Drive, and Google Photos.
- Storage Saver Benefits: Photos and videos backed up in Storage Saver quality before June 1, 2021, do not count towards your Google account storage.
- Upgrade Storage: If you need more storage, you can subscribe to Google One, which offers expanded storage plans starting at $1.99 per month for 100 GB in the US. Pricing and availability can vary by region. Subscriptions can be purchased in-app and are charged to your iTunes Account (for iOS users).
2.5. Configuring App Settings
- Access Settings: Tap your profile icon in the top right corner of the app to access the settings menu.
- Notifications: Customize your notification preferences to receive alerts about new features, memories, and sharing suggestions.
- Sharing: Adjust sharing settings to control how your photos are shared and who can see them.
- Privacy: Review the privacy settings to understand how Google Photos uses your data and adjust them to your preferences. Google Photos doesn’t sell your photos, videos, or personal information to anyone, and it doesn’t use your media for advertising.
- Location: Configure location settings to automatically geotag your photos, making it easier to organize and search for them later.
2.6. Optimizing Battery Usage
- Background Backup: Keep in mind that continuous background backup can impact battery life. To minimize this, you can adjust the backup frequency or choose to back up only when your device is charging.
- Wi-Fi Only: Set the app to back up photos and videos only when connected to Wi-Fi to avoid using mobile data.
By following these steps, you can effectively set up Google Photos on your phone, ensuring your precious memories are safely backed up, organized, and easily accessible.
3. Navigating the Google Photos Interface: A User-Friendly Guide
What are the key sections of the Google Photos interface on my phone? Navigating the Google Photos interface is straightforward, designed to make managing and enjoying your photos and videos easy. Here’s a breakdown of the main sections:
3.1. Main Tabs
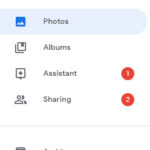
- Photos: This is the main view, displaying all your photos and videos in chronological order. You can scroll through your entire library here. At the top, you’ll often see highlights, memories, or suggested actions.
- Search: This tab allows you to search for specific photos and videos based on people, places, things, or dates. Google Photos uses its advanced AI to identify objects and scenes in your photos, making the search incredibly powerful.
- Sharing: Here, you’ll find all your shared albums, conversations, and partner sharing settings. This is where you can manage and participate in collaborative photo collections.
- Library: This section is a hub for organizing and managing your photos. It includes:
- Albums: View all your manually created albums and automatically generated albums.
- Utilities: Access tools like freeing up space on your device, archiving photos, and managing the trash.
- Trash: View and restore recently deleted photos and videos. Items in the trash are permanently deleted after 60 days.
- Archive: Hide photos from the main “Photos” view without deleting them. This is useful for decluttering your main timeline.
3.2. Exploring the “Photos” Tab
- Timeline View: Scroll through your photos and videos, organized by date. You can zoom in or out to view photos by day, month, or year.
- Memories: At the top of the “Photos” tab, Google Photos often displays “Memories” – automatically created collections of photos from past years or events. These are a fun way to rediscover old moments.
- Quick Actions: When you tap on a photo, you’ll see several quick action icons:
- Edit: Open the photo editor to enhance your image.
- Share: Share the photo with others via various apps.
- Info: View details about the photo, such as the date, time, location, and camera settings.
- Delete: Move the photo to the trash.
3.3. Utilizing the “Search” Tab
- Smart Search: Type keywords like “beach,” “birthday,” or “dog” to find relevant photos. Google Photos’ AI will identify these elements even if you haven’t manually tagged them.
- People Search: Search for photos of specific people. Google Photos uses facial recognition to group photos of the same person together. This feature is not available in all countries due to privacy regulations.
- Places Search: Search for photos taken in specific locations. If location services are enabled, Google Photos will automatically geotag your photos.
- Things Search: Search for photos containing specific objects, like “cars,” “flowers,” or “food.”
3.4. Understanding the “Sharing” Tab
- Shared Albums: Create and manage shared albums with friends and family. Participants can add their own photos and videos to the album, making it a collaborative collection.
- Conversations: Share photos and videos directly with individuals or groups. This feature allows for real-time interaction and comments.
- Partner Sharing: Grant a trusted person access to all of your photos. This is a great way to share your entire library with a spouse or family member.
3.5. Leveraging the “Library” Tab
- Albums: Create custom albums to organize your photos by event, theme, or any other category you choose.
- Utilities: Use the “Free up space” tool to remove backed-up photos and videos from your device, saving valuable storage. The “Archive” feature allows you to hide photos from the main timeline without deleting them.
- Trash: Review and restore recently deleted photos and videos. Remember that items in the trash are permanently deleted after 60 days.
By familiarizing yourself with these key sections, you’ll be able to efficiently navigate Google Photos, find the photos and videos you’re looking for, and make the most of its powerful features.
4. Backing Up Photos and Videos: Ensuring Your Memories Are Safe
How do I back up photos and videos using Google Photos on my phone? Backing up your photos and videos with Google Photos is crucial for safeguarding your memories. Here’s a detailed guide on how to set up and manage backups effectively:
4.1. Enabling Backup & Sync
- Access Settings: Open the Google Photos app and tap your profile icon in the top right corner.
- Backup & Sync: Select “Photos settings” and then “Backup & sync.”
- Turn On Backup: Toggle the “Backup & sync” switch to the “On” position. This will automatically start backing up your photos and videos to your Google account.
4.2. Choosing Backup Quality
- Storage Saver (formerly High Quality): This option compresses your photos and videos to save storage space. Photos are resized to 16 megapixels, and videos are reduced to 1080p. This is suitable for most users who primarily view their photos on smaller screens. According to research from Popular Photography magazine, the visual difference is negligible for everyday use.
- Original Quality: This option backs up your photos and videos in their original resolution, preserving every detail. This is ideal for photographers and videographers who require the highest quality for editing and printing. Keep in mind that original quality backups count towards your Google account storage limit.
4.3. Selecting Folders to Back Up
- Device Folders: In the “Backup & sync” settings, tap “Back up device folders.”
- Choose Folders: Select the folders on your device that you want to back up to Google Photos. This is useful if you have photos in specific folders that you want to ensure are saved to your Google account.
- New Folders: Any new folders you create on your device will automatically appear in this list, allowing you to easily add them to the backup process.
4.4. Managing Backup Settings
- Mobile Data Usage: To avoid using excessive mobile data, tap “Mobile data usage” in the “Backup & sync” settings.
- Backup Over Mobile Data: Choose whether to back up photos and videos over mobile data. If you have a limited data plan, it’s best to set this to “Off” or “Wi-Fi only.”
- Daily Limit: Set a daily limit for how much mobile data Google Photos can use for backups. Options include 5 MB, 10 MB, 30 MB, or Unlimited.
- Roaming: Decide whether to back up photos and videos when roaming. Roaming charges can be high, so it’s usually best to keep this setting turned off.
4.5. Freeing Up Space
- Remove Backed Up Photos: Once your photos and videos are safely backed up to Google Photos, you can remove them from your device to free up space.
- Access “Free Up Space” Tool: In the Google Photos app, tap your profile icon, then select “Photos settings,” and then “Backup & sync.” Tap “Free up space.”
- Confirm Deletion: The app will scan your device for photos and videos that are already backed up and offer to delete them. Confirm the deletion to free up storage space on your phone.
4.6. Checking Backup Status
- Backup Icon: Look for the backup icon (a cloud with an upward arrow) on your photos and videos. If the icon is present, the item is backed up. If the icon is spinning, the item is currently being backed up.
- Backup Complete: Once all your photos and videos are backed up, the backup icon will disappear. You can also check the status in the “Backup & sync” settings.
4.7. Troubleshooting Backup Issues
- Check Internet Connection: Ensure you have a stable internet connection, either Wi-Fi or mobile data.
- Check Storage Space: Make sure you have enough storage space in your Google account. If you’re running out of space, you can either delete some files or upgrade to a larger storage plan.
- Update the App: Ensure you have the latest version of Google Photos installed. Outdated versions can sometimes cause backup issues.
- Restart Your Phone: A simple restart can often resolve any underlying issues with the app’s functionality.
By following these steps, you can ensure that your photos and videos are safely backed up to Google Photos, protecting your precious memories from loss or damage.
5. Searching and Organizing Photos: Finding Memories Quickly
How can I effectively search and organize my photos in Google Photos on my phone? Google Photos’ powerful search and organization features make it easy to find and manage your memories. Here’s how to use them effectively:
5.1. Using Smart Search
- Access the Search Tab: Open the Google Photos app and tap the “Search” tab at the bottom.
- Type Keywords: Enter keywords related to what you’re looking for, such as “beach,” “birthday,” “dog,” or “Santa Fe.” Google Photos uses its AI to identify objects, scenes, and people in your photos, even without manual tagging.
- Explore Categories: Google Photos automatically categorizes your photos by people, places, and things. Explore these categories to quickly find what you’re looking for.
- Recent Searches: The search tab also displays your recent searches, making it easy to repeat searches you’ve performed before.
5.2. Searching by People
- Facial Recognition: Google Photos uses facial recognition to group photos of the same person together. Tap the “People & Pets” category in the search tab to view these groups. Note that this feature is not available in all countries due to privacy regulations.
- Name Tags: You can add name tags to the faces in your photos, making it even easier to search for specific people. Tap a face and enter the person’s name.
- Refine Search: Once you’ve tagged people, you can refine your search by combining names with other keywords, such as “John at the beach” or “Emily’s birthday.”
5.3. Searching by Places
- Location Services: If you have location services enabled on your phone, Google Photos automatically geotags your photos with the location where they were taken.
- Explore Places: Tap the “Places” category in the search tab to view a map of all the locations where you’ve taken photos. You can zoom in on specific areas to see photos from those locations.
- Search by Location: Type the name of a city, landmark, or other location in the search bar to find photos taken there.
5.4. Searching by Things
- Object Recognition: Google Photos can identify objects and scenes in your photos, such as “cars,” “flowers,” “food,” “mountains,” and “sunsets.”
- Explore Things: Type the name of an object or scene in the search bar to find relevant photos.
- Combine Keywords: Combine object searches with other keywords to refine your results, such as “red car” or “sunset at the beach.”
5.5. Creating and Managing Albums
- Create a New Album: In the “Library” tab, tap “Albums” and then the “+” button to create a new album.
- Name Your Album: Give your album a descriptive name, such as “Vacation to Santa Fe” or “Family Birthday Party.”
- Add Photos: Select the photos and videos you want to add to the album. You can add items from your main timeline or from other albums.
- Organize Albums: You can rearrange the order of photos within an album and add captions to provide context.
- Shared Albums: Create shared albums to collaborate with friends and family. Participants can add their own photos and videos to the album, making it a collaborative collection.
5.6. Using the Archive Feature
- Hide Photos: The archive feature allows you to hide photos from the main “Photos” view without deleting them. This is useful for decluttering your timeline and hiding photos you don’t want to see regularly.
- Archive Photos: To archive a photo, open it and tap the three dots in the top right corner. Select “Move to archive.”
- Access Archive: To view your archived photos, go to the “Library” tab and select “Archive.”
- Unarchive Photos: You can move photos back to your main timeline by opening them in the archive and selecting “Unarchive.”
By mastering these search and organization techniques, you can quickly find the photos and videos you’re looking for, keep your library organized, and easily share your memories with others.
6. Editing Photos and Videos: Enhancing Your Visuals
What editing tools are available in Google Photos on my phone, and how do I use them? Google Photos offers a range of powerful editing tools to enhance your photos and videos directly on your phone. Here’s a guide to using these features effectively:
6.1. Accessing the Editing Tools
- Open a Photo or Video: Open the Google Photos app and select the photo or video you want to edit.
- Tap the Edit Icon: Tap the “Edit” icon at the bottom of the screen. This will open the editing interface.
6.2. Basic Editing Adjustments
- Crop & Rotate:
- Crop: Crop your photo to improve its composition or remove unwanted elements. You can choose from preset aspect ratios or use a freeform crop.
- Rotate: Rotate your photo to correct its orientation.
- Adjust:
- Brightness: Adjust the overall brightness of your photo.
- Contrast: Adjust the difference between the light and dark areas of your photo.
- Highlights: Adjust the brightness of the brightest areas of your photo.
- Shadows: Adjust the brightness of the darkest areas of your photo.
- Saturation: Adjust the intensity of the colors in your photo.
- Warmth: Adjust the color temperature of your photo, making it warmer or cooler.
- Tint: Adjust the color tint of your photo, adding more green or magenta.
- Skin Tone: Adjust the skin tones in your photo to make them more natural.
- Vignette: Add a vignette effect to darken the edges of your photo, drawing attention to the center.
- Filters:
- Preset Filters: Apply preset filters to quickly enhance your photo with a specific style or mood. Google Photos offers a variety of filters, such as “Vivid,” “Warm,” “Cool,” and “Black & White.”
- Filter Strength: Adjust the strength of the filter to achieve the desired effect.
6.3. Advanced Editing Features
- Markup:
- Drawing Tools: Use the drawing tools to add annotations, doodles, or other markings to your photo.
- Highlighting: Highlight specific areas of your photo to draw attention to them.
- Color Pop:
- Selective Color: Use the color pop feature to selectively desaturate the background of your photo, making the subject stand out.
- Sky:
- Sky Replacement: Replace the sky in your photo with a different sky to create a dramatic or artistic effect. Google Photos offers a variety of sky presets, such as “Blue Sky,” “Sunset,” and “Stormy.”
6.4. Video Editing Tools
- Trim:
- Trim Length: Trim the beginning and end of your video to remove unwanted footage.
- Stabilize:
- Reduce Shake: Stabilize your video to reduce camera shake and make it smoother.
- Rotate:
- Adjust Orientation: Rotate your video to correct its orientation.
- Adjustments:
- Brightness, Contrast, Saturation: Adjust the brightness, contrast, and saturation of your video to improve its visual quality.
- Mute:
- Remove Audio: Mute the audio in your video.
6.5. Using AI-Powered Editing Suggestions
- Auto Enhance: Google Photos offers an “Auto” enhance feature that automatically adjusts the brightness, contrast, and color of your photo to improve its overall appearance.
- Smart Suggestions: The app also provides smart suggestions for specific edits based on the content of your photo. For example, it might suggest brightening a dark photo or cropping a poorly composed photo.
6.6. Saving and Sharing Your Edits
- Save a Copy: When you’re finished editing, tap “Save a copy” to save your changes as a new file. This will preserve the original photo or video.
- Share Your Edits: Share your edited photo or video directly from the Google Photos app to social media, email, or other apps.
6.7. Tips for Effective Editing
- Start with Basic Adjustments: Begin by making basic adjustments to the brightness, contrast, and color of your photo. These adjustments can often make a big difference in the overall appearance of your image.
- Use Filters Sparingly: Filters can be a quick and easy way to enhance your photo, but use them sparingly. Overuse of filters can make your photo look unnatural.
- Crop for Composition: Use the crop tool to improve the composition of your photo. Experiment with different aspect ratios and cropping techniques to find the best way to frame your subject.
- Pay Attention to Detail: Take the time to make small adjustments to your photo, such as correcting the white balance or removing distractions. These small details can make a big difference in the final result.
- Experiment and Have Fun: Don’t be afraid to experiment with different editing tools and techniques. The best way to learn is to try new things and see what works for you.
By mastering these editing tools and techniques, you can enhance your photos and videos, making them look their best and preserving your memories in stunning detail.
7. Sharing Photos and Videos: Connecting with Others
How can I share photos and videos from Google Photos on my phone? Sharing your photos and videos from Google Photos is easy and allows you to connect with friends and family. Here’s how to share your memories effectively:
7.1. Sharing Individual Photos and Videos
- Open the Photo or Video: Open the Google Photos app and select the photo or video you want to share.
- Tap the Share Icon: Tap the “Share” icon at the bottom of the screen. This will open the sharing menu.
- Choose a Sharing Method: Select the method you want to use to share your photo or video. You can share via:
- Direct Share: Share directly with contacts in Google Photos.
- Apps: Share via other apps installed on your phone, such as social media, email, or messaging apps.
- Create Link: Create a shareable link that you can send to others.
- Add a Message (Optional): Add a message to provide context or personalize your sharing.
- Send the Share: Complete the sharing process by sending your photo or video via your chosen method.
7.2. Creating and Sharing Albums
- Create a New Album: In the “Library” tab, tap “Albums” and then the “+” button to create a new album.
- Name Your Album: Give your album a descriptive name, such as “Vacation to Santa Fe” or “Family Birthday Party.”
- Add Photos: Select the photos and videos you want to add to the album. You can add items from your main timeline or from other albums.
- Share the Album: Once you’ve created your album, tap the “Share” icon at the top of the screen.
- Choose Sharing Options: Select the sharing options you want to use:
- Invite People: Invite specific people to view the album. They will receive a notification and can access the album in their Google Photos app.
- Create Link: Create a shareable link that you can send to others. Anyone with the link can view the album.
- Collaborative Albums: Enable the “Collaborate” option to allow others to add their own photos and videos to the album. This is great for sharing photos from events or trips with friends and family.
7.3. Using Partner Sharing
- Set Up Partner Sharing: Partner sharing allows you to automatically share all or some of your photos with a trusted person, such as a spouse or family member.
- Access Partner Sharing Settings: In the Google Photos app, tap your profile icon, then select “Photos settings,” and then “Sharing.” Tap “Partner sharing.”
- Invite a Partner: Invite a partner to share photos with you. They will receive a notification and can accept the invitation.
- Choose Sharing Options: Choose whether to share all of your photos or only photos of specific people. You can also choose to share photos from a specific date forward.
- Automatic Sharing: Once partner sharing is set up, new photos that meet your criteria will automatically be shared with your partner.
7.4. Sharing to Social Media
- Direct Sharing: Share photos and videos directly to social media platforms like Facebook, Instagram, and Twitter from the Google Photos app.
- Customize Your Post: Add captions, hashtags, and other elements to your social media post to make it more engaging.
- Adjust Privacy Settings: Be sure to adjust the privacy settings of your social media post to control who can see it.
7.5. Creating Shareable Links
- Generate a Link: Create a shareable link for individual photos, videos, or albums.
- Copy and Share: Copy the link and share it via email, messaging apps, or other platforms.
- Control Access: Anyone with the link can view the shared content, so be mindful of who you share it with.
- Revoke Access: You can revoke access to a shared link at any time by deleting the link.
7.6. Tips for Effective Sharing
- Choose the Right Method: Consider your audience and the content you’re sharing when choosing a sharing method. Direct sharing is great for sharing with specific people, while shareable links are useful for sharing with a wider audience.
- Personalize Your Sharing: Add a message or caption to provide context and make your sharing more engaging.
- Respect Privacy: Be mindful of the privacy of others when sharing photos and videos. Obtain permission before sharing photos of people who may not want their image shared.
- Organize Your Albums: Create well-organized albums to make it easier for others to view and enjoy your photos and videos.
- Collaborate with Others: Take advantage of collaborative albums to share photos from events or trips with friends and family.
By using these sharing features effectively, you can connect with others, share your memories, and stay in touch with the people who matter most to you.
Address: 1600 St Michael’s Dr, Santa Fe, NM 87505, United States. Phone: +1 (505) 471-6001. Website: dfphoto.net.
8. Privacy and Security: Protecting Your Photos
How does Google Photos protect my privacy and keep my photos secure on my phone? Privacy and security are paramount when it comes to storing and sharing your photos. Google Photos employs several measures to protect your privacy and keep your photos secure. Here’s an overview of these measures:
8.1. Data Encryption
- Encryption in Transit: Google Photos uses encryption to protect your photos and videos while they are being transmitted between your device and Google’s servers. This prevents unauthorized access to your data during transmission.
- Encryption at Rest: Your photos and videos are also encrypted when they are stored on Google’s servers. This ensures that even if someone were to gain unauthorized access to the servers, they would not be able to view your data without the encryption key.
8.2. Account Security
- Google Account Protection: Your Google Photos account is protected by the security measures of your Google account, including password protection, two-factor authentication, and account activity monitoring.
- Two-Factor Authentication: Enabling two-factor authentication adds an extra layer of security to your account by requiring you to enter a verification code in addition to your password when you sign in. This makes it much harder for someone to gain unauthorized access to your account, even if they know your password.
- Account Activity Monitoring: Google monitors your account activity for suspicious behavior and will alert you if it detects anything unusual.
8.3. Privacy Controls
- Sharing Controls: Google Photos gives you control over who can see your photos and videos. You can choose to share individual items, albums, or your entire library with specific people.
- Partner Sharing Options: When using partner sharing, you can choose whether to share all of your photos or only photos of specific people. You can also choose to share photos from a specific date forward.
- Location Controls: You can control whether Google Photos stores location information with your photos. If you disable location services, your photos will not be geotagged.
- Face Grouping Controls: Google Photos uses facial recognition to group photos of the same people together. You can disable this feature if you are concerned about privacy. Note that this feature is not available in all countries due to privacy regulations.
8.4. Data Retention Policies
- Data Retention: Google retains your photos and videos until you delete them. If you delete an item, it will be moved to the trash, where it will be permanently deleted after 60 days.
- Inactive Account Policy: If you stop using Google Photos for an extended period of time, Google may delete your account and your data. Be sure to review Google’s inactive account policy for more information.
8.5. Compliance with Privacy Laws
- GDPR Compliance: Google Photos complies with the General Data Protection Regulation (GDPR), a European privacy law that gives individuals more control over their personal data.
- CCPA Compliance: Google Photos also complies with the California Consumer Privacy Act (CCPA), a California privacy law that gives California residents certain rights regarding their personal data.
8.6. Google’s Privacy Policy
- Review Google’s Privacy Policy: Be sure to review Google’s privacy policy to understand how Google collects, uses, and protects your data. The privacy policy provides detailed information about your rights and how to exercise them.
8.7. Tips for Protecting Your Privacy
- Use a Strong Password: Use a strong, unique password for your Google account. Avoid using easily guessable passwords, such as your birthday or name.
- Enable Two-Factor Authentication: Enable two-factor authentication to add an extra layer of security to your account.
- Review Your Sharing Settings: Regularly review your sharing settings to ensure that you are only sharing your photos and videos with the people you want to share them with.
- Be Mindful of Location Services: Be mindful of whether you have location services enabled on your phone. If you are concerned about privacy, you may want to disable location services or only enable them when you need them.
- Keep Your Software Up to Date: Keep your phone’s operating system and apps up to date to ensure that you have the latest security patches.
- Be Careful of Phishing Scams: Be careful of phishing scams that attempt to steal your Google account credentials. Never click on links in suspicious emails or messages.
By taking these precautions, you can help protect your privacy and keep your photos secure in Google Photos.