Are you curious about Where Do The Deleted Photos Go On Iphone? At dfphoto.net, we provide a straightforward answer and guide you through retrieving those cherished memories. We also explore iPhone photo recovery, data security best practices, and ways to optimize your photo storage.
1. Understanding the iPhone Photo Deletion Process
When you delete a photo on your iPhone, it doesn’t immediately vanish into thin air. It’s a common misconception that deleted photos are permanently gone. Instead, they are moved to a specific location, giving you a chance to recover them. Knowing this process is crucial for understanding iPhone photo recovery and managing your digital photo storage.
1.1. The “Recently Deleted” Album
The primary destination for deleted photos on your iPhone is the “Recently Deleted” album. This album acts as a temporary holding place for photos and videos you’ve removed from your main library. Items in this album remain for 30 days before being permanently deleted.
1.2. Accessing the “Recently Deleted” Album
To access the “Recently Deleted” album:
- Open the Photos app.
- Tap the Albums tab at the bottom.
- Scroll down to the Utilities section.
- Tap on Recently Deleted.
In iOS 16 and later, you may need to use Face ID or Touch ID to unlock this album for added security.
1.3. What Happens After 30 Days?
After the 30-day period, the photos and videos in the “Recently Deleted” album are permanently erased from your device. Once this happens, the standard recovery methods won’t work, emphasizing the importance of regularly backing up your photos.
2. Recovering Photos from the “Recently Deleted” Album
The “Recently Deleted” album provides a convenient way to recover photos you might have accidentally deleted. Here’s how to retrieve your photos:
2.1. Steps to Recover Deleted Photos
- Open the Photos app.
- Go to the Albums tab and tap Recently Deleted.
- Tap Select in the upper-right corner.
- Choose the photos or videos you want to recover.
- Tap Recover at the bottom-right corner.
- Confirm by tapping Recover Photo or Recover Video.
2.2. Recovering All Photos at Once
If you want to recover all the photos and videos in the “Recently Deleted” album:
- Open the Photos app.
- Go to the Albums tab and tap Recently Deleted.
- Tap Select in the upper-right corner.
- Tap Recover All at the bottom-left corner.
- Confirm by tapping Recover.
2.3. Important Considerations
- Time Limit: Remember that you only have 30 days to recover photos from this album.
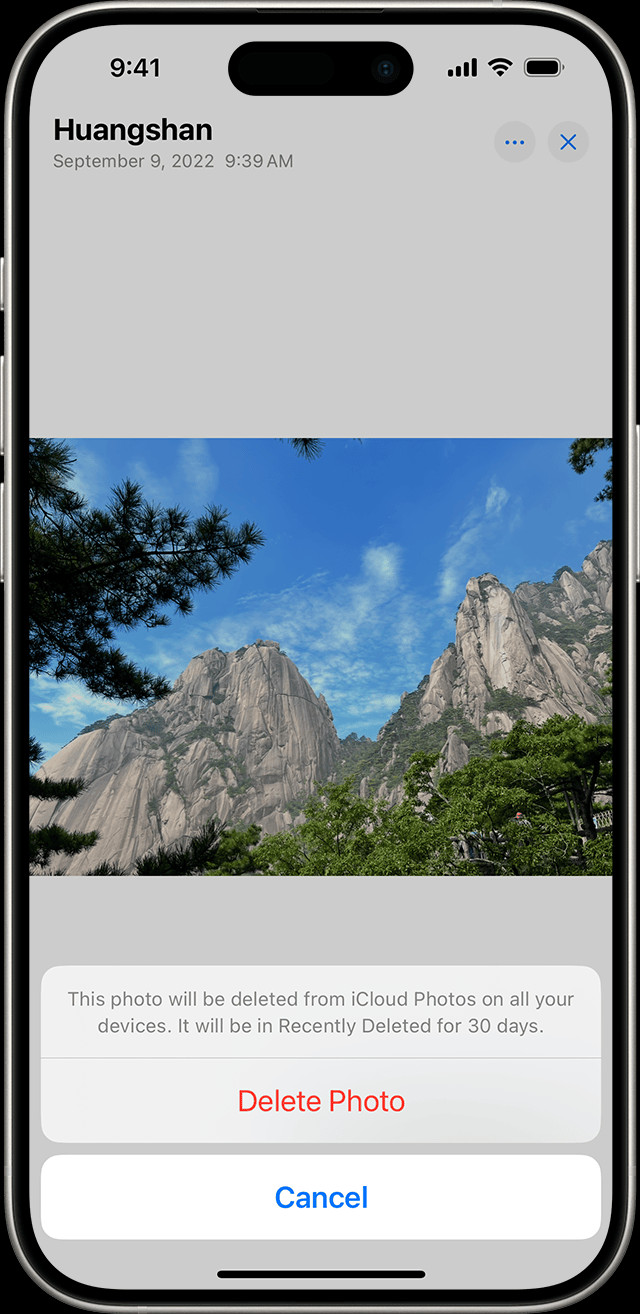
- iCloud Photos: If you use iCloud Photos, deleting a photo on one device deletes it on all devices connected to the same iCloud account.
3. What If Photos Are Not in “Recently Deleted”?
Sometimes, photos might not appear in the “Recently Deleted” album. This could be due to various reasons, such as deleting them permanently or issues with iCloud syncing. In such cases, you’ll need to explore alternative recovery methods.
3.1. Checking iCloud Backup
iCloud Backup is a valuable tool for iPhone data recovery. If you had iCloud Backup enabled before deleting the photos, you might be able to restore them from a previous backup.
3.2. Steps to Restore from iCloud Backup
- Erase Your iPhone: Go to Settings > General > Transfer or Reset iPhone > Erase All Content and Settings.
- Follow Setup Assistant: After your iPhone restarts, follow the on-screen instructions until you reach the Apps & Data screen.
- Restore from iCloud Backup: Choose Restore from iCloud Backup and sign in with your Apple ID.
- Select Backup: Select the most recent backup that contains your photos.
- Wait for Restoration: Wait for the restoration process to complete. This might take some time depending on the size of the backup and your internet connection.
3.3. Limitations of iCloud Backup
- Backup Availability: You can only restore if you had a recent backup.
- Data Overwrite: Restoring from a backup will replace the current data on your iPhone with the data from the backup.
3.4. Using iTunes/Finder Backup
If you regularly back up your iPhone to your computer using iTunes (or Finder on newer macOS versions), you can restore your photos from these backups.
3.5. Steps to Restore from iTunes/Finder Backup
- Connect iPhone to Computer: Connect your iPhone to the computer you used for the backup.
- Open iTunes/Finder: Open iTunes (or Finder on macOS Catalina and later).
- Select iPhone: Select your iPhone when it appears in iTunes/Finder.
- Restore Backup: Click Restore Backup and choose the relevant backup.
- Follow Instructions: Follow the on-screen instructions to complete the restoration.
3.6. Considerations for iTunes/Finder Backup
- Backup Requirement: This method requires a previous backup to be available.
- Data Replacement: Restoring from a backup will replace the existing data on your iPhone.
4. Third-Party Data Recovery Software
When standard methods fail, third-party data recovery software can be a viable option. These tools are designed to scan your device for recoverable data, including photos and videos.
4.1. Popular Data Recovery Software
Some popular data recovery software options include:
- EaseUS MobiSaver
- Dr.Fone – Data Recovery (iOS)
- iMyFone D-Back
- Tenorshare UltData
4.2. How Data Recovery Software Works
These software programs work by scanning the iPhone’s internal storage for traces of deleted files. They use sophisticated algorithms to identify and recover data that hasn’t been overwritten.
4.3. Steps to Use Data Recovery Software
- Download and Install: Download and install the data recovery software on your computer.
- Connect iPhone: Connect your iPhone to your computer.
- Scan Device: Launch the software and follow the instructions to scan your iPhone.
- Preview Recoverable Files: Preview the recoverable photos and videos.
- Recover Files: Select the files you want to recover and save them to your computer.
4.4. Risks and Limitations
- Success Rate: The success rate of data recovery software can vary depending on factors like how long ago the photos were deleted and whether the storage space has been overwritten.
- Security Concerns: Using third-party software involves granting access to your device’s data, so it’s important to choose reputable and trustworthy software.
- Cost: Many data recovery software programs require a paid license for full functionality.
5. Preventing Photo Loss on Your iPhone
Prevention is always better than cure when it comes to digital photo management. Implementing proactive measures can save you from the stress of losing precious memories.
5.1. Regularly Backing Up Your iPhone
Regular backups are the cornerstone of preventing data loss. You can back up your iPhone using iCloud or your computer.
5.2. Enabling iCloud Photos
iCloud Photos automatically uploads and stores your photos and videos in iCloud, so you can access them on any device. To enable iCloud Photos:
- Go to Settings > [Your Name] > iCloud > Photos.
- Turn on iCloud Photos.
5.3. Using iTunes/Finder for Backup
You can also back up your iPhone to your computer using iTunes (or Finder on macOS Catalina and later).
- Connect your iPhone to your computer.
- Open iTunes/Finder and select your iPhone.
- Click Back Up Now to create a backup of your device.
5.4. External Hard Drives for Photo Storage
Consider using an external hard drive for additional photo storage, especially if you have a large photo library.
5.5. Best Practices for External Hard Drive Storage
- Choose a Reliable Drive: Opt for a reputable brand with positive reviews.
- Regularly Transfer Photos: Make it a habit to transfer photos from your iPhone to the external hard drive regularly.
- Create a Backup Strategy: Consider having multiple backups of your photos, including one offsite backup.
 Photos in recently deleted folder, able to be recovered
6. Managing Storage on Your iPhone
Efficient storage management can prevent photo loss and improve your iPhone’s performance. Regularly clearing unnecessary files and optimizing your photo storage can make a big difference.
6.1. Checking Your iPhone Storage
- Go to Settings > General > iPhone Storage.
This screen shows you how much storage you’ve used and provides recommendations for optimizing your storage.
6.2. Optimizing Photo Storage
iPhone offers an option to optimize photo storage by storing full-resolution photos in iCloud and keeping smaller, device-optimized versions on your iPhone.
- Go to Settings > [Your Name] > iCloud > Photos.
- Choose Optimize iPhone Storage.
6.3. Deleting Unnecessary Photos and Videos
Regularly review your photo library and delete photos and videos you no longer need. This can free up significant storage space on your iPhone.
6.4. Using Cloud Storage Services
In addition to iCloud, consider using other cloud storage services like Google Photos, Dropbox, or Amazon Photos to back up and store your photos.
6.5. Benefits of Cloud Storage Services
- Accessibility: Access your photos from any device with an internet connection.
- Redundancy: Multiple backups ensure your photos are safe even if one storage location fails.
- Collaboration: Easily share photos with friends and family.
7. Understanding Data Security and Privacy
Protecting your photos also means understanding data security and privacy. Be aware of potential risks and take steps to safeguard your personal information.
7.1. Securing Your iCloud Account
Your iCloud account contains a wealth of personal information, so it’s essential to secure it properly.
7.2. Best Practices for iCloud Security
- Use a Strong Password: Create a strong, unique password for your Apple ID.
- Enable Two-Factor Authentication: This adds an extra layer of security to your account.
- Regularly Review Security Settings: Keep an eye on your account activity and security settings.
7.3. Protecting Against Phishing and Malware
Be cautious of phishing emails and malware that could compromise your data.
7.4. Tips to Avoid Phishing and Malware
- Be Skeptical of Suspicious Emails: Don’t click on links or download attachments from unknown senders.
- Keep Your Software Updated: Regularly update your iPhone and computer’s operating systems and security software.
- Use a Reputable Antivirus: Consider using a reputable antivirus program on your computer.
7.5. Privacy Settings on Your iPhone
Review and adjust the privacy settings on your iPhone to control how your data is shared.
7.6. Adjusting Privacy Settings
- Go to Settings > Privacy.
- Review each category (e.g., Location Services, Contacts, Photos) and adjust the settings as needed.
8. Advanced Techniques for Photo Recovery
For more challenging photo recovery scenarios, advanced techniques might be necessary. These methods often require specialized tools and expertise.
8.1. Forensic Data Recovery
Forensic data recovery involves using advanced techniques to recover data from damaged or inaccessible devices. This type of recovery is often used in law enforcement and cybersecurity investigations.
8.2. Data Recovery Services
Professional data recovery services have specialized equipment and expertise to recover data from severely damaged iPhones. These services can be expensive, but they might be the only option for recovering critical photos.
8.3. When to Seek Professional Help
- Physical Damage: If your iPhone has been physically damaged (e.g., water damage, broken screen), seek professional help.
- Failed Recovery Attempts: If you’ve tried multiple recovery methods without success, consult a data recovery specialist.
- Critical Data: If the photos are extremely important and irreplaceable, consider professional recovery services.
9. iPhone Photography Tips and Tricks
While ensuring your photos are safe, why not improve your photography skills? Here are some tips and tricks to help you take stunning photos with your iPhone.
9.1. Mastering iPhone Camera Settings
Understanding your iPhone’s camera settings can significantly improve the quality of your photos.
9.2. Key Camera Settings to Adjust
- Exposure: Adjust the exposure to brighten or darken your photos.
- Focus: Tap on the screen to focus on a specific subject.
- HDR: Use HDR (High Dynamic Range) to capture more detail in high-contrast scenes.
- Live Photos: Capture a few moments before and after you take a photo.
9.3. Composition Techniques
Composition is crucial for creating visually appealing photos.
9.4. Popular Composition Techniques
- Rule of Thirds: Divide your frame into nine equal parts and place key elements along these lines or at their intersections.
- Leading Lines: Use lines to guide the viewer’s eye through the photo.
- Symmetry: Create balanced and harmonious compositions.
- Framing: Use elements in the foreground to frame the subject.
9.5. Using Natural Light
Natural light can make a big difference in your photos.
9.6. Tips for Using Natural Light
- Golden Hour: Shoot during the golden hour (shortly after sunrise and before sunset) for warm, soft light.
- Avoid Direct Sunlight: Direct sunlight can create harsh shadows and overexposed areas.
- Use Reflectors: Use reflectors to bounce light onto your subject.
9.7. Editing Photos on Your iPhone
Your iPhone has built-in editing tools that allow you to enhance your photos.
9.8. Basic Editing Steps
- Open the Photos app and select the photo you want to edit.
- Tap Edit in the upper-right corner.
- Use the editing tools to adjust exposure, contrast, brightness, and other settings.
- Tap Done to save your changes.
10. Exploring dfphoto.net for Photography Resources
For more photography tips, tutorials, and inspiration, visit dfphoto.net. Our website offers a wealth of resources for photographers of all levels.
10.1. What You Can Find on dfphoto.net
- Photography Tutorials: Learn about various photography techniques, from basic to advanced.
- Equipment Reviews: Get unbiased reviews of cameras, lenses, and other photography gear.
- Inspiration Gallery: Browse stunning photos from talented photographers around the world.
- Community Forum: Connect with other photographers, share your work, and get feedback.
10.2. How dfphoto.net Can Help You
Whether you’re a beginner or a seasoned pro, dfphoto.net has something to offer. Our comprehensive resources can help you improve your skills, stay up-to-date with the latest trends, and connect with a vibrant community of photographers.
10.3. Staying Updated with dfphoto.net
To stay updated with the latest content on dfphoto.net:
- Subscribe to Our Newsletter: Get regular updates delivered to your inbox.
- Follow Us on Social Media: Stay connected on Facebook, Instagram, and Twitter.
- Visit Our Website Regularly: Check back often for new articles, tutorials, and inspiration.
FAQ: Where Do the Deleted Photos Go On iPhone?
Here are some frequently asked questions about where deleted photos go on iPhone:
Q1: Where do deleted photos go on iPhone immediately after deletion?
Deleted photos on iPhone go to the “Recently Deleted” album in the Photos app.
Q2: How long do photos stay in the “Recently Deleted” album?
Photos remain in the “Recently Deleted” album for 30 days.
Q3: Can I recover photos after they are permanently deleted from the “Recently Deleted” album?
Recovering photos after they are permanently deleted is difficult but possible using data recovery software or professional services.
Q4: Does iCloud affect where deleted photos go on my iPhone?
Yes, if you use iCloud Photos, deleting a photo on one device deletes it on all devices connected to the same iCloud account.
Q5: How do I access the “Recently Deleted” album on my iPhone?
Open the Photos app, tap the Albums tab, scroll down to Utilities, and tap on “Recently Deleted”.
Q6: Is there a way to make the “Recently Deleted” album unlocked by default?
Yes, in Settings, tap Face ID (or Touch ID), then Photos, and turn off “Use Face ID” (or “Use Touch ID”) for the Photos app.
Q7: What happens to duplicate photos after merging them on my iPhone?
When you merge duplicate photos, the lower-quality duplicates move to the “Recently Deleted” album.
Q8: Can I use third-party software to recover permanently deleted photos from my iPhone?
Yes, third-party data recovery software can scan your device for recoverable data, but success is not guaranteed.
Q9: How can I prevent accidental photo deletion on my iPhone?
Regularly back up your iPhone using iCloud or your computer, and be cautious when deleting photos.
Q10: What are the best practices for managing storage on my iPhone to avoid photo loss?
Optimize photo storage by using iCloud Photos, regularly deleting unnecessary photos and videos, and using cloud storage services.
Losing photos on your iPhone can be a stressful experience, but understanding where do the deleted photos go on iPhone and the available recovery methods can help you retrieve your precious memories. By implementing proactive measures like regular backups and efficient storage management, you can minimize the risk of data loss. Visit dfphoto.net for more photography tips, tutorials, and resources to enhance your photography journey.
Address: 1600 St Michael’s Dr, Santa Fe, NM 87505, United States
Phone: +1 (505) 471-6001
Website: dfphoto.net
Discover the art of photography and safeguard your visual stories with dfphoto.net!