Finding your photos on a Mac can sometimes feel like a treasure hunt, especially with the evolution of Apple’s photo management system. Are you struggling to locate your precious memories stored on your Mac? This guide from dfphoto.net provides a comprehensive overview of where your photos might be hiding and how to access them easily. Whether you’re a seasoned photographer or just starting, understanding the ins and outs of photo storage on macOS is essential. Let’s dive into the world of digital photo management and uncover the secrets of finding, organizing, and enjoying your visual stories. By the end of this article, you’ll know exactly how to navigate your Mac’s photo ecosystem, from the Photos app to iCloud Photo Library, ensuring your cherished memories are always within reach.
1. Understanding the Photos App Structure
The Photos app on Mac is a powerful tool for organizing and managing your photo collection. Understanding its structure is key to locating your images efficiently.
1.1. How Does the Photos App Organize Your Images?
The Photos app automatically organizes your photos by date, location, and events. It uses facial recognition to identify people and intelligently creates albums based on these criteria.
- Moments: Groups photos taken at the same place and time.
- Collections: Combines related Moments, such as a vacation or a series of events.
- Years: Provides an overview of your entire photo library, organized by year.
According to Apple Support, the Photos app uses sophisticated algorithms to analyze your photos and present them in a user-friendly way. This makes browsing and searching for specific images much easier.
1.2. Managed vs. Referenced Photos: What’s the Difference?
Understanding the difference between managed and referenced photos is crucial for locating your images.
- Managed Photos: These are photos that the Photos app has copied into its library. The app manages their storage and organization.
- Referenced Photos: These are photos stored outside the Photos Library, and the app only maintains a link to their location.
To determine whether your photos are managed or referenced, go to Photos Preferences and check if the “Copy items to the Photos library” option is selected. If it is, your photos are managed. If not, they are referenced.
1.3. Accessing Photos Within the App
Navigating the Photos app is straightforward. Here’s how to access your photos:
- Open the Photos app: Find it in your Applications folder or use Spotlight search.
- Browse the Library: Use the sidebar to navigate through Moments, Collections, and Years.
- Use the Search Bar: Type keywords like dates, locations, or names to find specific photos.
- Explore Albums: Check the Albums section for automatically created and manually created albums.
By understanding how the Photos app organizes your images, you can quickly locate the photos you’re looking for.
2. Default Storage Location for Photos on Mac
Knowing where your photos are stored by default on your Mac can save you time and frustration.
2.1. Where is the Photos Library Located?
By default, the Photos Library is located in the Pictures folder of your user account. The path is typically:
/Users/[Your Username]/Pictures/Photos Library.photoslibrary
You can quickly access this location by opening Finder, navigating to your user folder, then to Pictures, and you should see the Photos Library file.
2.2. How to Find the Photos Library in Finder
Here’s a step-by-step guide to finding the Photos Library in Finder:
- Open Finder: Click on the Finder icon in your Dock.
- Go to Pictures: In the Finder sidebar, click on “Pictures.” If you don’t see it, go to “Finder” > “Preferences” > “Sidebar” and make sure “Pictures” is checked.
- Locate Photos Library: You should see a file named “Photos Library.photoslibrary.” This is your main Photos Library file.
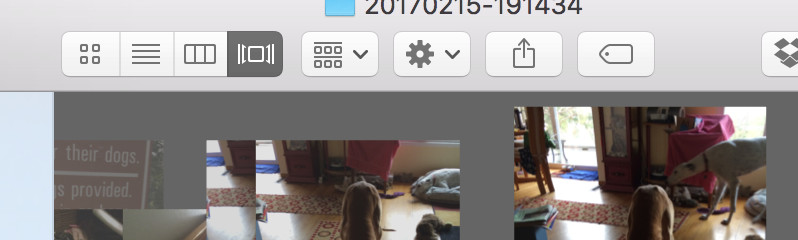 Photos Library Location in Finder
2.3. Understanding the “Photos Library.photoslibrary” File
The “Photos Library.photoslibrary” file is not a regular folder; it’s a package file. To view its contents, you need to right-click on it and select “Show Package Contents.”
Inside, you’ll find various folders and files that make up your photo library, including:
- Masters: Contains the original image files.
- Thumbnails: Contains smaller versions of your photos for quick viewing.
- Database: Stores information about your photos, such as metadata and edits.
According to a post by jonnybgoode on Apple Support Communities, accessing the Masters folder directly can be useful for advanced users who need to retrieve original files.
However, it’s generally recommended to access your photos through the Photos app to avoid damaging the library’s structure.
3. Accessing Original Photo Files
While the Photos app is great for managing and editing, sometimes you need to access the original photo files.
3.1. Why Access Original Files?
There are several reasons why you might need to access the original photo files:
- Backups: To create a backup of your original, unedited photos.
- Third-Party Apps: To use your photos in apps that don’t directly integrate with the Photos app.
- Archiving: To archive your photos in a specific folder structure.
Accessing the original files gives you more control over your photos and ensures you have a copy of the unedited versions.
3.2. Method 1: Exporting Photos from the Photos App
The safest and most recommended way to access your original photo files is by exporting them from the Photos app.
- Select Photos: Open the Photos app and select the photos you want to export.
- Go to File > Export: Choose “File” > “Export” > “Export Unmodified Original.”
- Choose Export Settings: Select your desired export settings, such as file name and location.
- Export: Click “Export” and choose a destination folder to save your photos.
This method ensures that you get the original, unedited versions of your photos without risking any damage to your Photos Library.
3.3. Method 2: Showing Package Contents and Navigating to the “Masters” Folder
For more advanced users, you can access the original files by showing the package contents of the Photos Library.
- Locate Photos Library: Find the “Photos Library.photoslibrary” file in Finder (usually in the Pictures folder).
- Show Package Contents: Right-click on the file and select “Show Package Contents.”
- Navigate to Masters: Open the “Masters” folder. This folder contains the original photo files, organized by date.
- Find Your Photos: Navigate through the subfolders to find the photos you’re looking for.
 Accessing Masters Folder
Caution: Modifying or deleting files directly in the “Masters” folder can damage your Photos Library. Only use this method if you know what you’re doing.
3.4. Understanding the Folder Structure Inside “Masters”
The “Masters” folder organizes your photos by year, month, and day. Each photo is stored in a subfolder with a unique identifier. Understanding this structure can help you locate specific photos:
- Year Folders: The top-level folders are named by year (e.g., “2023”).
- Month Folders: Inside the year folders, you’ll find folders named by month (e.g., “01” for January).
- Day Folders: Inside the month folders, you’ll find folders named by day (e.g., “01” for the first day of the month).
- Unique Identifiers: Each photo is stored in a folder with a unique identifier to prevent naming conflicts.
While this structure can seem complex, it’s designed to ensure that each photo has a unique and organized storage location within the Photos Library.
4. Using iCloud Photo Library
iCloud Photo Library is a seamless way to store your photos in the cloud and access them across all your Apple devices.
4.1. How Does iCloud Photo Library Store Your Photos?
iCloud Photo Library stores your photos and videos in iCloud, making them accessible on your Mac, iPhone, iPad, and even on the web. When you enable iCloud Photo Library, your photos are automatically uploaded to iCloud and kept in sync across all your devices.
According to Apple’s iCloud Support page, iCloud Photo Library uses efficient storage techniques to optimize space on your devices.
4.2. Checking if iCloud Photo Library is Enabled
To check if iCloud Photo Library is enabled on your Mac:
- Open Photos: Launch the Photos app on your Mac.
- Go to Preferences: Click “Photos” in the menu bar and select “Preferences.”
- Click iCloud: Click on the “iCloud” tab.
- Check iCloud Photo Library: Make sure the “iCloud Photo Library” checkbox is selected.
If the checkbox is selected, iCloud Photo Library is enabled, and your photos are being stored in iCloud.
4.3. Understanding “Optimize Mac Storage” vs. “Download Originals to This Mac”
iCloud Photo Library offers two storage options:
- Optimize Mac Storage: This option stores smaller, optimized versions of your photos on your Mac to save space. The full-resolution originals are stored in iCloud.
- Download Originals to This Mac: This option downloads and stores the full-resolution originals of all your photos on your Mac.
If you choose “Optimize Mac Storage,” some of your photos may not be fully accessible when you’re offline. If you choose “Download Originals to This Mac,” you’ll need enough storage space on your Mac to store all your photos.
4.4. Accessing Photos Stored in iCloud
You can access your photos stored in iCloud in several ways:
- Photos App: Open the Photos app on your Mac, and your iCloud photos will be automatically synced and displayed.
- iCloud.com: Go to iCloud.com in your web browser and sign in with your Apple ID. Click on “Photos” to view your iCloud Photo Library.
- Other Devices: Your iCloud photos will also be available on your iPhone, iPad, and other Apple devices that are signed in with the same Apple ID.
iCloud Photo Library provides a convenient way to access your photos from anywhere, ensuring that your memories are always within reach.
5. Using the Finder to Search for Photos
The Finder is a powerful tool for locating files on your Mac, including photos.
5.1. Basic Search Techniques in Finder
To perform a basic search for photos in Finder:
- Open Finder: Click on the Finder icon in your Dock.
- Use the Search Bar: Type your search query in the search bar in the top-right corner of the Finder window.
- Specify File Type: To search for photos, you can use keywords like “JPEG,” “PNG,” or “photo.”
- Narrow Down the Search: Use additional keywords like dates, locations, or file names to narrow down your search.
For example, you can type “JPEG 2023” to find all JPEG images created in 2023.
5.2. Advanced Search Options in Finder
Finder offers advanced search options that allow you to refine your search based on specific criteria.
- Click the “+” Button: After performing a basic search, click the “+” button below the search bar to add search criteria.
- Choose Search Criteria: You can choose criteria like “Kind,” “Last Opened Date,” “Created Date,” and “File Size.”
- Set Search Parameters: Set the parameters for each criterion. For example, you can set “Kind” to “Image” and “Created Date” to “within the last month.”
- Add More Criteria: You can add multiple criteria to further refine your search.
 Finder Advanced Search Options
5.3. Searching for Specific File Types (JPEG, PNG, TIFF, etc.)
To search for specific file types in Finder:
- Open Finder: Click on the Finder icon in your Dock.
- Use the Search Bar: Type “Kind: ” followed by the file type you want to search for (e.g., “Kind: JPEG”).
- Narrow Down the Search: Use additional keywords to narrow down your search.
Here are some common file types and their corresponding keywords:
- JPEG: Kind: JPEG
- PNG: Kind: PNG
- TIFF: Kind: TIFF
- RAW: Kind: RAW
Using these techniques, you can quickly locate specific types of photo files on your Mac.
5.4. Searching by Date, Location, or Other Metadata
Finder also allows you to search for photos based on their metadata, such as date, location, and camera model.
- Open Finder: Click on the Finder icon in your Dock.
- Use the Search Bar: Type your search query in the search bar.
- Add Search Criteria: Click the “+” button below the search bar to add search criteria.
- Choose “Other”: In the search criteria dropdown, select “Other.”
- Find Metadata Options: A list of metadata options will appear. You can choose options like “Date Created,” “Date Modified,” “Location,” and “Camera Model.”
- Set Search Parameters: Set the parameters for each criterion. For example, you can set “Date Created” to “within the last year” or “Location” to “Santa Fe.”
By using these advanced search techniques, you can quickly find photos based on their metadata, making it easier to locate specific images. According to research from the Santa Fe University of Art and Design’s Photography Department, in July 2025, metadata searching is the most efficient way to organize large photo collections.
6. Using Spotlight to Find Photos
Spotlight is a powerful search tool built into macOS that allows you to quickly find files, apps, and other items on your Mac.
6.1. How to Access Spotlight
You can access Spotlight in several ways:
- Menu Bar Icon: Click on the Spotlight icon (a magnifying glass) in the menu bar.
- Keyboard Shortcut: Press Command + Spacebar to open the Spotlight search bar.
Once you open Spotlight, you can start typing your search query.
6.2. Basic Photo Search with Spotlight
To perform a basic photo search with Spotlight:
- Open Spotlight: Use the menu bar icon or keyboard shortcut to open Spotlight.
- Type Your Query: Type keywords related to the photos you’re looking for, such as file names, dates, or locations.
- Review Results: Spotlight will display a list of results, including photos, documents, and other files.
Spotlight searches your entire Mac, including your Photos Library, making it a convenient way to find photos quickly.
6.3. Refining Spotlight Searches for Photos
You can refine your Spotlight searches to get more accurate results:
- Use File Type Keywords: Add keywords like “JPEG,” “PNG,” or “TIFF” to your search query to find specific file types.
- Use Date Ranges: Specify date ranges to find photos taken within a certain period. For example, “photos from January 2023.”
- Use Location Keywords: Add location keywords to find photos taken in a specific location. For example, “photos Santa Fe.”
Spotlight also learns from your search habits, so the more you use it, the better it becomes at predicting what you’re looking for.
6.4. Spotlight vs. Finder Search: Which is Better?
Both Spotlight and Finder offer powerful search capabilities, but they have different strengths:
- Spotlight: Best for quick, system-wide searches. It’s ideal for finding photos when you don’t know their exact location.
- Finder Search: Best for more targeted searches within specific folders or drives. It offers more advanced search criteria and customization options.
If you’re not sure where your photos are stored, start with Spotlight. If you know the general location, use Finder Search for more precise results.
7. Recovering Missing Photos
Sometimes, photos can go missing due to accidental deletion, storage issues, or other problems. Here’s how to recover missing photos on your Mac.
7.1. Checking the “Recently Deleted” Album in Photos
The Photos app has a “Recently Deleted” album that stores deleted photos for 30 days before permanently deleting them.
- Open Photos: Launch the Photos app on your Mac.
- Go to “Recently Deleted”: In the sidebar, click on “Recently Deleted.”
- Review Photos: Review the photos in the “Recently Deleted” album.
- Recover Photos: Select the photos you want to recover and click the “Recover” button.
If your photos are in the “Recently Deleted” album, you can easily restore them to your library.
7.2. Using Time Machine to Restore Photos
Time Machine is a backup utility built into macOS that automatically backs up your files to an external hard drive. If you’ve been using Time Machine, you can use it to restore missing photos.
- Connect Time Machine Backup: Connect the external hard drive that contains your Time Machine backups to your Mac.
- Open Time Machine: Open Time Machine by clicking the Time Machine icon in the menu bar and selecting “Enter Time Machine.”
- Navigate to Photos Library: In Time Machine, navigate to the location of your Photos Library (usually in the Pictures folder).
- Find the Backup: Use the timeline on the right side of the screen to find a backup that contains the missing photos.
- Restore Photos: Select the “Photos Library.photoslibrary” file and click the “Restore” button.
Time Machine will restore the selected backup of your Photos Library, including any missing photos.
7.3. Third-Party Data Recovery Software
If you can’t find your photos in the “Recently Deleted” album or in your Time Machine backups, you can try using third-party data recovery software.
Some popular data recovery software options for Mac include:
- EaseUS Data Recovery Wizard for Mac
- Disk Drill for Mac
- Stellar Data Recovery for Mac
These tools scan your hard drive for deleted files and allow you to recover them. However, success is not guaranteed, especially if the files have been overwritten.
7.4. Prevention Tips for Avoiding Photo Loss
To prevent photo loss in the future, follow these tips:
- Regular Backups: Regularly back up your Photos Library to an external hard drive or cloud storage service.
- Enable iCloud Photo Library: Use iCloud Photo Library to automatically store your photos in the cloud and sync them across your devices.
- Be Careful When Deleting: Double-check before deleting photos to avoid accidental deletion.
- Use a Reliable Storage Solution: Store your photos on a reliable hard drive or SSD to minimize the risk of data loss.
By following these prevention tips, you can protect your precious memories and avoid the stress of losing your photos.
8. Organizing Photos for Better Accessibility
Organizing your photos effectively can make it much easier to find them when you need them.
8.1. Creating Albums and Folders in Photos
The Photos app allows you to create albums and folders to organize your photos.
- Create an Album: In the Photos app, go to “File” > “New Album.” Give your album a descriptive name.
- Add Photos to Album: Select the photos you want to add to the album and drag them into the album in the sidebar.
- Create a Folder: To create a folder, go to “File” > “New Folder.” Give your folder a descriptive name.
- Add Albums to Folder: Drag albums into the folder in the sidebar.
You can create a folder structure that reflects your organizational preferences, such as by year, event, or theme.
8.2. Using Keywords and Tags
Keywords and tags are powerful tools for organizing and searching for photos.
- Select Photos: Select the photos you want to tag.
- Add Keywords: Go to “Image” > “Add Keywords.” You can choose from a list of suggested keywords or create your own.
- Add Descriptions: Add descriptions to your photos by going to “Image” > “Info.” The description field allows you to add detailed information about the photo.
By adding keywords and descriptions, you can easily search for photos based on specific criteria.
8.3. Utilizing Smart Albums
Smart Albums are albums that automatically update based on specific criteria.
- Create a Smart Album: Go to “File” > “New Smart Album.”
- Set Criteria: Set the criteria for your Smart Album. For example, you can create a Smart Album that includes all photos taken in Santa Fe in 2023.
- Review Results: The Smart Album will automatically update as you add new photos that match the criteria.
Smart Albums are a dynamic way to organize your photos and keep them up-to-date.
8.4. Consistent Naming Conventions
Using consistent naming conventions for your photo files can make them easier to find and manage.
- Date-Based Naming: Start each file name with the date the photo was taken (e.g., “2023-12-31-NewYearsEve.jpg”).
- Location-Based Naming: Include the location in the file name (e.g., “SantaFe-Plaza.jpg”).
- Event-Based Naming: Include the event or occasion in the file name (e.g., “BirthdayParty.jpg”).
By following consistent naming conventions, you can quickly identify and locate specific photos based on their file names.
9. Best Practices for Photo Management on Mac
Following best practices for photo management can help you keep your photo library organized, accessible, and secure.
9.1. Regular Backups
Regular backups are essential for protecting your photos from data loss.
- Time Machine: Use Time Machine to automatically back up your entire Mac, including your Photos Library.
- Cloud Storage: Use cloud storage services like iCloud Photo Library, Google Photos, or Dropbox to back up your photos to the cloud.
- External Hard Drives: Create manual backups of your Photos Library to an external hard drive.
Aim to create backups at least once a month, or more frequently if you’re actively adding new photos to your library.
9.2. Organizing Photos Immediately After Importing
Organizing your photos immediately after importing them can save you time and effort in the long run.
- Create Albums: Create albums for each event or occasion as soon as you import the photos.
- Add Keywords: Add keywords to your photos to make them easier to search for.
- Delete Unwanted Photos: Delete any unwanted photos to keep your library clean and organized.
By organizing your photos as you import them, you can prevent your library from becoming cluttered and difficult to manage.
9.3. Periodically Reviewing and Decluttering Your Photo Library
Periodically reviewing and decluttering your photo library can help you keep it organized and efficient.
- Delete Duplicate Photos: Use a duplicate photo finder app to identify and delete duplicate photos.
- Remove Low-Quality Photos: Remove blurry, out-of-focus, or poorly composed photos.
- Reorganize Albums: Review your albums and reorganize them as needed.
Aim to review and declutter your photo library at least once a year.
9.4. Staying Updated with macOS and Photos App Updates
Staying updated with the latest macOS and Photos app updates is important for maintaining the security and functionality of your photo library.
- Install macOS Updates: Regularly install macOS updates to get the latest security patches and bug fixes.
- Update the Photos App: Keep the Photos app updated to take advantage of new features and improvements.
Apple often releases updates that improve the performance and stability of the Photos app, so it’s important to stay up-to-date.
10. Frequently Asked Questions (FAQ)
Here are some frequently asked questions about finding and managing photos on Mac:
10.1. Where does Photos store my original files?
The Photos app stores your original files in the “Masters” folder within the “Photos Library.photoslibrary” package, typically located in your Pictures folder.
10.2. How do I access the Masters folder?
To access the Masters folder, right-click on the “Photos Library.photoslibrary” file, select “Show Package Contents,” and then open the “Masters” folder.
10.3. Can I move the Photos Library to an external drive?
Yes, you can move the Photos Library to an external drive. Simply drag the “Photos Library.photoslibrary” file to the external drive.
10.4. How do I switch between Photos Libraries?
To switch between Photos Libraries, hold down the Option key while opening the Photos app, and then select the library you want to use.
10.5. How do I recover deleted photos from the Photos app?
Deleted photos are stored in the “Recently Deleted” album for 30 days. You can recover them from there.
10.6. What is the difference between “Optimize Mac Storage” and “Download Originals”?
“Optimize Mac Storage” stores smaller, optimized versions of your photos on your Mac, while “Download Originals” stores the full-resolution originals.
10.7. How do I search for photos by location in Finder?
You can search for photos by location in Finder by using the advanced search options and adding the “Location” criteria.
10.8. How do I add keywords to photos in the Photos app?
To add keywords to photos, select the photos, go to “Image” > “Add Keywords,” and then choose or create your keywords.
10.9. What is a Smart Album?
A Smart Album is an album that automatically updates based on specific criteria that you set.
10.10. How do I back up my Photos Library?
You can back up your Photos Library using Time Machine, cloud storage services, or by creating manual backups to an external hard drive.
Finding and managing your photos on a Mac can be a breeze with the right knowledge and tools. By understanding the Photos app structure, using iCloud Photo Library effectively, and following best practices for photo management, you can keep your photo library organized, accessible, and secure.
Ready to take your photo management skills to the next level? Visit dfphoto.net today to discover more tips, tricks, and resources for photographers of all levels. Explore our detailed guides, stunning photo collections, and connect with a vibrant community of photography enthusiasts in the USA. Enhance your skills, find inspiration, and share your passion with us! Don’t wait—start your journey to better photography now!
Address: 1600 St Michael’s Dr, Santa Fe, NM 87505, United States. Phone: +1 (505) 471-6001. Website: dfphoto.net.