Lockets have always held a special place in our hearts as timeless keepsakes, allowing us to carry cherished memories close. The idea of encapsulating a precious photograph within a beautiful pendant is incredibly appealing. If you’re wondering, “Where Can I Get A Locket Photo Made?”, you might be surprised to learn that you can create your own stunning photo locket right at home! This guide will walk you through crafting personalized photo pendants, offering a unique and heartfelt touch to this classic piece of jewelry.
Photo lockets are more than just accessories; they are sentimental treasures. They make profoundly personal gifts, perfect for commemorating special occasions, honoring loved ones, or simply keeping family memories alive. Imagine gifting a friend a locket with a picture of their pet, or creating matching pendants for family members with a photo of a beloved grandparent. The possibilities are endless, and the personal touch you add by making it yourself elevates the sentiment even further.
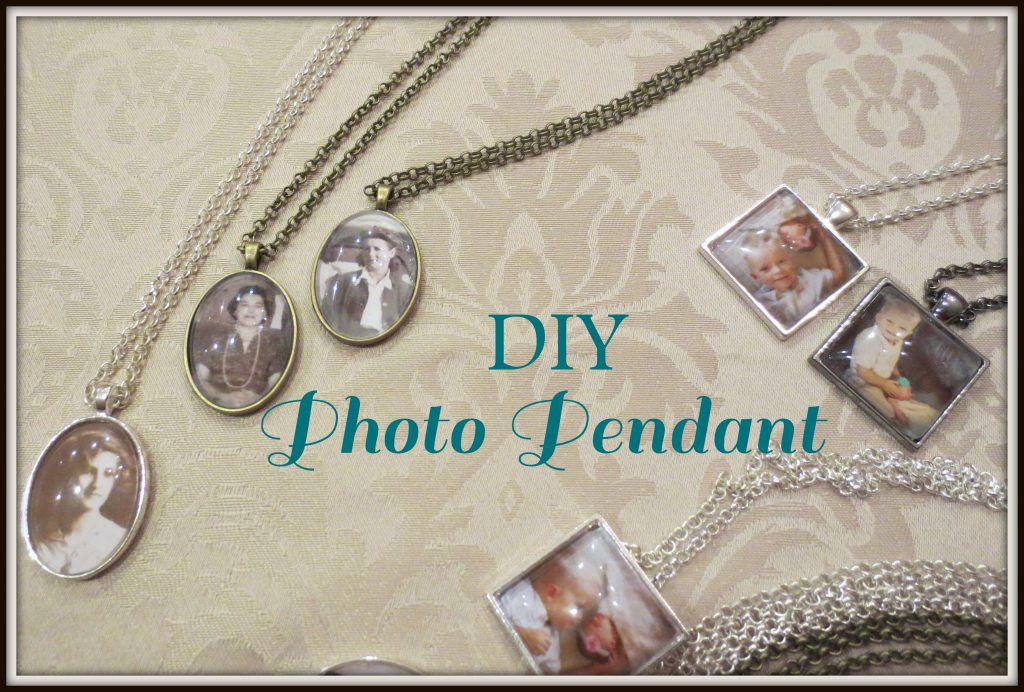 photo pendant title
Crafting Your Own Photo Pendant: A Step-by-Step Tutorial
Creating your own photo pendant is a rewarding and surprisingly simple process. With just a few readily available supplies and some easy steps, you can transform your favorite photos into wearable memories. Here’s how to make your own stunning photo locket:
Gathering Your Supplies
Before you begin, ensure you have all the necessary materials. You can find most of these supplies online or at your local craft store. Here’s what you’ll need:
- Your Chosen Photo: Print your special photo on matte card stock or cover weight paper. It’s crucial to use non-glossy paper as glossy surfaces don’t work well with glazes. Laser printer photos are ideal, but inkjet prints can also work.
- Pendant Trays and Glass Tiles: These provide the base and clear covering for your pendant. Suppliers like Sun and Moon Crafts offer kits, or you can source them individually. Ensure the glass tiles fit snugly into your chosen trays.
- Necklace Chain: Select a chain that complements your pendant tray. Again, Sun and Moon Crafts and other craft suppliers offer various styles.
- Glaze: This will seal and protect your photo, giving it a beautiful, slightly magnified look under the glass tile. Options include Diamond Glaze and Glamour Seal. Glamour Seal is known for its quick drying time and compatibility with inkjet prints without pre-sealing.
- Sealer (Only for Diamond Glaze with Inkjet Prints): If using Diamond Glaze with inkjet prints, you’ll need a sealer like spray acrylic sealer or Microglaze to prevent smudging.
- Scissors or Craft Knife: For precise photo trimming.
- Word Processing Software (Optional): For resizing and cropping your photo digitally.
Preparing Your Photo
The key to a perfect photo pendant is properly preparing your picture. Here’s how to get it ready:
- Resize and Crop: Use word processing software like Microsoft Word to resize your photo to fit your pendant tray. For a 1-inch square pendant, aim for a 1×1 inch photo. First, crop your photo into a square shape. Then, resize it to the desired dimensions. In Word, right-click on the photo, select “Size and Position,” and then navigate to the “Size” tab to adjust the height and width.
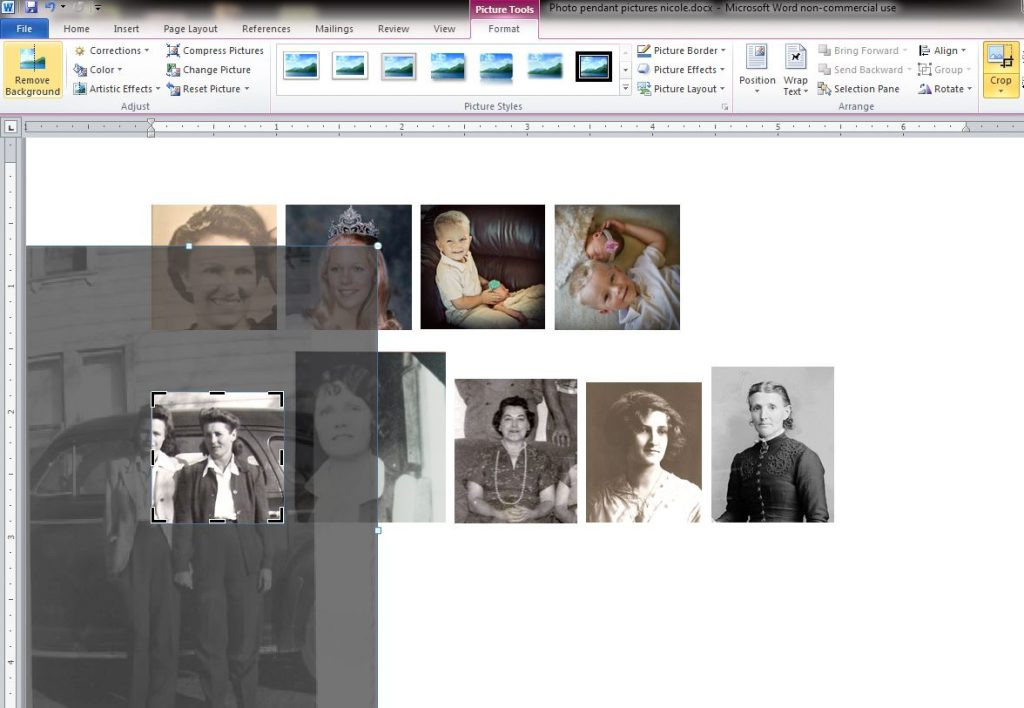 crop
crop
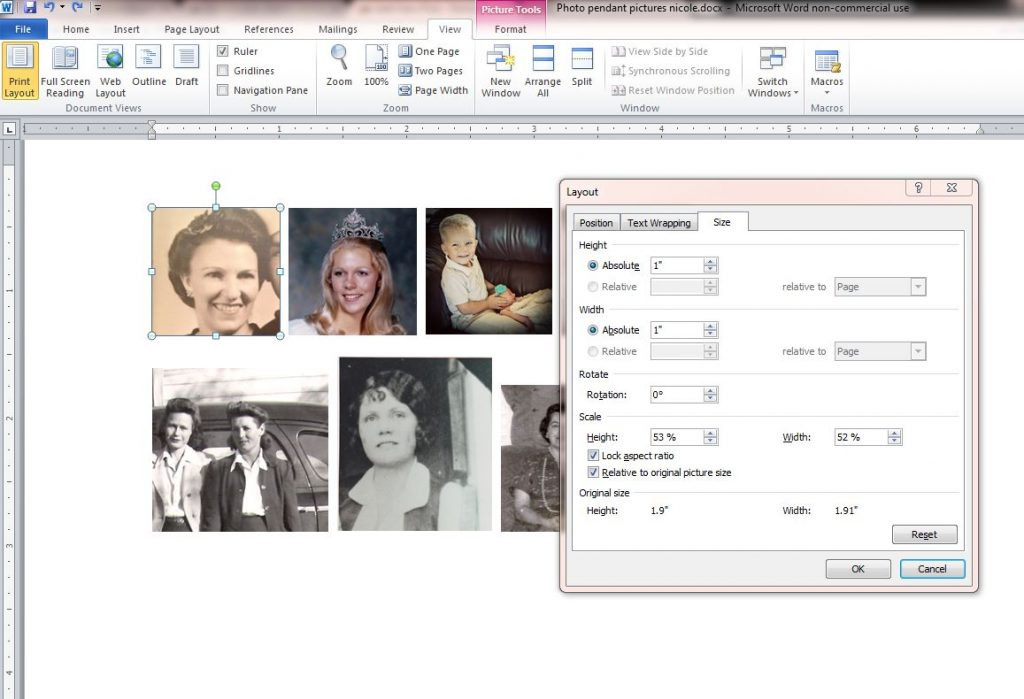 resize in word
-
Print Your Photo: Print your resized photo on matte cardstock or cover weight paper. Remember, non-glossy paper is essential for the glaze to adhere correctly.
-
Cut and Seal (If Necessary): Carefully cut out your photo to fit the glass tile. If you’re using Diamond Glaze with an inkjet printed photo, seal the ink at this stage. Apply a thin layer of Microglaze or spray with acrylic sealer and let it dry completely. This prevents the ink from running when you apply the glaze.
Assembling Your Photo Locket
Now for the exciting part – putting your photo pendant together!
-
Apply Glaze to the Glass Tile: Follow the instructions provided with your chosen glaze. For Glamour Seal, apply a thin, even layer directly onto the glass tile.
-
Adhere Photo to Glass: Gently press the glazed side of the glass tile onto the printed side of your photo. Ensure there are no air bubbles. Let it dry completely. Glamour Seal dries relatively quickly, while Diamond Glaze may require overnight drying.
-
Trim Edges: Once dry, carefully trim any excess photo paper extending beyond the glass tile.
-
Attach to Pendant Tray: Apply another thin layer of glaze to the back of the photo-covered glass tile. Place it securely into the pendant tray. Let it dry thoroughly.
-
Add the Chain: Finally, thread your necklace chain through the loop on the pendant tray.
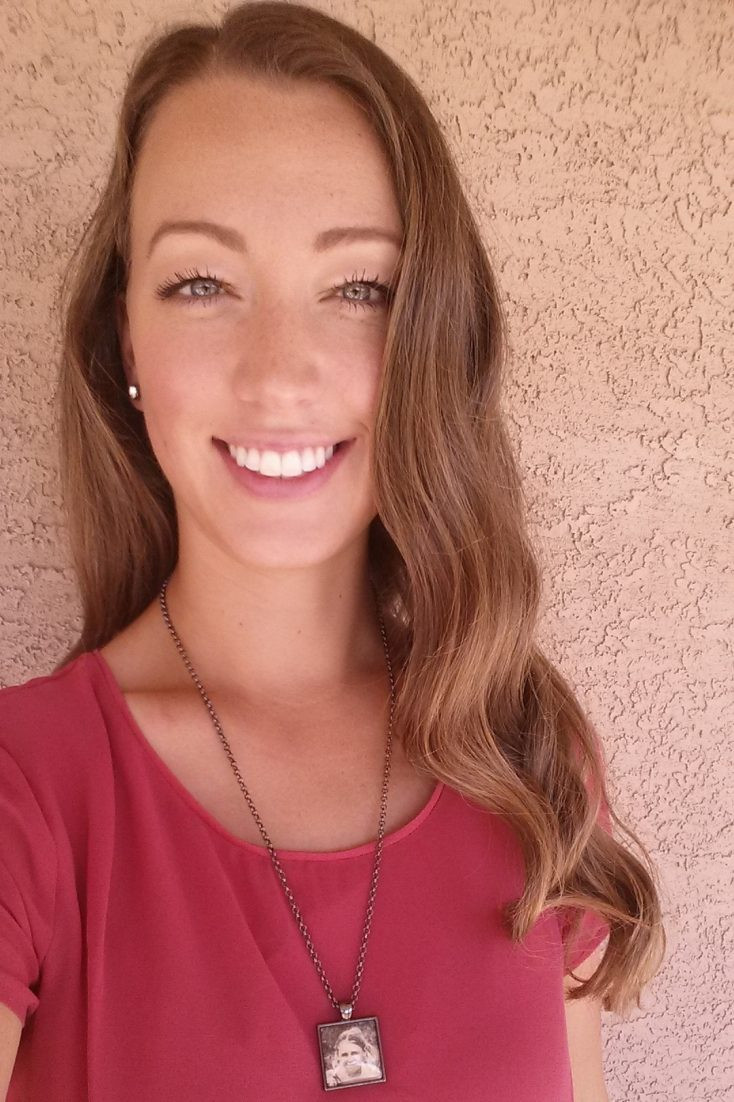 20150912_131124
You’ve now created your own beautiful photo pendant! This handmade piece is not only a testament to your crafting skills but also a deeply personal keepsake.
Where to Find Supplies for Photo Locket Creation
Finding the right supplies is crucial for your DIY project. Here are some excellent places to source your materials:
- Sun and Moon Crafts: This website (Sun and Moon Crafts) specializes in jewelry making supplies, including pendant trays, glass tiles, chains, and glazes like Diamond Glaze. They offer kits specifically for photo pendants, making it convenient to get everything you need in one place.
- Amazon: A vast marketplace like Amazon (Amazon.com) is a great resource for Glamour Seal, spray acrylic sealer, necklace chains, and various pendant trays and glass tiles.
- Local Craft Stores: Stores like Michaels, Hobby Lobby, and Joann Fabrics often carry jewelry-making supplies, including pendant components and glues suitable for crafting photo lockets.
Alternatives to DIY: Professional Photo Locket Services
While DIY photo lockets offer a personal touch, you might prefer professional services for ready-made options. Many jewelers and online retailers specialize in creating custom photo lockets. Websites like Etsy and specialized jewelry stores offer services where you can upload your photo and have a beautifully finished locket delivered to you. Searching online for “custom photo locket” will reveal numerous options if you’d rather have someone else handle the creation process.
Conclusion: Cherish Memories in a Handmade Locket
Creating your own photo locket is a wonderfully fulfilling project. It allows you to answer the question “where can I get a locket photo made?” with “I can make it myself!” The process is straightforward, affordable, and results in a deeply personal and meaningful piece of jewelry. Whether you’re making it for yourself or as a heartfelt gift, a DIY photo pendant is a beautiful way to keep cherished memories close to your heart. So gather your supplies and start crafting your own wearable memories today!