Are you wondering Where Can I Develop Photos? Discovering the ideal place to develop your photos is essential for preserving memories, and dfphoto.net is here to guide you through the best choices available with high-quality processing. Whether you’re a seasoned photographer or just starting, understanding the development options, turnaround times, and digital access can significantly enhance your photographic journey, ensuring your images are beautifully preserved and easily shared with our expert insights and comprehensive reviews. Let’s explore developing pictures, film processing, and photo printing.
1: Understanding Your Photo Development Needs
Before diving into the “where,” let’s clarify the “what” and “why.” Understanding your specific needs will help you choose the best photo development service.
1.1: Types of Film
Different films require different developing processes. Knowing your film type is crucial.
- Color Negative Film (C-41): This is the most common type, used in most disposable cameras and consumer film rolls. Processing is widely available.
- Black and White Film: Requires specific developers and processes. Ensure the lab you choose offers black and white development.
- Slide Film (E-6): Less common, producing positive images directly on the film. Requires specialized processing.
1.2: Desired Output
Consider what you want as the final product.
- Prints: Physical copies of your photos. Think about size, finish (glossy, matte), and paper quality.
- Digital Scans: Digital files for sharing online, archiving, or further editing. Resolution is a key factor here.
- Both: Many services offer both prints and scans.
1.3: Level of Involvement
Are you hands-on or prefer a hands-off approach?
- DIY (Do-It-Yourself): Developing film at home offers complete control but requires equipment, chemicals, and knowledge.
- Professional Lab: Offers convenience, expertise, and often higher quality results.
1.4: Turnaround Time
How quickly do you need your photos?
- Local Labs: Often offer faster turnaround times than mail-in services.
- Mail-In Services: Can be more convenient, but factor in shipping time.
1.5: Budget
Photo development costs vary significantly.
- DIY: Initial investment in equipment, but lower per-roll cost.
- Local Labs: Prices vary; compare quotes.
- Mail-In Services: Often competitive pricing, but shipping costs add up.
Understanding these factors will guide you to the best option for developing your photos.
2: Local Photo Labs: Pros and Cons
Local photo labs offer a personalized touch and often faster turnaround times, but they may not be available everywhere.
2.1: Advantages of Local Photo Labs
- Personal Interaction: You can discuss your specific needs and preferences with the staff.
- Faster Turnaround: Often, you can get your photos back in a day or two.
- Support Local Business: You’re supporting your community.
- Quality Control: Easier to address any issues or concerns directly.
- Specialized Services: Some local labs offer niche services like custom printing or restoration.
2.2: Disadvantages of Local Photo Labs
- Limited Availability: May not be available in all areas, especially rural ones.
- Potentially Higher Prices: Compared to mail-in services.
- Inconsistent Quality: Quality can vary widely depending on the lab and its equipment.
- Limited Film Type Options: Some labs may not process all film types.
2.3: Finding Local Photo Labs
- Google Maps: Search for “photo lab near me.”
- Yelp: Check reviews and ratings.
- Photography Forums: Ask for recommendations from local photographers.
2.4: Questions to Ask a Local Photo Lab
- What film types do you develop?
- What is your turnaround time?
- What are your prices for developing and scanning?
- What resolution do you scan at?
- Can I see samples of your work?
- Do you return negatives?
- What is your policy on damaged film?
Choosing a local photo lab can be a great option if you value personal service and quick turnaround, but be sure to do your research and ask the right questions.
3: Mail-In Photo Development Services: Convenience at Your Doorstep
Mail-in services offer convenience and accessibility, especially for those without a local lab nearby.
3.1: Benefits of Mail-In Services
- Convenience: Send your film from anywhere.
- Accessibility: Ideal if you don’t have a local lab.
- Competitive Pricing: Often offer lower prices than local labs.
- Wide Range of Services: Many offer a variety of film types, scanning options, and printing services.
- Archiving Options: Some offer archival-quality scans and storage.
3.2: Drawbacks of Mail-In Services
- Slower Turnaround: Factor in shipping time both ways.
- Lack of Personal Interaction: Communication is typically online or via phone.
- Shipping Risks: Potential for lost or damaged film.
- Uncertainty About Quality: Rely on online reviews and reputation.
3.3: Popular Mail-In Photo Development Services
- The Darkroom (dfphoto.net): (Address: 1600 St Michael’s Dr, Santa Fe, NM 87505, United States. Phone: +1 (505) 471-6001. Website: dfphoto.net.) Known for its reliable service and good quality scans. They offer a range of services including disposable camera processing, film developing, and photo gifts.
- Dwayne’s Photo: A reputable lab known for its Kodachrome processing (though Kodachrome is no longer manufactured, they still offer excellent service for other film types).
- Indie Film Lab: Caters to the artistic community, offering unique processing and scanning options.
- Richard Photo Lab: High-end lab known for its meticulous processing and printing.
3.4: How to Choose a Mail-In Service
- Read Reviews: Check online reviews and testimonials.
- Compare Prices: Get quotes for the services you need.
- Check Film Types: Ensure they process your film type.
- Review Scanning Options: Consider resolution, file format, and delivery method.
- Inquire About Insurance: What is their policy on lost or damaged film?
Mail-in services offer a convenient way to develop your photos, but it’s important to choose a reputable lab and understand the risks involved.
4: Disposable Camera Development: Specific Considerations
Disposable cameras are a fun and easy way to capture memories, but developing the film requires special attention.
4.1: Why Disposable Cameras Need Special Care
- Plastic Construction: The cameras themselves are not very durable.
- Fixed Focus Lens: Image quality may not be as high as with other cameras.
- Film Type: Typically use 800 ISO color negative film, which requires standard C-41 processing.
4.2: Where to Develop Disposable Cameras
- The Darkroom (dfphoto.net): Specializes in disposable camera development and returns negatives, something drug stores often don’t do.
- Mail-In Services: Most mail-in labs process disposable camera film.
- Some Local Labs: Check with your local lab to see if they offer this service.
4.3: What to Expect from Disposable Camera Development
- Standard C-41 Processing: The film is developed using the standard color negative process.
- Digital Scans: You’ll typically receive digital scans of your photos.
- Prints (Optional): You can usually order prints as well.
- Lower Image Quality: Don’t expect the same quality as from a high-end camera.
- Fun, Nostalgic Results: Disposable cameras offer a unique, lo-fi aesthetic.
4.4: Tips for Shooting with Disposable Cameras
- Use in Good Lighting: Disposable cameras perform best in bright light.
- Get Close to Your Subject: The fixed focus lens works best at close range.
- Use the Flash Indoors: The built-in flash is essential for indoor shots.
- Hold the Camera Steady: Avoid blurry photos.
- Have Fun: Disposable cameras are all about capturing candid moments.
Developing disposable camera film is a simple process, and the results can be surprisingly rewarding.
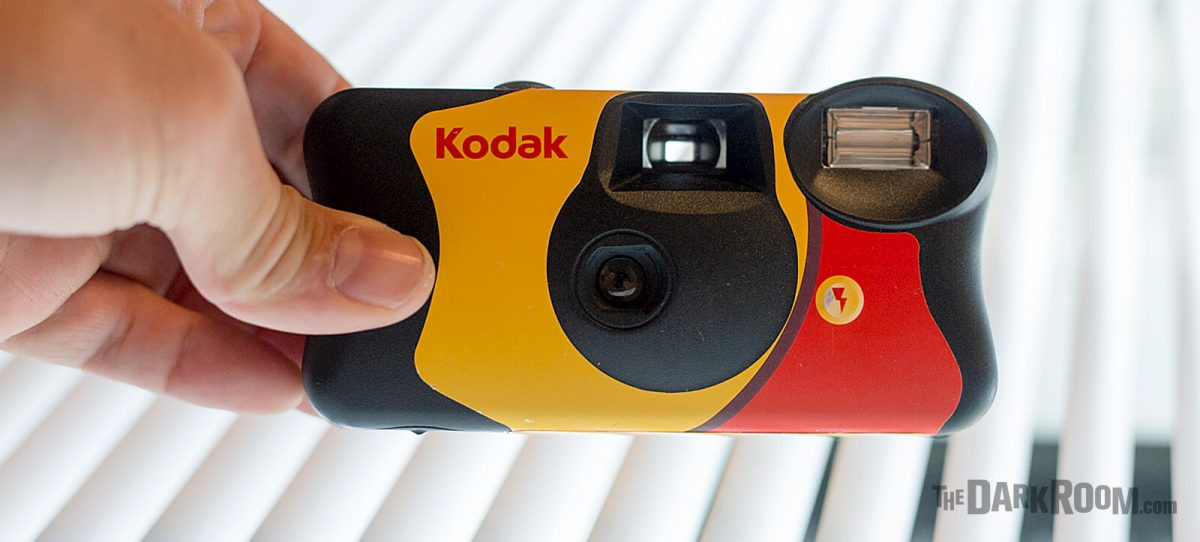 Kodak FunSaver Disposable Camera Review
4.5: Review of Popular Disposable Cameras
According to The Darkroom’s review, here’s a quick rundown of some popular disposable cameras:
| Camera | Rating | Exposures | ISO | Key Features |
|---|---|---|---|---|
| Kodak FunSaver Disposable Camera | ★★★★★ | 27 | 800 | Great exposure latitude, versatile in various lighting conditions, subtle grain, sharp plastic optics. |
| Fujifilm QuickSnap Single Use Camera | ★★★☆☆ | 27 | 400 | Smallest, practical flash switch, best for daylight landscapes or low light with flash. |
| Rollei Inferno Ragazzi Disposable Camera | ★★★★☆ | 27 | 400 | Good exposure latitude, sharp lens from 3-5ft, reliable flash, some interesting distortion. |
| Lomography Simple Use Lomochrome Purple | ★★★★☆ | 36 | 400 | Unique LomoChrome Purple film, mimics color infrared film, fun and otherworldly photos. |
| Lomography B&W 400 Simple Use | ★★★☆☆ | 27 | 400 | Classic true B&W HP5 Plus film, great tones, contrast, grain, and exposure latitude. |
| Ilford XP2 Single Use Camera | ★★★★☆ | 27 | 400 | Sharp, great for open daylight shooting, fine grain, beautiful tones, can be developed as C-41. |
| JCH Streetpan Kassha B&W | ★☆☆☆☆ | 27 | 400 | Known for contrast and punchy tones, but often produces dark images, blurry from 15ft to infinity. |
| Kodak Water & Sport Waterproof | ★★☆☆☆ | N/A | 800 | Rugged build, waterproof down to 50ft, versatile in lower light areas underwater, less sharp than Fun Saver. |
| Ilford B&W HP5 Single-Use Camera | ★★★★★ | 27 | 400 | Classic true b&w HP5 Plus film, great tones, contrast, grain, and exposure latitude. |
| FujiFilm QuickSnap Waterproof | ★★★☆☆ | 27 | 800 | Best selling waterproof, good skin tones, better in low light due to 800iso film. |
5: DIY Photo Development: Taking Control
Developing your film at home offers complete control over the process, but it requires an investment in equipment and knowledge.
5.1: Advantages of DIY Development
- Complete Control: You control every step of the process.
- Cost Savings: Lower per-roll cost once you have the equipment.
- Creative Options: Experiment with different developers and techniques.
- Convenience: Develop film on your own schedule.
- Educational: Learn about the chemistry and science of photography.
5.2: Disadvantages of DIY Development
- Initial Investment: Equipment and chemicals can be expensive.
- Time Commitment: Requires time and attention to detail.
- Learning Curve: Requires knowledge of the process and troubleshooting skills.
- Safety Concerns: Working with chemicals requires caution.
- Space Requirements: You need a dedicated darkroom or space that can be darkened.
5.3: Essential Equipment for DIY Development
- Developing Tank and Reels: To hold the film during development.
- Chemicals: Developer, stop bath, fixer, and wetting agent.
- Thermometer: To monitor chemical temperatures.
- Timer: To ensure accurate development times.
- Changing Bag or Tent: To load film onto the reels in complete darkness.
- Graduates and Measuring Cylinders: To measure chemicals accurately.
- Film Clips: To hang film for drying.
- Distilled Water: For mixing chemicals and rinsing film.
- Scanner: To digitize your negatives.
5.4: Steps for DIY Development
- Prepare Chemicals: Mix chemicals according to the manufacturer’s instructions.
- Load Film: In complete darkness, load the film onto the reels and place them in the developing tank.
- Develop: Pour in the developer, agitate according to instructions, and pour it out.
- Stop Bath: Pour in the stop bath, agitate, and pour it out.
- Fix: Pour in the fixer, agitate, and pour it out.
- Wash: Wash the film thoroughly with water.
- Wetting Agent: Soak the film in a wetting agent to prevent water spots.
- Dry: Hang the film to dry in a dust-free environment.
- Scan: Scan the negatives to create digital files.
5.5: Resources for Learning DIY Development
- Online Tutorials: YouTube is a great resource for visual learners.
- Photography Books: Look for books on film development.
- Online Forums: Connect with other DIY developers.
- Workshops: Some photography schools offer workshops on film development.
DIY development is a rewarding but challenging process. Be prepared to invest time and effort into learning the techniques and troubleshooting any issues that arise.
6: Digital Scanning: Preserving Your Memories Digitally
Whether you develop your film at home or use a lab, digital scanning is essential for preserving and sharing your photos.
6.1: Why Scan Your Film?
- Digital Archiving: Create digital backups of your photos.
- Sharing Online: Easily share your photos on social media or with friends and family.
- Further Editing: Edit and enhance your photos in Photoshop or other software.
- Printing Options: Print your photos at any size and on various materials.
- Preservation: Digital files are less susceptible to damage than film negatives.
6.2: Scanning Options
- Flatbed Scanners: Versatile and affordable, good for scanning prints and negatives.
- Film Scanners: Designed specifically for scanning film, offering higher quality and resolution.
- Drum Scanners: The highest quality option, used by professionals for archival-quality scans.
- Lab Scanning: Many labs offer scanning services as part of their development packages.
6.3: Key Scanning Specifications
- Resolution: Measured in DPI (dots per inch), higher resolution means more detail. 300 DPI is good for prints, while 3000+ DPI is ideal for archiving.
- Bit Depth: Higher bit depth means more color information. 8-bit is standard, while 16-bit offers more flexibility for editing.
- File Format: TIFF is a lossless format ideal for archiving, while JPEG is a compressed format good for sharing.
- Color Correction: Ensure the scanner or lab offers color correction to accurately reproduce colors.
- Dust and Scratch Removal: Some scanners and labs offer automatic dust and scratch removal.
6.4: Tips for Scanning Your Film
- Clean Your Negatives: Use a soft brush or air blower to remove dust and debris.
- Calibrate Your Scanner: Ensure accurate color reproduction.
- Scan at the Highest Resolution Possible: You can always downsize later.
- Save as TIFF: For archiving, save your scans as TIFF files.
- Backup Your Scans: Store your digital files on multiple devices and in the cloud.
6.5: Recommended Scanners
| Scanner | Type | Key Features |
|---|---|---|
| Epson Perfection V600 | Flatbed | Affordable, versatile, good for prints and negatives, Digital ICE technology for dust and scratch removal. |
| Plustek OpticFilm 8200i | Film | High-resolution scanning, dedicated film holders, included SilverFast software. |
| Reflecta RPS 10M | Film | Automatic film strip feeder, high-speed scanning, infrared dust and scratch removal. |
| Noritsu/Frontier Scanners | Lab Scanners | Professional-grade scanners used by many photo labs, known for their speed, quality, and color accuracy. |
Digital scanning is a crucial step in preserving your film photos. Whether you do it yourself or use a lab, understanding the options and specifications will help you achieve the best results.
7: Printing Your Photos: Bringing Memories to Life
Printing your photos is a tangible way to enjoy and share your memories.
7.1: Printing Options
- At Home: Using your own inkjet printer.
- Local Photo Labs: Offering a range of printing services.
- Online Printing Services: Convenient and often more affordable.
7.2: Key Printing Considerations
- Paper Type: Glossy, matte, luster, metallic, etc. Each offers a different look and feel.
- Paper Weight: Heavier paper feels more luxurious and durable.
- Ink Type: Dye-based inks are more vibrant, while pigment-based inks are more archival.
- Color Accuracy: Ensure the printer or lab is calibrated for accurate color reproduction.
- Print Size: Choose a size that is appropriate for the image and its intended use.
7.3: Paper Types Explained
| Paper Type | Description | Best For |
|---|---|---|
| Glossy | Shiny surface, vibrant colors, high contrast. | Snapshots, colorful images, images intended for framing. |
| Matte | Non-reflective surface, soft colors, subtle contrast. | Black and white photos, portraits, images displayed in brightly lit areas. |
| Luster | Semi-gloss surface, good color saturation, fingerprint resistant. | General-purpose printing, portraits, wedding photos. |
| Metallic | Unique metallic sheen, adds depth and dimension to images. | Landscapes, abstract photos, images with strong highlights. |
| Fine Art | Archival-quality paper, textured surface, excellent color accuracy. | High-end prints, gallery displays, images intended for long-term preservation. |
7.4: Tips for Printing Your Photos
- Choose the Right Paper: Consider the image and its intended use.
- Calibrate Your Monitor: Ensure accurate color reproduction.
- Edit Your Photos First: Adjust brightness, contrast, and color balance.
- Print a Test Print: Check for color accuracy and sharpness.
- Store Your Prints Properly: Protect them from light, heat, and humidity.
7.5: Recommended Printing Services
- The Darkroom (dfphoto.net): Offers genuine photo prints with professional quality.
- MPix: Known for its high-quality prints and wide range of options.
- Bay Photo Lab: A professional lab offering a variety of printing services.
- Shutterfly: A popular consumer-friendly option for prints and photo gifts.
Printing your photos is a wonderful way to bring your memories to life. Whether you print at home or use a professional service, consider the paper type, ink type, and color accuracy to achieve the best results.
8: Ethical Considerations in Photo Development
Photo development involves more than just technical processes; it also raises ethical considerations.
8.1: Privacy
- Respect for Subjects: Be mindful of the privacy of the people in your photos.
- Data Security: Ensure labs handle your digital files securely.
- Consent: Obtain consent when photographing individuals, especially in private settings.
8.2: Authenticity
- Honest Representation: Avoid manipulating photos to deceive or mislead.
- Transparency: Disclose any significant alterations made to an image.
- Journalistic Integrity: In photojournalism, strive for accuracy and objectivity.
8.3: Copyright
- Respect for Intellectual Property: Do not reproduce or distribute copyrighted images without permission.
- Fair Use: Understand the limitations of fair use for educational or commentary purposes.
- Licensing: Obtain appropriate licenses when using images for commercial purposes.
8.4: Cultural Sensitivity
- Avoid Stereotypes: Be mindful of perpetuating harmful stereotypes in your photos.
- Respect for Traditions: When photographing cultural events, be respectful of local customs.
- Informed Consent: Seek informed consent when photographing vulnerable populations.
8.5: Environmental Impact
- Chemical Disposal: Dispose of photo chemicals responsibly.
- Sustainable Practices: Choose labs that use environmentally friendly practices.
- Digital Waste: Be mindful of the energy consumption and waste associated with digital storage.
8.6: Resources for Ethical Photography
- National Press Photographers Association (NPPA): Offers a code of ethics for photojournalists.
- Poynter Institute: Provides resources on ethical journalism.
- Digital Photography Review (DPreview): Features articles on ethical issues in photography.
- Santa Fe University of Art and Design’s Photography Department: Offers courses and workshops on ethical photography practices.
Ethical considerations are an integral part of photography. By being mindful of privacy, authenticity, copyright, cultural sensitivity, and environmental impact, you can ensure that your photo development practices are responsible and ethical.
9: Preserving Negatives: Ensuring Longevity
Your negatives are the original record of your photos, so proper preservation is essential for long-term enjoyment.
9.1: Why Preserve Negatives?
- Original Source: Negatives contain the highest level of detail and information.
- Future Printing: You can make new prints from negatives at any time.
- Archival Value: Negatives can last for decades or even centuries if properly stored.
- Historical Significance: Negatives can be valuable historical records.
9.2: Storage Materials
- Acid-Free Sleeves: Protect negatives from scratches and dust.
- Archival Binders: Store sleeves in binders for easy organization.
- Storage Boxes: Store binders in boxes for protection from light and humidity.
9.3: Environmental Conditions
- Temperature: Store negatives in a cool, dry place.
- Humidity: Avoid high humidity, which can promote mold growth.
- Light: Protect negatives from direct sunlight, which can cause fading.
- Air Pollution: Avoid storing negatives in areas with high air pollution.
9.4: Handling Negatives
- Handle with Care: Avoid touching the emulsion side of the negative.
- Use Cotton Gloves: Wear cotton gloves to prevent fingerprints.
- Avoid Bending or Folding: Store negatives flat to prevent damage.
- Clean with Air Blower: Use an air blower to remove dust and debris.
9.5: Digital Archiving
- Scan Negatives: Create digital backups of your negatives.
- Store Digital Files Securely: Store digital files on multiple devices and in the cloud.
- Update Digital Files: Periodically update your digital files to new formats.
9.6: Recommended Storage Products
| Product | Description |
|---|---|
| Print File Sleeves | Acid-free sleeves for storing negatives. |
| Archival Methods Binders | Archival-quality binders for storing sleeves. |
| Hollinger Metal Edge Boxes | Archival-quality boxes for storing binders. |
| Cotton Gloves | Gloves for handling negatives. |
| Giottos Rocket Air Blower | Air blower for cleaning negatives. |
Preserving your negatives is a simple but important step in ensuring the longevity of your photos. By using proper storage materials, controlling environmental conditions, and handling negatives with care, you can enjoy your photos for generations to come.
10: The Future of Photo Development
Photo development is constantly evolving, with new technologies and trends emerging all the time.
10.1: Hybrid Workflows
- Combining Film and Digital: Using film for its unique aesthetic and digital for its convenience.
- Scanning and Editing: Scanning film and editing in Photoshop.
- Printing from Digital Files: Printing digital files on high-quality paper.
10.2: AI and Photo Development
- AI-Powered Scanning: Automatic dust and scratch removal, color correction, and image enhancement.
- AI-Based Editing: AI tools for retouching, color grading, and content-aware fill.
- AI-Generated Photos: Creating photos from scratch using AI.
10.3: Sustainable Practices
- Eco-Friendly Chemicals: Developing chemicals that are less harmful to the environment.
- Reduced Water Usage: Developing processes that use less water.
- Recycling: Recycling film and paper waste.
- Carbon Offsetting: Offsetting the carbon emissions associated with photo development.
10.4: New Film Stocks
- Experimental Films: Films with unique colors, tones, and effects.
- Re-Imagined Classics: Updated versions of classic film stocks.
- Specialty Films: Films designed for specific purposes, such as infrared photography.
10.5: The Resurgence of Film Photography
- Nostalgia: A longing for the tactile experience of film photography.
- Aesthetic: A preference for the unique look and feel of film photos.
- Creative Control: A desire to have more control over the photographic process.
- Slowing Down: A reaction against the fast pace of digital photography.
10.6: Resources for Staying Up-to-Date
- Photography Blogs: Follow photography blogs for the latest news and trends.
- Photography Magazines: Subscribe to photography magazines for in-depth articles and reviews.
- Photography Forums: Participate in photography forums to connect with other photographers.
- Photography Workshops: Attend photography workshops to learn new techniques and skills.
- dfphoto.net: A valuable resource for learning about film photography and finding photo development services.
The future of photo development is exciting, with new technologies and trends constantly emerging. By staying up-to-date on the latest developments, you can continue to explore the art and craft of photography and create stunning images that capture your vision.
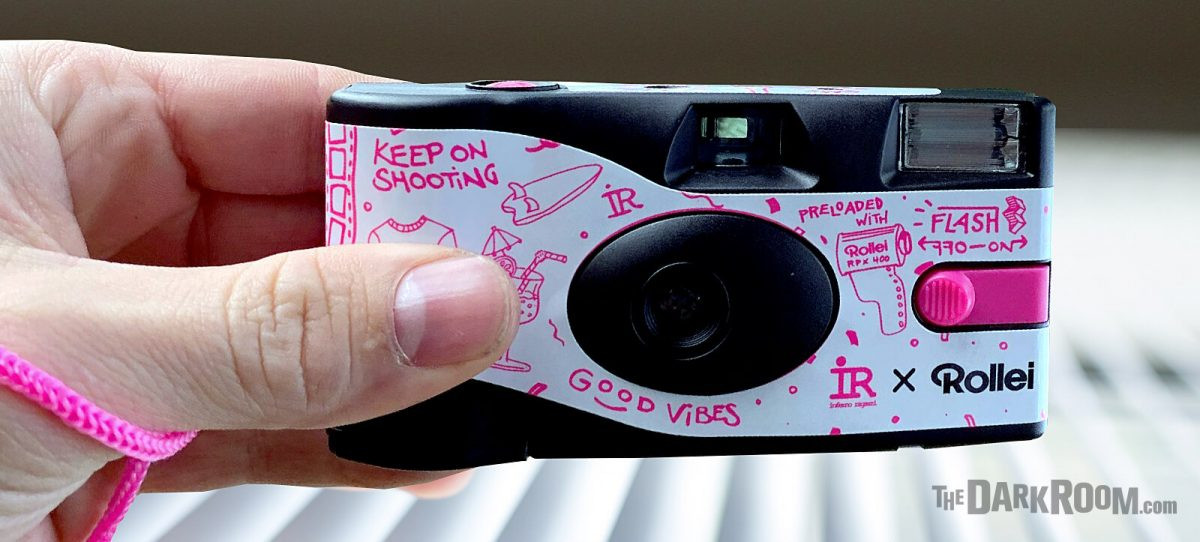 Rollei Inferno Ragazzi Disposable Camera
FAQ: Developing Your Photos
Q1: Where can I develop photos from a disposable camera?
You can develop photos from a disposable camera at specialized services like The Darkroom (dfphoto.net), which returns negatives, unlike many drug stores, or through mail-in services and some local photo labs.
Q2: What’s the best way to get my film developed locally?
To find the best local photo lab, use Google Maps or Yelp to search for nearby options, check online reviews, and inquire about film types processed, turnaround times, and prices.
Q3: How do mail-in photo development services work?
Mail-in services allow you to conveniently send your film from anywhere; they process it and provide digital scans or prints, but turnaround times may be longer due to shipping.
Q4: Is it cheaper to develop photos at home?
Developing photos at home can be more cost-effective in the long run after the initial investment in equipment and chemicals, offering greater control over the process.
Q5: What resolution should I choose when scanning my film?
Choose a scanning resolution of at least 300 DPI for prints and 3000+ DPI for archiving to ensure high detail and quality in your digital images.
Q6: How can I ensure the ethical handling of my photos during development?
Ensure ethical handling by respecting privacy, obtaining consent, avoiding manipulation, and choosing labs that follow sustainable practices.
Q7: What’s the best way to preserve my negatives?
Preserve negatives by storing them in acid-free sleeves within archival binders and boxes, in a cool, dry, and dark environment, while handling them with cotton gloves to prevent damage.
Q8: What are some sustainable practices in photo development?
Sustainable practices include using eco-friendly chemicals, reducing water usage, recycling materials, and offsetting carbon emissions.
Q9: How do I choose the right paper type for my photo prints?
Choose paper types based on the image and its intended use; glossy for vibrant colors, matte for soft tones, luster for general use, and metallic for adding depth.
Q10: What role does AI play in modern photo development?
AI enhances photo development through AI-powered scanning with automatic enhancements and AI-based editing tools for retouching and color grading, improving overall image quality and efficiency.
Conclusion: Capturing Memories with Confidence
Deciding where to develop photos is a personal choice, balancing convenience, cost, and quality. Whether you opt for the hands-on approach of DIY development, the personalized service of a local lab, or the convenience of a mail-in service like dfphoto.net, understanding your needs and the options available ensures your memories are preserved beautifully. Embrace the art of photography, explore new techniques, and let dfphoto.net be your trusted resource for all things film.
Ready to bring your photographic visions to life? Visit dfphoto.net today to discover our wide range of services, from expert film developing to stunning photo prints. Explore our tutorials, connect with a vibrant community of photographers, and unleash your creative potential. Your journey into the world of photography starts here! Address: 1600 St Michael’s Dr, Santa Fe, NM 87505, United States. Phone: +1 (505) 471-6001. Website: dfphoto.net.