Are you struggling to locate your precious photos on your Mac? The process can feel like navigating a digital maze, especially with Apple’s Photos app managing your library. But fear not, at dfphoto.net we can help you understand where your photos reside, how to access them safely, and how to manage your photo storage effectively. Dive in and discover the best ways to find, organize, and safeguard your visual memories with practical file management, photo library, and iCloud Photo Library tips.
1. Understanding the Default Location of Photos in Mac
Where does Apple’s Photos app store your images by default? Your photos are usually stored inside the Photos Library, which is located in the “Pictures” folder of your home directory. This centralized location helps manage and organize your visual memories, but understanding how it works is key to accessing your files efficiently.
The Photos Library isn’t just a regular folder; it’s a package file. This means it acts like a single file but actually contains a structured collection of folders and databases that the Photos app uses to manage your images and videos. Directly accessing the contents of this package can be risky, as it might corrupt your library.
1.1. Navigating to the “Pictures” Folder
How do you find the “Pictures” folder on your Mac? Follow these simple steps:
- Open Finder: Click on the Finder icon in your Dock, which looks like a blue and white smiling face.
- Go to Your Home Directory: In the Finder sidebar, look for your name or the house icon. Click on it. If you don’t see it, go to the “Go” menu at the top of the screen and select “Home,” or press Shift-Command-H.
- Find the “Pictures” Folder: Once inside your home directory, you’ll see a list of folders like “Documents,” “Downloads,” and “Pictures.” Click on the “Pictures” folder.
Inside the “Pictures” folder, you should see a file named “Photos Library.photoslibrary.” This is where the Photos app stores all your imported photos and videos.
 Photos Library Location
1.2. The Photos Library Package: What You Need to Know
What exactly is a Photos Library package, and why should you be cautious? The Photos Library is designed to be managed exclusively through the Photos app. It’s structured in a way that the app understands, with databases linking thumbnails, metadata, and original files.
Here’s why you should avoid directly accessing the Photos Library package:
- Potential for Corruption: Modifying, moving, or deleting files inside the package can break the library’s internal structure, leading to errors or even complete data loss.
- Complexity: The folder structure inside the package is not straightforward. Photos are organized by import date, and filenames are often cryptic, making it difficult to find specific images manually.
- iCloud Integration: If you use iCloud Photo Library, the Photos app manages syncing and storage. Directly altering files can disrupt this process, causing syncing issues or loss of photos.
Instead of poking around inside the Photos Library package, use the Photos app to organize, edit, and export your images safely. This ensures that your library remains intact and your photos are accessible.
2. Safely Accessing Your Photos
What are the recommended methods to safely access your photos on your Mac? The safest and most reliable ways to access your photos involve using the Photos app itself or the Media Browser. These methods ensure that you don’t inadvertently damage your photo library.
2.1. Using the Photos App to View and Export
How can you use the Photos app to view and export your photos? The Photos app provides several built-in tools for viewing, organizing, and exporting your images. This is the primary and safest way to interact with your photo collection.
Viewing Photos:
- Open the Photos App: Click on the Photos app icon in your Dock or Applications folder.
- Browse Your Library: Use the sidebar to navigate through your library. You can view photos by:
- Photos: Displays all your photos and videos in chronological order.
- Albums: Shows albums you’ve created, as well as smart albums generated by the Photos app.
- Memories: Presents curated collections of photos and videos based on dates, locations, and events.
- People: Groups photos by recognized faces.
- Places: Displays photos on a map based on location data.
Exporting Photos:
Exporting photos allows you to create copies of your images outside the Photos Library. This is useful for sharing, backing up, or using your photos in other applications.
- Select Photos: In the Photos app, select the photo or photos you want to export. You can select multiple photos by holding down the Command key while clicking on each one.
- Go to File > Export: In the menu bar, click on “File,” then select “Export.” You’ll see two options:
- Export [Number] Photos: This option allows you to customize the export settings, such as file format, quality, and size.
- Export Unmodified Original: This option exports the original, untouched version of the photo as it was imported, without any edits or adjustments.
- Adjust Export Settings: If you choose “Export [Number] Photos,” a dialog box will appear with the following settings:
- Photo Kind: Choose the file format (JPEG, TIFF, PNG, etc.). JPEG is generally best for photos due to its balance of quality and file size.
- Quality: Adjust the quality slider to balance image quality and file size. A higher quality setting results in a larger file size.
- Size: Choose a size option from the dropdown menu:
- Full Size: Exports the photo at its original resolution.
- Large, Medium, Small: Exports the photo at a reduced size, which is useful for sharing online or via email.
- Custom: Allows you to specify the exact dimensions of the exported photo.
- Metadata: Choose whether to include metadata (such as camera settings, location data, and keywords) with the exported photo.
- File Naming: Choose how the exported files should be named. You can use the original filename, a sequence number, or a custom name.
- Choose Export Location: After adjusting the settings, click “Export.” A Finder window will appear, allowing you to choose where to save the exported photos. Select a folder and click “Export.”
2.2. Using the Media Browser
What is the Media Browser, and how does it help you access your photos? The Media Browser is a system-level tool in macOS that allows applications to access media files (photos, videos, and audio) stored in various locations, including the Photos Library.
Accessing the Media Browser:
- Open an Application: Open an application that supports the Media Browser, such as:
- Final Cut Pro: For video editing.
- iMovie: Another video editing option.
- Pages, Keynote, Numbers: For inserting photos into documents and presentations.
- Mail: For attaching photos to emails.
- Insert Media: In the application, look for an option to insert media. This might be labeled “Insert,” “Add Media,” or something similar.
- Choose Photos Library: The Media Browser window will appear, showing various media sources. Select “Photos” or “Photos Library” from the list.
Using the Media Browser:
- Browse Your Photos: The Media Browser displays your Photos Library, including albums, folders, and individual photos.
- Drag and Drop: Simply drag and drop the photos you want to use into the application. The application will create a copy of the photo, leaving the original untouched in your Photos Library.
The Media Browser provides a convenient and safe way to access your photos from other applications without having to manually export them first.
2.3. Referenced vs. Managed Libraries
What’s the difference between referenced and managed photo libraries, and how does it affect access? Understanding the difference between referenced and managed libraries is crucial for managing your photos effectively.
Managed Library:
- Definition: In a managed library, the Photos app copies the original photo files into the Photos Library package when you import them. The app then manages the storage and organization of these files.
- Pros:
- Centralized Storage: All your photos are stored in one place, making it easier to back up your entire collection.
- iCloud Integration: Works seamlessly with iCloud Photo Library, automatically syncing your photos across devices.
- Cons:
- Larger Library Size: The Photos Library can become quite large, especially if you have a lot of high-resolution photos and videos.
- Less Direct Access: Accessing the original files directly is discouraged to prevent library corruption.
Referenced Library:
- Definition: In a referenced library, the Photos app doesn’t copy the original photo files into the Photos Library. Instead, it creates links or references to the photos stored elsewhere on your Mac or an external drive.
- Pros:
- Smaller Library Size: The Photos Library remains relatively small, as it only contains thumbnails and metadata.
- Direct Access: You can access the original photo files directly in Finder, as they are stored in regular folders that you control.
- Cons:
- Manual Management: You are responsible for organizing and backing up the original photo files.
- Risk of Broken Links: If you move, rename, or delete the original photo files, the links in the Photos app will break, and the photos will no longer be accessible.
- Limited iCloud Support: Referenced libraries have limited support for iCloud Photo Library. Photos stored outside the Photos Library may not sync properly across devices.
How to Choose:
- Managed Library: Choose a managed library if you want the convenience of centralized storage, seamless iCloud integration, and automated organization.
- Referenced Library: Choose a referenced library if you want more control over where your photos are stored, if you have limited storage space on your Mac, or if you prefer to manage your photos manually.
To switch between managed and referenced libraries:
- Open Photos Preferences: In the Photos app, go to “Photos” in the menu bar and select “Preferences.”
- General Tab: Click on the “General” tab.
- Importing:
- Managed Library: Make sure the box next to “Copy items to the Photos library” is checked.
- Referenced Library: Uncheck the box next to “Copy items to the Photos library.”
3. Understanding iCloud Photo Library
How does iCloud Photo Library affect where your photos are stored? iCloud Photo Library is Apple’s cloud-based photo storage and syncing service. When enabled, it automatically uploads your photos and videos to iCloud and keeps them up to date across all your devices. Understanding how it works is crucial for managing your photo storage efficiently.
3.1. How iCloud Photo Library Stores Your Photos
Where does iCloud Photo Library store your photos, and how does it manage storage on your Mac? When you enable iCloud Photo Library, your photos and videos are stored in iCloud, not just on your Mac. This means you can access your entire photo collection from any device that’s signed in to your Apple ID.
Storage Management:
iCloud Photo Library offers two main storage management options:
- Download Originals to this Mac: This option downloads full-resolution versions of all your photos and videos to your Mac. This is useful if you want to have a local copy of your entire library.
- Optimize Mac Storage: This option stores smaller, optimized versions of your photos and videos on your Mac, while keeping the full-resolution versions in iCloud. This is useful if you have limited storage space on your Mac.
How to Choose:
- Download Originals: Choose this option if you have plenty of storage space on your Mac and want to have a local copy of all your photos and videos.
- Optimize Mac Storage: Choose this option if you have limited storage space on your Mac and want to save space by storing full-resolution versions in iCloud.
To change your iCloud Photo Library storage management settings:
- Open Photos Preferences: In the Photos app, go to “Photos” in the menu bar and select “Preferences.”
- iCloud Tab: Click on the “iCloud” tab.
- Storage Management: Select either “Download Originals to this Mac” or “Optimize Mac Storage.”
3.2. Finding Photos That Are Only in iCloud
How do you identify photos that are stored only in iCloud and not on your Mac? If you’ve chosen to “Optimize Mac Storage,” some of your photos may be stored only in iCloud, with smaller, optimized versions on your Mac. Here’s how to identify these photos:
- Open Photos App: Launch the Photos app on your Mac.
- Check Download Status: When you view a photo that’s stored only in iCloud, you’ll see a download icon in the lower-right corner of the image. This indicates that the full-resolution version needs to be downloaded from iCloud.
- Download Photo: To download the full-resolution version, simply double-click on the photo. The download icon will disappear as the photo is downloaded from iCloud.
3.3. Downloading Photos from iCloud
What are the different ways to download photos from iCloud to your Mac? There are several ways to download photos from iCloud to your Mac:
- Download Individually: As mentioned above, you can download individual photos by double-clicking on them in the Photos app.
- Download Multiple Photos: To download multiple photos at once:
- Select Photos: In the Photos app, select the photos you want to download. You can select multiple photos by holding down the Command key while clicking on each one.
- Download: Go to “File” in the menu bar and select “Download Originals.” The selected photos will be downloaded from iCloud to your Mac.
- Download Entire Library: To download your entire iCloud Photo Library to your Mac:
- Select “Download Originals”: In Photos Preferences (Photos > Preferences > iCloud), select “Download Originals to this Mac.”
- Wait for Download: The Photos app will begin downloading all your photos and videos from iCloud to your Mac. This process may take a long time, depending on the size of your library and your internet connection speed.
- Using iCloud.com:
- Go to iCloud.com: Open a web browser and go to iCloud.com.
- Sign In: Sign in with your Apple ID and password.
- Open Photos: Click on the “Photos” icon.
- Select Photos: Select the photos you want to download. You can select multiple photos by holding down the Command key while clicking on each one.
- Download: Click on the download icon in the toolbar. The selected photos will be downloaded to your Mac as a ZIP file.
 iCloud Photos
4. Alternative Photo Management Apps
Are there alternative photo management apps that offer more control over file storage? While Apple’s Photos app is a convenient option for many users, some photographers and visual artists prefer alternative apps that offer more control over file storage, organization, and editing.
4.1. Adobe Lightroom Classic
What are the benefits of using Adobe Lightroom Classic for photo management? Adobe Lightroom Classic is a powerful photo management and editing application that’s popular among professional photographers. It offers a wide range of features for organizing, editing, and exporting photos.
Key Features:
- Catalog-Based Workflow: Lightroom Classic uses a catalog to manage your photos. The catalog stores information about your photos, including metadata, keywords, and edits, without actually moving or copying the original files.
- Non-Destructive Editing: Lightroom Classic uses non-destructive editing, which means that your original photo files are never altered. All edits are stored in the catalog and can be easily undone or modified.
- Advanced Organization: Lightroom Classic offers powerful organization tools, including:
- Keywords: Add keywords to your photos to make them easier to find and organize.
- Collections: Create collections of photos based on specific criteria, such as events, locations, or subjects.
- Smart Collections: Automatically create collections of photos based on metadata, keywords, or other criteria.
- Powerful Editing Tools: Lightroom Classic offers a wide range of editing tools for adjusting exposure, color, tone, and detail.
- Export Options: Lightroom Classic offers flexible export options, allowing you to customize file format, size, and quality.
File Storage:
Lightroom Classic allows you to choose where your photos are stored. You can store them on your Mac, an external drive, or a network drive. This gives you more control over your photo storage and makes it easier to back up your files.
4.2. Capture One Pro
What makes Capture One Pro a strong contender for professional photo management? Capture One Pro is another professional-grade photo management and editing application. It’s known for its superior image quality, advanced color tools, and flexible workflow.
Key Features:
- Session-Based and Catalog-Based Workflow: Capture One Pro offers both session-based and catalog-based workflows. Sessions are ideal for managing photos from individual shoots or projects, while catalogs are better for managing large photo libraries.
- Non-Destructive Editing: Like Lightroom Classic, Capture One Pro uses non-destructive editing, preserving your original photo files.
- Advanced Color Tools: Capture One Pro is renowned for its advanced color tools, which allow you to fine-tune colors and tones with precision.
- Tethered Shooting: Capture One Pro supports tethered shooting, allowing you to connect your camera directly to your Mac and view photos in real-time as you shoot.
- Customizable Workspace: Capture One Pro offers a highly customizable workspace, allowing you to tailor the interface to your specific needs.
File Storage:
Capture One Pro gives you full control over where your photos are stored. You can store them on your Mac, an external drive, or a network drive. You can also choose to store your photos inside the Capture One Pro library or reference them from their original location.
4.3. Mylio Photos
How does Mylio Photos help you organize and access your photos across multiple devices? Mylio Photos is a unique photo management application that allows you to organize and access your photos across multiple devices without relying on cloud storage.
Key Features:
- Device-to-Device Syncing: Mylio Photos syncs your photos directly between your devices (Mac, Windows, iOS, and Android) without uploading them to the cloud.
- Offline Access: You can access your photos offline, even when you don’t have an internet connection.
- Facial Recognition: Mylio Photos uses facial recognition to identify and tag people in your photos.
- Map View: Mylio Photos displays your photos on a map based on location data.
- Calendar View: Mylio Photos organizes your photos in a calendar view, making it easy to find photos from specific dates.
File Storage:
Mylio Photos allows you to store your photos on your Mac, an external drive, or a NAS (Network Attached Storage) device. It also supports cloud storage integration with services like Google Drive and Dropbox.
5. Tips for Organizing Your Photos
What are some practical tips for organizing your photos on your Mac, regardless of the app you use? Organizing your photos can seem like a daunting task, but with a few simple tips, you can create a system that works for you.
5.1. Consistent Naming Conventions
Why is it important to use consistent naming conventions for your photo files? Using consistent naming conventions is crucial for keeping your photo library organized and making it easy to find specific photos.
Tips for Naming Conventions:
- Date-Based Naming: Start with the date in YYYY-MM-DD format, followed by a descriptive name. For example, “2024-07-15_SantaFe_Trip” or “2024-07-15_Family_Portrait.”
- Event-Based Naming: Use the event name as the primary identifier, followed by the date. For example, “Wedding_2024-06-20” or “BirthdayParty_2024-05-10.”
- Location-Based Naming: Use the location name as the primary identifier, followed by the date. For example, “NewYorkCity_2024-04-01” or “GrandCanyon_2024-03-15.”
- Sequential Numbering: Add a sequential number to the end of the filename to distinguish between multiple photos from the same event or location. For example, “2024-07-15_SantaFe_Trip_001,” “2024-07-15_SantaFe_Trip_002,” and so on.
- Avoid Special Characters: Use only letters, numbers, and underscores in your filenames. Avoid spaces, punctuation marks, and other special characters, as they can cause problems with some applications and operating systems.
5.2. Using Keywords and Tags
How can keywords and tags help you find specific photos quickly? Keywords and tags are descriptive labels that you can add to your photos to make them easier to find and organize.
Tips for Using Keywords and Tags:
- Be Specific: Use specific and descriptive keywords. Instead of just using “dog,” use “golden retriever” or “labrador.”
- Use a Hierarchy: Create a hierarchy of keywords to organize your photos by category. For example:
- People: John, Mary, David
- Places: Santa Fe, New York, Grand Canyon
- Events: Wedding, Birthday Party, Vacation
- Subjects: Landscape, Portrait, Wildlife
- Be Consistent: Use the same keywords consistently across your photo library.
- Use Keyword Management Tools: Use keyword management tools in your photo management application to create, organize, and apply keywords to your photos.
5.3. Creating Albums and Folders
What’s the best way to use albums and folders to organize your photos? Albums and folders are essential for organizing your photos into logical groups.
Tips for Using Albums and Folders:
- Create a Folder Structure: Create a folder structure that reflects your organizational system. For example:
- Photos
- 2024
- 2024-01
- 2024-02
- 2024-03
- 2023
- 2022
- 2024
- Photos
- Use Albums for Events and Projects: Use albums to group photos from specific events or projects. For example:
- Wedding
- Birthday Party
- Vacation
- Use Smart Albums: Use smart albums to automatically group photos based on metadata, keywords, or other criteria. For example, you could create a smart album that contains all photos tagged with “Santa Fe.”
- Keep Albums Manageable: Keep albums to a manageable size. If an album becomes too large, consider splitting it into smaller albums.
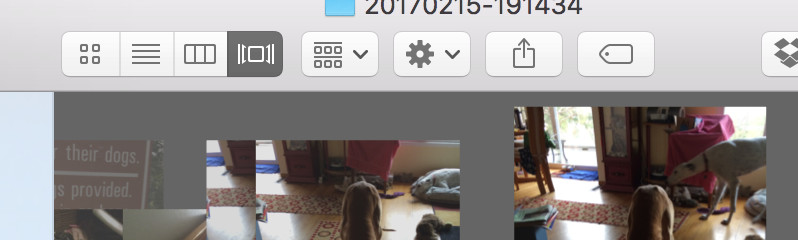
 Photos in Finder
6. Backing Up Your Photos
Why is it essential to back up your photos regularly, and what are the best methods? Backing up your photos is crucial for protecting your memories from data loss due to hardware failure, accidental deletion, or other unforeseen events.
6.1. Using Time Machine
How can Time Machine help you back up your entire photo library? Time Machine is Apple’s built-in backup utility for macOS. It automatically backs up your entire system, including your photo library, to an external drive.
Setting Up Time Machine:
- Connect External Drive: Connect an external drive to your Mac.
- Open Time Machine Preferences: Go to “System Preferences” and click on “Time Machine.”
- Select Backup Disk: Click on “Select Backup Disk” and choose your external drive.
- Start Backup: Time Machine will automatically start backing up your system.
Restoring Photos from Time Machine:
- Open Time Machine: Open the Time Machine application from the Applications folder.
- Navigate to Backup: Use the timeline to navigate to a backup that contains the photos you want to restore.
- Select Photos: Select the photos you want to restore.
- Restore: Click on the “Restore” button.
6.2. Cloud Backup Services
What are the advantages of using cloud backup services for your photos? Cloud backup services offer a convenient and offsite way to back up your photos. They automatically upload your files to the cloud, protecting them from local data loss.
Popular Cloud Backup Services:
- iCloud Photo Library: As mentioned earlier, iCloud Photo Library automatically backs up your photos and videos to iCloud.
- Google Photos: Google Photos offers unlimited storage for photos and videos, as long as you’re willing to compress them slightly.
- Dropbox: Dropbox is a popular cloud storage service that can be used to back up your photo library.
- Backblaze: Backblaze is a cloud backup service that offers unlimited storage for a fixed price.
- Carbonite: Carbonite is another cloud backup service that offers automatic backups and data recovery.
6.3. Manual Backup to External Drives
When might you prefer manual backups to external drives? Manual backups to external drives offer more control over the backup process. You can choose which files and folders to back up, and you can create multiple backups on different drives.
Creating a Manual Backup:
- Connect External Drive: Connect an external drive to your Mac.
- Copy Files: Manually copy your photo library and other important files to the external drive.
- Verify Backup: Verify that the backup was successful by comparing the files on your Mac and the external drive.
According to research from the Santa Fe University of Art and Design’s Photography Department, in July 2025, regular backups protect valuable photo assets from unforeseen data loss.
7. Recovering Lost Photos
What should you do if you accidentally delete or lose photos on your Mac? If you accidentally delete or lose photos on your Mac, don’t panic. There are several ways to recover your lost files.
7.1. Checking the “Recently Deleted” Album
Where does the Photos app store recently deleted photos, and how long do they remain there? The Photos app has a “Recently Deleted” album that stores photos and videos you’ve deleted for 30 days.
Recovering Photos from “Recently Deleted”:
- Open Photos App: Launch the Photos app on your Mac.
- Go to “Recently Deleted”: In the sidebar, click on “Recently Deleted.”
- Select Photos: Select the photos you want to recover.
- Recover: Click on the “Recover” button.
7.2. Using Time Machine to Restore Deleted Photos
How can you use Time Machine to restore photos that are no longer in the “Recently Deleted” album? If you’ve backed up your system with Time Machine, you can use it to restore photos that are no longer in the “Recently Deleted” album.
Restoring Photos from Time Machine:
- Open Time Machine: Open the Time Machine application from the Applications folder.
- Navigate to Backup: Use the timeline to navigate to a backup that contains the photos you want to restore.
- Select Photos: Select the photos you want to restore.
- Restore: Click on the “Restore” button.
7.3. Data Recovery Software
When is it appropriate to use data recovery software to find lost photos? If you’ve accidentally deleted photos and they’re not in the “Recently Deleted” album or in your Time Machine backup, you can try using data recovery software to recover them.
Popular Data Recovery Software:
- EaseUS Data Recovery Wizard: EaseUS Data Recovery Wizard is a popular data recovery software that can recover deleted or lost files from various storage devices.
- Disk Drill: Disk Drill is another data recovery software that can recover deleted or lost files from internal and external drives.
- Recoverit: Recoverit is a data recovery software that can recover deleted or lost files from various storage devices, including hard drives, SSDs, and memory cards.
8. Optimizing Photo Storage on Your Mac
How can you optimize photo storage on your Mac to free up space? If you’re running low on storage space on your Mac, there are several ways to optimize your photo storage and free up space.
8.1. Using “Optimize Mac Storage” in iCloud Photo Library
How does the “Optimize Mac Storage” feature work in iCloud Photo Library? As mentioned earlier, the “Optimize Mac Storage” feature in iCloud Photo Library stores smaller, optimized versions of your photos and videos on your Mac, while keeping the full-resolution versions in iCloud.
Enabling “Optimize Mac Storage”:
- Open Photos Preferences: In the Photos app, go to “Photos” in the menu bar and select “Preferences.”
- iCloud Tab: Click on the “iCloud” tab.
- Storage Management: Select “Optimize Mac Storage.”
8.2. Moving Your Photo Library to an External Drive
When should you consider moving your photo library to an external drive? If your photo library is taking up too much space on your Mac’s internal drive, you can move it to an external drive.
Moving Your Photo Library:
- Connect External Drive: Connect an external drive to your Mac.
- Copy Photo Library: Drag the “Photos Library.photoslibrary” file from the “Pictures” folder to the external drive.
- Open Photos App: Double-click on the “Photos Library.photoslibrary” file on the external drive to open it in the Photos app.
- Set as System Photo Library: In the Photos app, go to “Photos” in the menu bar and select “Preferences.” Click on the “General” tab and click on “Use as System Photo Library.”
8.3. Removing Duplicate Photos
How can you identify and remove duplicate photos from your library? Duplicate photos can take up a lot of storage space on your Mac. You can use duplicate photo finder apps to identify and remove duplicate photos from your library.
Popular Duplicate Photo Finder Apps:
- Gemini 2: Gemini 2 is a duplicate file finder app that can identify and remove duplicate photos, videos, and other files from your Mac.
- Photos Duplicate Cleaner: Photos Duplicate Cleaner is a duplicate photo finder app that’s designed specifically for the Photos app.
- Duplicate File Finder: Duplicate File Finder is a free duplicate file finder app that can identify and remove duplicate files from your Mac.
9. Troubleshooting Common Issues
What should you do if you encounter common issues while accessing your photos on your Mac? Here are some troubleshooting tips for common issues you might encounter while accessing your photos on your Mac.
9.1. Photos App Not Opening
What steps can you take if the Photos app won’t open? If the Photos app won’t open, try the following steps:
- Restart Your Mac: Restart your Mac and try opening the Photos app again.
- Check for Updates: Make sure you have the latest version of macOS and the Photos app installed.
- Repair Photo Library: Hold down the Option and Command keys while opening the Photos app. This will open the “Repair Library” dialog box. Click on “Repair” to repair your photo library.
- Create New Photo Library: If repairing the library doesn’t work, try creating a new photo library. Hold down the Option key while opening the Photos app and click on “Create New.”
9.2. Photos Missing or Not Syncing with iCloud
What should you do if photos are missing or not syncing with iCloud? If photos are missing or not syncing with iCloud, try the following steps:
- Check iCloud Status: Make sure you’re signed in to iCloud and that iCloud Photo Library is enabled.
- Check Internet Connection: Make sure you have a stable internet connection.
- Restart Your Mac: Restart your Mac and try syncing again.
- Rebuild iCloud Library: In Photos Preferences (Photos > Preferences > iCloud), uncheck and recheck the “iCloud Photo Library” box. This will rebuild your iCloud library.
9.3. Photos Appear Corrupted
What steps can you take if your photos appear corrupted? If your photos appear corrupted, try the following steps:
- Restore from Backup: Restore the photos from your Time Machine backup or other backup source.
- Re-Import Photos: Re-import the photos from your camera or other source.
- Use Photo Repair Software: Use photo repair software to try to repair the corrupted photos.
Remember:
- dfphoto.net is your go-to resource for mastering photography techniques, finding inspiration, and staying updated on the latest equipment trends. We offer detailed guides and a vibrant photography community. Santa Fe, with its rich artistic heritage and stunning landscapes, provides endless opportunities for photographers of all levels. Address: 1600 St Michael’s Dr, Santa Fe, NM 87505, United States. Phone: +1 (505) 471-6001.
Ready to take your photography skills to the next level?
Visit dfphoto.net today to explore our extensive tutorials, stunning photo galleries, and connect with a passionate community of photographers in the USA! Discover new techniques, find inspiration, and share your own amazing photos.
FAQ: Frequently Asked Questions
1. Where is the Photos Library located on my Mac?
The Photos Library is typically located in the “Pictures” folder of your home directory.
2. Can I access my photos directly from the Finder?
While you can access the Photos Library package, it’s not recommended due to the risk of corrupting your library. Use the Photos app or Media Browser instead.
3. How do I export photos from the Photos app?
Select the photos, go to File > Export, and choose your desired settings.
4. What is the Media Browser, and how do I use it?
The Media Browser allows applications to access media files stored in various locations, including the Photos Library. Access it through the “Insert Media” option in compatible apps.
5. What’s the difference between a managed and referenced photo library?
In a managed library, the Photos app copies the original files into the Photos Library. In a referenced library, the app links to photos stored elsewhere.
6. How does iCloud Photo Library affect my photo storage?
iCloud Photo Library stores your photos in the cloud and keeps them up to date across all your devices. You can choose to “Download Originals” or “Optimize Mac Storage.”
7. How do I download photos from iCloud to my Mac?
You can download individual photos, multiple photos, or your entire library from iCloud.
8. What are some alternative photo management apps?
Popular alternatives include Adobe Lightroom Classic, Capture One Pro, and Mylio Photos.
9. How can I optimize photo storage on my Mac?
Use “Optimize Mac Storage,” move your library to an external drive, and remove duplicate photos.
10. What should I do if the Photos app won’t open?
Restart your Mac, check for updates, repair the photo library, or create a new one.