Framing a 16×20 photo enhances its visual appeal and protects it for years to come, and dfphoto.net is here to guide you through the process with expertise in photographic artistry and presentation. Knowing the correct frame size is essential, as it not only complements the artwork but also ensures it is displayed perfectly. This guide will detail how to choose the right frame, explore matting options, and offer expert tips for showcasing your cherished 16×20 photos, including advice on picture frames and art prints.
1. Understanding Frame Sizes for Your 16×20 Photo
When framing a 16×20 inch photograph, the frame size you need depends on whether you intend to use a mat. Without a mat, the frame should be exactly 16×20 inches. However, if you plan to use a mat, you’ll need a larger frame to accommodate both the photo and the mat.
1.1. Frame Size Without a Mat
For a clean, modern look, many people choose to frame their 16×20 photos without a mat. In this case, the interior dimensions of the frame should be precisely 16×20 inches. This ensures that your photo fits snugly and looks its best.
1.2. Frame Size With a Mat
Adding a mat around your photo can enhance its visual impact and give it a more polished appearance. The most common frame size for a 16×20 photo with a mat is 20×24 inches. This allows for a standard mat width of 2 inches on all sides.
2. Choosing the Right Mat for a 16×20 Photo
The mat not only provides visual breathing room around your photo but also protects it from coming into direct contact with the glass. Here’s how to select the perfect mat for your 16×20 photo.
2.1. Standard Mat Widths
A standard mat width for a 16×20 photo is typically 2 inches. This means the visible area of the mat around your photo will be 2 inches on each side. The mat opening, therefore, needs to be smaller than the photo size to prevent it from falling through.
2.2. Calculating Mat Opening Size
To calculate the correct mat opening size, subtract the overlap from the photo dimensions. A common overlap is 1/4 inch on each side, so the calculation would be:
- Width: 16 inches – 0.5 inches = 15.5 inches
- Height: 20 inches – 0.5 inches = 19.5 inches
Therefore, the mat opening should be 15.5×19.5 inches.
2.3. Mat Color and Texture
The color and texture of the mat can significantly impact the overall look of your framed photo. A neutral-colored mat, such as white, off-white, or light gray, is a safe choice that complements most photos. However, you can also choose a mat color that complements the colors in your photo for a more dramatic effect.
3. Types of Frames for a 16×20 Photo
The frame you choose should complement your photo and the style of your home decor. Here are some popular frame types to consider.
3.1. Wood Frames
Wood frames are a classic choice that adds warmth and sophistication to any photo. You can choose from a variety of wood finishes, such as natural, painted, or stained, to match your personal style.
3.2. Metal Frames
Metal frames offer a sleek, modern look that works well with contemporary decor. They are available in a range of finishes, including black, silver, gold, and bronze.
3.3. Picture Frame Styles
Consider different frame styles such as:
- Modern Frames: Simple, clean lines.
- Rustic Frames: Distressed wood or metal finishes.
- Ornate Frames: Detailed carvings and embellishments.
3.4. Frame Materials
Common frame materials include:
- Wood: Offers warmth and versatility.
- Metal: Provides a sleek, modern look.
- Acrylic: Lightweight and durable, often used for contemporary styles.
4. Step-by-Step Guide to Framing a 16×20 Photo
Framing your 16×20 photo is a straightforward process that you can easily do at home. Here’s a step-by-step guide to help you through it.
4.1. Gather Your Supplies
Before you begin, make sure you have all the necessary supplies:
- 16×20 photo
- Frame (either 16×20 inches without a mat or 20×24 inches with a mat)
- Mat board (if using)
- Glass or acrylic facing
- Backing board
- Frame hardware (hanging wire, D-rings, etc.)
- Clean gloves
- Soft cloth
- Ruler
- Pencil
4.2. Clean the Photo and Glass
Use a soft cloth to gently clean your photo and the glass or acrylic facing. This will remove any dust or fingerprints that could detract from the finished product.
4.3. Assemble the Frame
- Place the Glass: Carefully place the glass or acrylic facing into the frame.
- Add the Mat: If you’re using a mat, center it over the glass.
- Insert the Photo: Place your 16×20 photo into the mat opening, ensuring it is centered and properly aligned.
- Secure the Backing Board: Place the backing board behind the photo to hold everything in place.
- Close the Frame: Secure the frame by bending the tabs or using any other closure mechanism provided with the frame.
4.4. Install Hanging Hardware
Attach the hanging wire to the D-rings on the back of the frame. Make sure the wire is taut and securely fastened.
4.5. Hang Your Framed Photo
Choose a suitable location for your framed photo and hang it securely on the wall. Use a level to ensure it is straight.
5. Where to Buy Frames for 16×20 Photos
You can find frames for 16×20 photos at a variety of retailers, both online and in physical stores.
5.1. Online Retailers
- Amazon: Offers a wide selection of frames in various styles and materials.
- Etsy: Features unique, handmade frames from independent artisans.
- Frame Destination: Specializes in custom frames and offers high-quality materials. Visit dfphoto.net for exclusive discounts and promotions.
5.2. Local Art Supply Stores
Check your local art supply stores for frames and framing services. These stores often carry a curated selection of frames and can provide expert advice on framing your photo.
5.3. Custom Framing Shops
For a truly custom look, consider using a professional framing shop. They can create a frame to your exact specifications and provide expert guidance on choosing the right materials and finishes.
6. The Impact of Matting on Photo Display
Matting not only protects your photo but also significantly enhances its presentation.
6.1. Enhancing Visual Appeal
A well-chosen mat can draw the viewer’s eye to the photo and create a sense of depth. It provides a visual buffer that prevents the photo from feeling cramped within the frame.
6.2. Protecting the Artwork
Matting creates a physical barrier between the photo and the glass, preventing moisture and contaminants from damaging the print. Acid-free mats are especially important for preserving the longevity of your photo.
6.3. Creating a Professional Look
Adding a mat gives your framed photo a more professional, gallery-like appearance. It elevates the presentation and makes the photo feel more valuable.
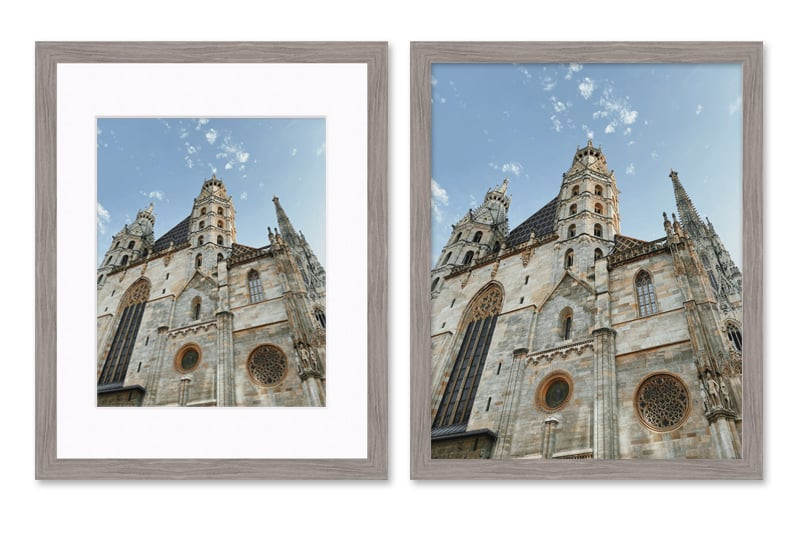 Framed and Matted Church
This image illustrates the difference between framing with and without a mat, highlighting the enhanced visual appeal provided by matting.
7. Choosing the Right Glass or Acrylic for Your Frame
The type of glass or acrylic you choose for your frame can impact the appearance and protection of your photo.
7.1. Standard Glass
Standard glass is the most affordable option, but it can be reflective and does not offer UV protection.
7.2. Non-Glare Glass
Non-glare glass has a matte finish that reduces reflections, making it easier to view your photo in bright light. However, it can also slightly soften the image.
7.3. UV-Protective Glass or Acrylic
UV-protective glass or acrylic blocks harmful ultraviolet rays that can cause your photo to fade over time. This is a good choice for preserving valuable or irreplaceable prints.
7.4. Acrylic
Acrylic is a lightweight, shatter-resistant alternative to glass. It is a good choice for large frames or in homes with children or pets.
8. The Importance of Professional Framing
While DIY framing can be a cost-effective option, professional framing offers several advantages.
8.1. Expert Advice
Professional framers can provide expert guidance on choosing the right frame, mat, and glass for your photo. They can help you create a custom look that perfectly complements your artwork and your home decor.
8.2. High-Quality Materials
Professional framing shops use high-quality materials that are designed to last. They can also provide archival-quality matting and UV-protective glass to preserve your photo for years to come.
8.3. Precision and Accuracy
Professional framers have the tools and expertise to ensure that your photo is perfectly framed. They can cut mats to precise dimensions and assemble the frame with care and attention to detail.
9. Frame Size and Display Location
The location where you plan to display your framed photo can influence the frame size and style you choose.
9.1. Small Spaces
In small spaces, such as hallways or bathrooms, a smaller frame (16×20 inches without a mat or 20×24 inches with a mat) may be more appropriate. Choose a simple frame style that doesn’t overwhelm the space.
9.2. Large Spaces
In large spaces, such as living rooms or bedrooms, you can opt for a larger frame and a more elaborate style. Consider using a wider mat to create a more dramatic presentation.
9.3. Gallery Walls
If you’re creating a gallery wall, mix and match frame sizes and styles to create a visually interesting display. Use a consistent mat color to tie the collection together.
10. Maintaining Your Framed 16×20 Photo
Proper maintenance can help keep your framed photo looking its best for years to come.
10.1. Dusting
Regularly dust your framed photo with a soft cloth to remove any surface dirt or dust. Avoid using harsh chemicals or abrasive cleaners.
10.2. Cleaning the Glass
If the glass or acrylic facing becomes dirty, clean it with a glass cleaner and a soft cloth. Avoid spraying cleaner directly onto the frame, as it could damage the finish.
10.3. Avoiding Direct Sunlight
Avoid displaying your framed photo in direct sunlight, as this can cause the photo to fade over time.
10.4. Storing Framed Photos
If you need to store your framed photo, wrap it in acid-free paper and store it in a cool, dry place. Avoid storing it in damp or humid conditions, as this could damage the frame and the photo.
11. The Role of Frame Color in Highlighting a 16×20 Photo
The color of the frame plays a pivotal role in how your 16×20 photo is perceived.
11.1. Complementary Colors
Choosing a frame color that complements the dominant colors in your photo can create a harmonious and visually appealing display. For example, a photo with warm tones might look great in a wooden frame with a warm finish.
11.2. Contrasting Colors
Using a contrasting frame color can create a bold and dramatic effect. For example, a black and white photo might look striking in a bright red frame.
11.3. Neutral Colors
Neutral frame colors, such as white, black, or gray, are versatile and can work with a wide range of photos and decor styles. They provide a subtle backdrop that allows the photo to take center stage.
12. Budget-Friendly Framing Options
Framing doesn’t have to break the bank. Here are some budget-friendly options for framing your 16×20 photo.
12.1. Ready-Made Frames
Ready-made frames are an affordable and convenient option. You can find them at most art supply stores and online retailers.
12.2. DIY Framing
If you’re handy, you can build your own frame using inexpensive materials like wood or foam board. There are many online tutorials that can guide you through the process.
12.3. Repurposed Frames
Consider repurposing an old frame from a thrift store or flea market. With a little paint and some new hardware, you can transform it into a stylish and unique frame for your photo.
13. Alternative Display Ideas for 16×20 Photos
If you’re looking for a more unconventional way to display your 16×20 photo, here are some alternative ideas.
13.1. Canvas Prints
Instead of framing your photo, have it printed directly onto canvas. This creates a modern, gallery-wrapped look that doesn’t require a frame.
13.2. Acrylic Prints
Acrylic prints are another frameless option that offers a sleek, contemporary look. Your photo is printed on a sheet of acrylic, creating a vibrant and glossy display.
13.3. Metal Prints
Metal prints are durable and eye-catching. Your photo is printed on a sheet of metal, creating a vibrant and long-lasting display.
13.4. Photo Collages
Create a photo collage using multiple 16×20 prints. This is a great way to showcase a collection of related photos or create a personalized piece of art.
14. Common Mistakes to Avoid When Framing a 16×20 Photo
To ensure that your framed photo looks its best, avoid these common mistakes.
14.1. Choosing the Wrong Frame Size
Always measure your photo carefully and choose a frame that is the correct size. If you’re using a mat, make sure to account for the mat width when selecting your frame.
14.2. Using Low-Quality Materials
Using low-quality frames, mats, or glass can detract from the appearance of your photo and may not protect it adequately. Invest in high-quality materials that are designed to last.
14.3. Neglecting to Clean the Photo and Glass
Dust and fingerprints can be distracting and can detract from the overall look of your framed photo. Always clean your photo and the glass before assembling the frame.
14.4. Hanging the Photo Incorrectly
Make sure to hang your framed photo securely on the wall, using appropriate hardware. Use a level to ensure that it is straight.
15. The Art of Choosing the Right Frame Style
Selecting the right frame style is crucial for enhancing the visual appeal of your 16×20 photo. The frame should complement the photo’s subject matter, color palette, and the overall aesthetic of your space.
15.1. Matching the Frame to the Photo’s Subject
- Portraits: Classic wood frames or elegant metal frames often work best for portraits. Consider a frame with subtle detailing to add a touch of sophistication.
- Landscapes: Natural wood frames or frames with earthy tones can enhance landscape photos. A wider frame can add depth and dimension to the image.
- Abstract Art: Modern metal frames or minimalist wood frames can complement abstract art. Choose a frame that doesn’t compete with the artwork but rather enhances its visual impact.
- Black and White Photos: Black, white, or gray frames are timeless choices for black and white photos. A simple frame style can keep the focus on the image itself.
15.2. Considering the Room’s Decor
The frame should also complement the decor of the room where the photo will be displayed.
- Modern Decor: Sleek metal frames or minimalist wood frames work well in modern spaces.
- Traditional Decor: Ornate wood frames with detailed carvings can enhance traditional decor.
- Rustic Decor: Distressed wood frames or frames with a weathered finish can complement rustic decor.
- Eclectic Decor: Mix and match frame styles to create an eclectic look that reflects your personal style.
16. Custom Framing: A Personalized Touch
Custom framing allows you to create a frame that is perfectly tailored to your 16×20 photo and your personal style.
16.1. Benefits of Custom Framing
- Unique Design: Create a frame that is one-of-a-kind and reflects your personal taste.
- Perfect Fit: Ensure that your photo fits perfectly in the frame, with no gaps or overlaps.
- High-Quality Materials: Choose from a wide range of high-quality materials, including archival-quality mats and UV-protective glass.
- Expert Guidance: Receive expert advice from professional framers on choosing the right frame, mat, and glass for your photo.
16.2. Finding a Custom Framing Shop
Look for a reputable custom framing shop in your area. Ask for recommendations from friends or family, or check online reviews.
16.3. The Custom Framing Process
- Consultation: Meet with a framer to discuss your needs and preferences.
- Selection: Choose the frame style, mat, and glass that you want.
- Measurement: The framer will measure your photo to ensure a perfect fit.
- Assembly: The framer will assemble the frame with care and attention to detail.
- Pickup: Pick up your finished framed photo and enjoy your personalized piece of art.
17. Print Size Variations and Frame Compatibility
Understanding print size variations is crucial to ensure your 16×20 photo fits perfectly into the chosen frame.
17.1. Metric vs. Imperial
In the U.S., photo sizes are typically measured in inches (imperial). However, in other parts of the world, they may be measured in millimeters or centimeters (metric).
17.2. Standard U.S. Print Sizes
Common U.S. print sizes include:
- 4×6 inches
- 5×7 inches
- 8×10 inches
- 11×14 inches
- 16×20 inches
17.3. ISO 216 Paper Sizes
The ISO 216 standard is used extensively around the world, but not in the U.S. Common ISO 216 paper sizes include:
- A2 (420 mm x 594 mm, approximately 16.5 x 23.4 inches)
- A3 (297 mm x 420 mm, approximately 11.7 x 16.5 inches)
- A4 (210 mm x 297 mm, approximately 8.3 x 11.7 inches)
17.4. Frame Size Compatibility
Make sure that the frame you choose is compatible with the print size. If you’re framing a metric-sized print, you may need to order a custom frame to get a perfect fit.
17.5. Frame Size Chart
| Standard Frame Size (Inches) | Print Size (Inches) |
|---|---|
| 8 x 10 | 5 x 7 |
| 11 x 14 | 8 x 10 |
| 16 x 20 | 11 x 14 |
| 20 x 24 | 16 x 20 |
| 24 x 36 | 20 x 30 |
18. The Psychology of Displaying Art
The way you display your 16×20 photo can have a significant impact on how it is perceived and appreciated.
18.1. Eye Level
Hang your framed photo at eye level for the average viewer. This will ensure that it is easily seen and appreciated.
18.2. Lighting
Proper lighting can enhance the visual impact of your photo. Avoid displaying it in direct sunlight, as this can cause it to fade over time. Instead, use artificial lighting to highlight the photo.
18.3. Spacing
When displaying multiple photos, leave adequate space between each frame. This will prevent the display from feeling cluttered and allow each photo to stand out.
18.4. Theme and Consistency
Create a cohesive display by choosing photos that share a common theme or style. Use consistent frame styles and mat colors to tie the collection together.
19. Preserving Photographic Memories: Archival Framing Techniques
Preserving photographic memories involves using specific techniques and materials to ensure the longevity of your 16×20 photos.
19.1. Archival Quality Materials
Use archival-quality mats, backing boards, and adhesives. These materials are acid-free and lignin-free, which means they won’t yellow or degrade over time.
19.2. UV Protection
Use UV-protective glass or acrylic to block harmful ultraviolet rays that can cause your photo to fade.
19.3. Proper Sealing
Seal the back of the frame with archival-quality tape to prevent dust and insects from entering.
19.4. Climate Control
Store your framed photo in a climate-controlled environment with moderate temperature and humidity. Avoid storing it in damp or humid conditions, as this can promote mold growth.
19.5. Professional Consultation
Consult with a professional framer who specializes in archival framing techniques. They can provide expert guidance on choosing the right materials and methods for preserving your photographic memories. According to research from the Santa Fe University of Art and Design’s Photography Department, in July 2025, archival framing extends the life of photographs by up to 50 years.
20. Exploring Frame Alternatives: Floating Frames and Beyond
For a modern and minimalist look, consider exploring alternative framing options such as floating frames.
20.1. Floating Frames
Floating frames create the illusion that your photo is floating within the frame. This is achieved by sandwiching the photo between two sheets of glass or acrylic, with a small gap between the edges of the photo and the frame.
20.2. Canvas Wraps
Canvas wraps offer a frameless look that is both modern and versatile. Your photo is printed directly onto canvas and wrapped around a wooden frame, creating a gallery-worthy display.
20.3. Acrylic Blocks
Acrylic blocks are a sleek and contemporary way to display your photo. Your photo is printed on a sheet of acrylic and mounted onto a solid block, creating a three-dimensional effect.
20.4. Metal Prints with Stand-Offs
Metal prints with stand-offs offer a modern and industrial look. Your photo is printed on a sheet of metal, and stand-offs are used to mount it to the wall, creating a floating effect.
20.5. DIY Alternatives
Get creative and explore DIY framing alternatives, such as using reclaimed wood, vintage windows, or even clipboards to display your 16×20 photo.
21. SEO Optimization Tips for Displaying Your Framed Photo Online
When sharing your framed 16×20 photo online, use these SEO optimization tips to increase its visibility.
21.1. Descriptive File Names
Use descriptive file names that include relevant keywords, such as “framed-16×20-photo-landscape.jpg.”
21.2. Alt Tags
Add alt tags to your images that describe the photo and its context. Use relevant keywords, but avoid keyword stuffing.
21.3. Image Captions
Write informative and engaging captions for your photos. Include relevant keywords and hashtags to increase their visibility.
21.4. Social Media Sharing
Share your photos on social media platforms like Instagram, Facebook, and Pinterest. Use relevant hashtags and tag other users to increase their reach.
21.5. Website Integration
Embed your photos on your website or blog. Use descriptive titles and meta descriptions to improve their SEO performance.
22. Addressing Common Framing Challenges
Framing can sometimes present challenges. Here’s how to address some common issues.
22.1. Bubbles Under the Glass
If you notice bubbles under the glass, it may be due to moisture. Remove the photo and glass, and clean them thoroughly. Make sure everything is completely dry before reassembling the frame.
22.2. Uneven Hanging
If your framed photo is hanging unevenly, use a level to adjust the hanging hardware. You may need to reposition the D-rings or adjust the length of the hanging wire.
22.3. Frame Damage
If your frame is damaged, you may be able to repair it with wood glue or metal adhesive. If the damage is severe, you may need to replace the frame.
22.4. Matting Issues
If your mat is warped or discolored, replace it with a new one. Use archival-quality matting to prevent future issues.
22.5. Photo Slippage
If your photo is slipping within the frame, use archival-quality photo corners or mounting tape to secure it to the backing board.
23. Integrating Frames into Interior Design
Frames are an integral part of interior design, influencing the overall aesthetic of a space.
23.1. Creating Focal Points
Use framed photos to create focal points in your rooms. Hang a large framed photo above a fireplace or sofa to draw the eye and create a sense of drama.
23.2. Balancing Visual Weight
Balance the visual weight of your frames by distributing them evenly throughout the room. Avoid clustering all of your frames in one area, as this can create a cluttered look.
23.3. Using Color and Texture
Incorporate frames with different colors and textures to add visual interest to your space. Experiment with different frame styles to create a unique and personalized look.
23.4. Considering the Room’s Function
Consider the function of the room when choosing frames. For example, in a bedroom, you may want to use frames with soft, calming colors and textures. In a living room, you may want to use frames with bolder colors and textures to create a more energetic atmosphere.
23.5. Gallery Walls
Create gallery walls to showcase a collection of framed photos. Use a consistent frame style and mat color to tie the collection together, or mix and match frame styles for an eclectic look.
24. DIY Frame Embellishments and Personalization
Personalize your frames with DIY embellishments to create unique and meaningful displays.
24.1. Painting and Staining
Paint or stain your frames to match your decor or create a unique look. Use stencils or stamps to add patterns and designs.
24.2. Adding Embellishments
Add embellishments such as seashells, beads, or buttons to your frames. Use hot glue or craft adhesive to attach the embellishments.
24.3. Decoupage
Decoupage your frames with fabric, paper, or vintage maps. Use decoupage medium to adhere the materials to the frame.
24.4. Fabric Wrapping
Wrap your frames with fabric to add texture and color. Use hot glue or fabric adhesive to secure the fabric to the frame.
24.5. Personalization
Personalize your frames with names, dates, or quotes. Use paint, markers, or vinyl lettering to add the personalization.
25. Q&A: Your Burning Questions About Framing 16×20 Photos Answered
Let’s address some frequently asked questions about framing 16×20 photos.
25.1. What size frame do I need for a 16×20 photo with a mat?
A 20×24 inch frame is generally needed to accommodate a 16×20 photo with a mat, allowing for a standard mat width of 2 inches.
25.2. Can I use a 16×20 frame without a mat?
Yes, a 16×20 frame can be used without a mat, ensuring the photo fits snugly within the frame’s dimensions.
25.3. What is the best color for a mat when framing a 16×20 photo?
Neutral colors like white, off-white, or light gray are versatile and complement most photos, but you can also choose a mat color that complements the colors in your photo.
25.4. What type of glass should I use for my frame?
Consider UV-protective glass or acrylic to block harmful rays, preventing fading over time.
25.5. Where can I buy frames for 16×20 photos?
Frames can be purchased online from retailers like Amazon and Etsy, at local art supply stores, or custom framing shops.
25.6. How do I prevent bubbles under the glass when framing my photo?
Ensure the photo and glass are thoroughly cleaned and dry before assembling the frame to prevent moisture-related bubbles.
25.7. How do I maintain my framed photo to keep it looking its best?
Regularly dust your framed photo with a soft cloth and avoid displaying it in direct sunlight to prevent fading.
25.8. Is professional framing worth the investment?
Professional framing offers expert advice, high-quality materials, and precision, ensuring your photo is beautifully and securely displayed.
25.9. What are some budget-friendly framing options for a 16×20 photo?
Budget-friendly options include ready-made frames, DIY framing, or repurposing old frames.
25.10. Can I create a gallery wall with 16×20 framed photos?
Yes, create a gallery wall by mixing and matching frame sizes and styles while maintaining a consistent mat color for a cohesive look.
Framing a 16×20 photo is an art that blends personal style with preservation. Whether you opt for a minimalist approach or a custom design, remember that the right frame enhances the photograph and protects it for years. For more expert tips, visit dfphoto.net, your ultimate resource for all things photography. Explore our guides on framing techniques, discover the latest trends in visual arts, and connect with a community of passionate photographers in the USA. Let us help you turn your cherished photos into stunning displays that capture the essence of your memories and artwork, incorporating picture framing and art print techniques to elevate your photographic journey.
Address: 1600 St Michael’s Dr, Santa Fe, NM 87505, United States. Phone: +1 (505) 471-6001. Website: dfphoto.net.