Do you often wonder what the exact size of a 4×6 photo is and why it’s so popular in photography? At dfphoto.net, we’re here to provide an exhaustive breakdown of this standard photo size. We will explore its dimensions in various units, common uses, and how it stacks up against other sizes. Get ready to master the art of picture sizes and unlock your visual storytelling potential. Delve into the technical aspects of photographic printing and embrace the world of digital imaging with confidence.
1. The Enduring Appeal of 4×6 Photos
The 4×6 photo is a universally recognized standard, commonly recommended by photographers and found in countless albums. Let’s explore the origins and reasons behind its lasting popularity.
1.1 Historical Roots
The popularity of the 4×6 size traces back to the early days of roll film 135, introduced by Kodak in 1934. Initially, the 3.5×5 format, known as 3R, was the standard. However, the 4×6 format emerged alongside the rise of 35mm cameras in the 20th century, designed to accommodate the 24x36mm frames with a 3:2 aspect ratio.
1.2 Industry Adoption and Compatibility
Over time, the 4×6 size gained significant traction in the photography industry due to its excellent compatibility. Today, most photo printing services, both film and digital, are optimized for 4×6 images, fitting various cameras and smartphones. This compatibility streamlines post-production for both professional photographers and casual users.
1.3 Cost-Effectiveness and Accessibility
The cost-effective production and widespread availability of photo frames and albums tailored for this size contribute significantly to its global popularity. According to a 2023 study by the Photo Imaging Manufacturers Association (PIMA), 4×6 prints account for approximately 60% of all photo prints made annually.
 Vintage Camera and 4×6 Photo Print
2. Decoding the Dimensions of a 4×6 Photo
Let’s dive into the exact measurements of a 4×6 photo in various units to understand its physical dimensions thoroughly.
2.1 Size in Inches
A 4×6 photo measures 4 inches in width and 6 inches in height, featuring an aspect ratio of 2:3. Practically, this is nearly equivalent to the viewfinder frame of early digital cameras.
2.2 Size in Feet
While less common, a 4×6 photo converts to approximately 0.33 feet wide and 0.5 feet high. This conversion is mainly used for comparing it with larger objects, like banners or projection screens.
2.3 Size in Centimeters (cm)
To convert inches to centimeters, we use the formula 1 inch = 2.54 cm. Therefore:
- Width = 4 inches * 2.54 cm = 10.16 cm
- Height = 6 inches * 2.54 cm = 15.24 cm
Thus, a 4×6 photo measures 10.16 cm x 15.24 cm.
2.4 Size in Millimeters (mm)
To convert inches to millimeters, we use the formula 1 inch = 25.4 mm. Therefore:
- Width = 4 inches * 25.4 mm = 101.6 mm
- Height = 6 inches * 25.4 mm = 152.4 mm
Thus, a 4×6 photo measures 101.6 mm x 152.4 mm.
2.5 Size in Pixels
The pixel dimensions of a 4×6 photo depend on the resolution. For web display, 72 ppi (pixels per inch) is common, resulting in 288 x 432 pixels. However, for high-quality prints, higher resolutions are recommended:
| Resolution | Image Quality | Pixel Dimensions |
|---|---|---|
| 180 ppi | Medium | 720 x 1080 pixels |
| 240 ppi | Good | 960 x 1440 pixels |
| 300 ppi | High | 1200 x 1800 pixels |
2.6 Understanding Aspect Ratio
The aspect ratio is the proportional relationship between the width and height of an image. For a 4×6 photo, dividing both sides by 2 gives us an aspect ratio of 2:3, essential for maintaining image proportions during resizing or printing.
3. Versatile Uses of 4×6 Photo Dimensions
The 4×6 size is favored for its balance of convenience and flexibility, making it a popular choice for various applications among professional photographers and casual users alike.
3.1 Ideal for Scrapbooks and Photo Albums
Finding frames for 4×6 images is easy, making them ideal for scrapbooks and photo albums. This size offers flexibility, allowing scrapbook enthusiasts to creatively organize their albums.
3.2 Practical for Educational and Business Purposes
Businesses and educational institutions frequently use 4×6 photos for ID cards, informational displays, and promotional materials. Several countries, including Saudi Arabia, Egypt, UAE, and Syria, require 4×6 passport photos.
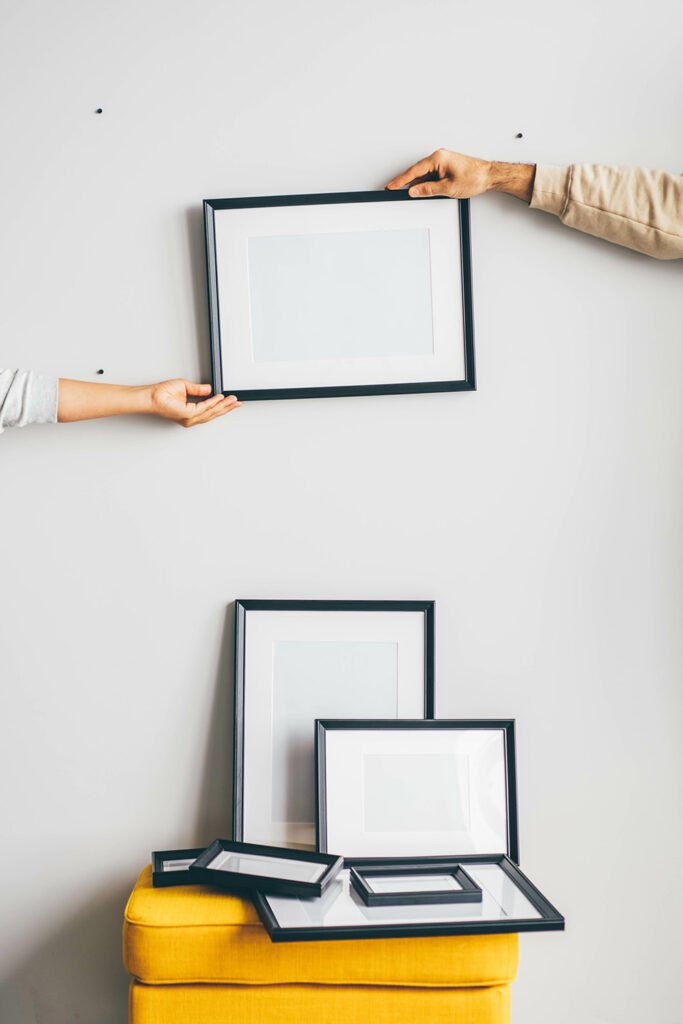
3.3 Perfect for Decoration and Gift-Giving
The 4×6 size is excellent for framing and display, large enough to capture essential details while compact enough to fit various spaces. They also add a personal touch to cards or gifts.
3.4 Suited for Digital Display
4×6 pictures are compatible with most online platforms. While standard sizes vary across platforms, this size works well for digital photos and avatars, balancing maximum size with full display capability.
 Common Uses Of 4×6 Photo Dimensions
4. Step-by-Step Guide: Resizing Your Photos to 4×6
Sometimes, cameras or smartphones produce images larger than 4×6. Here’s how to resize them without losing resolution, using Adobe Photoshop:
- Step 1: Open your image in Photoshop.
- Step 2: Click on “Image” in the menu bar, then select “Image Size.”
- Step 3: Adjust the dimensions to the desired size. Enter “4” in the Width field and “6” in the Height field, ensuring the measurement is set to inches.
- Step 4: Uncheck “Resample” to maintain the original pixel count and click “OK.”
- Step 5: Go back to the menu and select “Image,” then “Canvas Size.”
- Step 6: Modify the parameters to match the 4×6 dimensions and set the cropping direction to your preference.
- Step 7: Click “OK” to apply the changes.
5. Printing Your 4×6 Photos: A Quick Guide
Follow these steps to ensure your 4×6 photos print perfectly:
- Step 1: Ensure your image resolution is 300 ppi (1200 x 1800 pixels).
- Step 2: Verify the aspect ratio is 2:3. Crop the image if necessary to match these dimensions.
- Step 3: Select the appropriate paper type. Glossy or semi-glossy papers are generally recommended, but choose one that suits your printer.
- Step 4: Configure your printer settings for accurate color and paper size.
- Step 5: Print a test using plain paper to check the quality before printing on photo paper.
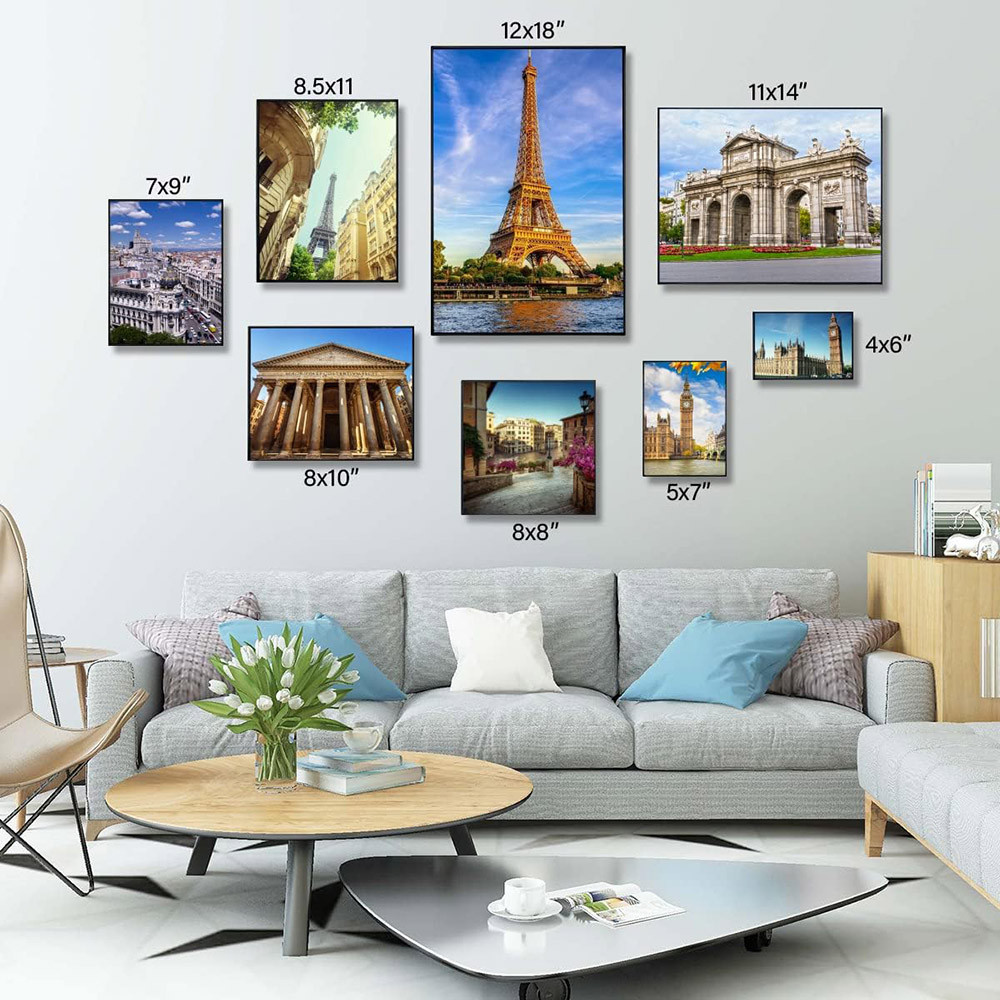
6. 4×6 Compared: Understanding Size Differences
Let’s see how the 4×6 photo size compares with other common sizes to better understand its advantages and limitations.
6.1 4×6 vs. 3×5
The 3×5 size is slightly smaller than 4×6, offering less space to showcase intricate details. It is more compact, making it suitable for smaller albums or frames.
6.2 4×6 vs. 5×7
A 5×7 photo provides more display area, enhancing visual impact and making it a preferred choice for portraits or panoramic images in medium-sized spaces.
6.3 4×6 vs. 8×10
The 8×10 size is almost twice as large as a 4×6. Its larger dimensions make it ideal for portraits or formal photos where users want full focus, often seen in galleries or professional award ceremonies.
6.4 4×6 vs. 11×14
The 11×14 size is typically reserved for artwork, posters, or landscape photos. It demands more space in showrooms or homes and offers a visual highlight that captures attention.
| Size | Dimensions (inches) | Common Uses |
|---|---|---|
| 3×5 | 3 x 5 | Small albums, compact frames |
| 4×6 | 4 x 6 | Standard prints, scrapbooks, gifts |
| 5×7 | 5 x 7 | Portraits, medium-sized displays |
| 8×10 | 8 x 10 | Formal portraits, galleries |
| 11×14 | 11 x 14 | Art prints, landscape photos, large displays |
7. Expert Insights: Tips from dfphoto.net
At dfphoto.net, we’ve seen how the right photo size can make all the difference. Here are some pro tips to enhance your photography experience:
- Choose the Right Resolution: Always aim for 300 ppi for high-quality prints.
- Consider Your Display Space: Match the photo size to the available space for optimal impact.
- Experiment with Different Papers: Different paper types can dramatically affect the look and feel of your prints.
- Use Editing Tools Wisely: Crop and resize images carefully to maintain the best possible quality.
- Back Up Your Photos: Ensure your precious memories are safe by backing up your digital images.
8. The Importance of Color Management
Achieving accurate and vibrant colors in your 4×6 prints requires effective color management.
8.1 Calibrating Your Monitor
Calibrating your monitor ensures that the colors you see on screen are accurate. This is crucial for making informed editing decisions. Tools like the X-Rite i1Display Pro can help you calibrate your monitor for consistent color representation.
8.2 Using Color Profiles
Color profiles define the color space of an image and ensure consistent color reproduction across different devices. Use the sRGB color profile for web images and Adobe RGB for prints to maintain color accuracy.
8.3 Printer Settings
Adjust your printer settings to match the paper type and color profile you’re using. Most printers come with preset options for various paper types, ensuring optimal print quality.
9. Exploring Creative Printing Options
Beyond standard prints, there are numerous creative ways to showcase your 4×6 photos.
9.1 Photo Collages
Create stunning photo collages by arranging multiple 4×6 prints in a visually appealing layout. Use software like Adobe Photoshop or online tools like Canva to design your collage.
9.2 Personalized Gifts
Turn your 4×6 photos into personalized gifts like mugs, phone cases, and keychains. Websites like Shutterfly and Zazzle offer custom printing services for creating unique and memorable presents.
9.3 DIY Photo Displays
Get creative with DIY photo displays using materials like string lights, wooden boards, and clothespins. These displays add a personal touch to your home decor and allow you to easily swap out photos.
10. Preserving Your Memories: Archival Practices
To ensure your 4×6 prints last for generations, follow these archival practices:
10.1 Use Archival-Quality Materials
Print your photos on acid-free paper and use archival-quality inks to prevent fading and discoloration over time. Look for products labeled as “archival” or “acid-free” when purchasing printing supplies.
10.2 Store Photos Properly
Store your photos in acid-free albums or boxes in a cool, dry place away from direct sunlight. Avoid storing photos in humid environments, as moisture can damage the prints.
10.3 Handle Photos with Care
Handle your photos with clean, dry hands to prevent smudging or scratching. Avoid touching the printed surface, as oils from your skin can damage the image over time.
11. The Rise of Mobile Photography and 4×6 Prints
With the rise of mobile photography, printing 4×6 photos has become more accessible than ever.
11.1 Mobile Printing Apps
Use mobile printing apps like the HP Smart app or the Canon PRINT app to print photos directly from your smartphone. These apps allow you to easily select, edit, and print your photos without transferring them to a computer.
11.2 Social Media Integration
Many printing services integrate with social media platforms, allowing you to print photos directly from your Instagram, Facebook, or other social media accounts. This makes it easy to create physical prints of your favorite online memories.
11.3 Portable Photo Printers
Consider investing in a portable photo printer like the Canon SELPHY or the Fujifilm Instax Share. These compact printers allow you to print 4×6 photos on the go, making them perfect for parties, events, and travel.
12. The Future of Photo Printing
The photo printing industry continues to evolve, with new technologies and trends emerging.
12.1 Sustainable Printing Practices
More and more printing services are adopting sustainable practices, such as using recycled paper, eco-friendly inks, and energy-efficient equipment. Look for companies that prioritize environmental responsibility when choosing a printing service.
12.2 Augmented Reality Prints
Some companies are experimenting with augmented reality (AR) prints, which come to life when viewed through a smartphone or tablet. These prints combine the tangible experience of a physical photo with the interactive elements of digital media.
12.3 Personalized Photo Products
The demand for personalized photo products is growing, with consumers seeking unique ways to display and share their memories. Expect to see more innovative products like custom photo books, wall art, and home decor items in the future.
13. Common Challenges and Solutions
Navigating photo sizes can sometimes be tricky. Here are some common challenges and practical solutions to help you avoid them:
13.1 Image Cropping Issues
Challenge: Cropping an image to fit a 4×6 size can sometimes cut out important details.
Solution: Use photo editing software to carefully adjust the cropping area, ensuring that key elements remain within the frame. Consider slightly adjusting the print size if necessary.
13.2 Low Resolution Prints
Challenge: Printing a low-resolution image at 4×6 can result in a blurry or pixelated print.
Solution: Always use high-resolution images (at least 1200 x 1800 pixels for 300 ppi) for printing. If you only have a low-resolution image, consider using upscaling software to improve its quality before printing.
13.3 Color Discrepancies
Challenge: Colors in your prints may not match the colors you see on your screen.
Solution: Calibrate your monitor regularly and use color-managed workflows to ensure accurate color reproduction. Also, check your printer settings and paper type to optimize color output.
14. The Art of Photo Composition for 4×6 Prints
Creating visually appealing 4×6 prints requires thoughtful composition.
14.1 Rule of Thirds
The rule of thirds involves dividing your frame into nine equal parts and placing key elements along these lines or at their intersections. This technique creates a balanced and engaging composition.
14.2 Leading Lines
Use leading lines to guide the viewer’s eye through the image and towards the main subject. Leading lines can be roads, rivers, fences, or any other linear element in the scene.
14.3 Symmetry and Patterns
Symmetry and patterns can create visually striking compositions. Look for symmetrical scenes or repeating patterns in your environment and use them to create eye-catching photos.
14.4 Negative Space
Use negative space (the empty areas around your subject) to create a sense of balance and draw attention to the main subject. Negative space can also convey a sense of calmness or isolation.
15. FAQs About 4×6 Photo Sizes
Here are some frequently asked questions about 4×6 photo sizes to further clarify any doubts:
15.1 Do Smartphones Use A 2:3 Aspect Ratio?
No, most smartphones typically use a 4:3 aspect ratio by default, which is not available in most camera settings. A third-party tool would be needed to crop it to the desired 4×6 size.
15.2 What Is The Best Resolution For Printing 4×6 Photos?
For optimal results, aim for a resolution of at least 1200 x 1800 pixels, equivalent to 300 ppi. This setting ensures a sharp and high-quality display.
15.3 Can I Print 4×6 Photos At Home?
Yes, you can print 4×6 photos at home if you have a printer that supports this size and high-quality photo paper.
15.4 Are 4×6 Photos Good For Framing?
Yes, 4×6 photos are ideal for framing as they are a standard size and easily fit into most frames designed for this dimension.
15.5 How Do I Choose The Right Paper For 4×6 Prints?
Select paper based on your desired finish—glossy for vibrant colors, matte for a softer look, or satin for a balance of both.
15.6 What Are The Advantages Of 4×6 Prints Over Larger Sizes?
4×6 prints are cost-effective, easy to store, and suitable for various uses like albums, scrapbooks, and small frames.
15.7 How Do I Maintain The Quality Of My 4×6 Prints Over Time?
Store your prints in acid-free albums or boxes and avoid direct sunlight and humidity to prevent fading.
15.8 What Is The Difference Between DPI And PPI?
DPI (dots per inch) refers to the resolution of a printer, while PPI (pixels per inch) refers to the resolution of an image.
15.9 Can I Enlarge A 4×6 Photo Without Losing Quality?
Enlarging a 4×6 photo significantly can result in a loss of quality. Use high-resolution images and consider professional upscaling services for best results.
15.10 Where Can I Get High-Quality 4×6 Prints?
Many online and local photo printing services offer high-quality 4×6 prints. Research and choose a reputable service with good reviews.
16. Conclusion
The 4×6 photo size is a timeless standard in photography, offering a perfect balance of portability, flexibility, and affordability. Whether you’re creating scrapbooks, decorating your home, or preserving precious memories, the 4×6 format provides an exceptional visual touch.
Ready to take your photography to the next level? Visit dfphoto.net for more in-depth guides, creative inspiration, and a vibrant community of photography enthusiasts. Explore our tutorials, showcase your work, and connect with like-minded individuals. Unleash your creativity with dfphoto.net, where every snapshot tells a story.
Address: 1600 St Michael’s Dr, Santa Fe, NM 87505, United States.
Phone: +1 (505) 471-6001.
Website: dfphoto.net.