Google Photos stands out as a top choice for cloud photo storage, lauded for its intelligent organization, user-friendly editing capabilities, and effortless sharing features. Among its array of functionalities, the Google Photos archive often remains misunderstood. So, what exactly is the archive, and how can you effectively utilize it to enhance your photo management?
If you’re already a Google Photos user on your smartphone or computer, you’ve likely encountered the archive icon. But what is its purpose, and how does archiving differ from simply deleting your precious photos? This guide will delve into the Google Photos archive, explaining its features and benefits to help you master your photo library.
Understanding Google Photos Archive: Hide, Don’t Delete
In simple terms, the Google Photos archive is designed to hide photos from your main view without deleting them. When you archive an image from your library, it’s moved to a separate archive section, safely stored in the cloud for as long as you need. The key advantage? Archived images disappear from your primary Google Photos feed, creating a cleaner and more organized space.
This feature is incredibly useful for decluttering your Google Photos timeline. Imagine your feed filled with screenshots, receipts, or travel documents. By archiving these less visually appealing items, you can curate a much more aesthetically pleasing view of your cherished memories and recent snapshots. Similarly, you might want to conceal some less flattering selfies or keep only the best photos from a vacation in your main feed. Archiving the rest allows them to be hidden from immediate view, yet still accessible whenever you wish to revisit or use them.
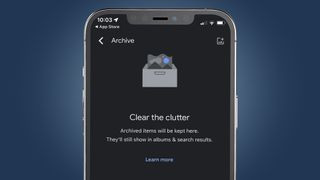 An iPhone displaying the Google Photos archive menu options
(Image credit: Future) Streamline your Google Photos feed by archiving screenshots and receipts.
What Happens When You Archive Photos in Google Photos?
Rest assured, archiving photos in Google Photos does not delete them. They remain securely stored in the cloud, just relocated from your main photo stream to a dedicated ‘Archive’ section. This archive is easily accessible through the Google Photos app on both Android and iOS devices, as well as via any desktop web browser.
Crucially, archived images remain discoverable through Google Photos’ search functionality. This means you can still leverage Google’s powerful image recognition and search tools to find specific archived photos, ensuring that archiving doesn’t hinder your ability to locate images when needed.
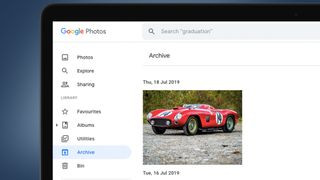 A laptop screen showcasing the Google Photos archive sidebar navigation
(Image credit: Future) Access your archived photos anytime through the ‘Archive’ tab in Google Photos.
Furthermore, archiving a photo doesn’t remove it from any albums you’ve created. This is a significant advantage for organization. You can maintain curated albums of specific events or themes while simultaneously cleaning up your main feed, keeping everything neatly organized.
Another important point: photos in the Google Photos archive are excluded from automatically generated movies and animations. This prevents potentially unwanted or less desirable photos, like those funny party snaps, from unexpectedly appearing in your otherwise carefully curated highlight reels of family vacations or special moments.
Step-by-Step Guide: How to Archive and Unarchive in Google Photos
The process for using the Google Photos archive is straightforward across different devices. Here’s a breakdown for Android, iOS, and desktop:
Archiving Photos on Android:
- Open the Google Photos app on your Android device.
- Select a photo from your main feed by tapping and holding it.
- Tap the three vertical dots icon (More options).
- Choose ‘Move to Archive’ from the toolbar that appears.
A confirmation pop-up will briefly appear the first time you archive a photo, explaining the feature. Subsequent archiving actions will show a simpler banner with an ‘Undo’ option.
 An Android phone screen illustrating the Google Photos archive menu options
(Image credit: Future) Easily archive photos directly from your Android Google Photos app.
To archive multiple photos on Android:
- Long-press on a photo in the main feed to select it.
- Tap on other photos you wish to archive to select them as well.
- Tap the ‘Archive’ shortcut from the toolbar at the bottom (you may need to swipe to see it).
Accessing and Unarchiving Photos on Android:
- Tap ‘Library’ at the bottom of the Google Photos app.
- Tap the ‘Archive’ button.
- To unarchive, select photos within the archive and tap the ‘Unarchive’ option.
Archiving Photos on iOS (iPhone/iPad):
The steps for archiving photos on iOS devices are very similar to Android:
- Launch the Google Photos app on your iPhone or iPad.
- Open a photo from the main feed.
- Tap the three dots icon in the top right corner (or swipe up on the photo).
- Select the ‘Archive’ (or ‘Move to Archive’) icon.
For multiple photos on iOS:
- Long-press on a photo to select it.
- Tap additional photos to select them.
- Scroll across the bottom toolbar and select the ‘Archive’ button.
Accessing and Unarchiving Photos on iOS:
- Tap ‘Library’ at the bottom right corner of the app.
- Select ‘Archive’.
- To unarchive, select photos and tap the ‘Unarchive’ option.
 An iPad displaying a photo and the Google Photos archive menu
(Image credit: Future) Manage your Google Photos archive efficiently on your iPad.
Archiving Photos on Desktop:
Using the Google Photos archive on a desktop browser offers an additional method and a handy shortcut:
- Go to photos.google.com in your web browser and sign in.
- To archive a single photo:
- Open the photo.
- Click the three vertical dots in the top right corner.
- Select ‘Archive’ from the dropdown menu.
- Alternatively, use the ‘Shift + A’ shortcut while viewing a photo full-screen.
- To archive multiple photos:
- Hover over a photo in the main feed and click the grey checkmark that appears.
- Select multiple photos in this way.
- Click the three dots in the top-right corner and select ‘Archive’, or use the ‘Shift + A’ shortcut.
Accessing and Unarchiving Photos on Desktop:
- Find the ‘Archive’ tab under the ‘Library’ section on the left sidebar.
- To unarchive: Select photos within the archive, click the three dots, and choose ‘Unarchive’, or use the ‘Shift + A’ shortcut.
- You can also ‘Add photos’ to the archive directly from the archive tab using the button in the top-right corner.
Image 1 of 2
(Image credit: Future) Manage your archive directly from the Google Photos website interface.
Image 2 of 2
(Image credit: Future) The desktop interface provides multiple ways to archive and unarchive your photos.
Maximize Your Google Photos Experience with Archive
The Google Photos archive is a powerful tool for anyone looking to better organize their digital memories. By effectively using the archive, you can maintain a clean and curated main photo feed while still keeping all your photos safely stored and accessible. Whether you’re decluttering everyday snapshots or simply refining your main view to showcase your best moments, mastering the Google Photos archive is a key step in optimizing your Google Photos experience. Start using the archive today and enjoy a more organized and visually appealing photo library.
