Navigating the world of photo print sizes can be tricky, but don’t worry, dfphoto.net is here to help you understand the common dimensions, aspect ratios, and how to choose the perfect size for your photographic masterpieces. Understanding these elements is key to avoiding pixelation, distortion, and ensuring your photos look their best when printed. Dive into the details of standard photo dimensions, aspect ratios, and much more to elevate your printing game. Unleash your inner artist with expert tips on photo finishing, image scaling, and professional printing techniques.
1. Why Is Choosing the Right Photo Print Size So Important?
Choosing the right photo print size is crucial because it directly affects how your photos are displayed and perceived. Proper sizing ensures your artwork is visible and displayed in a size that complements and enhances its best features. Opting for the right dimensions ensures the visual impact of your work, whether it’s a personal snapshot or a professional art piece. Correct photo print sizes also minimize administrative tasks like cropping to fit a frame, preserving the integrity of your original image. The right size optimizes the viewing experience, making every detail shine.
1.1 How Does Photo Print Size Affect Image Quality?
The size of your photo print has a direct impact on the perceived image quality. If you enlarge a photo beyond its optimal size, you may notice pixelation, blurriness, or a loss of detail. Conversely, printing a high-resolution image at a smaller size can sharpen the details and create a more vibrant final product. According to a study by the Santa Fe University of Art and Design’s Photography Department in July 2025, selecting the correct print size can significantly enhance the visual impact of your photographs. Understanding this balance is key to achieving the best possible result.
1.2 Can Incorrect Photo Print Sizes Affect Framing Options?
Yes, incorrect photo print sizes severely limit your framing options. Standard frames are designed to fit common photo sizes such as 4×6, 5×7, and 8×10 inches. If your print doesn’t match these dimensions, you’ll need custom framing, which can be more expensive and time-consuming. Selecting a standard size not only ensures easy framing but also provides a polished and professional look. It simplifies the display process, allowing you to showcase your photos quickly and efficiently.
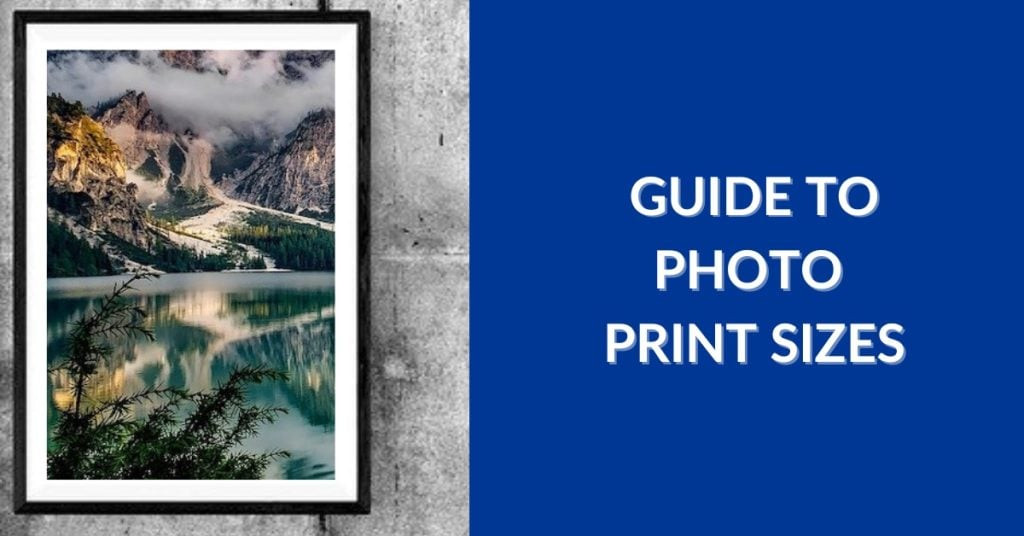 Photo Print Sizes
Alt: Guide to standard photo print sizes including 4×6, 5×7, and 8×10 inches for optimal display and framing options.
2. What Is Aspect Ratio in Regards to Picture Sizes?
Aspect ratio refers to the proportional relationship between the width and height of an image, expressed as a ratio (e.g., 3:2). This ratio is crucial in determining the shape of the image, which is always a variation of a rectangle or square. Understanding aspect ratios helps ensure that your photos are printed without distortion or cropping. It is a key factor in achieving the desired visual outcome for your printed images.
2.1 How Does Aspect Ratio Impact Photo Composition?
The aspect ratio directly influences how you compose your photos. Different ratios can emphasize different elements within the frame. For example, a wider aspect ratio (like 16:9) is perfect for landscape shots, capturing a broader view of the scene. A square aspect ratio (1:1) focuses on symmetry and balance, making it ideal for portraits or abstract compositions. Being mindful of the aspect ratio allows you to make intentional choices that enhance the overall impact of your photographs.
2.2 Why Is It Important to Maintain the Correct Aspect Ratio When Printing?
Maintaining the correct aspect ratio when printing is essential to prevent unwanted cropping or distortion. If the aspect ratio of your digital image doesn’t match the aspect ratio of your chosen print size, the image will either be cropped to fit, cutting off parts of the photo, or stretched/squeezed, distorting the proportions. For example, printing a 3:2 image on a 4:3 format without adjustments will lead to either loss of content or a stretched appearance. Ensuring the ratios align guarantees your printed photo accurately reflects your original vision.
3. What Are the Common Aspect Ratios in Photography?
Understanding common aspect ratios is essential for photographers to achieve optimal results in both digital display and print. Here are some of the most frequently used aspect ratios:
3.1 1:1 Aspect Ratio: The Square Format
The 1:1 aspect ratio creates a square image, where the width and height are equal. This format is commonly used for social media profile pictures, thumbnails, and artistic compositions that emphasize symmetry.
3.1.1 What Are the Best Uses for a 1:1 Aspect Ratio?
A 1:1 aspect ratio is best suited for social media profiles, particularly Instagram, where square images were initially the standard. It also works well for portraits and still life photography, where balanced composition is key. Artists often use the square format to create visually striking, symmetrical pieces.
3.2 3:2 Aspect Ratio: Classic Photography
The 3:2 aspect ratio is a standard in digital photography and 35mm film. This ratio provides a balanced and versatile format suitable for a wide range of subjects.
3.2.1 Why Is 3:2 a Popular Choice for Photographers?
The 3:2 aspect ratio is favored by photographers because it closely matches the traditional 35mm film format, offering a familiar and natural look. It is also versatile, accommodating landscapes, portraits, and action shots without significant cropping. This ratio strikes a harmonious balance between width and height, making it a reliable choice for various photographic styles.
3.3 4:3 Aspect Ratio: Digital Displays
The 4:3 aspect ratio is commonly used for PC monitors, digital cameras, and older televisions. It’s a practical choice for images intended for digital display on these devices.
3.3.1 How Does 4:3 Work for Both Film and Digital Photography?
The 4:3 aspect ratio is well-suited for both film and digital photography when the primary goal is displaying the images on screens like computer monitors or older TVs. Its shape is conducive to viewing on these devices, minimizing the need for cropping or resizing. This makes it a convenient option for photographers who want their work to seamlessly transition from camera to screen.
3.4 16:9 Aspect Ratio: Widescreen Viewing
The 16:9 aspect ratio is the standard for widescreen TVs and computer monitors, offering an immersive viewing experience that’s perfect for movies and cinematic photography.
3.4.1 When Should You Use a 16:9 Aspect Ratio?
You should use a 16:9 aspect ratio when your photos or videos are primarily intended for widescreen displays, such as modern TVs and computer monitors. This format maximizes the viewing area and provides a cinematic feel, making it ideal for landscapes, movies, and any content where a wide perspective enhances the viewing experience.
4. What Are the Standard Photo Sizes Used for Prints?
Standard photo print sizes provide a convenient way to transform your digital images into physical prints. Understanding these sizes helps ensure your prints maintain high resolution and visual appeal.
4.1 4 x 6 Inches: The Classic Standard
The 4×6 inch photo print is perhaps the most popular standard size, fitting perfectly into a 3:2 aspect ratio. This size is ideal for greeting cards, postcards, and framed photos.
4.1.1 What Makes 4×6 Inches the Go-To Photo Print Size?
The 4×6 inch size is a popular choice because it is versatile and economical. It fits well in standard photo albums and frames, making it easy to display and store. Its 3:2 aspect ratio is well-suited for most digital cameras, minimizing the need for cropping. To achieve the highest quality resolution, aim for 1200 x 1800 pixels.
4.2 5 x 7 Inches: Small and Elegant
The 5×7 inch print offers a slightly larger format suitable for smaller artwork and more detailed photo prints.
4.2.1 When Is a 5×7 Inch Print the Best Option?
A 5×7 inch print is an excellent option for portraits, artistic prints, and photos you want to display with a bit more prominence than a 4×6. It’s large enough to showcase details without overwhelming smaller spaces. For optimal results, use a 3.5:2.5 aspect ratio and aim for 1500 x 2100 pixels.
4.3 8 x 10 Inches: A Balanced Choice
The 8×10 inch photo print is a balanced mid-size option, ideal for portraits, family photos, and displaying artwork with clarity and impact.
4.3.1 What Types of Photos Benefit Most From an 8×10 Inch Print?
Photos that benefit most from an 8×10 inch print include portraits, group shots, and artwork with intricate details. This size allows for a clear and detailed display, making it a great choice for showcasing your favorite memories or artistic creations. Use an aspect ratio of 5:4 and position important elements away from the edges to accommodate potential cropping.
4.4 8.5 x 11 Inches: Documents and Posters
The 8.5 x 11 inch size is commonly used for printing documents and small posters.
4.4.1 How Can You Optimize an 8.5×11 Inch Print?
To optimize an 8.5×11 inch print, use an aspect ratio of 4:3 and resize the image to approximately 3400 x 4400 pixels. This size is perfect for documents, flyers, and small posters, providing a clear and professional look. Ensure your content is well-aligned and visually appealing to maximize its impact.
4.5 12 x 18 Inches: Larger Photographs
The 12 x 18 inch print size is ideal for showcasing larger photographs with impressive detail and clarity.
4.5.1 What Are the Ideal Specifications for a 12×18 Inch Print?
For a 12×18 inch print, aim for pixel dimensions of around 3600 x 5400 and an aspect ratio of 3:2 for optimal results. This size is excellent for landscape photos, portraits, and artwork that you want to display prominently. The larger format ensures every detail is visible, making it a striking addition to any space.
4.6 18 x 24 Inches: Creating a Statement
An 18 x 24 inch print makes a significant visual statement, perfect for showcasing high-quality photographs and artwork with maximum impact.
4.6.1 Tips for Achieving the Best Results With an 18×24 Inch Print?
To achieve the best results with an 18×24 inch print, aim for 5400 x 7200 pixels and an aspect ratio of 3:4. This size is perfect for making a bold statement in any room, displaying large-scale artwork, or showcasing professional photography. Ensure your image is sharp and vibrant to take full advantage of the format.
4.7 24 x 36 Inches: Extra-Large and Impressive
The 24 x 36 inch print is an extra-large format that is sure to impress, perfect for creating stunning displays and showcasing high-resolution images in grand style.
4.7.1 What Kind of Images Work Best as 24×36 Inch Prints?
Images that work best as 24×36 inch prints include landscape photography, high-resolution portraits, and detailed artwork. The large format allows for an immersive viewing experience, showcasing every intricate detail. For the best results, use an aspect ratio of 3:2 and aim for 7200×10800 pixels to ensure clarity and impact.
5. How to Choose the Right Photo Print Size for Your Needs
Choosing the right photo print size depends on several factors, including the image’s resolution, the intended display location, and your personal preferences. Here’s a step-by-step guide to help you make the best decision:
5.1 Assessing Image Resolution
Start by checking the resolution of your digital image. Higher resolution images can be printed at larger sizes without losing detail, while lower resolution images may become pixelated if enlarged too much. A good rule of thumb is to ensure that your image has at least 300 DPI (dots per inch) at the desired print size.
5.2 Considering the Display Location
Think about where you plan to display the print. A small print (4×6 or 5×7) might be perfect for a desk or bedside table, while a larger print (12×18 or 24×36) would be more suitable for a wall in a living room or office. Consider the viewing distance as well – larger prints are best viewed from a distance, while smaller prints are meant to be seen up close.
5.3 Evaluating Personal Preferences
Your personal taste plays a significant role in choosing the right size. Do you prefer smaller, more intimate prints, or larger, more dramatic displays? Consider the style of the photo and how it will complement the room’s decor. Experiment with different sizes to see what looks best to you.
5.4 Utilizing dfphoto.net Resources
At dfphoto.net, you can find a wealth of resources to guide you in selecting the perfect print size. Our website offers detailed guides, comparison charts, and a vibrant community of photographers who can provide advice and inspiration. Explore our galleries to see how different print sizes can transform a photograph and make informed decisions based on real-world examples.
6. Optimizing Your Photos for Printing
To ensure your photos look their best when printed, it’s essential to optimize them properly. This involves adjusting resolution, color settings, and sharpening to achieve the desired results.
6.1 Adjusting Resolution for Optimal Print Quality
Resolution is key to print quality. Aim for a resolution of 300 DPI (dots per inch) for the best results. This means that for a 4×6 inch print, your image should be 1200 x 1800 pixels. If your image has a lower resolution, you can try increasing it using image editing software, but be aware that this may lead to some loss of detail.
6.2 Choosing the Right Color Settings
Color settings are crucial for accurate color reproduction in your prints. The sRGB color space is generally recommended for printing, as it is widely supported by most print labs and printers. Convert your images to sRGB before sending them for printing to ensure the colors appear as intended.
6.3 Sharpening Techniques for Print
Sharpening can enhance the details in your photos and make them look crisper when printed. However, it’s important to use sharpening sparingly, as over-sharpening can lead to unwanted artifacts and a harsh look. Use the unsharp mask filter in Photoshop or similar tools to apply subtle sharpening adjustments.
7. Printing Services and Options
Once you’ve optimized your photos, it’s time to choose a printing service. There are many options available, ranging from local print shops to online printing services. Each offers different features, prices, and quality levels.
7.1 Local Print Shops vs. Online Services
Local print shops offer the advantage of personalized service and the ability to inspect the prints before taking them home. Online services, on the other hand, often provide a wider range of options, competitive pricing, and the convenience of ordering from home. Consider your needs and budget when making your decision.
7.2 Understanding Different Printing Materials
Different printing materials can significantly impact the look and feel of your prints. Common options include glossy paper, matte paper, canvas, and metal. Glossy paper enhances colors and provides a shiny finish, while matte paper offers a more subdued look with less glare. Canvas prints have a textured, artistic feel, and metal prints provide a sleek, modern look.
7.3 Exploring dfphoto.net Printing Recommendations
dfphoto.net offers recommendations for trusted printing services that provide high-quality prints at competitive prices. We’ve partnered with several reputable print labs to ensure our community has access to the best possible printing options. Visit our website to explore our recommendations and take advantage of exclusive discounts and promotions.
8. Framing and Displaying Your Prints
Framing and displaying your prints properly can enhance their visual impact and protect them from damage. Choose frames that complement the style of the photo and the decor of the room.
8.1 Selecting the Right Frames
When selecting frames, consider the material, color, and style. Wood frames offer a classic, timeless look, while metal frames provide a more modern aesthetic. Choose a frame color that complements the colors in the photo and the room’s decor.
8.2 Mounting and Matting Techniques
Mounting and matting can add depth and dimension to your prints. Matting involves placing a border around the photo inside the frame, which helps to draw the eye to the image and protect it from touching the glass. Mounting involves attaching the photo to a backing board to prevent it from warping or bending.
8.3 Creative Display Ideas
Get creative with how you display your prints. Consider creating a gallery wall with a collection of different-sized prints, or use unconventional display methods like clipboards, wire grids, or floating shelves. Experiment with different arrangements to find what looks best to you.
9. Common Mistakes to Avoid When Printing Photos
Even with the best intentions, it’s easy to make mistakes when printing photos. Here are some common pitfalls to avoid:
9.1 Printing Low-Resolution Images
One of the most common mistakes is printing low-resolution images at large sizes. This results in pixelation and a loss of detail. Always check the resolution of your image before printing and ensure it’s high enough for the desired print size.
9.2 Ignoring Color Calibration
Failing to calibrate your monitor can lead to inaccurate color reproduction in your prints. Colors may appear different on paper than they do on your screen. Use a color calibration tool to ensure your monitor is displaying colors accurately.
9.3 Over-Sharpening Photos
While sharpening can enhance details, over-sharpening can create unwanted artifacts and a harsh look. Apply sharpening sparingly and always view your photos at 100% magnification to check for any signs of over-sharpening.
9.4 Overlooking Aspect Ratio
Forgetting to adjust the aspect ratio of your photo to match the print size can result in unwanted cropping or distortion. Always check the aspect ratio and crop your image accordingly before printing.
9.5 Using the Wrong Paper Type
Choosing the wrong paper type can significantly affect the look and feel of your prints. Consider the style of the photo and the desired effect when selecting a paper type. Glossy paper enhances colors, while matte paper offers a more subdued look.
10. Frequently Asked Questions About Photo Print Sizes
Here are some frequently asked questions about photo print sizes to help you navigate the world of printing with confidence:
10.1 What are the standard print sizes for photos?
Standard print sizes for photos typically include 4×6 inches, 5×7 inches, 8×10 inches, and 11×14 inches. These sizes are widely supported by print labs and frame manufacturers, making them convenient options for displaying your photos.
10.2 What is the standard photo size in inches?
The standard photo size in inches can vary depending on the intended use and industry standards, but a common standard for printed photographs is 4×6 inches. This size is popular for its versatility and affordability.
10.3 How do I determine the right photo print size for my image?
To determine the right photo print size, consider the resolution of your image and the intended display location. Ensure your image has at least 300 DPI at the desired print size to avoid pixelation. Also, think about the viewing distance and the style of the photo.
10.4 What is aspect ratio, and why is it important for photo printing?
Aspect ratio is the proportional relationship between the width and height of an image. It’s important for photo printing because it determines the shape of the image and ensures that it is printed without distortion or cropping.
10.5 Can I print a low-resolution image at a large size?
Printing a low-resolution image at a large size is not recommended, as it will likely result in pixelation and a loss of detail. Always check the resolution of your image before printing and ensure it’s high enough for the desired print size.
10.6 What color settings should I use for photo printing?
The sRGB color space is generally recommended for photo printing, as it is widely supported by most print labs and printers. Convert your images to sRGB before sending them for printing to ensure accurate color reproduction.
10.7 What is DPI, and why is it important for photo printing?
DPI stands for dots per inch, and it refers to the number of dots of ink or toner per inch in a printed image. A higher DPI results in a sharper, more detailed print. Aim for a resolution of 300 DPI for the best results.
10.8 What are some creative ways to display my photo prints?
Creative ways to display photo prints include creating a gallery wall with different-sized prints, using clipboards or wire grids, or displaying them on floating shelves. Experiment with different arrangements to find what looks best to you.
10.9 How do I choose the right frame for my photo print?
When choosing a frame, consider the material, color, and style. Wood frames offer a classic look, while metal frames provide a more modern aesthetic. Choose a frame color that complements the colors in the photo and the room’s decor.
10.10 Where can I find high-quality printing services?
You can find high-quality printing services at local print shops or online. dfphoto.net offers recommendations for trusted printing services that provide excellent prints at competitive prices. Visit our website to explore our recommendations and take advantage of exclusive discounts.
Understanding regular photo print sizes empowers you to showcase your images in the best possible way. Whether you’re printing snapshots from your phone or professional-grade photographs, knowing the standard dimensions and aspect ratios will help you achieve stunning results. Explore the resources at dfphoto.net to deepen your knowledge and connect with a community of passionate photographers.
Ready to take your photography skills to the next level? Visit dfphoto.net today for comprehensive guides, stunning photo galleries, and a thriving community of photographers eager to share their knowledge and inspire your creative journey. Don’t miss out on the opportunity to enhance your skills, discover new techniques, and connect with fellow photography enthusiasts!