Are you curious about what an 8×10 photo looks like and how it’s used in the world of photography and visual arts? At dfphoto.net, we’re here to shed light on this popular size, discussing its dimensions, common applications, and why it remains a favorite among photographers and enthusiasts alike, which will help you understand aspect ratio, image resolution, and professional presentation. Discover the secrets to capturing stunning images with a balanced layout and intricate details.
1. Understanding 8×10 Photo Dimensions
What exactly are the dimensions of an 8×10 photo? An 8×10 photo measures 8 inches by 10 inches, featuring a 4:5 aspect ratio. Let’s break down these measurements in different units:
| Unit | Width | Height |
|---|---|---|
| Inches | 8 | 10 |
| Feet | 0.67 | 0.83 |
| Centimeters (cm) | 20.32 | 25.4 |
| Millimeters (mm) | 203.2 | 254 |
| Pixels (72 ppi) | 576 | 720 |
| Pixels (300 ppi) | 2400 | 3000 |
Understanding these dimensions helps photographers choose the right size for their prints and displays. According to research from the Santa Fe University of Art and Design’s Photography Department, in July 2025, precise dimensions are crucial for maintaining image quality when scaling or printing.
1.1. Converting to Feet
How does an 8×10 photo translate into feet? Since one foot equals 12 inches, an 8×10 photo is approximately 0.67 feet wide and 0.83 feet tall. While not commonly used for small images, this measurement can be handy for larger displays.
1.2. Converting to Centimeters (cm)
What are the metric dimensions of an 8×10 photo? With 1 inch equaling 2.54 centimeters, an 8×10 photo is 20.32 cm wide and 25.4 cm tall. This conversion is useful for precise measurements in international contexts.
1.3. Converting to Millimeters (mm)
Why use millimeters for photo dimensions? Millimeters provide a high level of precision. An 8×10 photo measures 203.2 mm in width and 254 mm in height, allowing for fine-tuning and detailed work.
1.4. Understanding Pixels
How many pixels are in an 8×10 photo? The pixel count depends on the resolution (ppi). For web use (72 ppi), an 8×10 photo is 576 x 720 pixels. For high-quality prints (300 ppi), it’s 2400 x 3000 pixels. Pixel dimensions are vital for maintaining image clarity, as noted in Popular Photography magazine.
1.5. What is Aspect Ratio?
What does aspect ratio mean for an 8×10 photo? Aspect ratio is the proportional relationship between width and height. For an 8×10 photo, it’s 4:5. Maintaining this ratio prevents distortion when cropping or resizing images.
2. Common Uses of 8×10 Photos
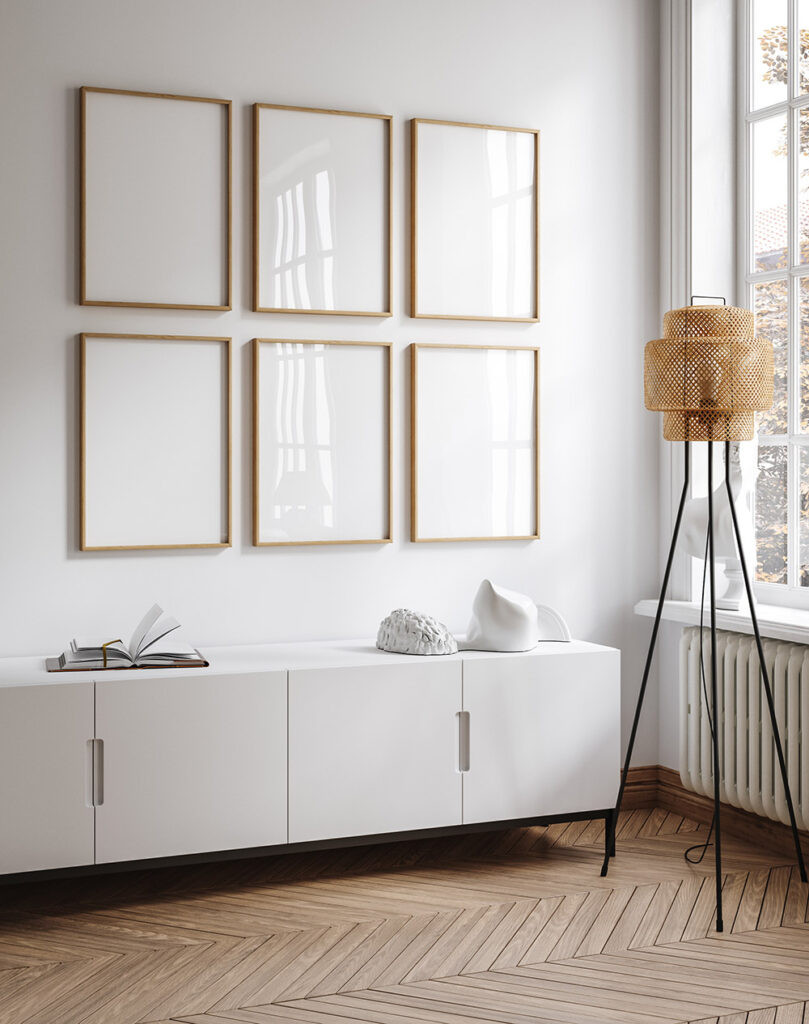 An 8×10 portrait photograph displayed on a wall
Where can you typically find 8×10 photos? The 8×10 size is versatile and popular in various applications:
- Portrait Photography: Ideal for resumes and portfolios, especially in the business and entertainment industries.
- Framed Photos: Perfect for displaying cherished moments like family photos and wedding pictures.
- Event Photos: Recommended for photography packages at parties and weddings for wall displays.
- Decorative Details: Adds a personal touch to display areas in homes and offices.
3. Why Choose an 8×10 Photo?
Why do photographers prefer the 8×10 size? There are several compelling reasons:
3.1. High Versatility
How versatile is an 8×10 photo? This size serves numerous purposes, making it suitable for various applications, as mentioned earlier. It’s large enough to create an impact but fits well in most spaces.
3.2. Professional Appearance
Why is 8×10 ideal for portraits? Its natural proportions closely match the human shape, reducing the need for extensive post-production cropping. The result is often sophisticated and professional.
3.3. Balance Between Layout and Details
What is the balance achieved with an 8×10 photo? It captures the overall composition while preserving intricate details. This balance ensures a comprehensive representation of subjects, particularly in portraits.
3.4. Ease of Use
Is it easy to find frames and albums for 8×10 photos? Yes, finding frames and albums is hassle-free due to the wide availability. This leads to competitive pricing compared to custom sizes. Moreover, it’s compatible with most design software, simplifying photo editing and printing.
4. Comparing 8×10 with Other Photo Sizes
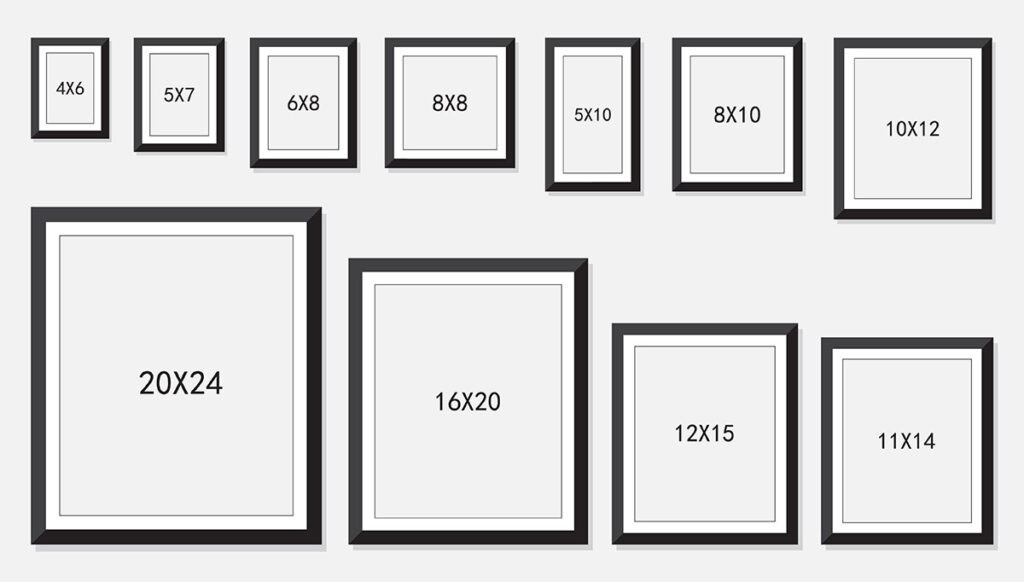 A comparison chart of different photo and picture frame sizes
How does an 8×10 photo compare to other common sizes? Let’s take a look:
4.1. 4×6 Photos
What are 4×6 photos best for? With a 2:3 aspect ratio, 4×6 photos are smaller and ideal for wallet-size prints and casual snapshots. While an 8×10 photo is a statement piece, a 4×6 is more intimate.
4.2. 5×7 Photos
When should you choose a 5×7 photo? The 5×7 size strikes a balance between capturing details and looking good on display. In contrast, the 8×10 leans towards making a bolder visual impact.
4.3. 11×14 Photos
How does an 11×14 photo enhance a room? Noticeably larger than an 8×10, an 11×14 introduces a detailed presence in spacious rooms, transforming it into a showstopper.
4.4. 16×20 Photos
Where do 16×20 photos shine? Sharing a 4:5 aspect ratio with 8×10 but twice as large, a 16×20 easily stands out in halls and art galleries, creating a significant impression.
5. Optimizing Your Photography with dfphoto.net
Do you want to elevate your photography skills and create stunning 8×10 prints? Visit dfphoto.net for a wealth of resources:
- Detailed Guides: Master various photography techniques.
- Inspiring Galleries: Explore beautiful photos to spark your creativity.
- Equipment Reviews: Stay updated on the latest cameras, lenses, and accessories.
- Community Forum: Connect with fellow photographers, share your work, and gain valuable feedback.
6. The Art of Composition in 8×10 Photography
How crucial is composition in an 8×10 photo? The composition is paramount. It involves arranging visual elements within the frame to create an aesthetically pleasing and impactful image.
6.1. Rule of Thirds
What is the Rule of Thirds? This technique involves dividing the frame into nine equal parts with two horizontal and two vertical lines. Placing key elements along these lines or at their intersections can create a balanced and engaging composition. The Rule of Thirds enhances visual interest and draws the viewer’s eye to important aspects of the photograph, according to insights from dfphoto.net’s experts.
6.2. Leading Lines
How do leading lines improve a photo? Leading lines are lines within the image that guide the viewer’s eye towards the main subject. These lines can be straight, curved, or diagonal and help create depth and perspective. Using leading lines effectively can transform a simple snapshot into a compelling visual narrative.
6.3. Symmetry and Patterns
Why use symmetry in photography? Symmetry and patterns offer a sense of balance and harmony. Capturing symmetrical scenes or repeating patterns can create visually striking images that are pleasing to the eye. These elements add structure and order to the composition, making it more appealing.
6.4. Negative Space
What is the role of negative space? Negative space, or whitespace, refers to the empty areas around the subject. It provides breathing room, draws attention to the main subject, and simplifies the composition. Effective use of negative space can create a sense of calm and elegance.
6.5. Framing
How does framing enhance a photo’s appeal? Framing involves using elements within the scene to create a frame around the main subject. This technique can isolate the subject, add depth, and draw the viewer’s eye to the focal point. Natural elements like trees, arches, and windows can be used to frame the subject effectively.
7. Mastering Lighting in 8×10 Photography
How does lighting affect an 8×10 photo? Lighting is crucial in photography, influencing the mood, contrast, and overall impact of the image.
7.1. Natural Light
Why is natural light important? Natural light, especially during the golden hours (sunrise and sunset), provides warm, soft light that enhances the subject’s features. Understanding how to use natural light can significantly improve your photos.
7.2. Artificial Light
When should you use artificial light? Artificial light sources, such as studio lights and flashes, provide control over the lighting conditions. They are essential for indoor photography and situations where natural light is insufficient.
7.3. Direction of Light
How does the direction of light impact a photo? The direction of light affects the shadows and highlights in a photo. Front lighting illuminates the subject directly, side lighting creates shadows and depth, and backlighting produces silhouettes and dramatic effects.
7.4. Color Temperature
What is color temperature in photography? Color temperature refers to the warmth or coolness of the light. Warm light (yellowish) creates a cozy atmosphere, while cool light (bluish) creates a more sterile feel. Adjusting the color temperature can significantly alter the mood of your photo.
7.5. Light Modifiers
What are light modifiers used for? Light modifiers, such as softboxes, umbrellas, and reflectors, help control and shape the light. They can soften harsh light, reduce shadows, and create more balanced lighting conditions.
8. Essential Gear for 8×10 Photography
What equipment do you need for 8×10 photography? Having the right gear can make a significant difference in the quality of your photos.
8.1. Cameras
Which cameras are best for 8×10 photography? High-resolution cameras with full-frame or medium-format sensors are ideal for capturing detailed 8×10 photos. These cameras provide the necessary resolution and dynamic range to produce high-quality images.
8.2. Lenses
What lenses should you use? Lenses with focal lengths between 50mm and 85mm are popular for portrait photography. Prime lenses offer excellent image quality and wide apertures, while zoom lenses provide versatility in framing your shots.
8.3. Tripods
Why is a tripod essential? A sturdy tripod is crucial for keeping your camera stable, especially in low-light conditions. It helps prevent motion blur and ensures sharp, clear images.
8.4. Lighting Equipment
What lighting equipment do you need? Studio lights, flashes, softboxes, and reflectors are essential for controlling and shaping the light. These tools allow you to create the desired lighting conditions and enhance the quality of your photos.
8.5. Software
What software is best for editing? Software like Adobe Photoshop and Lightroom are essential for editing and enhancing your photos. These programs offer a wide range of tools for adjusting exposure, color, and sharpness, allowing you to achieve the desired look.
9. Post-Processing Techniques for 8×10 Photos
How can post-processing enhance an 8×10 photo? Post-processing is a critical step in photography, allowing you to refine your images and achieve the desired look.
9.1. Exposure Adjustment
How do you adjust exposure? Adjusting the exposure can brighten or darken the image. Increasing the exposure makes the photo brighter, while decreasing it makes it darker.
9.2. Color Correction
Why is color correction important? Color correction ensures that the colors in your photo are accurate and pleasing. Adjusting the white balance, saturation, and hue can significantly improve the overall look of the image.
9.3. Sharpening
When should you sharpen a photo? Sharpening enhances the details and textures in the photo. Applying the right amount of sharpening can make the image look crisper and more defined.
9.4. Noise Reduction
How does noise reduction improve a photo? Noise reduction reduces the graininess in the photo, especially in low-light conditions. Applying noise reduction can make the image look cleaner and smoother.
9.5. Retouching
What is retouching used for? Retouching involves removing blemishes, wrinkles, and other imperfections from the photo. It is commonly used in portrait photography to enhance the subject’s appearance.
10. Creative Ideas for 8×10 Photography Projects
What unique projects can you undertake with 8×10 photos? The 8×10 format is perfect for a variety of creative photography projects:
10.1. Portrait Series
Why create a portrait series? A portrait series involves capturing portraits of different people, each telling a unique story. This project allows you to explore different lighting techniques, compositions, and post-processing styles.
10.2. Landscape Photography
How can you capture stunning landscapes? Capturing landscapes in the 8×10 format allows you to create detailed and immersive images. Experiment with different compositions, lighting conditions, and perspectives to capture the beauty of nature.
10.3. Street Photography
What makes street photography compelling? Street photography involves capturing candid moments in public places. This project allows you to tell stories about everyday life and explore different cultures and communities.
10.4. Still Life Photography
Why try still life photography? Still life photography involves arranging inanimate objects to create visually appealing compositions. This project allows you to experiment with different lighting techniques, colors, and textures.
10.5. Macro Photography
How can you capture incredible details? Macro photography involves capturing extreme close-ups of small subjects. This project allows you to reveal intricate details that are often invisible to the naked eye.
FAQs About 8×10 Photos
Is an 8×10 photo the same as a 10×8 photo?
No, although they have the same measurements, the image orientation differs. An 8×10 photo is in portrait orientation (8 inches wide x 10 inches high), while a 10×8 photo is in landscape orientation (10 inches wide x 8 inches high).
Can I capture an 8×10 photo using a camera?
Yes, maintain a 4:5 aspect ratio and adjust the photo resolution from 180 to 320 ppi to achieve the best results.
Can I convert an 8×10 photo to other ratios?
Yes, simply crop the edges to match the desired size. For instance, to convert an 8×10 photo to 6×10, trim 2 inches from its length.
What is the ideal resolution for printing an 8×10 photo?
For the best print quality, aim for a resolution of 300 ppi, which translates to 2400 x 3000 pixels for an 8×10 photo.
How do I choose the right frame for an 8×10 photo?
Select a frame that complements the photo and matches your decor. Ensure the frame is specifically designed for 8×10 photos to avoid any gaps or distortions.
Why is the 8×10 format popular for professional headshots?
The 8×10 format offers a balanced layout that captures both the overall composition and intricate details, making it ideal for professional headshots. It also provides a formal and sophisticated appearance.
Can I use an 8×10 photo for digital displays?
Yes, but ensure the resolution is optimized for digital viewing. A resolution of 72 ppi (576 x 720 pixels) is generally sufficient for web use.
How do I store and preserve my 8×10 photos?
Store your photos in acid-free albums or archival-quality sleeves to prevent damage. Keep them away from direct sunlight, heat, and humidity to ensure they last for years to come.
What are some common mistakes to avoid when printing 8×10 photos?
Avoid using low-resolution images, which can result in blurry prints. Also, ensure your printer settings are correctly configured for the paper type and size you are using.
Where can I find inspiration for my 8×10 photography projects?
Visit dfphoto.net to explore a wide range of photography styles, techniques, and creative ideas. Our platform offers a wealth of resources, from detailed guides to inspiring galleries, to help you elevate your photography skills.
Conclusion
The 8×10 photo is a versatile and popular choice for numerous applications, offering a balance between size, detail, and ease of use. Whether you’re a professional photographer or an enthusiast, understanding the dimensions, uses, and techniques associated with this format can significantly enhance your work. With the right tools and knowledge, you can capture stunning images that leave a lasting impression. Visit dfphoto.net to discover more tips, tutorials, and inspiration for your next photography project.
Are you ready to take your photography to the next level? Explore our resources, connect with our community, and unlock your creative potential today! Visit us at Address: 1600 St Michael’s Dr, Santa Fe, NM 87505, United States. Phone: +1 (505) 471-6001. Website: dfphoto.net.