Is There A Way To Delete Duplicate Photos On Iphone? Yes, absolutely! iPhones have built-in features and various third-party apps that help you remove those storage-hogging duplicates. This article by dfphoto.net, will explore efficient methods to manage your photo library, reclaim valuable space, and keep your memories organized. Optimize your photo management process with our guide that focuses on identifying and deleting duplicate images, using smart albums, and leveraging the cloud to clear up storage.
1. Understanding Why You Have Duplicate Photos on Your iPhone
Duplicate photos on your iPhone can be frustrating. It’s like finding two identical socks when you only need one! But how do these duplicates sneak into your photo library? Let’s explore some of the common culprits:
- Multiple Downloads: Sometimes, we download the same image more than once from emails, messaging apps, or websites without realizing it.
- Sharing and Saving: When you share photos with friends or family, they might send them back to you. If you save these received images, you’ve created a duplicate.
- Backup Restorations: Restoring your iPhone from a backup can sometimes reintroduce photos that were already present, creating duplicates.
- App Glitches: Occasionally, apps can malfunction and save multiple copies of the same image.
- HDR and Burst Mode Photography: High Dynamic Range (HDR) mode takes multiple shots of the same scene and saves them as separate images. Burst mode, which rapidly captures a series of photos, can also lead to many similar images. According to Popular Photography, HDR and burst mode are essential features for capturing stunning shots, but they can quickly fill up your storage with near-identical images.
- Cloud Syncing Issues: Problems with iCloud Photos or other cloud services can cause photos to sync multiple times, resulting in duplicates.
Recognizing these causes can help you be more mindful of your photo-saving habits and prevent future duplication.
2. The Native Duplicate Detection Feature on iOS
Apple introduced a built-in duplicate detection feature starting with iOS 16. This tool is a game-changer for iPhone users looking to declutter their photo libraries. Here’s how to use it:
2.1. Accessing the Duplicates Album
- Open the Photos app on your iPhone.
- Tap on the Albums tab at the bottom of the screen.
- Scroll down to the Utilities section.
- Look for the Duplicates album. This album automatically identifies potential duplicate photos and videos in your library.
If you don’t see the Duplicates album, make sure you’re running iOS 16 or later. The detection process runs automatically in the background, so it might take some time for the album to appear, especially if you have a large photo library.
2.2. Merging Duplicate Photos
Once you’re in the Duplicates album, you’ll see sets of photos that the system believes are duplicates. Here’s how to merge them:
- Review the Duplicates: Tap on a set of duplicates to compare the photos. The system usually identifies near-identical images or those with slight variations.
- Tap Merge: At the bottom of the screen, you’ll see a Merge option. Tapping this will combine the duplicates into a single image. According to Apple Support, the highest quality version of the image will be retained, along with relevant data.
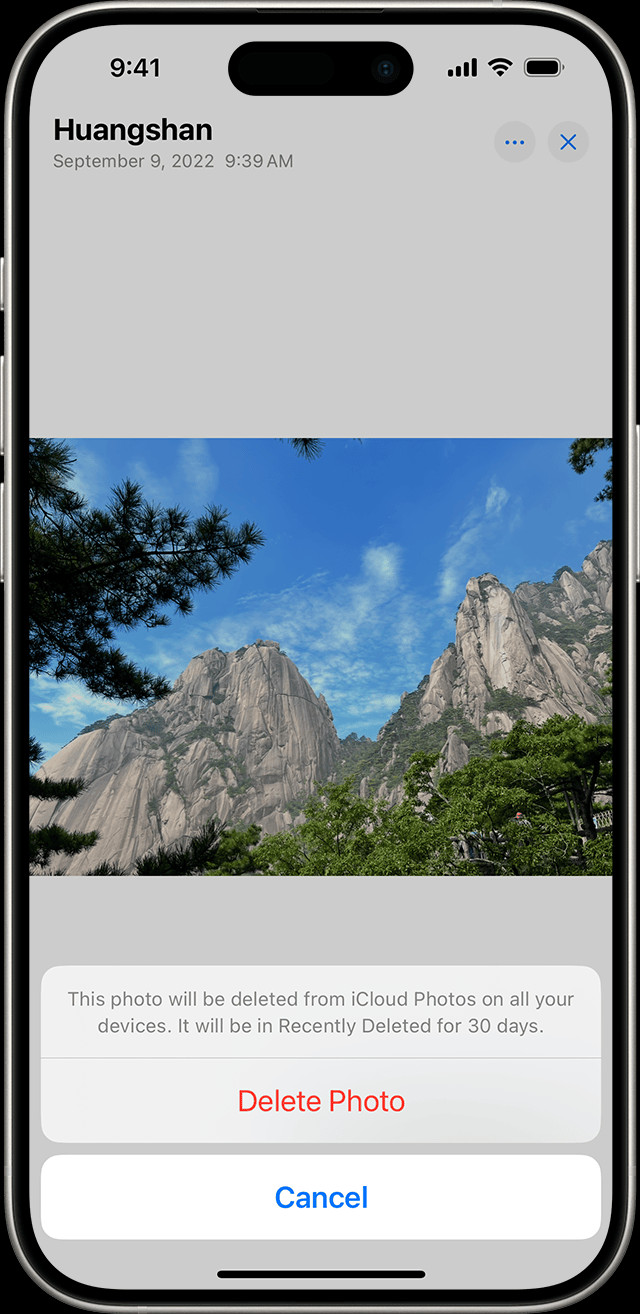 iPhone showing Delete Photo option
2.3. Merging Multiple Sets of Duplicates
To merge multiple sets of duplicates at once:
- Tap Select in the upper-right corner of the screen.
- Tap on each set of duplicates you want to merge.
- Alternatively, tap Select All to choose all identified duplicates.
- Tap Merge at the bottom of the screen.
- Confirm by tapping Merge [Number] Items.
2.4. How the Merge Process Works
When you merge duplicate photos, your iPhone intelligently combines them. It keeps the highest quality image and consolidates all relevant data, such as metadata, keywords, and edits, into that single photo. The other duplicates are moved to the Recently Deleted album, where they stay for 30 days before being permanently deleted. This gives you a safety net in case you change your mind.
2.5. Limitations of the Native Feature
While the built-in duplicate detection feature is handy, it has some limitations:
- Operating System Requirement: It’s only available on iOS 16 and later.
- Detection Accuracy: It may not catch all duplicates, especially those with significant differences in quality or edits.
- Manual Review Still Needed: You need to review and merge each set of duplicates manually, which can be time-consuming for large libraries.
Despite these limitations, Apple’s native tool is a great starting point for managing duplicate photos on your iPhone.
3. Third-Party Apps to Delete Duplicate Photos
If the native iOS feature doesn’t quite meet your needs, several third-party apps can help you manage duplicate photos on your iPhone. These apps often offer more advanced features, such as faster scanning, more accurate detection, and automated deletion options.
3.1. Overview of Popular Apps
- Gemini Photos: This app uses smart algorithms to identify similar and duplicate photos. It learns your preferences over time, making its suggestions more accurate.
- Remo Duplicate Photos Remover: Remo is a straightforward app that quickly scans your photo library for duplicates and similar-looking images. It offers various scanning modes for different needs.
- Duplicate Photos Fixer Pro: This app provides a comprehensive solution for finding and removing duplicate photos. It supports external storage and offers advanced scanning options.
- Cleanup Duplicate Photo Cleaner: Cleanup is designed with simplicity in mind, making it easy to scan and delete duplicate photos quickly.
3.2. Features and Benefits of Each App
| App | Features | Benefits |
|---|---|---|
| Gemini Photos | Smart algorithms, learns preferences, identifies similar photos | Accurate detection, personalized suggestions, efficient management |
| Remo Duplicate Photos Remover | Fast scanning, multiple scanning modes, simple interface | Quick results, flexible options, easy to use |
| Duplicate Photos Fixer Pro | Comprehensive scanning, supports external storage, advanced options | Thorough cleaning, versatile storage support, customizable settings |
| Cleanup Duplicate Photo Cleaner | Simple interface, fast scanning | User-friendly, quick cleanup |
3.3. Step-by-Step Guide to Using a Third-Party App (Example: Gemini Photos)
- Download and Install: Download Gemini Photos from the App Store and install it on your iPhone.
- Grant Access: Open the app and grant it access to your photo library.
- Scan for Duplicates: Tap the Start Scan button. Gemini Photos will begin analyzing your photos to identify duplicates and similar images.
- Review the Results: Once the scan is complete, Gemini Photos will present you with a list of duplicate sets. Review each set to ensure the app has correctly identified the duplicates.
- Select and Delete: You can choose to delete all duplicates with one tap or review each set individually. Gemini Photos will highlight the best version of each photo, making it easier to decide which ones to keep.
- Confirm Deletion: Confirm the deletion, and the selected duplicates will be moved to your Recently Deleted album.
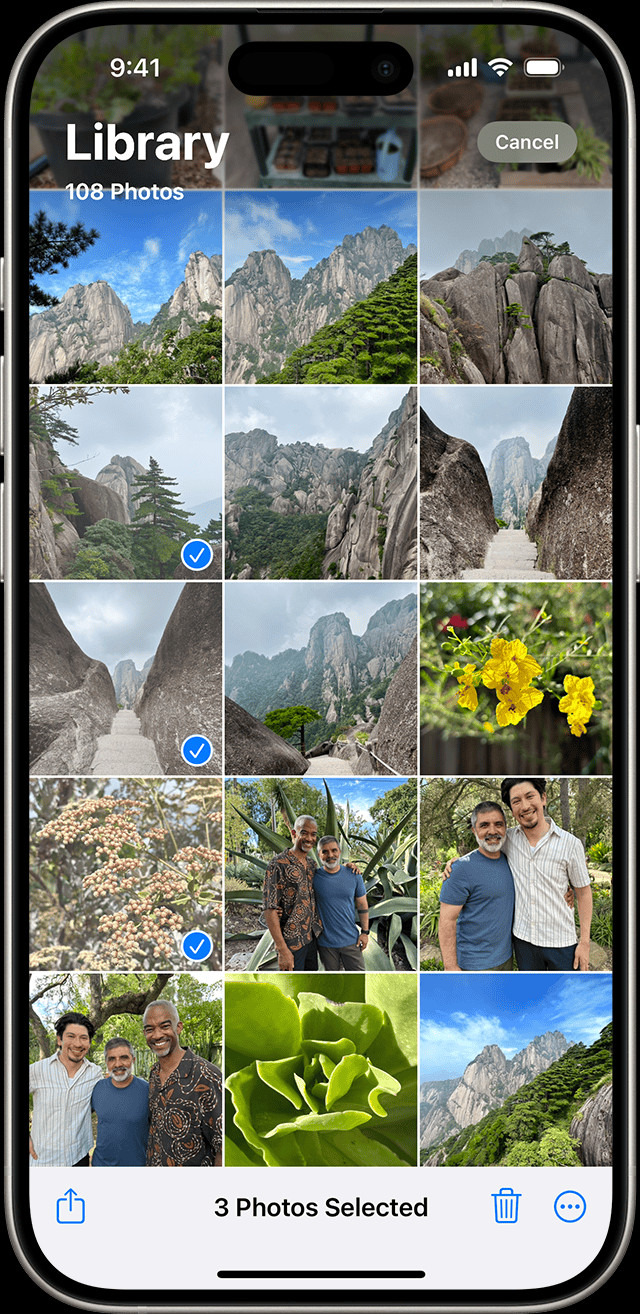 iPhone showing multiple photos selected in the Photos app
3.4. Potential Risks and Considerations
- Privacy Concerns: Granting a third-party app access to your photo library raises privacy concerns. Make sure to choose reputable apps with clear privacy policies.
- In-App Purchases: Many duplicate photo finder apps offer basic features for free but require in-app purchases for advanced functionality.
- False Positives: No app is perfect, and they may sometimes misidentify unique photos as duplicates. Always review the results carefully before deleting anything.
Using third-party apps can be a more efficient way to manage duplicate photos, but it’s important to weigh the benefits against the potential risks.
4. Manual Methods to Identify and Delete Duplicate Photos
While automated tools are convenient, sometimes the best approach is to manually review your photo library. This method gives you complete control over which photos to keep and which to delete.
4.1. Tips for Efficiently Reviewing Your Photo Library
- Set Aside Dedicated Time: Choose a time when you won’t be rushed or distracted.
- Use a Large Screen: If possible, connect your iPhone to a larger screen, such as an iPad or computer, to make it easier to view and compare photos.
- Create Smart Albums: Use smart albums to group similar photos together. For example, create an album for screenshots, another for photos taken in burst mode, and so on.
- Utilize the Favorites Feature: Mark your favorite photos as favorites. This will help you quickly identify the best shots and make it easier to spot duplicates.
- Sort by Date: Sorting your photos by date can help you identify duplicates that were taken around the same time.
- Zoom In: Zoom in on photos to check for subtle differences in quality or composition.
4.2. Identifying Near-Identical Photos
When reviewing your photos, pay close attention to:
- Burst Mode Shots: These are often very similar, so choose the sharpest and best-composed one.
- HDR Photos: Compare the HDR version to the regular version and decide which one you prefer.
- Photos with Slight Variations: Look for photos that are almost identical but have minor differences in lighting, focus, or composition.
4.3. Deleting Photos Manually
To delete photos manually:
- Open the Photos app.
- Navigate to the photo you want to delete.
- Tap the Trash icon at the bottom of the screen.
- Confirm the deletion.
To delete multiple photos at once:
- Tap Select in the upper-right corner of the screen.
- Tap on each photo you want to delete.
- Tap the Trash icon at the bottom of the screen.
- Confirm the deletion.
4.4. Advantages and Disadvantages of Manual Deletion
- Advantages:
- Complete Control: You have full control over which photos are deleted.
- No Privacy Concerns: You don’t need to grant access to third-party apps.
- Cost-Effective: It’s free!
- Disadvantages:
- Time-Consuming: It can take a lot of time to review a large photo library manually.
- Tedious: The process can be repetitive and boring.
- Human Error: You might accidentally delete photos you meant to keep.
Despite the drawbacks, manual deletion is a reliable method for managing duplicate photos, especially if you prefer to have complete control over the process.
5. Managing iCloud Photos to Prevent Duplicates
iCloud Photos is a fantastic service for syncing your photos across all your Apple devices. However, it can also be a source of duplicate photos if not managed properly.
5.1. How iCloud Photos Syncs Photos
iCloud Photos automatically uploads and syncs your photo library across all devices signed in with the same Apple ID. This means that any changes you make on one device, such as deleting or editing a photo, will be reflected on all your other devices.
5.2. Preventing Duplicates When Using iCloud Photos
- Be Mindful of Downloads: Avoid downloading the same photo multiple times from different sources.
- Consolidate Your Library: Before enabling iCloud Photos, make sure all your photos are in one place. This will prevent duplicates from being created when the service syncs your library.
- Regularly Review Your Library: Set aside time to review your photo library and delete any duplicates that may have slipped through.
- Use Smart Albums: Organize your photos into smart albums to make it easier to spot duplicates.
- Check Recently Deleted: Regularly check the Recently Deleted album to ensure you haven’t accidentally deleted any important photos.
5.3. Deleting Duplicates Directly in iCloud
You can also manage your iCloud Photos directly from the iCloud website:
- Go to iCloud.com and sign in with your Apple ID.
- Click on Photos.
- Browse your photo library and identify any duplicates.
- Select the duplicates and click the Trash icon to delete them.
Any changes you make on the iCloud website will be synced to all your devices.
5.4. Best Practices for iCloud Photo Management
- Enable Optimize iPhone Storage: This feature helps save space on your iPhone by storing full-resolution photos in iCloud and keeping smaller, optimized versions on your device.
- Use a Strong Wi-Fi Connection: Uploading and downloading large photo libraries can consume a lot of data. Use a strong Wi-Fi connection to avoid overage charges.
- Regularly Update Your Devices: Keep your iPhone and other Apple devices updated to the latest version of iOS to ensure optimal performance and compatibility with iCloud Photos.
- Back Up Your Library: While iCloud Photos is a great way to sync your photos, it’s not a substitute for a proper backup. Back up your photo library to an external hard drive or another cloud service for added security.
Managing iCloud Photos effectively can help you prevent duplicates and keep your photo library organized and accessible across all your devices.
6. Utilizing Smart Albums to Organize Your Photos
Smart Albums are a powerful feature in the Photos app that can help you organize your photos and identify duplicates more easily. Unlike regular albums, Smart Albums automatically group photos based on specific criteria, such as date, location, keywords, or file type.
6.1. Creating Smart Albums Based on Criteria
To create a Smart Album:
- Open the Photos app on your Mac (Smart Albums are only available on macOS).
- Go to File > New Smart Album.
- Give your Smart Album a name.
- Set the criteria for the album. For example, you can create a Smart Album that includes all photos taken in a specific location or all photos with a specific keyword.
- Click OK to create the Smart Album.
6.2. Examples of Useful Smart Albums for Duplicate Detection
- Smart Album for Burst Mode Photos: Create a Smart Album that includes all photos taken in burst mode. This will help you quickly review and delete the less desirable shots.
- Smart Album for Screenshots: Create a Smart Album that includes all screenshots. This will make it easier to manage and delete screenshots that you no longer need.
- Smart Album for Photos with Specific Keywords: If you use keywords to tag your photos, you can create Smart Albums based on those keywords. This can help you group similar photos together and identify duplicates.
- Smart Album for Photos Taken Within a Specific Date Range: Create a Smart Album that includes all photos taken within a specific date range. This can be useful for reviewing photos from a particular event or trip.
6.3. How Smart Albums Help Identify Duplicates
Smart Albums make it easier to identify duplicates by grouping similar photos together. For example, if you create a Smart Album for photos taken in burst mode, you can quickly compare the shots and delete the ones that are not as sharp or well-composed.
6.4. Limitations of Smart Albums on iOS
While Smart Albums are a powerful tool for organizing your photos, they are only available on macOS. You can’t create Smart Albums directly on your iPhone or iPad. However, any Smart Albums you create on your Mac will sync to your iOS devices via iCloud Photos.
Despite this limitation, Smart Albums are a valuable tool for managing your photo library and identifying duplicates. By creating Smart Albums based on specific criteria, you can quickly group similar photos together and make it easier to spot duplicates.
7. Best Practices for Maintaining a Clean Photo Library
Maintaining a clean photo library is an ongoing process. Here are some best practices to help you keep your photos organized and free of duplicates:
7.1. Regularly Review and Delete Unnecessary Photos
Set aside time each week or month to review your photo library and delete any unnecessary photos. This includes:
- Blurry or out-of-focus photos
- Poorly composed shots
- Accidental photos
- Screenshots you no longer need
- Duplicates
7.2. Organize Photos into Albums
Organize your photos into albums to make it easier to find and manage them. Create albums for:
- Specific events or trips
- Family members or friends
- Specific themes or subjects
7.3. Use Keywords and Captions
Use keywords and captions to add more information to your photos. This will make it easier to search for specific photos and group similar photos together.
7.4. Back Up Your Photo Library Regularly
Back up your photo library to an external hard drive or another cloud service for added security. This will ensure that you don’t lose your precious memories if something happens to your iPhone or iCloud account.
7.5. Be Mindful of Photo-Saving Habits
Be mindful of your photo-saving habits to prevent duplicates from being created in the first place. Avoid downloading the same photo multiple times, and be careful when sharing photos with others.
7.6. Utilize Cloud Services Effectively
Use cloud services like iCloud Photos to sync your photos across all your devices. But be sure to manage your cloud storage effectively to avoid duplicates and unnecessary storage costs.
By following these best practices, you can keep your photo library clean, organized, and free of duplicates.
8. Understanding Photo Storage Options on iPhone
Managing photo storage on your iPhone is crucial for maintaining optimal performance and preventing storage-related issues. Let’s explore the various storage options available and how to make the most of them.
8.1. Internal Storage
Your iPhone comes with a fixed amount of internal storage, ranging from 64GB to 1TB. This storage is used for everything on your phone, including apps, photos, videos, and system files. Once you run out of internal storage, you’ll need to free up space by deleting files or transferring them to another storage option.
8.2. iCloud Photos
iCloud Photos is Apple’s cloud-based photo storage service. It automatically uploads and syncs your photo library across all your Apple devices. With iCloud Photos, you can:
- Access your photos from any device
- Save space on your iPhone by enabling Optimize iPhone Storage
- Share photos and videos with friends and family
iCloud Photos offers 5GB of free storage, but you can upgrade to a paid plan for more space.
8.3. Third-Party Cloud Storage Services
In addition to iCloud Photos, several third-party cloud storage services can be used to store your photos:
- Google Photos: Offers unlimited storage for compressed photos and videos, as well as paid plans for storing original-quality files.
- Dropbox: A versatile cloud storage service that can be used to store photos, videos, and other files.
- Amazon Photos: Offers unlimited storage for photos for Amazon Prime members, as well as paid plans for storing videos and other files.
8.4. External Storage Options
You can also use external storage devices to store your photos:
- External Hard Drives: Connect an external hard drive to your computer and transfer your photos to it.
- USB Flash Drives: Use a USB flash drive with a Lightning connector to transfer photos directly from your iPhone.
- SD Card Readers: Use an SD card reader to transfer photos from an SD card to your iPhone.
8.5. Balancing Storage Options for Optimal Performance
To get the most out of your photo storage options, consider the following:
- Use iCloud Photos with Optimize iPhone Storage: This will save space on your iPhone while keeping your photos accessible in the cloud.
- Back Up to an External Hard Drive: Regularly back up your photo library to an external hard drive for added security.
- Consider Third-Party Cloud Storage: If you need more storage than iCloud Photos offers, consider using a third-party cloud storage service like Google Photos or Dropbox.
- Manage Your Internal Storage: Regularly review your iPhone’s internal storage and delete any unnecessary files.
By balancing your storage options effectively, you can ensure that you always have enough space for your photos and videos while maintaining optimal performance on your iPhone.
9. How to Recover Accidentally Deleted Photos
Accidentally deleting a precious photo can be heartbreaking. Fortunately, there are several ways to recover deleted photos on your iPhone.
9.1. The Recently Deleted Album
When you delete a photo on your iPhone, it’s not immediately gone forever. Instead, it’s moved to the Recently Deleted album, where it stays for 30 days before being permanently deleted.
To recover a photo from the Recently Deleted album:
- Open the Photos app.
- Tap on the Albums tab.
- Scroll down to the Utilities section and tap on Recently Deleted.
- Select the photo you want to recover.
- Tap Recover in the bottom-right corner of the screen.
- Confirm by tapping Recover Photo.
The photo will be moved back to your main photo library.
9.2. Recovering from iCloud Backup
If you’ve accidentally deleted a photo and it’s no longer in the Recently Deleted album, you may be able to recover it from an iCloud backup.
To recover from an iCloud backup:
- Erase your iPhone (Settings > General > Reset > Erase All Content and Settings).
- Follow the on-screen instructions to restore your iPhone from an iCloud backup.
- Choose a backup that was created before you deleted the photo.
Keep in mind that restoring from an iCloud backup will erase all the data on your iPhone and replace it with the data from the backup.
9.3. Using Third-Party Data Recovery Software
Several third-party data recovery software programs can help you recover deleted photos from your iPhone. These programs scan your iPhone’s storage for deleted files and attempt to recover them.
Some popular data recovery software programs include:
- Dr.Fone – Data Recovery (iOS)
- EaseUS MobiSaver
- Tenorshare UltData
These programs can be effective, but they are not guaranteed to recover all deleted photos.
9.4. Preventing Permanent Photo Loss
To prevent permanent photo loss, it’s essential to:
- Back up your photo library regularly to an external hard drive or another cloud service.
- Be careful when deleting photos, and always double-check before confirming the deletion.
- Act quickly if you accidentally delete a photo. The sooner you try to recover it, the better your chances of success.
By following these tips, you can minimize the risk of losing your precious memories.
10. How dfphoto.net Can Help You Master iPhone Photography
At dfphoto.net, we are passionate about helping photographers of all levels improve their skills and capture stunning images. Whether you’re an amateur enthusiast or a seasoned pro, our website offers a wealth of resources to help you master iPhone photography.
10.1. Extensive Tutorials and Guides
Our website features a wide range of tutorials and guides covering various aspects of iPhone photography, including:
- Basic Camera Settings: Learn how to adjust focus, exposure, and other camera settings to capture the perfect shot.
- Composition Techniques: Discover the secrets of composition, such as the rule of thirds, leading lines, and symmetry, to create visually appealing photos.
- Lighting Tips: Master the art of working with natural and artificial light to enhance your photos.
- Editing Techniques: Learn how to use the built-in editing tools on your iPhone, as well as third-party apps, to enhance your photos and bring out their full potential.
10.2. Gear Reviews and Recommendations
Choosing the right gear can make a big difference in your photography. Our website features in-depth reviews and recommendations for various iPhone photography accessories, including:
- Lenses: Explore the world of add-on lenses for your iPhone, such as wide-angle, telephoto, and macro lenses.
- Tripods: Discover the benefits of using a tripod for steady shots and low-light photography.
- Lighting Equipment: Learn about different types of lighting equipment, such as LED panels and reflectors, and how to use them to improve your photos.
- Apps: Find the best photo editing and organization apps for your iPhone.
10.3. Inspiration and Ideas
Need some inspiration for your next photoshoot? Our website features a gallery of stunning iPhone photos, as well as articles and interviews with talented iPhone photographers.
10.4. Community Forum
Connect with other iPhone photographers in our community forum. Share your photos, ask questions, and get feedback from fellow enthusiasts.
10.5. Expert Advice
Our team of experienced photographers is always available to provide expert advice and guidance. Whether you need help with a specific technique or want to discuss your portfolio, we’re here to help.
At dfphoto.net, we believe that anyone can take amazing photos with their iPhone. With our resources and guidance, you’ll be well on your way to mastering iPhone photography. Visit us at dfphoto.net to explore our extensive collection of tutorials, gear reviews, and inspiring photos. Join our community of passionate photographers and take your iPhone photography to the next level.
And if you’re ever in Santa Fe, feel free to drop by for a visit! Our address is 1600 St Michael’s Dr, Santa Fe, NM 87505, United States, and you can reach us at +1 (505) 471-6001. We’d love to chat about photography and share our passion with you.
FAQ: Duplicate Photos on iPhone
1. Why does my iPhone have so many duplicate photos?
Duplicate photos can accumulate due to multiple downloads, sharing, backup restorations, app glitches, HDR mode, burst mode, and cloud syncing issues.
2. How do I find duplicate photos on my iPhone without an app?
Use the built-in Duplicate Detection feature in iOS 16 and later by navigating to Photos > Albums > Utilities > Duplicates.
3. Does iCloud Photos prevent duplicate photos?
iCloud Photos syncs photos across devices, which can sometimes lead to duplicates if not managed carefully. Be mindful of downloads and consolidate your library before enabling iCloud Photos.
4. What happens when I merge duplicate photos on my iPhone?
Your iPhone combines the highest quality image and relevant data into one photo, and the other duplicates are moved to the Recently Deleted album.
5. Are third-party duplicate photo finder apps safe to use?
Choose reputable apps with clear privacy policies to minimize privacy risks. Always review the results carefully before deleting anything.
6. How can I recover accidentally deleted photos on my iPhone?
Check the Recently Deleted album in the Photos app, where deleted photos are stored for 30 days. You can also recover from an iCloud backup or use third-party data recovery software.
7. What are Smart Albums, and how do they help with duplicate photos?
Smart Albums are available on macOS and automatically group photos based on specific criteria like date or location, making it easier to identify duplicates.
8. How do I prevent duplicate photos when using iCloud Photos?
Be mindful of downloads, consolidate your library, regularly review your library, use Smart Albums, and check the Recently Deleted album.
9. What is the best way to manage photo storage on my iPhone?
Balance internal storage, iCloud Photos with Optimize iPhone Storage, third-party cloud storage services, and regular backups to an external hard drive.
10. Can dfphoto.net help me improve my iPhone photography skills?
Yes! dfphoto.net offers tutorials, gear reviews, inspiration, a community forum, and expert advice to help you master iPhone photography.
Final Thoughts
Managing duplicate photos on your iPhone doesn’t have to be a daunting task. Whether you opt for the convenience of the built-in iOS feature, the advanced capabilities of third-party apps, or the control of manual deletion, there’s a method that suits your needs. Remember to regularly maintain your photo library to keep it organized and free of duplicates. And for all things photography, don’t forget to check out dfphoto.net! Our extensive resources, including tutorials, gear reviews, and community forums, are designed to help you enhance your skills and capture stunning images.