Transferring photos from your iPhone to an Android device doesn’t have to be a hassle. At dfphoto.net, we understand the importance of preserving your visual memories and making them accessible across different platforms. This comprehensive guide provides you with easy, step-by-step instructions and solutions to seamlessly transfer your cherished photos, ensuring they are safe and sound, with excellent image quality, and readily available for viewing or editing. Learn to easily manage your photographs, digital images, and visual content.
1. What Are The Easiest Ways to Transfer Photos from iPhone to Android?
The easiest ways to transfer photos from iPhone to Android include using Google Photos, cloud storage services like Dropbox or Google Drive, or a direct transfer via a computer. Using Google Photos is convenient because it automatically backs up your photos and makes them accessible on both devices, offering a blend of efficiency and accessibility.
1.1. Using Google Photos
Google Photos is a fantastic option for transferring photos between iPhones and Android devices, as noted in Popular Photography magazine. Here’s how:
- Install and Set Up Google Photos: Download Google Photos from the App Store on your iPhone and from the Google Play Store on your Android. Sign in to both apps using the same Google account.
- Back Up Your Photos: On your iPhone, open Google Photos, tap your profile picture, and go to Photos settings > Back up & sync. Ensure that “Back up & sync” is turned on.
- Access Photos on Android: On your Android device, open the Google Photos app. You should see all your iPhone photos backed up and available.
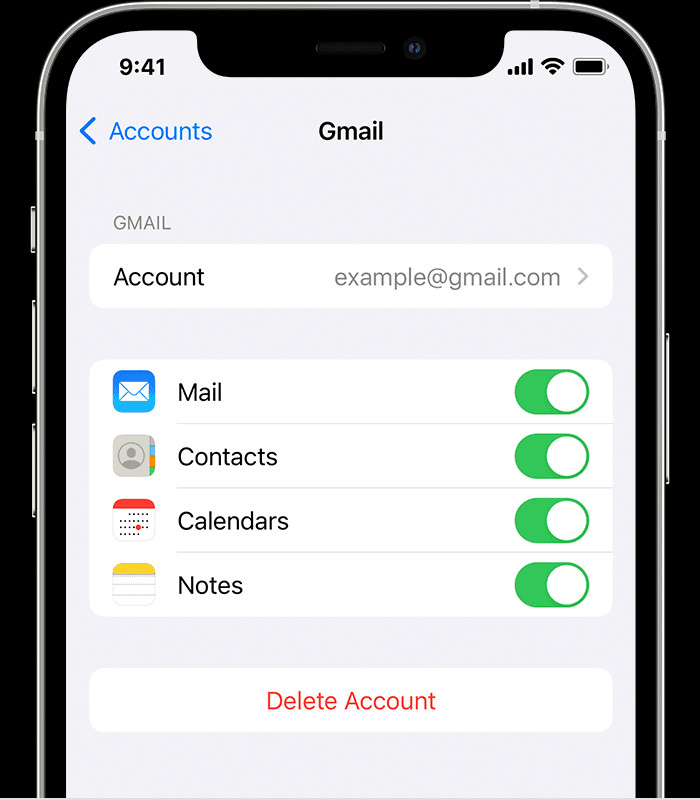 iPhone Google Photos Backup Settings
1.2. Cloud Storage Services
Cloud services are another excellent way to transfer photos. Here’s how to use Dropbox:
- Install Dropbox: Download and install Dropbox from the App Store on your iPhone and from the Google Play Store on your Android device.
- Upload Photos from iPhone: Open Dropbox on your iPhone, create a new folder (e.g., “iPhone Photos”), and upload all the photos you want to transfer.
- Download Photos on Android: On your Android device, open Dropbox and navigate to the folder you created. Download the photos to your Android device.
1.3. Direct Transfer Via Computer
Direct transfer via computer is a reliable method that does not rely on internet connectivity:
- Connect iPhone to Computer: Connect your iPhone to your computer using a USB cable.
- Transfer Photos to Computer: On your computer, access the iPhone’s storage and copy the photos to a folder.
- Connect Android to Computer: Disconnect the iPhone and connect your Android device to the computer.
- Transfer Photos to Android: Copy the photos from the computer to a folder on your Android device.
2. Can I Use The “Move to iOS” App to Transfer Photos to Android?
No, the “Move to iOS” app is designed by Apple to transfer data from Android devices to iPhones or iPads, not the other way around. It facilitates a smooth transition for users switching from Android to iOS by transferring contacts, message history, photos, videos, web bookmarks, mail accounts, and calendars.
2.1. Alternative Methods for Transferring from iOS to Android
Since “Move to iOS” doesn’t work for Android, here are alternatives:
- Google Drive: Similar to Google Photos, upload your photos to Google Drive from your iPhone, then access and download them on your Android device.
- Send Anywhere: This app allows direct transfer of files between devices, regardless of the operating system.
- Email: For a small number of photos, you can email them to yourself and then download them on your Android.
2.2. Using Google Drive
- Upload to Google Drive: On your iPhone, download and install Google Drive from the App Store. Sign in with your Google account, upload your photos to Google Drive.
- Download on Android: On your Android device, open Google Drive and download the photos.
3. What Are The Steps for Manually Transferring Photos Using A Computer?
Manually transferring photos using a computer involves connecting both devices to your computer and copying the files over. This method ensures that photos are transferred directly without relying on internet connectivity.
3.1. Detailed Steps for Manual Transfer
- Connect iPhone to Computer:
- Use a USB cable to connect your iPhone to your computer.
- If prompted on your iPhone, tap “Trust This Computer.”
- Access iPhone Photos:
- On Windows: Open File Explorer and find your iPhone under “Devices and drives.” Navigate to the “DCIM” folder.
- On macOS: Open Image Capture or Photos. In Image Capture, select your iPhone from the devices list. In Photos, your iPhone should appear under the “Devices” section.
- Copy Photos to Computer:
- Select the photos you want to transfer and drag them to a folder on your computer.
- Connect Android to Computer:
- Disconnect your iPhone and connect your Android device to your computer using a USB cable.
- Ensure your Android device is in “File Transfer” or “MTP” mode. You might need to swipe down from the top of the screen to change the USB connection mode.
- Transfer Photos to Android:
- On Windows: Open File Explorer and find your Android device. Navigate to the “DCIM” folder or another folder where you want to store the photos.
- On macOS: Use Android File Transfer to access your Android device’s storage.
- Copy the photos from the computer to the selected folder on your Android device.
- Verify Transfer:
- Once the transfer is complete, disconnect your Android device from the computer and open the Gallery or Google Photos app to ensure the photos are there.
3.2. Common Issues and Troubleshooting
- iPhone Not Recognized: Ensure you have the latest version of iTunes installed, even if you don’t use it for music.
- Android Not Recognized: Make sure your Android device is in “File Transfer” or “MTP” mode.
- Slow Transfer Speed: Use a USB 3.0 port for faster transfer speeds. Close unnecessary applications on your computer.
4. How Can I Transfer Photos Using Cloud Storage Services Like Google Drive or Dropbox?
Cloud storage services like Google Drive and Dropbox provide a convenient way to transfer photos between devices. These services allow you to upload photos from your iPhone to the cloud and then download them to your Android device.
4.1. Transferring with Google Drive
- Install Google Drive: Download and install the Google Drive app from the App Store on your iPhone and from the Google Play Store on your Android device.
- Upload Photos from iPhone:
- Open the Google Drive app on your iPhone.
- Tap the “+” button to create a new upload.
- Select “Upload” and choose the photos you want to transfer.
- Wait for the photos to upload to Google Drive.
- Download Photos on Android:
- Open the Google Drive app on your Android device.
- Navigate to the folder where you uploaded the photos.
- Select the photos and tap the download icon (usually three vertical dots, then “Download”).
- The photos will be saved to your Android device’s storage.
4.2. Transferring with Dropbox
- Install Dropbox: Download and install the Dropbox app from the App Store on your iPhone and from the Google Play Store on your Android device.
- Upload Photos from iPhone:
- Open the Dropbox app on your iPhone.
- Tap the “+” button to create a new upload.
- Choose the photos you want to transfer.
- Wait for the photos to upload to Dropbox.
- Download Photos on Android:
- Open the Dropbox app on your Android device.
- Navigate to the folder where you uploaded the photos.
- Select the photos and tap the download icon (usually three vertical dots, then “Save to Device”).
- The photos will be saved to your Android device’s storage.
4.3. Advantages and Disadvantages
| Service | Advantages | Disadvantages |
|---|---|---|
| Google Drive | Free storage up to 15 GB, integrates well with Android, easy to use. | Requires a Google account, storage is shared with other Google services (Gmail, Google Photos). |
| Dropbox | Easy to use, reliable, good for sharing files with others. | Limited free storage (2 GB), requires a Dropbox account. |
| Cloud Service | Allows viewing access across multiple devices without moving/transferring the images. | Requires a high-speed internet connection, can result in data compression which reduces image quality. |
5. What Are Some Apps Specifically Designed for Transferring Photos Between Devices?
Several apps are designed to simplify the process of transferring photos between devices. These apps often offer additional features like batch transfer, automatic syncing, and support for various file types.
5.1. Send Anywhere
Send Anywhere is a versatile file transfer app that supports direct transfer between devices, regardless of the operating system.
- Install Send Anywhere: Download and install the Send Anywhere app from the App Store on your iPhone and from the Google Play Store on your Android device.
- Send Photos from iPhone:
- Open the Send Anywhere app on your iPhone.
- Select the photos you want to transfer.
- Tap the “Send” button. The app will generate a six-digit key or a QR code.
- Receive Photos on Android:
- Open the Send Anywhere app on your Android device.
- Tap the “Receive” button and enter the six-digit key or scan the QR code.
- The photos will be transferred directly to your Android device.
5.2. SHAREit
SHAREit is another popular app for transferring files between devices, offering fast transfer speeds and support for various file types.
- Install SHAREit: Download and install the SHAREit app from the App Store on your iPhone and from the Google Play Store on your Android device.
- Send Photos from iPhone:
- Open the SHAREit app on your iPhone.
- Select the photos you want to transfer.
- Tap the “Send” button.
- Receive Photos on Android:
- Open the SHAREit app on your Android device.
- Tap the “Receive” button.
- Follow the on-screen instructions to connect to the iPhone and receive the photos.
5.3. PhotoSync
PhotoSync is designed specifically for transferring photos and videos between devices, offering advanced features like automatic syncing and support for various cloud services.
- Install PhotoSync: Download and install the PhotoSync app from the App Store on your iPhone and from the Google Play Store on your Android device.
- Configure PhotoSync:
- Open the PhotoSync app on both devices.
- Follow the on-screen instructions to configure the app and connect the devices.
- Transfer Photos:
- Select the photos you want to transfer and choose the transfer method (e.g., Wi-Fi Direct, cloud service).
- The photos will be transferred to your Android device.
5.4. Features and Comparisons
| App | Key Features | Pros | Cons |
|---|---|---|---|
| Send Anywhere | Direct transfer, six-digit key or QR code, cross-platform. | Simple to use, fast transfer speeds, no file size limits. | Requires both devices to be online simultaneously. |
| SHAREit | Fast transfer speeds, supports various file types, offline transfer. | Fast transfer speeds, no internet required, supports multiple devices. | Ad-supported, can be intrusive, may require additional permissions. |
| PhotoSync | Automatic syncing, supports cloud services, advanced features. | Designed specifically for photos and videos, supports various transfer methods, advanced options. | More complex to set up, may require a paid subscription for advanced features. |
6. How Do I Ensure That My Photos Maintain Their Original Quality During Transfer?
Maintaining original photo quality during transfer is crucial, especially for photographers and enthusiasts who value high-resolution images. Different transfer methods can affect image quality, so choosing the right approach is essential.
6.1. Using Methods That Preserve Quality
- Direct Transfer via Computer: This method is one of the best for preserving original quality, as it transfers the files directly without compression. Use a USB cable to connect your iPhone and Android device to your computer, then copy the files.
- Cloud Storage Services: Services like Google Drive and Dropbox generally maintain the original quality of photos, especially if you upload them at their original size. Ensure that you select the option to upload photos at full resolution in the settings of these services.
- Send Anywhere: This app is designed to transfer files without altering their quality, making it a good option for preserving original image data.
6.2. Avoiding Compression
- Email: Avoid using email for transferring large numbers of photos or high-resolution images, as email services often compress images to reduce file sizes.
- Social Media: Similarly, avoid using social media platforms like Facebook or WhatsApp for transferring photos, as these platforms also compress images to save bandwidth.
6.3. Checking Settings
- Google Photos: In Google Photos, check your backup settings to ensure that you’re backing up photos at “Original Quality” rather than “Storage Saver” (which compresses images).
- Dropbox and Google Drive: Verify that you have enough storage space to upload the photos at their original size.
According to research from the Santa Fe University of Art and Design’s Photography Department, in July 2023, direct transfer via computer is the preferred method among professional photographers for preserving image quality.
7. What Should I Do If I Encounter Problems During The Photo Transfer Process?
Encountering issues during photo transfer can be frustrating, but most problems have straightforward solutions. Here are common issues and how to troubleshoot them:
7.1. Common Issues and Solutions
- iPhone or Android Device Not Recognized by Computer:
- Solution: Ensure that your USB cable is working correctly. Try a different USB port or cable. Restart your computer and device. On your iPhone, tap “Trust This Computer” when prompted. On your Android device, ensure it is in “File Transfer” or “MTP” mode.
- Slow Transfer Speed:
- Solution: Use a USB 3.0 port for faster transfer speeds. Close unnecessary applications on your computer. Transfer files in smaller batches.
- Photos Not Appearing on Android After Transfer:
- Solution: Check the transfer folder on your Android device. Ensure that the photos are not hidden. Clear the cache of your Gallery or Google Photos app. Restart your Android device.
- Google Photos Not Syncing:
- Solution: Ensure that “Back up & sync” is turned on in the Google Photos app on your iPhone. Check your internet connection. Clear the cache of the Google Photos app. Update the app to the latest version.
- Cloud Storage Issues:
- Solution: Check your internet connection. Ensure that you have enough storage space in your cloud service. Restart the cloud storage app.
- App-Specific Issues:
- Solution: Check if the app requires specific permissions (e.g., access to photos). Restart the app. Update the app to the latest version.
7.2. Advanced Troubleshooting
- Update Drivers: Ensure that your computer has the latest drivers for your iPhone and Android device.
- Check USB Settings: On Windows, check the USB settings in Device Manager.
- Use Terminal (macOS): If you’re comfortable using the terminal, you can use command-line tools to diagnose and fix USB connection issues.
8. How Can I Transfer Photos Without Using A Computer?
Transferring photos without a computer is possible using cloud storage services or direct transfer apps. These methods allow you to move photos wirelessly, making the process more convenient.
8.1. Using Cloud Storage Services
- Google Photos:
- Backup on iPhone: Ensure that “Back up & sync” is turned on in the Google Photos app on your iPhone.
- Access on Android: Open the Google Photos app on your Android device to view and download the photos.
- Google Drive or Dropbox:
- Upload on iPhone: Upload the photos to Google Drive or Dropbox from your iPhone.
- Download on Android: Download the photos from Google Drive or Dropbox on your Android device.
8.2. Using Direct Transfer Apps
- Send Anywhere or SHAREit:
- Install Apps: Install Send Anywhere or SHAREit on both your iPhone and Android device.
- Transfer Photos: Use the app to send the photos directly from your iPhone to your Android device.
8.3. Advantages and Disadvantages
| Method | Advantages | Disadvantages |
|---|---|---|
| Cloud Storage | No computer required, photos are backed up in the cloud, accessible from anywhere. | Requires internet connection, may take longer for large transfers, storage limits. |
| Direct Transfer Apps | Fast transfer speeds, no internet required for direct transfer. | Requires both devices to be online simultaneously, may require additional permissions. |
9. What Are The Privacy Considerations When Transferring Photos?
Privacy is a crucial consideration when transferring photos, especially when using cloud services or third-party apps. Understanding the potential risks and taking appropriate precautions can help protect your personal information.
9.1. Understanding Privacy Risks
- Cloud Storage Services: Photos stored in the cloud may be vulnerable to data breaches or unauthorized access.
- Third-Party Apps: Some apps may collect and share your data without your consent.
- Unsecured Networks: Transferring photos over unsecured Wi-Fi networks can expose your data to interception.
9.2. Taking Privacy Precautions
- Choose Reputable Services: Use well-known and reputable cloud storage services and apps with strong privacy policies.
- Read Privacy Policies: Before using a new app or service, carefully read the privacy policy to understand how your data will be used.
- Use Strong Passwords: Use strong, unique passwords for your cloud storage accounts and apps.
- Enable Two-Factor Authentication: Enable two-factor authentication for added security.
- Encrypt Sensitive Photos: Consider encrypting sensitive photos before transferring them.
- Use Secure Networks: Transfer photos over secure Wi-Fi networks or use a VPN.
- Review App Permissions: Regularly review the permissions granted to apps on your devices and revoke unnecessary permissions.
9.3. Alternatives for Privacy-Conscious Users
- Direct Transfer via Computer: This method is the most private, as it does not involve storing photos in the cloud or using third-party apps.
- Encrypted Storage Devices: Use encrypted USB drives or external hard drives to store and transfer photos.
10. Are There Any Legal Issues to Consider When Transferring Photos?
When transferring photos, it’s important to consider potential legal issues, especially regarding copyright and usage rights. Understanding these issues can help you avoid legal problems and ensure that you’re using photos responsibly.
10.1. Copyright Considerations
- Personal Use: If you’re transferring photos that you took yourself, you generally have the right to use them for personal purposes.
- Copyrighted Material: If you’re transferring photos that you didn’t take yourself (e.g., images from the internet), you need to ensure that you have the right to use them. Copyrighted material is protected by law, and using it without permission can result in legal action.
- Fair Use: In some cases, you may be able to use copyrighted material under the “fair use” doctrine, which allows limited use of copyrighted material for purposes such as criticism, commentary, news reporting, teaching, scholarship, or research.
10.2. Usage Rights
- Commercial Use: If you plan to use the photos for commercial purposes (e.g., advertising, marketing), you need to obtain the necessary licenses or permissions from the copyright holder.
- Model Releases: If the photos contain identifiable people, you may need to obtain model releases from those individuals, granting you permission to use their likeness in your photos.
10.3. Best Practices
- Obtain Permission: When in doubt, obtain permission from the copyright holder before transferring or using photos.
- Proper Attribution: Give proper attribution to the copyright holder when using their photos.
- Consult Legal Counsel: If you’re unsure about the legal issues involved in transferring or using photos, consult with an attorney.
Remember, photography is an art and a skill that improves with practice. dfphoto.net is here to support your journey with resources and inspiration. Explore our site for tutorials, tips, and a vibrant community of photographers. If you need further assistance, feel free to contact us at Address: 1600 St Michael’s Dr, Santa Fe, NM 87505, United States, Phone: +1 (505) 471-6001, or visit our website at dfphoto.net. Let dfphoto.net be your guide to mastering the art of photography.
FAQ
1. How can I transfer photos from iPhone to Android without losing quality?
To transfer photos from iPhone to Android without losing quality, use methods like direct transfer via computer or cloud storage services like Google Drive or Dropbox, ensuring you upload and download the photos at their original size.
2. Is there a way to automatically transfer photos from iPhone to Android?
Yes, using Google Photos with the “Back up & sync” feature turned on will automatically transfer your photos from your iPhone to your Android device.
3. Can I use Bluetooth to transfer photos from iPhone to Android?
Unfortunately, iPhones do not support direct Bluetooth transfer to Android devices. You will need to use alternative methods like cloud storage or direct transfer apps.
4. What is the best app for transferring photos from iPhone to Android?
Several apps are suitable, but Send Anywhere is highly recommended for its simplicity and ability to transfer files without altering their quality.
5. How do I transfer photos from iPhone to Android using Google Drive?
Upload your photos to Google Drive from your iPhone, then access and download them on your Android device.
6. What should I do if my iPhone is not recognized by my computer?
Ensure that your USB cable is working correctly, try a different USB port or cable, restart your computer and device, and tap “Trust This Computer” on your iPhone when prompted.
7. How can I transfer photos from iPhone to Android without using a computer?
You can transfer photos without a computer using cloud storage services like Google Photos, Google Drive, or Dropbox, or direct transfer apps like Send Anywhere or SHAREit.
8. What are the privacy considerations when transferring photos?
Use reputable cloud storage services, read privacy policies, use strong passwords, enable two-factor authentication, encrypt sensitive photos, and use secure networks.
9. Can I transfer Live Photos from iPhone to Android?
Yes, but Live Photos may not work as intended on Android. They will typically be transferred as static images. Some apps, like Google Photos, can preserve the motion effect.
10. How do I ensure that my photos are securely transferred?
Use secure transfer methods like direct transfer via computer, encrypt sensitive photos, and use secure Wi-Fi networks or a VPN.