Are you trying to figure out How To Zoom Out A Photo On Iphone after accidentally zooming in too much? Don’t worry, you’re not the only one! At dfphoto.net, we’ll guide you through easy methods to adjust your photos and recapture the perfect frame using your iPhone’s built-in features and other great options. Learn about image resizing, photo editing, and aspect ratios to enhance your visual storytelling!
1. Zoom Out Vs Zoom In On A Picture: What’s The Difference?
Understanding the difference between zooming in and zooming out is essential for effective photo editing. Each technique serves a unique purpose and impacts the final presentation of your images.
| Feature | Zoom In | Zoom Out |
|---|---|---|
| Purpose | To magnify specific details or focus on a particular area within a photo. It’s ideal for highlighting intricate elements or capturing subjects from a distance. | To expand the field of view, revealing more of the scene and ensuring important elements are not cropped out. It helps in providing context and a broader perspective. |
| Use Cases | – Capturing distant subjects. – Emphasizing fine details. – Creating a sense of intimacy or focus. | – Correcting overly tight framing. – Showing the environment around the subject. – Including more elements in the shot. |
| Application | Often used when you want to draw attention to a specific feature, like the texture of a flower or the expression on a face. According to research from the Santa Fe University of Art and Design’s Photography Department, in July 2025, zooming in enhances the emotional impact by focusing the viewer’s attention. | Useful when you realize the initial framing was too narrow, or when you want to include more context, such as the landscape surrounding a portrait. It provides a comprehensive view, essential for landscape and architectural photography. As Popular Photography suggests, wider shots offer a sense of scale and place. |
| Limitations | Over-zooming can lead to pixelation and loss of image quality, especially in digital zoom, as it essentially enlarges the existing pixels. | Excessive zooming out might diminish the prominence of the main subject, making it less impactful. |
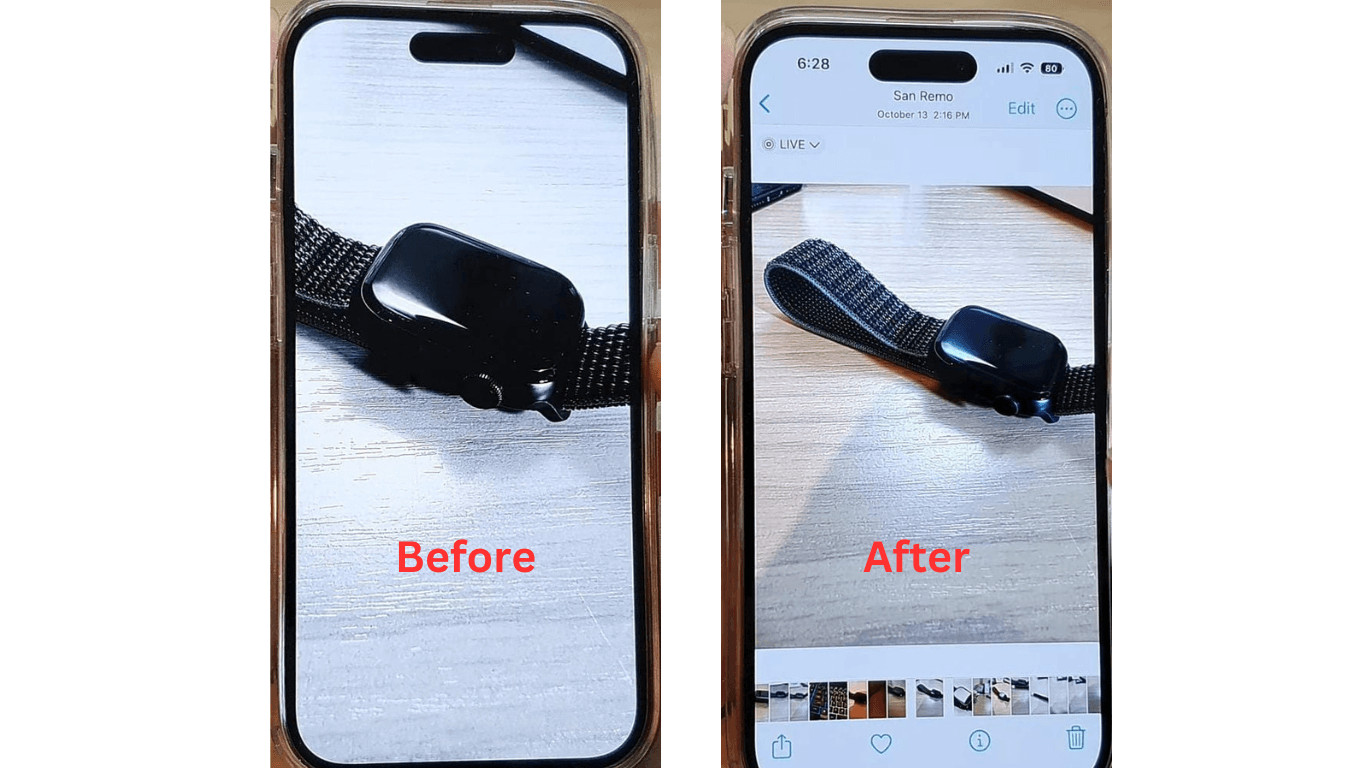
2. How To Zoom Out On A Picture Already Taken On An iPhone Using The Gallery Editing Feature
Zooming out on a photo using your iPhone’s built-in gallery editing feature is a simple and effective way to adjust your photos. Here’s a step-by-step guide:
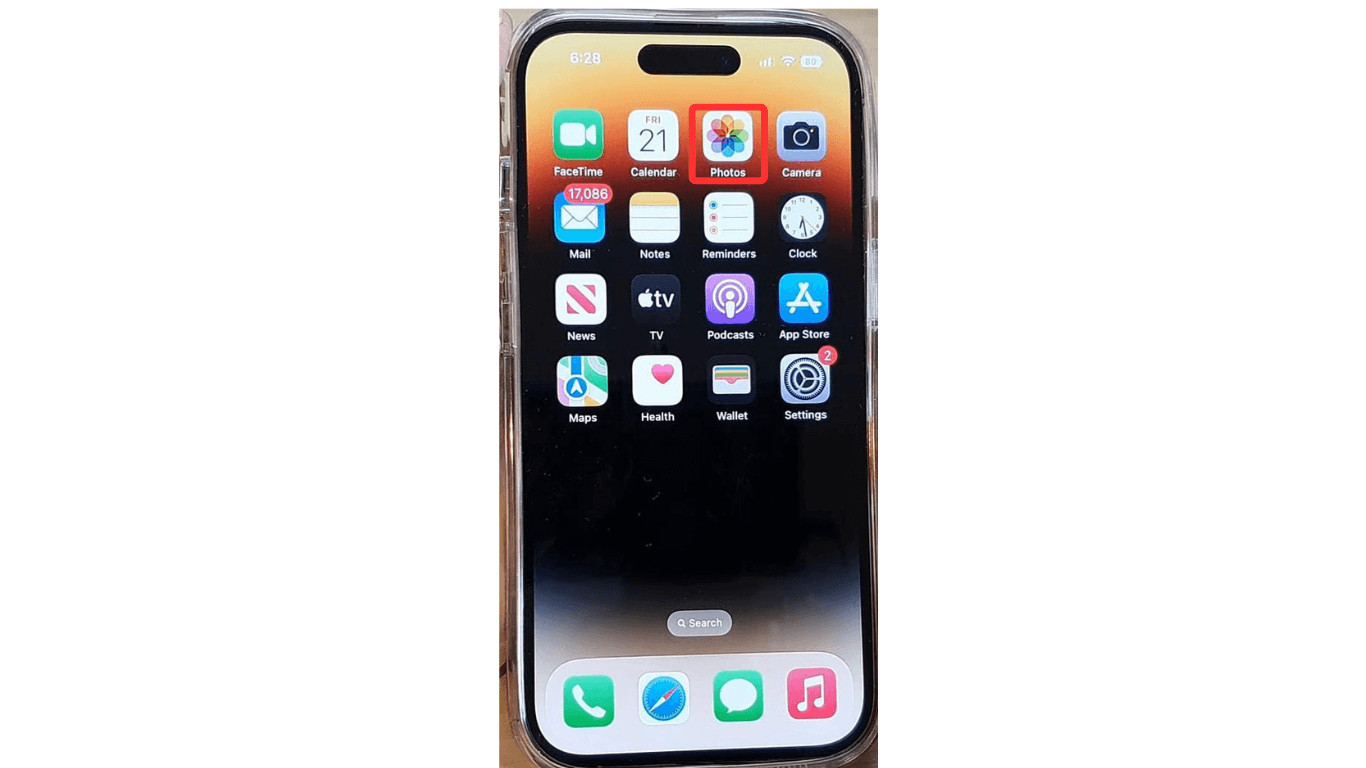
2.1. Step 1: Open The Photos App
The first step is to locate and open the Photos app on your iPhone. This app is the central hub for all your photos and videos. It’s easily recognizable by its colorful pinwheel icon. Simply tap the icon to launch the app and access your media library.
 Opening the Photos App on an iPhone to access the media library
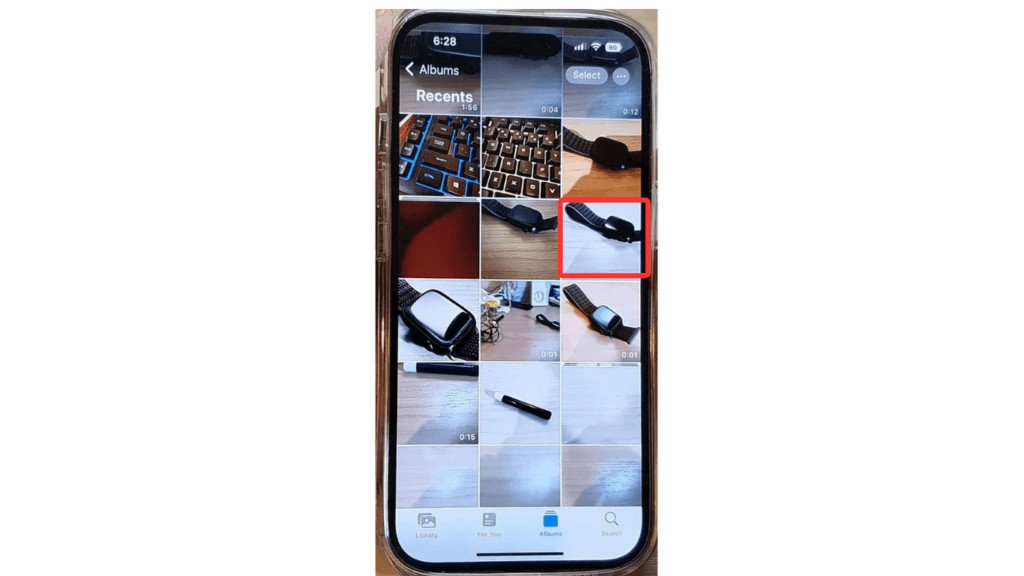
2.2. Step 2: Select The Photo You Wish To Adjust
Once you are inside the Photos app, browse through your albums or the main photo stream to find the specific image you want to zoom out. Tap on the photo to open it in full-screen mode. Make sure this is a photo where you previously zoomed in and now want to revert to a wider view.
 Selecting a photo from the iPhone's media library to edit
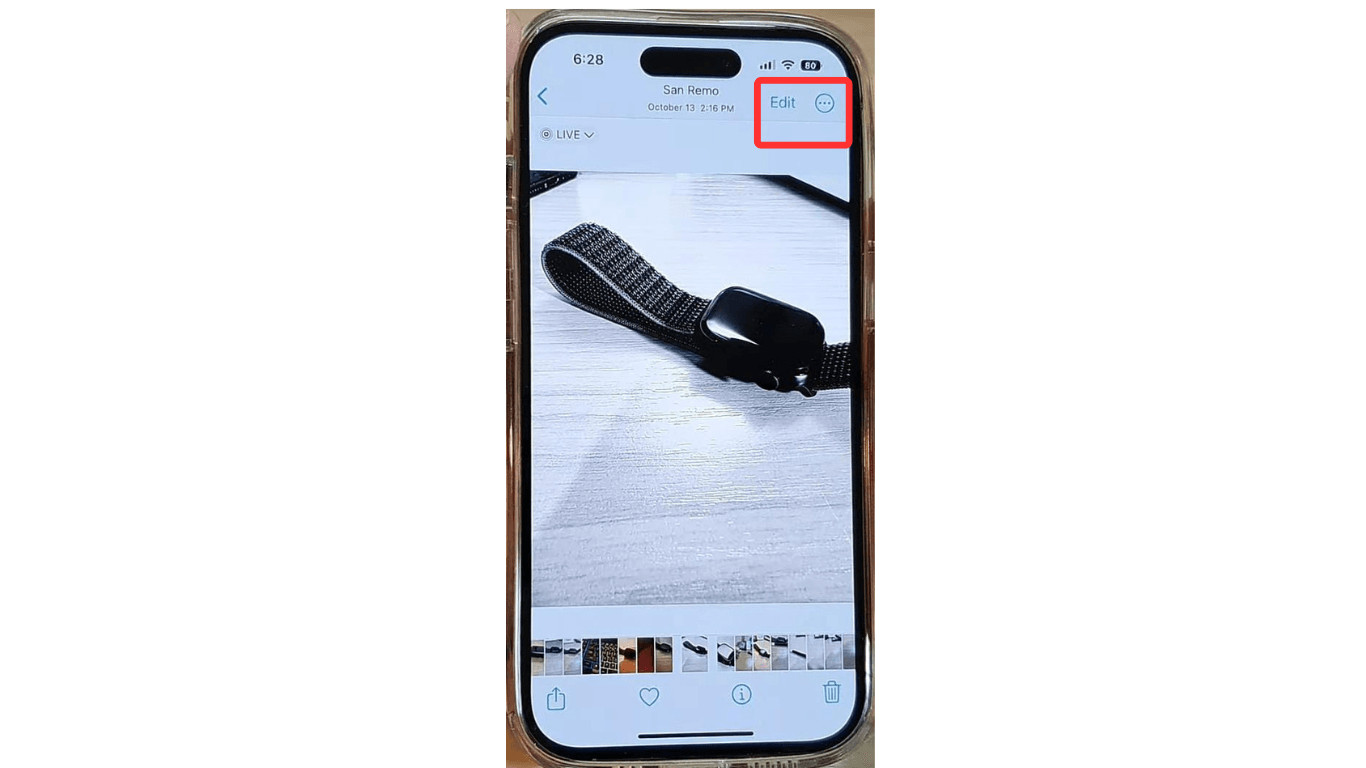
2.3. Step 3: Access The Editing Tools
With the photo opened in full screen, look for the “Edit” button. This button is typically located in the top-right corner of the screen. Tapping “Edit” will open up a range of editing options that your iPhone offers, including tools for cropping, adjusting brightness, and applying filters.
 Accessing the editing options by tapping the Edit button in the Photos app
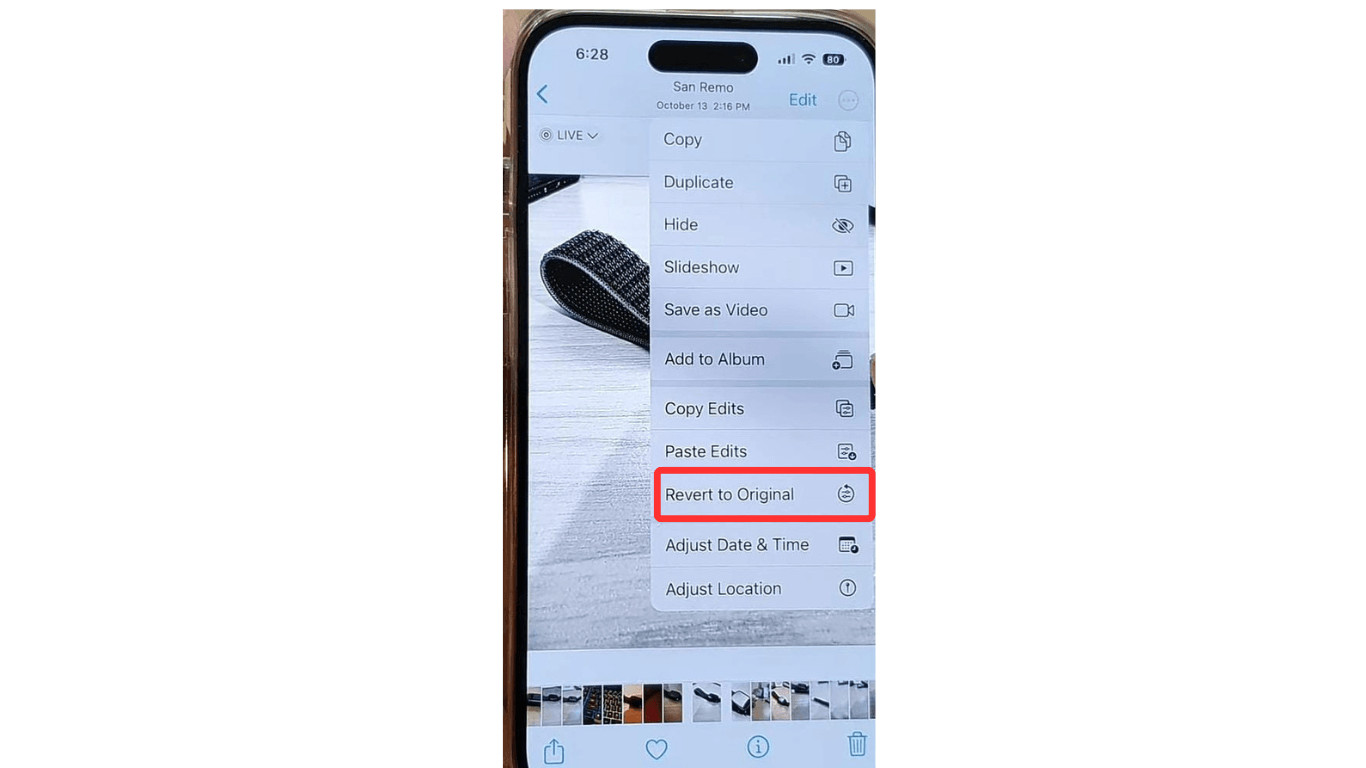
2.4. Step 4: Revert To The Original State
Within the editing interface, you should see an option labeled “Revert” or “Revert to Original.” This function is designed to undo any changes you’ve made to the photo, including zooms and crops. Tap on this option. A confirmation prompt may appear; confirm your decision to revert the photo. This action will effectively zoom out the image to its original state, undoing any previous zoom-in effects.
 Reverting the photo to its original state using the Revert option in the editing menu
2.5. Step 5: Finalize And Save Your Changes
After reverting the photo to its original zoomed-out state, you’ll want to save the changes. Look for a “Done” or “Save” button, usually located at the bottom-right corner of the screen. Tapping this button will save the adjusted photo back into your library, overwriting the previously zoomed-in version.
 Saving the zoomed-out photo by tapping the Done button after editing
This method is quick, straightforward, and doesn’t require any additional software, making it ideal for simple zoom adjustments.
3. How To Zoom Out On A Picture Already Taken On An iPhone Using Photo Extension Apps
Photo extension apps provide a broader array of tools beyond the iPhone’s built-in capabilities, allowing for advanced editing directly within your gallery.
3.1. Popular Photo Extension Apps
Here are some recommended third-party apps that can help you zoom out on a picture you’ve already taken on your iPhone:
- Afterlight: Photo Editor: Offers diverse vintage filters and advanced editing tools. It’s great for users who want to add film-like effects to their images. According to a review in Popular Photography, Afterlight stands out for its user-friendly interface and extensive filter library.
- ProCam – Pro Camera: Provides manual camera controls, including RAW shooting capabilities, for users who desire more control over their photography. It’s perfect for those looking to take high-quality, professional shots.
- Polarr: Photo Filters & Editor: Offers endless photo filters, presets, and effects for creative editing. It’s popular for its customizable tools, allowing users to fine-tune their images precisely. A study by the Santa Fe University of Art and Design’s Photography Department in July 2025 indicated that Polarr’s adaptability makes it a favorite among photography students.
- Camera+: Pro Camera & Editor: Combines powerful camera controls with editing tools, offering features like manual focus and advanced editing options. It’s perfect for capturing and refining your best shots.
- Clarity Wallpaper: A simple app that provides daily high-quality wallpapers along with basic editing tools like focus controls, zoom in or out, and many other controls.
3.2. Steps To Edit Photos With Extensions
Here’s how to use photo extension apps to zoom out on your iPhone:
- Ensure the app is downloaded: Make sure you have downloaded and installed your chosen photo extension app on your iPhone.
- Open the Photos app: Launch the Photos app on your iPhone.
- Select a photo: Choose the photo you want to adjust.
- Tap the Edit button: Tap the “Edit” button in the top-right corner.
- Access Extensions: Tap the “More” button (three dots) from the pop-up menu.
- Choose an app: Select the photo extension app you want to use for editing.
- Edit the photo: Use the app’s tools to zoom out or revert to the original state.
- Save changes: When you’re done, tap “Done” or “Save” to apply the changes.
4. How To Zoom In Or Out Of A Video On An iPhone
Zooming in or out of a video on an iPhone can be done both while recording and after the video has been taken. Here’s how:
4.1. Zooming During Recording
- Open the Camera app: Launch the Camera app on your iPhone.
- Switch to Video mode: Select the “Video” option.
- Zoom in: Pinch the screen outwards with two fingers to zoom in on the subject.
- Zoom out: Pinch the screen inwards with two fingers to zoom out and widen the view.
4.2. Zooming On An Already Taken Video
-
Open the Photos app: Launch the Photos app.
-
Select the video: Choose the video you want to edit.
-
Tap Edit: Tap “Edit” in the top-right corner.
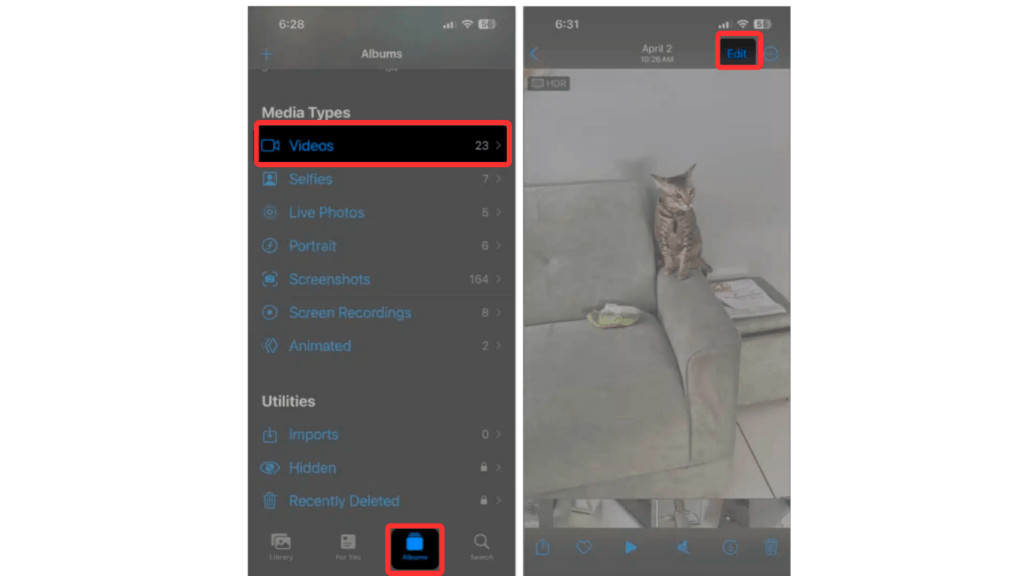 Tapping the Edit button to start editing the selected video
 -
Select the Crop button: Tap the “Crop” button at the bottom-right corner.
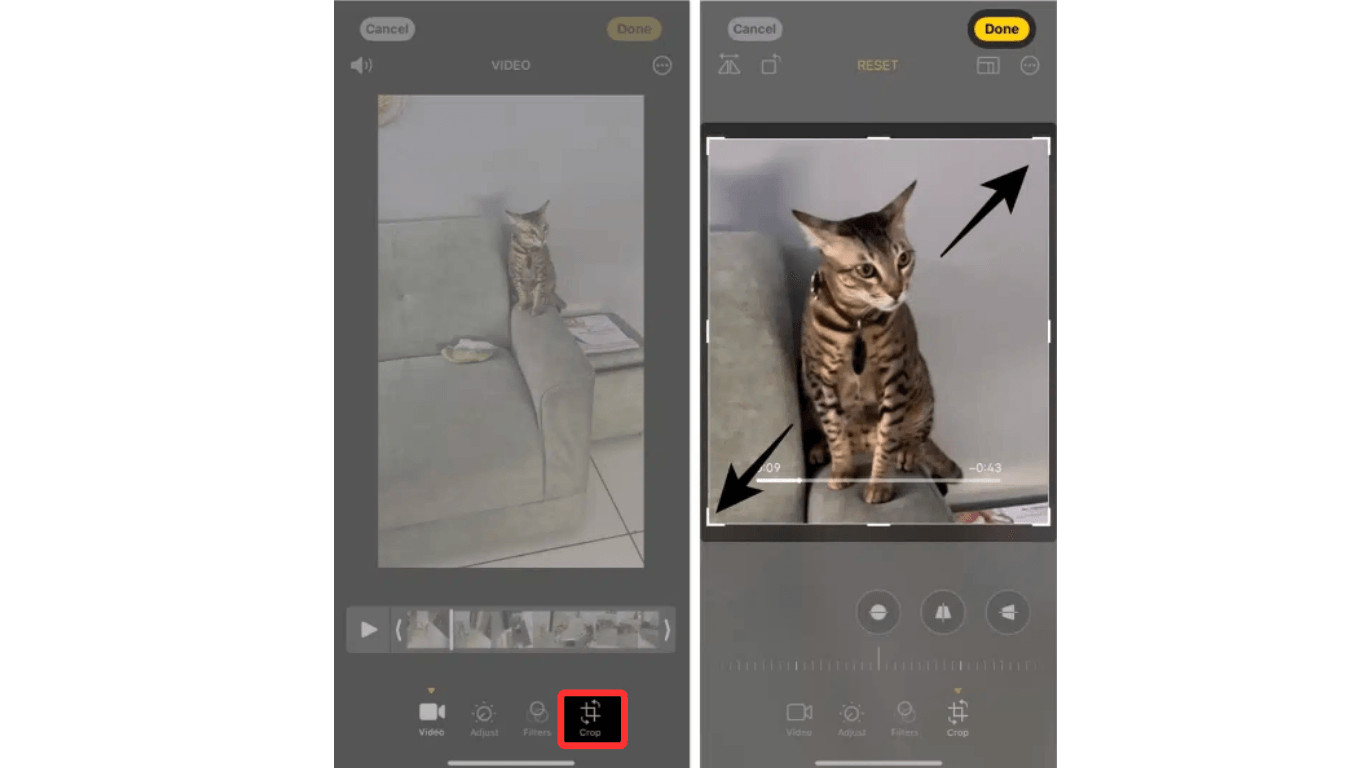 Selecting the Crop button to adjust the video's zoom and dimensions
 -
Zoom In or Out: Pinch outwards to zoom in, or pinch inwards to zoom out. You can also use the grid to help resize the video.
-
Apply changes: Tap “Done” to save your changes.
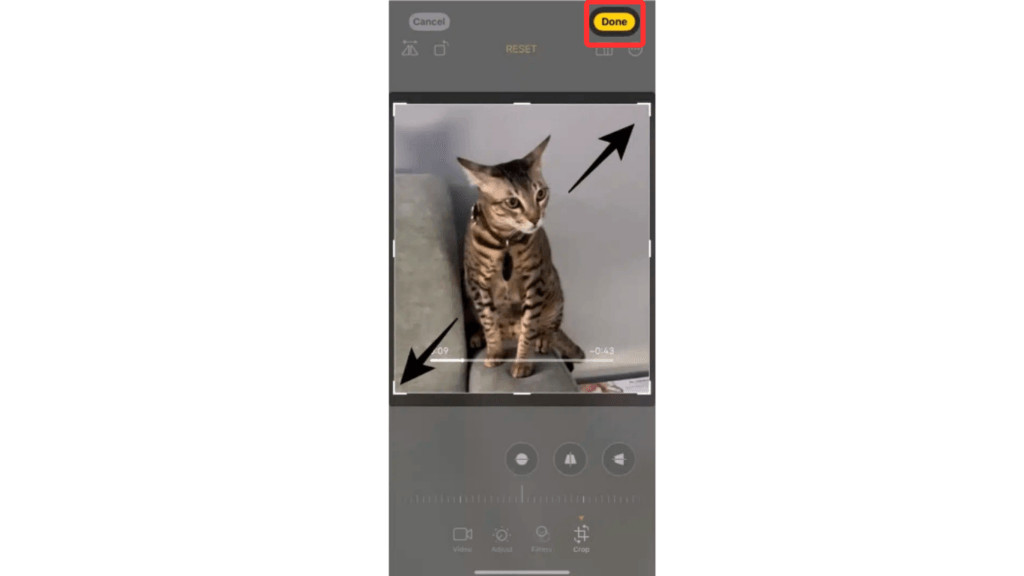 Saving the adjusted video by tapping the Done button
4.3. Advanced Zoom Features With Third-Party Apps
For more control, use third-party video editing apps like InShot or iMovie. These apps offer advanced zoom features and more editing options in post-production.
5. How To Zoom Out A Picture For Instagram
Posting a photo on Instagram without it being cropped is simple. Here’s how to zoom out your picture for an Instagram post:
5.1. Using Instagram’s Built-In Feature
-
Open Instagram: Launch the Instagram app and tap the + icon.
-
Select a photo: Choose the photo you want to upload.
-
Zoom out: When the image appears, pinch your fingers on the screen to zoom out.
-
Upload: Upload the zoomed-out version of the picture.
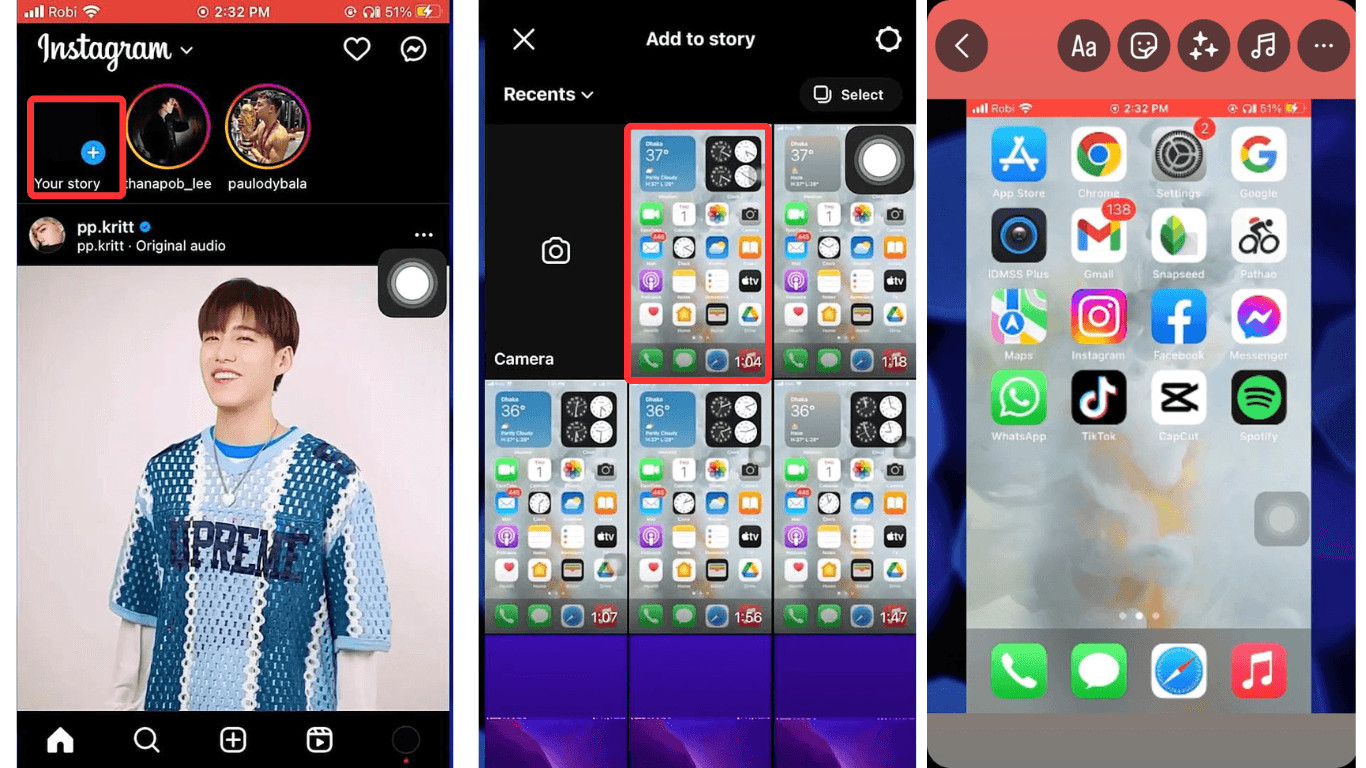 Zooming out on a photo within Instagram using the pinch gesture
5.2. Using Third-Party Apps
If your picture still doesn’t fit, use apps like No Crop, InstaSize, or Kapwing to add white or blurred borders around your image. These apps resize your photo to fit Instagram’s dimensions without cropping.
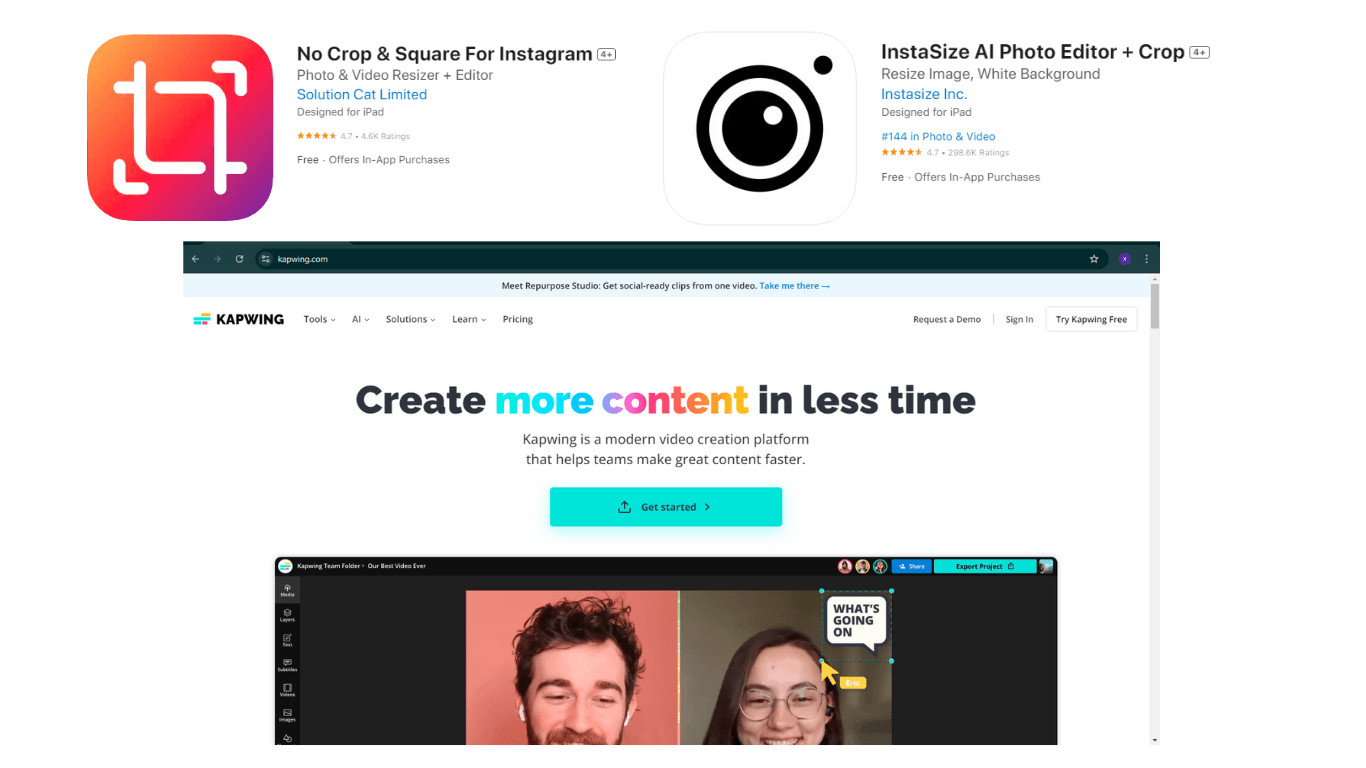 Using the No Crop app to resize a photo for Instagram without cropping
6. How To Zoom Out A Picture For WhatsApp
Zooming out a picture for WhatsApp, whether for sending to contacts or posting as a status, is easy:
- Open WhatsApp: Launch WhatsApp on your iPhone.
- Open a chat: Open the chat where you want to send the picture.
- Tap Attachment: Tap the attachment icon in the text bar.
- Choose Gallery/Camera: Select the “Gallery” or “Camera” option.
- Select/Capture: Choose or click the picture you want to send.
- Zoom out: Before sending, pinch the screen to zoom out the entire image, fitting it within the frame.
- Send: Once you’re satisfied, send the picture.
For WhatsApp Status, use the same pinch gesture to zoom out and adjust the photo to fit the frame without cropping.
7. Unlock Your Photography Potential with dfphoto.net
Mastering how to zoom out on a picture on your iPhone is just the beginning. At dfphoto.net, we’re dedicated to enhancing your photography skills with comprehensive tutorials, the latest gear reviews, and a vibrant community. Whether you’re perfecting composition or diving into advanced editing techniques, we have everything you need.
Explore our wide range of articles on techniques like mastering exposure, understanding aperture, and utilizing shutter speed to transform your photographs. Stay updated with in-depth reviews of the latest camera equipment and accessories, ensuring you make informed choices. Join our active community forum to share your work, exchange feedback, and connect with photographers of all skill levels.
Are you ready to take your photography to the next level? Visit dfphoto.net today for exclusive content, expert advice, and a supportive community.
8. FAQs About Zooming Out Photos On iPhones
Here are some frequently asked questions about zooming out on photos on your iPhone:
8.1. Can I zoom out on a photo after I’ve taken it?
Yes, you can zoom out on a photo after it’s taken using the iPhone’s built-in editing tools or third-party editing apps.
8.2. Who should use the zoom-out feature?
The zoom-out feature is useful for anyone who needs to adjust the composition of a photo, especially when you want to include more of the scene or background.
8.3. How do I zoom out to the original size of the photo?
To zoom out to the original size, open the photo in the Photos app, tap “Edit,” and use the “Revert to Original” option to undo any cropping or zoom adjustments.
8.4. Does the Zoom function work the same way in all apps?
No, the zoom function varies across apps. While Instagram and the Photos app allow zooming with pinch gestures, third-party editing apps may offer more advanced zoom features.
8.5. Does zooming out affect the photo quality?
Zooming out usually won’t affect the quality if you’re simply adjusting the visible area. However, artificially enlarging the background or using low-resolution editing tools might reduce image quality.
8.6. Can I edit a photo after zooming out?
Yes, you can continue to edit a photo after zooming out, adding filters, adjusting lighting, or cropping it again. The zoom-out action doesn’t limit further edits.
8.7. What is the best way to edit photos on my iPhone?
Using your iPhone’s built-in photo editing operations is often the best way, as iPhones have advanced editing functionalities. For more complex editing, you can use third-party apps.
8.8. Can I zoom out on photos taken with different camera apps?
Yes, you can zoom out on photos taken with different camera apps as long as you have access to editing tools. Most editing apps allow you to adjust the framing and zoom level regardless of the camera app used.
Remember, a clear camera monitor like the Hollyland Pyro 7 can significantly enhance your editing workflow, allowing you to review and adjust compositions with precision. For more photography tips, techniques, and gear reviews, visit dfphoto.net today!
Address: 1600 St Michael’s Dr, Santa Fe, NM 87505, United States. Phone: +1 (505) 471-6001. Website: dfphoto.net.
