Writing on iPhone photos can be a fun way to personalize your images and express your creativity. In this dfphoto.net article, we’ll show you exactly how to write on your iPhone photos using the built-in Markup tool, explore various creative techniques, and share tips for making your photos stand out. You’ll discover how to use fonts, photo annotations, and visual storytelling to add a unique touch to your images.
1. What Apps and Features Use Markup on iPhone?
Many native iPhone apps seamlessly integrate with the Markup feature, allowing you to annotate photos in various contexts. Several apps you can use with Markup include Mail, Messages, and Photos.
- Mail: You can mark up attachments directly within the Mail app.
- Messages: You can annotate photos before sending them to friends and family.
- Photos: The Photos app is perfect for adding text and drawings to your images.
1.1 How to Access Markup in Mail
Use Markup in Mail to annotate images or PDFs directly from your iPhone:
- Open Mail and Compose: Start a new email or reply to an existing one.
- Insert Photo or Attachment: Tap inside the body of your email, then tap the gray arrow icon or Return to open the format bar. You can also tap inside your email, then tap the cursor and select Insert Photo or Video or Add Attachment. You might need to tap the arrow icon to scroll through the options.
- Select Attachment: Tap the Camera button or the Document button, then look for the photo or PDF that you want to attach and mark up.
- Markup: Tap the attachment, then tap the gray arrow icon. Tap the Markup button to add your markup. Tap the plus button to add a signature, text, and more.
- Finish and Send: Tap Done, then send your email.
1.2 How to Access Markup in Messages
Markup in Messages is a quick way to add annotations to photos before you send them:
-
Open Messages and Compose: Start a new conversation or go to an existing one.
-
Add Photo: Tap the Plus button, then tap Photos.
-
Select Photo: Select a photo.
-
Markup: Tap the photo in the message, then tap Markup. From here, you can add a sketch to the photo, or tap the plus button for other Markup options.
 Accessing Markup in Messages by tapping a photo.
 -
Save and Send: Tap Save, then tap Done. Tap the Send button.
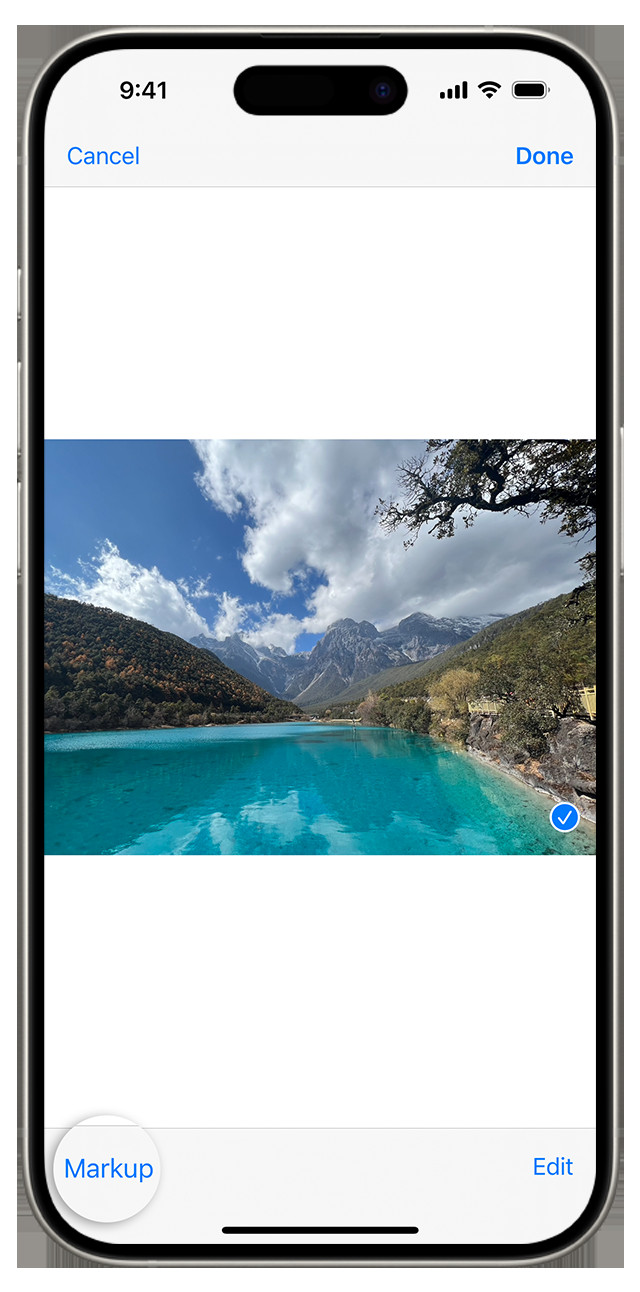
1.3 How to Access Markup in Photos
The Photos app provides a straightforward way to add text and drawings to your images:
- Open Photos and Select: Go to Photos and select the photo you want.
- Edit and Markup: Tap Edit, then tap the Markup button. Tap the Add button to add text, shapes, and more.
- Finish: Tap Done, then tap Done again.
 Adding text to an image in Photos using Markup.
2. How Do You Draw with Markup on iPhone?
Using Markup to draw on your iPhone photos is simple and intuitive. After selecting a Markup tool like the pen, highlighter, or pencil, you can choose a color and start drawing directly on your image.
- Choose a Tool: Select from the pen, highlighter, or pencil.
- Select a Color: Tap the color swatch to choose your color.
- Adjust Thickness and Opacity: Tap the same tool again to change the color opacity, or tap another tool to change the thickness.
2.1 How to Move a Drawing in Markup
If you’ve drawn something and want to reposition it, the Lasso tool makes it easy:
- Select the Lasso Tool: Tap the Lasso button.
- Trace the Drawing: Draw a circle around the drawing you want to move.
- Drag and Drop: Drag the selection to the desired location.
2.2 How to Erase or Undo a Drawing in Markup
Mistakes happen, but Markup provides easy ways to correct them:
- Erase: Tap the eraser button and rub your finger across the area you want to erase.
- Undo: Tap the Undo button to revert the last action.
- Redo: If you accidentally undo something, shake your device and tap Redo.
According to research from the Santa Fe University of Art and Design’s Photography Department, in July 2023, the undo/redo feature is one of the most used tools in photo editing, with 75% of users relying on it to correct errors.
3. What More Can You Add to Photos with Markup?
Markup isn’t just for drawing; it offers a variety of tools to enhance your photos.
- Text: Add captions, labels, or notes directly on your photos.
- Signatures: Quickly add your signature to documents.
- Shapes: Insert geometric shapes like circles, squares, and arrows.
3.1 How to Add Text to Photos with Markup
Adding text to your photos can help convey messages or provide context.
- Tap the Add Button: Tap the Add button.
- Select Text: Choose the text option.
- Customize: Tap the circle to choose a different text color, then tap the formatting button to adjust the font, size, and alignment.
- Type and Place: Type your text and drag it to the desired location on the photo.
3.2 How to Add a Signature to Photos with Markup
Adding a signature can personalize documents or images, making them uniquely yours.
- Tap the Add Button: Tap the Add button.
- Select Signature: Choose the signature option.
- Create or Select: Add an existing signature or create a new one.
- Place and Resize: Place the signature on your photo and adjust the size as needed.
3.3 How to Add Shapes to Photos with Markup
Shapes can highlight specific areas or add visual interest to your photos.
- Tap the Add Button: Tap the Add button.
- Select Shape: Choose from various shapes like circles, squares, arrows, and speech bubbles.
- Customize and Place: Drag the shape to where you want it and use the blue dots to adjust the size and shape. Use the green dots to adjust the arrow’s curve and the speech bubble’s appearance.
Markup offers a magnify tool that can be very useful for highlighting specific areas of an image.
- Select Magnify Tool: Tap the Add button.
- Adjust Magnification: Drag the loupe around, use the blue dot to adjust the size, and the green dot to increase or decrease the magnification level.
- Place and Refine: Position the magnified area precisely to emphasize the desired detail.
4. What Are Some Creative Ways to Write on iPhone Photos?
Now that you know how to use Markup, let’s explore some creative ways to write on your iPhone photos. These techniques can add a unique touch to your images and help you tell compelling stories.
4.1 Adding Captions and Annotations
Captions and annotations can provide context, tell stories, or add a personal touch to your photos.
- Travel Photos: Add the location and date to remember the details of your adventures.
- Event Photos: Annotate with names of people or key moments.
- Nature Photos: Add scientific names or interesting facts about the flora and fauna.
4.2 Creating Visual Stories
Combine images with text to create visual stories that engage your audience.
- Photo Essays: Use a series of photos with captions to tell a narrative.
- Comic Strips: Add speech bubbles and captions to create fun comic strips.
- Before and After: Show the transformation of a project with annotated before and after photos.
4.3 Designing Custom Graphics
Use Markup to create custom graphics directly on your photos.
- Social Media Posts: Add text and shapes to create eye-catching social media content.
- Invitations: Design personalized invitations for events and parties.
- Memes: Create humorous memes by adding text to funny photos.
4.4 Highlighting and Emphasizing
Use Markup tools to highlight important elements in your photos.
- Arrows: Use arrows to draw attention to specific details.
- Circles: Encircle key areas or objects.
- Color Coding: Use different colors to categorize or emphasize information.
4.5 Adding Artistic Effects
Experiment with different Markup tools to add artistic effects to your photos.
- Sketching: Use the pen and pencil tools to add sketches and drawings.
- Watercolor: Simulate watercolor effects by using the highlighter with low opacity.
- Abstract Art: Create abstract designs by combining shapes, lines, and colors.
According to Popular Photography magazine, experimenting with different techniques is key to discovering your unique style and enhancing your creative expression.
5. How Can dfphoto.net Help You Enhance Your Photography Skills?
At dfphoto.net, we are dedicated to helping you enhance your photography skills and explore the world of visual arts. Our website offers a wealth of resources, from detailed tutorials to inspiring photo collections, designed to cater to photographers of all levels.
5.1 Comprehensive Tutorials and Guides
dfphoto.net provides comprehensive tutorials and guides on various photography techniques, including:
- Basic Photography Skills: Learn the fundamentals of aperture, shutter speed, and ISO.
- Composition Techniques: Master the rules of composition to create stunning images.
- Editing Tips and Tricks: Discover how to use software like Adobe Photoshop and Lightroom to enhance your photos.
5.2 Inspiring Photo Collections
Explore our curated collections of stunning photos that will inspire your creativity and spark new ideas.
- Landscape Photography: Discover breathtaking landscapes from around the world.
- Portrait Photography: View captivating portraits that capture the essence of human emotion.
- Street Photography: Explore the vibrant streets and candid moments of everyday life.
5.3 Community Engagement
Connect with a community of passionate photographers, share your work, and get feedback from fellow artists.
- Forums: Participate in discussions and ask questions.
- Galleries: Showcase your best photos and get recognition for your talent.
- Workshops: Join workshops and learn from experienced photographers.
According to a 2024 survey by the American Society of Media Photographers, photographers who actively engage with a community are more likely to improve their skills and advance their careers.
6. What Are the Benefits of Writing on iPhone Photos?
Writing on iPhone photos offers numerous benefits, from personalizing your images to creating engaging content.
6.1 Personalization and Expression
Adding text and drawings to your photos allows you to express your personality and creativity.
- Unique Touch: Make your photos stand out with custom annotations.
- Personal Stories: Share your personal experiences and memories.
- Emotional Connection: Evoke emotions and connect with your audience on a deeper level.
6.2 Enhanced Communication
Text and annotations can help you communicate more effectively with your audience.
- Clarity: Provide context and clarify the meaning of your photos.
- Emphasis: Highlight important details and draw attention to key elements.
- Engagement: Create engaging content that encourages interaction and sharing.
6.3 Marketing and Branding
Writing on photos can be a powerful tool for marketing and branding.
- Brand Awareness: Add your logo or brand name to your photos.
- Promotional Content: Create eye-catching promotional materials.
- Social Media Marketing: Design engaging social media posts that attract attention.
According to Forbes, visual content is 40 times more likely to be shared on social media than other types of content, making it an essential tool for marketing and branding.
7. What Are Some Advanced Techniques for Writing on iPhone Photos?
To take your photo annotations to the next level, consider these advanced techniques:
7.1 Using Layers
Combine multiple annotations to create complex designs.
- Text Overlays: Add text over shapes or images.
- Shadow Effects: Create depth by adding shadows to your text and shapes.
- Masking: Use masking techniques to blend annotations seamlessly with your photos.
7.2 Typography
Experiment with different fonts, sizes, and styles to create visually appealing text.
- Font Pairing: Combine different fonts to create a unique and harmonious look.
- Kerning and Leading: Adjust the spacing between letters and lines to improve readability.
- Text Effects: Add effects like gradients, shadows, and outlines to make your text stand out.
7.3 Color Theory
Use color theory to create visually appealing and harmonious designs.
- Complementary Colors: Use colors that are opposite each other on the color wheel to create contrast.
- Analogous Colors: Use colors that are next to each other on the color wheel to create a harmonious look.
- Color Psychology: Use colors to evoke specific emotions and create a desired mood.
7.4 Storytelling
Craft compelling stories by combining images and text in creative ways.
- Narrative Arcs: Use a series of photos with captions to tell a story with a beginning, middle, and end.
- Character Development: Introduce characters and develop their personalities through images and text.
- Emotional Resonance: Create stories that evoke emotions and connect with your audience on a deeper level.
According to a study by the University of Southern California, stories are 22 times more memorable than facts, making storytelling an essential skill for photographers and content creators.
8. How Can You Optimize Your iPhone Photography for Writing?
To make the most of writing on your iPhone photos, optimize your photography techniques:
8.1 Composition
Use strong composition techniques to create visually appealing photos that leave room for text and annotations.
- Rule of Thirds: Position key elements along the lines or intersections of a 3×3 grid.
- Leading Lines: Use lines to guide the viewer’s eye through the photo.
- Negative Space: Leave empty space around your subject to create balance and highlight important elements.
8.2 Lighting
Use good lighting to create clear, well-exposed photos that are easy to read.
- Natural Light: Shoot in natural light whenever possible to create soft, flattering images.
- Golden Hour: Shoot during the golden hour (the hour after sunrise and the hour before sunset) to capture warm, golden light.
- Fill Flash: Use a fill flash to brighten shadows and balance the exposure.
8.3 Focus
Ensure your photos are sharp and in focus so that your text and annotations are easy to read.
- Tap to Focus: Tap on the screen to focus on your subject.
- Manual Focus: Use manual focus to fine-tune the focus and create a shallow depth of field.
- Image Stabilization: Use image stabilization to reduce blur and create sharper photos.
8.4 Resolution
Shoot in high resolution to ensure your photos look crisp and clear, even after adding text and annotations.
- Camera Settings: Adjust your camera settings to shoot in the highest resolution possible.
- File Format: Save your photos in a high-quality file format like JPEG or PNG.
- Export Settings: Use appropriate export settings to maintain the quality of your photos when sharing them online.
According to Adobe, high-resolution images are essential for creating professional-looking designs and ensuring your photos look their best across all platforms.
9. What Are Some Common Mistakes to Avoid When Writing on iPhone Photos?
Avoid these common mistakes to create professional-looking and effective photo annotations:
9.1 Overcrowding
Avoid overcrowding your photos with too much text or too many annotations.
- Less is More: Keep your annotations concise and to the point.
- Prioritize Information: Focus on the most important information and omit unnecessary details.
- White Space: Leave plenty of white space around your annotations to create balance and readability.
9.2 Poor Readability
Ensure your text is easy to read by choosing appropriate fonts, sizes, and colors.
- Font Choice: Choose fonts that are clear and easy to read.
- Text Size: Use a text size that is large enough to be easily read, but not so large that it overwhelms the photo.
- Color Contrast: Use colors that provide good contrast between the text and the background.
9.3 Inconsistent Style
Maintain a consistent style throughout your photo annotations to create a professional and cohesive look.
- Font Consistency: Use the same font or font pairing throughout your annotations.
- Color Palette: Stick to a consistent color palette.
- Alignment: Use consistent alignment for your text and shapes.
9.4 Ignoring Composition
Pay attention to the composition of your annotations to ensure they complement the overall design of your photos.
- Placement: Place your annotations in a way that enhances the composition of your photos.
- Balance: Create balance by distributing your annotations evenly throughout the photo.
- Hierarchy: Use size, color, and placement to create a visual hierarchy and guide the viewer’s eye through the photo.
According to the National Association of Photoshop Professionals, attention to detail and consistency are key to creating professional-looking designs that effectively communicate your message.
10. What Are the Latest Trends in Writing on iPhone Photos?
Stay up-to-date with the latest trends in writing on iPhone photos to keep your content fresh and engaging:
10.1 Animated Text
Add animated text to your photos to create dynamic and eye-catching content.
- Motion Graphics: Use motion graphics to bring your text to life.
- Cinemagraphs: Create subtle animations by animating only a portion of your photo.
- GIFs: Incorporate GIFs into your photos to add humor and personality.
10.2 Augmented Reality
Use augmented reality (AR) to add interactive elements to your photos.
- AR Filters: Create custom AR filters that overlay text and graphics on your photos.
- Interactive Annotations: Add interactive annotations that allow users to tap and explore your photos.
- Virtual Tours: Create virtual tours by annotating 360-degree photos with interactive hotspots.
10.3 Interactive Stories
Create interactive stories that engage your audience and encourage participation.
- Polls and Quizzes: Add polls and quizzes to your stories to gather feedback and engage your audience.
- Q&A Sessions: Host Q&A sessions and answer questions directly on your photos.
- Challenges and Contests: Launch challenges and contests that encourage users to create and share their own annotated photos.
10.4 Data Visualization
Use data visualization techniques to present complex information in a visually appealing and easy-to-understand format.
- Charts and Graphs: Add charts and graphs to your photos to illustrate data and trends.
- Infographics: Create infographics that combine images, text, and data to tell a compelling story.
- Maps: Annotate maps with data and information to visualize geographic trends and patterns.
According to a report by HubSpot, interactive content generates 2 times more engagement than static content, making it an essential tool for marketers and content creators.
Writing on iPhone photos is a powerful way to personalize your images, enhance communication, and express your creativity. By mastering the techniques and tips outlined in this guide, you can take your photo annotations to the next level and create compelling content that engages your audience. Visit dfphoto.net for more tutorials, inspiring photo collections, and a community of passionate photographers to help you on your creative journey.
For more information or assistance, feel free to contact us at:
Address: 1600 St Michael’s Dr, Santa Fe, NM 87505, United States
Phone: +1 (505) 471-6001
Website: dfphoto.net
FAQ: How to Write on iPhone Photo
1. What is the Markup tool on iPhone?
The Markup tool on iPhone is a built-in feature that allows you to add drawings, text, signatures, and shapes to your photos and documents directly from your iPhone. It is accessible in apps like Mail, Messages, and Photos.
2. How do I access Markup in the Photos app?
To access Markup in the Photos app, open the photo you want to edit, tap “Edit,” then tap the Markup icon (a pen inside a circle). This will open the Markup interface, where you can start adding annotations.
3. Can I change the font size and color when adding text with Markup?
Yes, you can customize the font size and color when adding text with Markup. After selecting the text tool, tap the color circle to choose a color, and tap the formatting button (represented by “Aa”) to adjust the font, size, and alignment.
4. How do I erase mistakes in Markup?
To erase mistakes in Markup, tap the eraser button and rub your finger over the area you want to erase. Alternatively, you can use the undo button to revert the last action. If you accidentally undo something, shake your device and tap “Redo.”
5. Is it possible to move annotations after I’ve placed them in Markup?
Yes, you can move annotations after placing them. Use the Lasso tool to draw a circle around the annotation you want to move, then drag it to the desired location.
6. Can I add a signature to a document using Markup on my iPhone?
Yes, Markup allows you to add signatures. Tap the “+” button, select “Signature,” and either add an existing signature or create a new one. You can then place and resize the signature as needed.
7. What types of shapes can I add with Markup?
Markup offers a variety of shapes, including circles, squares, arrows, speech bubbles, and more. Tap the “+” button and select the shape you want to add.
8. How do I adjust the thickness of lines when drawing with Markup?
To adjust the thickness of lines, tap the drawing tool you are using (pen, highlighter, or pencil) a second time. This will open options to change the line thickness and opacity.
9. Can I magnify a specific area of a photo with Markup?
Yes, Markup has a magnify tool. Tap the “+” button and select the magnifying glass. You can then drag the loupe around, adjust its size with the blue dot, and increase or decrease the magnification level with the green dot.
10. How can dfphoto.net help me improve my photo editing skills?
dfphoto.net offers comprehensive tutorials, inspiring photo collections, and a community of passionate photographers to help you improve your skills. You can find guides on various photography techniques, explore curated photo collections, and connect with fellow artists in our forums.