Writing on photos using your iPhone is a fantastic way to personalize images, add context, or create engaging content. Are you eager to learn How To Write On A Photo In Iphone, adding creative flair and essential information? At dfphoto.net, we are passionate about helping you unlock the full potential of your iPhone’s photography capabilities with simple and effective techniques.
1. What is Markup and How Does it Enhance iPhone Photography?
Markup is a built-in feature on iPhones that allows users to annotate, draw, and write directly on photos, screenshots, and documents. This versatile tool enhances iPhone photography by enabling personalized edits and creative expression.
Markup streamlines photo editing, offering quick and easy ways to add notes, emphasize details, or create fun visuals right on your device. According to Apple Support, Markup is integrated into several apps, including Mail, Messages, and Photos, making it accessible whenever you need it.
1.1 What are the Benefits of Using Markup for Photo Editing on iPhone?
Using Markup for photo editing on your iPhone offers several benefits:
- Convenience: Markup is built directly into iOS, eliminating the need for third-party apps.
- Versatility: It includes various tools like pens, highlighters, text input, and shapes.
- Ease of Use: The interface is intuitive, making it simple for anyone to add annotations and edits.
- Integration: Markup works seamlessly with apps like Mail, Messages, and Photos.
- Customization: You can adjust colors, font sizes, and line thickness for personalized edits.
1.2 Which Apps Support Markup on iPhone?
Markup is supported across several native iPhone applications:
- Photos: Edit and annotate photos directly from your photo library.
- Mail: Add notes and highlights to attachments before sending emails.
- Messages: Quickly annotate photos and share them in conversations.
- Files: Mark up PDF documents and other files stored on your device.
- Screenshot Tool: Instantly edit screenshots as soon as you capture them.
2. How to Write on a Photo in iPhone Using the Photos App?
The Photos app on your iPhone provides a straightforward way to add text and drawings to your pictures using Markup. This feature is perfect for quick edits and personalizing your photos.
To write on a photo in the Photos app:
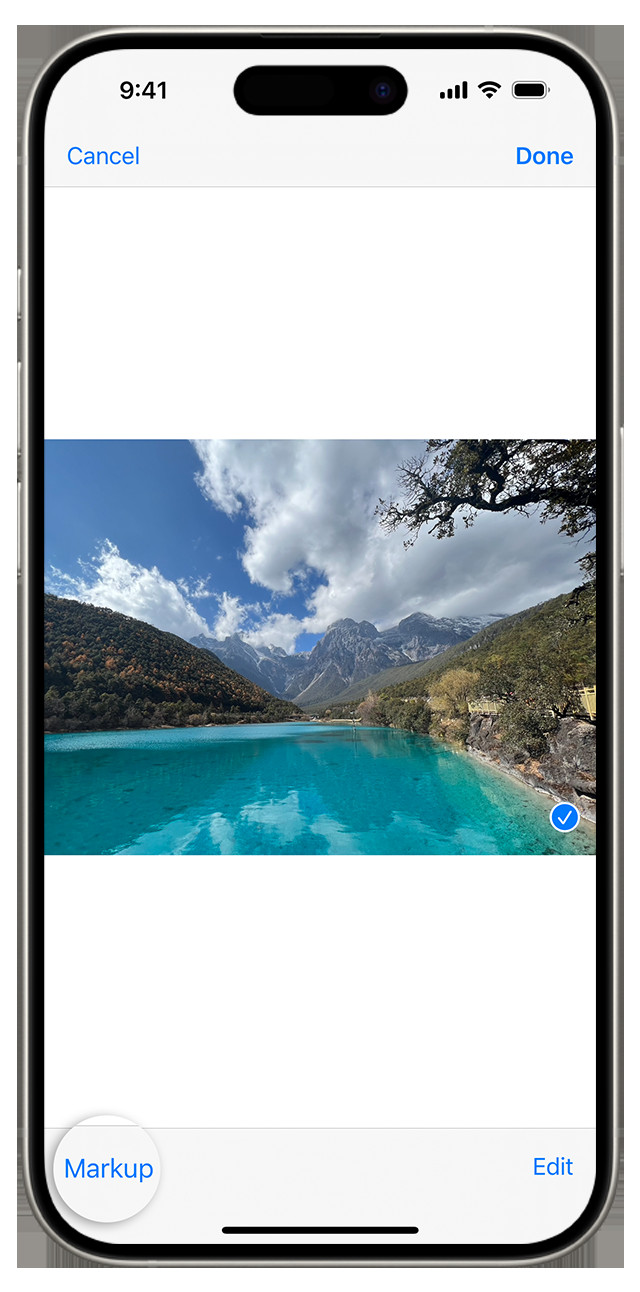
- Open the Photos app and select the photo you want to edit.
- Tap Edit in the upper-right corner.
- Tap the Markup button, which looks like a pen in a circle.
- Choose your tool: pen, highlighter, pencil, or text.
- Select a color from the color palette.
- Write or draw directly on the photo.
- Tap the + button to add text, shapes, or a signature.
- Tap Done, then Done again to save your changes.
2.1 How to Add Text to a Photo in the Photos App?
Adding text to a photo in the Photos app allows you to include captions, labels, or creative messages.
Follow these steps:
- Open the photo in the Photos app and tap Edit.
- Select the Markup tool.
- Tap the + button and choose Text.
- A text box will appear on your photo. Double-tap the text box to edit.
- Type your desired text.
- Use the formatting options to adjust the font, size, and alignment.
- Drag the text box to position it where you want.
- Tap Done, then Done again to save.
2.2 How to Customize the Text Style in Markup?
Customizing the text style in Markup allows you to create visually appealing and personalized annotations.
To customize text style:
- After adding a text box, tap the formatting button (Aa).
- Choose from available fonts.
- Adjust the size using the slider.
- Select the desired alignment (left, center, or right).
- Use the color palette to change the text color.
- Tap outside the formatting options to apply the changes.
2.3 How to Use Drawing Tools in the Photos App?
The drawing tools in the Photos app allow you to add freehand sketches, highlights, and annotations to your photos.
Here’s how to use them:
- Open the photo in the Photos app and tap Edit.
- Select the Markup tool.
- Choose from the pen, highlighter, or pencil.
- Select a color.
- Draw directly on the photo using your finger or a stylus.
- Adjust the line thickness by tapping the tool again.
- Use the eraser tool to remove any mistakes.
- Tap Done, then Done again to save.
 Drawing on an image using Markup tools in Photos app.
3. How to Write on a Photo in iPhone Using the Messages App?
The Messages app offers a convenient way to annotate and share photos directly within your conversations. You can quickly add text and drawings to images before sending them.
To write on a photo in the Messages app:
- Open Messages and select a conversation.
- Tap the + button, then tap Photos.
- Select the photo you want to send.
- Tap the photo in the message field, then tap Markup.
- Use the Markup tools to add text, drawings, or shapes.
- Tap Save, then Done.
- Tap the Send button.
3.1 How to Quickly Annotate and Send Photos in Messages?
Quickly annotating and sending photos in Messages can be done in a few simple steps.
Follow these instructions:
- Open Messages and select a conversation.
- Tap the + button and choose Photos.
- Select the photo.
- Tap the photo, then tap Markup.
- Annotate using the Markup tools.
- Tap Save, then Done.
- Tap the Send button to send the annotated photo.
3.2 How to Use Different Markup Tools in Messages?
The Messages app provides the same Markup tools as the Photos app, allowing you to add personalized touches to your photos.
These tools include:
- Pen: For freehand drawing and writing.
- Highlighter: To emphasize specific areas.
- Pencil: For sketching and light annotations.
- Text: To add captions and labels.
- Shapes: To insert geometric shapes like circles, squares, and arrows.
- Magnifier: To zoom in on details.
3.3 How to Erase Mistakes While Using Markup in Messages?
Correcting mistakes while using Markup in Messages is easy with the eraser tool and undo button.
Here’s how:
- Eraser Tool: Select the eraser tool and rub your finger over the area you want to erase.
- Undo Button: Tap the undo button to remove the last action.
- Redo: If you accidentally undo something, shake your device and tap Redo.
 Adding Markup to a photo directly within Messages app.
4. How to Write on a Photo in iPhone Using the Mail App?
The Mail app allows you to annotate attachments, making it easy to provide feedback or add important information directly to images before sending them.
To write on a photo in the Mail app:
- Open Mail and start a new email or reply to an existing one.
- Tap inside the body of the email, then tap the arrow icon or Return to open the format bar.
- Tap the Camera button or the Document button.
- Select the photo you want to attach and mark up.
- Tap the attachment, then tap the arrow icon.
- Tap the Markup button.
- Add your annotations using the Markup tools.
- Tap Done, then send your email.
4.1 How to Annotate Attachments in Mail Before Sending?
Annotating attachments in Mail before sending is a great way to provide context or feedback.
Follow these steps:
- Attach the photo to your email.
- Tap the attachment.
- Tap the Markup button.
- Use the Markup tools to add text, drawings, or shapes.
- Tap Done to save your annotations.
- Send the email with the annotated attachment.
4.2 How to Add a Signature to an Image in Mail Using Markup?
Adding a signature to an image in Mail using Markup can personalize your documents.
Here’s how:
- Open the photo in Markup in the Mail app.
- Tap the + button.
- Choose Signature.
- If you have an existing signature, select it. If not, tap Add Signature.
- Sign your name using your finger or a stylus.
- Tap Done.
- Position and resize the signature as needed.
- Tap Done again to save.
4.3 How to Use Shapes and Magnifier in Mail Markup?
Shapes and the magnifier tool in Mail Markup can help you highlight specific details or add visual elements to your photos.
Here’s how to use them:
- Shapes: Tap the + button and choose a shape (circle, square, arrow, etc.). Drag and resize the shape as needed. Use the green dots to adjust the arrow’s curve or the speech bubble’s appearance.
- Magnifier: Tap the + button and choose the magnifier tool. Drag the loupe around, use the blue dot to adjust the size, and the green dot to increase or decrease the magnification level.
5. Exploring Third-Party Apps for Writing on Photos
While the built-in Markup tool is handy, numerous third-party apps offer more advanced features for writing on photos. These apps often include additional fonts, editing tools, and creative options.
Some popular third-party apps include:
- Phonto: A simple app specifically for adding text to photos.
- Over: Provides a wide range of templates, graphics, and fonts.
- Adobe Photoshop Express: Offers powerful editing tools, including text overlays.
- Canva: A versatile design app with extensive text and graphic options.
5.1 What are the Advantages of Using Third-Party Apps?
Using third-party apps for writing on photos comes with several advantages:
- More Features: Access to a wider range of fonts, graphics, and editing tools.
- Greater Customization: More control over text styles, effects, and layouts.
- Advanced Editing Tools: Features like layering, masking, and blending modes.
- Creative Templates: Pre-designed templates for various social media platforms.
5.2 Recommendations for the Best Third-Party Apps for Photo Annotation?
Here are some top recommendations for third-party apps for photo annotation:
- Phonto: Best for simple text overlays with a wide selection of fonts.
- Over: Ideal for creating visually appealing graphics with text and images.
- Adobe Photoshop Express: Great for comprehensive photo editing and text additions.
- Canva: Perfect for designing professional-looking graphics with extensive templates.
- PicLab: Offers unique artistic filters and typography options.
5.3 How to Integrate Third-Party Apps with Your iPhone Photo Library?
Integrating third-party apps with your iPhone photo library is usually straightforward:
- Download and Install: Download the app from the App Store and install it on your iPhone.
- Grant Permissions: When you open the app, it will ask for permission to access your photos. Grant the necessary permissions.
- Select Photo: Choose the photo you want to edit from your photo library within the app.
- Edit and Save: Use the app’s tools to add text and annotations. Save the edited photo back to your photo library.
6. Tips and Tricks for Creative Photo Annotations
Creating visually appealing and effective photo annotations involves more than just adding text. Here are some tips and tricks to enhance your photo annotations:
- Choose the Right Font: Select a font that complements the photo’s style and conveys the right message.
- Use Contrasting Colors: Ensure the text color contrasts with the background for readability.
- Consider Placement: Position the text in a way that doesn’t obscure important details in the photo.
- Add Visual Elements: Incorporate shapes, icons, and graphics to enhance the visual appeal.
- Keep It Concise: Use short, impactful phrases rather than lengthy sentences.
- Maintain Consistency: Use a consistent style for all your photo annotations to create a cohesive look.
6.1 How to Choose the Right Font and Color for Your Text?
Choosing the right font and color is crucial for creating effective photo annotations.
Follow these guidelines:
- Font: Select a font that matches the photo’s tone. Serif fonts (like Times New Roman) are classic and formal, while sans-serif fonts (like Arial) are modern and clean. Script fonts are elegant but can be harder to read.
- Color: Choose a color that contrasts well with the background. White and black are always safe choices, but you can also use colors that complement the photo’s palette. Use color theory to guide your choices.
6.2 How to Use Shapes and Graphics to Enhance Your Annotations?
Shapes and graphics can add visual interest and highlight important information in your photo annotations.
Here are some ideas:
- Arrows: Use arrows to point out specific details.
- Circles: Encircle key areas to draw attention.
- Speech Bubbles: Add dialogue or captions in a fun way.
- Icons: Use icons to represent concepts or ideas.
- Lines: Underline or strikethrough text to emphasize it.
6.3 How to Create a Consistent Style for Your Photo Annotations?
Maintaining a consistent style for your photo annotations helps create a professional and cohesive look.
Here’s how:
- Font Choice: Stick to one or two fonts for all your annotations.
- Color Palette: Use a limited color palette that complements your photos.
- Placement: Position text and graphics in a consistent location on each photo.
- Tone: Maintain a consistent tone and voice in your captions and annotations.
7. Troubleshooting Common Issues with Markup
While Markup is generally reliable, you may encounter some issues. Here are solutions to common problems:
- Text Not Appearing: Ensure the text color contrasts with the background.
- Markup Tools Not Working: Restart the app or your iPhone.
- Changes Not Saving: Make sure you tap Done twice to save your changes.
- App Crashing: Update to the latest version of iOS or reinstall the app.
7.1 What to Do If Markup Tools are Not Working?
If the Markup tools are not working, try these troubleshooting steps:
- Restart the App: Close the app and reopen it.
- Restart Your iPhone: Turn your iPhone off and on again.
- Update iOS: Ensure you have the latest version of iOS installed.
- Check Storage: Make sure you have enough storage space on your iPhone.
- Reset Settings: Go to Settings > General > Transfer or Reset iPhone > Reset and choose Reset All Settings.
7.2 How to Resolve Issues with Saving Changes in Markup?
If your changes are not saving in Markup, follow these steps:
- Tap Done Twice: Make sure you tap Done after editing and then Done again to save the changes to your photo.
- Check Storage: Ensure you have enough storage space on your iPhone.
- Close and Reopen: Close the Photos app and reopen it to see if the changes have been saved.
- Restart iPhone: Restart your iPhone to refresh the system.
7.3 How to Update iOS to Ensure Markup Functions Properly?
Keeping your iOS updated ensures that Markup functions properly and you have access to the latest features and bug fixes.
Here’s how to update iOS:
- Go to Settings > General > Software Update.
- Your iPhone will check for available updates.
- If an update is available, tap Download and Install.
- Follow the on-screen instructions to complete the update.
8. Practical Applications of Writing on Photos
Writing on photos has numerous practical applications, from creating engaging social media content to providing visual instructions.
Here are some examples:
- Social Media: Add captions, quotes, and graphics to make your posts stand out.
- Education: Annotate diagrams and charts for presentations and study materials.
- Business: Mark up product photos for marketing and advertising.
- Personal Use: Create personalized greeting cards, invitations, and photo albums.
8.1 How to Use Annotated Photos for Social Media Engagement?
Annotated photos can significantly boost engagement on social media.
Here’s how to use them effectively:
- Add Captions: Use text to provide context and tell a story.
- Highlight Key Information: Use arrows and circles to draw attention to important details.
- Ask Questions: Encourage interaction by adding questions to your photos.
- Use Branded Graphics: Incorporate your logo and brand colors for consistency.
- Create Tutorials: Annotate photos with step-by-step instructions.
8.2 How to Create Educational Materials with Annotated Photos?
Annotated photos are excellent for creating engaging educational materials.
Here are some ideas:
- Diagrams: Label the different parts of a diagram.
- Maps: Mark locations and routes on a map.
- Science Illustrations: Annotate scientific illustrations with explanations.
- Historical Photos: Add captions and notes to provide historical context.
8.3 How to Use Annotated Photos for Business and Marketing?
Annotated photos can be a powerful tool for business and marketing.
Here’s how to use them:
- Product Highlights: Mark up product photos to showcase key features.
- Promotional Graphics: Add text and graphics to create eye-catching promotional images.
- Before and After Photos: Annotate before and after photos to demonstrate the effectiveness of your product or service.
- Customer Testimonials: Add customer quotes to photos to build trust.
9. Advanced Markup Techniques for Professional Results
For those looking to achieve professional results with Markup, mastering advanced techniques is essential.
These techniques include:
- Layering: Combining multiple text boxes and graphics.
- Masking: Hiding parts of an image to create unique effects.
- Blending Modes: Adjusting how different layers interact with each other.
- Color Grading: Enhancing the colors in your photos.
9.1 How to Use Layering to Create Complex Annotations?
Layering involves combining multiple text boxes and graphics to create complex and visually appealing annotations.
Here’s how to do it:
- Add Multiple Elements: Add several text boxes, shapes, and graphics to your photo.
- Arrange Layers: Adjust the order of the layers to create depth and visual interest.
- Group Elements: Group related elements together to move and resize them as a single unit.
- Adjust Transparency: Use transparency to blend different layers together seamlessly.
9.2 How to Apply Masking Techniques in Photo Annotations?
Masking allows you to hide parts of an image or annotation to create unique effects.
Here’s how to apply masking techniques:
- Create a Shape: Draw or insert a shape over the area you want to mask.
- Invert Selection: Invert the selection to mask everything outside the shape.
- Adjust Feathering: Feather the edges of the mask to create a soft transition.
- Use Clipping Masks: Use a shape as a clipping mask to reveal only the parts of an image that fall within the shape.
9.3 How to Enhance Photo Colors with Color Grading Tools?
Color grading involves adjusting the colors in your photos to enhance their visual appeal and create a specific mood.
Here’s how to use color grading tools:
- Adjust Exposure: Start by adjusting the exposure and contrast to get the right brightness levels.
- Correct White Balance: Adjust the white balance to ensure the colors are accurate.
- Use Color Curves: Use color curves to adjust the tones in your photos.
- Apply Filters: Apply filters to add a specific color cast or effect.
- Adjust Saturation: Adjust the saturation to make the colors more vibrant or muted.
10. Best Practices for Optimizing Photos for Different Platforms
Optimizing your photos for different platforms ensures they look their best and load quickly.
Here are some best practices:
- Resize Photos: Resize your photos to the recommended dimensions for each platform.
- Compress Images: Compress your images to reduce file size without sacrificing quality.
- Use the Right File Format: Use JPEG for photos and PNG for graphics with transparency.
- Add Alt Text: Add alt text to your images for accessibility and SEO.
10.1 Recommended Photo Dimensions for Social Media Platforms?
Here are the recommended photo dimensions for popular social media platforms:
| Platform | Recommended Dimensions |
|---|---|
| Square: 1080 x 1080 pixels, Portrait: 1080 x 1350 pixels, Landscape: 1080 x 566 pixels | |
| Profile Picture: 170 x 170 pixels, Cover Photo: 851 x 315 pixels, Post Image: 1200 x 630 pixels | |
| Header Image: 1500 x 500 pixels, In-Stream Photo: 1200 x 675 pixels | |
| Profile Picture: 400 x 400 pixels, Cover Photo: 1584 x 396 pixels, Post Image: 1200 x 627 pixels | |
| Profile Picture: 165 x 165 pixels, Board Cover: 217 x 147 pixels, Pin Image: 1000 x 1500 pixels (recommended aspect ratio) |
10.2 How to Compress Images Without Losing Quality?
Compressing images reduces file size without significantly impacting quality.
Here are some tools and techniques:
- Online Tools: Use online tools like TinyPNG, ImageOptim, or Compressor.io.
- Software: Use image editing software like Adobe Photoshop or GIMP.
- Save for Web: In Photoshop, use the “Save for Web” option to optimize images for online use.
- Adjust Quality Settings: Lower the quality setting slightly when saving images.
10.3 Why is Adding Alt Text to Photos Important?
Adding alt text to photos is important for several reasons:
- Accessibility: Alt text provides a description of the image for visually impaired users who use screen readers.
- SEO: Alt text helps search engines understand the content of the image, improving your website’s SEO.
- Context: Alt text provides context when the image cannot be displayed, such as when images are blocked or the internet connection is slow.
By mastering these techniques, you can take full advantage of your iPhone’s capabilities and create stunning visuals that capture attention and convey your message effectively. Visit dfphoto.net for more tips and tutorials on iPhone photography and creative editing. Explore our collection of beautiful photos and connect with a vibrant community of photographers.
FAQ Section
1. Can I use Markup on older iPhone models?
Yes, Markup is available on older iPhone models, but the exact features and interface may vary depending on the iOS version.
2. Is there a limit to how much text I can add to a photo using Markup?
There is no strict limit, but it’s best to keep text concise to maintain visual clarity.
3. Can I undo changes made with Markup?
Yes, you can use the undo button to revert changes made with Markup.
4. How do I change the font size in Markup?
Select the text box, tap the formatting button (Aa), and use the slider to adjust the font size.
5. Can I add my own custom fonts to Markup?
No, Markup only supports the fonts that are pre-installed on your iPhone.
6. How do I move text around in Markup?
Tap and drag the text box to position it where you want on the photo.
7. Can I use a stylus with Markup?
Yes, you can use a stylus for more precise drawing and writing in Markup.
8. How do I erase parts of a drawing in Markup?
Select the eraser tool and rub your finger over the area you want to erase.
9. Are there any alternatives to Markup for writing on photos?
Yes, there are several third-party apps like Phonto, Over, and Canva that offer more advanced features for writing on photos.
10. How do I save my annotated photo in high resolution?
Make sure to save the photo in its original size or choose a high-resolution export option if available in the app.
Address: 1600 St Michael’s Dr, Santa Fe, NM 87505, United States.
Phone: +1 (505) 471-6001
Website: dfphoto.net
Ready to elevate your photography skills? Explore dfphoto.net for in-depth tutorials, stunning photo collections, and a supportive community of fellow photographers. Dive in today and unleash your creative potential!