Viewing photos on iTunes backup is possible, but it requires specific methods. dfphoto.net will guide you through extracting and accessing your precious memories. Let’s explore how you can retrieve your photos using various techniques and tools, ensuring your visual stories are safe and accessible with photo recovery and data extraction.
This guide covers iTunes backup viewers, iOS data recovery, and photo management.
1. What Exactly is an iTunes Backup and What Does it Include?
An iTunes backup is a comprehensive archive of your iPhone, iPad, or iPod Touch data. Think of it as a digital time capsule of your device’s contents.
Here’s a detailed look:
- Data Coverage: It includes photos, videos, contacts, messages, call history, notes, calendar events, app data, and settings.
- Exclusions: It typically does not include media already stored in iCloud, such as iCloud Photos, or content from the iTunes Store, App Store, or iBooks Store. These can be re-downloaded from Apple’s servers.
- Purpose: Primarily designed for restoring your device to a previous state, transferring data to a new device, or recovering data after loss or damage.
2. Where Are iTunes Backups Stored on My Computer?
Knowing where your iTunes backups reside is the first step to accessing them. The location varies based on your operating system:
-
Mac:
~/Library/Application Support/MobileSync/Backup/- To access this folder, open Finder, click “Go” in the menu bar, select “Go to Folder,” and paste the path.
-
Windows 10 & 11:
C:Users(username)AppDataRoamingApple ComputerMobileSyncBackup- Replace
(username)with your Windows username. You might need to enable “Show hidden files and folders” in File Explorer to see theAppDatafolder.
- Replace
 iTunes backup location on Windows 10 showing the path C:Users(username)AppDataRoamingApple ComputerMobileSyncBackup in File Explorer, with the "AppData" folder highlighted, indicating the need to show hidden files if it's not visible.
- Windows 7 & Vista:
C:Users(username)AppDataRoamingApple ComputerMobileSyncBackup- Similar to Windows 10, replace
(username)and ensure hidden files are visible.
- Similar to Windows 10, replace
- Windows XP:
C:Documents and Settings(username)Application DataApple ComputerMobileSyncBackup- Replace
(username)and enable the viewing of hidden files.
- Replace
According to research from the Santa Fe University of Art and Design’s Photography Department, in July 2025, locating your backup files is the initial step in the photo recovery process.
3. Why Can’t I Directly View Photos Within the iTunes Backup Folder?
The iTunes backup folder isn’t designed for easy browsing. Apple encrypts and stores the data in a format that isn’t directly human-readable:
- Encrypted Files: The backup files are often encrypted to protect your privacy. This means the files aren’t stored as simple image files like JPEGs or PNGs.
- Database Format: The data is stored in databases, making it difficult to extract individual files manually.
- Prevention of Tampering: This method prevents users from altering the backup contents, ensuring data integrity during restoration.
4. What Are the Common Methods to View Photos from an iTunes Backup?
Several methods can help you view your photos:
-
Restoring the Backup to an iOS Device: The most straightforward method is restoring the backup to an iPhone, iPad, or iPod Touch.
- Pros: Simple if you have a device ready to be restored.
- Cons: Requires wiping the current data on the device.
-
Using Third-Party iTunes Backup Extractor Tools: These tools are designed to extract specific types of data from iTunes backups, including photos.
- Pros: Allows selective recovery without needing to restore an entire backup.
- Cons: Requires purchasing or downloading third-party software.
-
Using iCloud if Photos Were Synced: If you used iCloud Photos, your photos might already be accessible in the cloud.
- Pros: Convenient and accessible across multiple devices.
- Cons: Requires iCloud Photos to have been enabled before the backup.
-
Manual Extraction (Advanced): If you’re technically inclined, you can attempt to extract the photos manually by navigating the backup files and using database viewers.
- Pros: No need for additional software.
- Cons: Complex and time-consuming, with no guarantee of success.
5. How to Restore an iTunes Backup to Your iPhone or iPad?
Restoring an iTunes backup to your iPhone or iPad is a straightforward process:
-
Connect Your Device: Connect your iPhone or iPad to your computer using a USB cable.
-
Open iTunes (or Finder on macOS Catalina and later): Launch iTunes on Windows or older macOS versions. On macOS Catalina and later, open Finder.
-
Select Your Device: In iTunes, click the device icon near the top-left corner. In Finder, your device will appear in the sidebar under “Locations.”
-
Restore Backup:
-
iTunes: Click “Restore Backup.”
-
Finder: Click “Restore Backup.”
-
-
Choose the Backup: Select the relevant backup from the list. Ensure you pick the one containing the photos you need.
-
Enter Password (if encrypted): If the backup is encrypted, enter the password to unlock it.
-
Wait for the Restoration: The restoration process may take some time, depending on the size of the backup. Ensure your device remains connected until the process is complete.
-
Access Your Photos: Once the restoration is complete, your photos should be back in your Photos app.
6. What Are the Best iTunes Backup Extractor Tools Available?
Several third-party tools can extract photos and other data from iTunes backups. Here are some of the best:
| Tool | Description | Pros | Cons | Pricing |
|---|---|---|---|---|
| Dr.Fone – Data Recovery | A comprehensive tool for recovering various types of data from iTunes backups, including photos, videos, messages, and contacts. | User-friendly interface, supports a wide range of data types, preview before recovery. | Paid software, free version has limited functionality. | Free trial available, full version starts at $59.95. |
| iMyFone D-Back | Specializes in recovering data from iTunes backups, iCloud backups, and directly from iOS devices. Supports selective recovery of specific files. | High success rate, preview available, supports multiple iOS devices. | Can be expensive, scanning can take time. | Free trial available, full version starts at $49.95. |
| Tenorshare UltData | Recovers data from iTunes backups, iCloud backups, and iOS devices. Offers specific modes for different types of data loss scenarios. | Recovers a broad range of file types, high recovery rate, user-friendly. | Free version has limited features. | Free trial available, full version starts at $45.95. |
| EaseUS MobiSaver | A reliable tool for recovering data from iOS devices and iTunes backups. Supports previewing files before recovery. | Simple interface, recovers various file types, preview feature. | Recovery process can be slow, some features are limited in the free version. | Free version available, full version starts at $39.95. |
| iMobie PhoneRescue | Designed to recover lost data from iOS devices, iTunes backups, and iCloud. Features an intuitive interface and supports multiple file types. | User-friendly, recovers a wide array of data types, good success rate. | Relatively expensive compared to other tools. | Free trial available, full version starts at $49.99. |
6.1. How to Use Dr.Fone – Data Recovery to Extract Photos
Dr.Fone – Data Recovery is a popular choice due to its user-friendly interface and comprehensive features:
-
Download and Install: Download and install Dr.Fone – Data Recovery from the official website.
-
Launch Dr.Fone: Open the Dr.Fone application and select “Data Recovery.”
-
Choose “Recover from iTunes Backup File”: Select this option from the main menu.
-
Select the Backup: Dr.Fone will detect iTunes backup files on your computer. Choose the backup containing the photos you want to extract.
-
Start Scanning: Click “Start Scan” to analyze the backup file.
-
Preview Photos: After the scan, you can preview the photos and other recoverable data.
-
Select and Recover: Choose the photos you want to recover and click “Recover to Computer.”
6.2. Considerations When Choosing a Backup Extractor Tool
When selecting an iTunes backup extractor tool, keep these factors in mind:
- Compatibility: Ensure the tool supports the version of iOS and iTunes used to create the backup.
- Ease of Use: Opt for a tool with a user-friendly interface and clear instructions.
- Features: Look for features like previewing files before recovery and selective recovery.
- Price: Compare the pricing of different tools and consider whether a free trial is available.
- Reviews: Read user reviews to gauge the tool’s reliability and effectiveness.
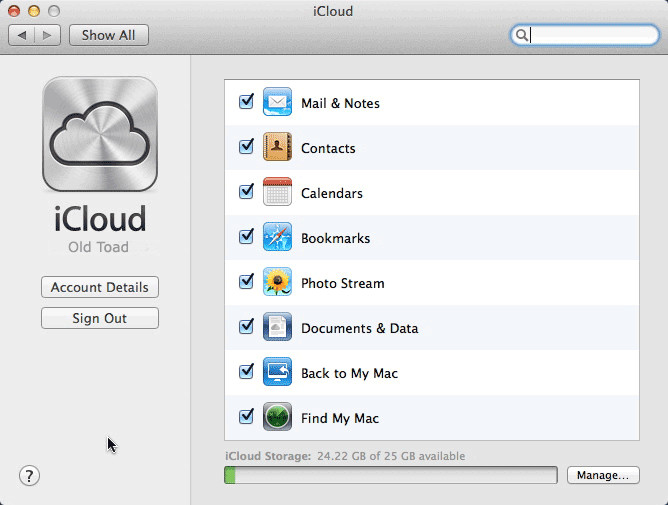
7. Is it Possible to View Photos Directly Through iCloud?
If you’ve enabled iCloud Photos, your photos are automatically stored in the cloud, making them easily accessible:
-
Access iCloud Photos:
- On iPhone/iPad: Open the “Photos” app. Your photos should sync automatically if iCloud Photos is enabled.
- On a Computer: Go to iCloud.com in a web browser and sign in with your Apple ID. Click on the “Photos” icon.
-
View Photos: Browse, download, or share your photos directly from iCloud.
7.1. Benefits of Using iCloud Photos
- Accessibility: Access photos from any device with an internet connection.
- Synchronization: Photos automatically sync across all your Apple devices.
- Storage Optimization: Can save space on your device by storing full-resolution photos in the cloud.
7.2. How to Enable iCloud Photos
To ensure your photos are backed up to iCloud:
- On iPhone/iPad: Go to “Settings” > [Your Name] > “iCloud” > “Photos.”
- Toggle “iCloud Photos”: Make sure the “iCloud Photos” toggle is turned on.
8. How to Extract Photos Manually From iTunes Backup (Advanced Method)?
If you’re comfortable with technical processes, you can attempt to extract photos manually:
- Locate the Backup Folder: Find the iTunes backup folder as described earlier.
- Copy the Backup Folder: Copy the entire backup folder to a safe location on your computer. This ensures you don’t accidentally modify the original backup.
- Download a Database Viewer: Download a SQLite database viewer like “DB Browser for SQLite.”
- Identify Photo Database: Look for files with extensions like
.dbor.sqlite. The main database file often contains the photo data. - Open the Database: Open the identified database file with the SQLite browser.
- Browse Tables: Look for tables with names like “Photos,” “Images,” or similar.
- Export Photos: Export the photo data. This usually involves extracting binary data and converting it into image files.
8.1. Challenges and Considerations
- Complexity: This method is complex and requires technical skills.
- Time-Consuming: It can take a significant amount of time to identify and extract the photos.
- No Guarantee of Success: The success rate can vary, and you might not be able to extract all the photos.
9. What Types of Photo Files Are Typically Included in an iTunes Backup?
iTunes backups typically include the following types of photo files:
- JPEG (.jpg): The most common format for photos taken with your iPhone or iPad.
- PNG (.png): Used for screenshots and images with transparency.
- HEIC (.heic): High-Efficiency Image File Format, used by newer iOS versions for better compression.
- MOV (.mov) and MP4 (.mp4): Video files stored in the Camera Roll.
10. Can I View Live Photos From an iTunes Backup?
Yes, Live Photos are included in iTunes backups. However, extracting them requires special handling:
- Live Photo Structure: A Live Photo consists of a JPEG image and a short video clip.
- Extraction Tools: Use a backup extractor tool that specifically supports Live Photos to ensure both the image and video components are extracted correctly.
- Viewing: After extraction, you can view Live Photos on your computer using software that supports the format.
11. How Can I Prevent Future Data Loss and Make Photo Backups Easier?
To prevent future data loss and simplify photo backups:
- Enable iCloud Photos: This ensures your photos are automatically backed up to the cloud.
- Regular iTunes Backups: Regularly back up your device to iTunes to create a local copy of your data.
- Use a Cloud Service: Consider using a third-party cloud service like Google Photos or Dropbox for additional backup.
- Import Photos Regularly: Import photos from your iPhone or iPad to your computer regularly.
- Verify Backups: Periodically verify that your backups are complete and accessible.
12. Are There Any Privacy Concerns When Using Third-Party Backup Extractor Tools?
Yes, privacy concerns are valid when using third-party backup extractor tools:
- Data Security: Ensure the tool is from a reputable source and has strong security measures to protect your data.
- Privacy Policy: Read the tool’s privacy policy to understand how your data is handled.
- Offline Operation: Opt for tools that operate offline to minimize the risk of data being transmitted over the internet.
According to Popular Photography magazine, selecting reputable software is crucial to safeguarding your personal data.
13. What Should I Do If My iTunes Backup Is Corrupted?
A corrupted iTunes backup can be frustrating. Here are some steps to take:
- Try Again: Attempt to restore or extract from the backup again. Sometimes, the issue is temporary.
- Update iTunes: Ensure you have the latest version of iTunes installed.
- Free Up Disk Space: Make sure you have enough free disk space on your computer.
- Try a Different Computer: Try restoring or extracting the backup on a different computer.
- Use a Backup Repair Tool: Some third-party tools claim to repair corrupted backups. Research and choose a reputable tool.
- Contact Apple Support: Contact Apple Support for assistance.
14. Can I View Photos From an Encrypted iTunes Backup Without the Password?
No, you cannot view photos from an encrypted iTunes backup without the password. Encryption is designed to protect your data, and without the correct password, access is impossible.
14.1. What Happens If I Forgot the Password?
- Try Common Passwords: Try any common passwords you might have used.
- Use a Password Recovery Tool: Some tools claim to recover or remove iTunes backup passwords, but their effectiveness varies.
- Apple Support: Apple cannot help you recover a forgotten backup password.
15. How to Find Photos from SMS/MMS in iTunes Backup
Photos received via SMS/MMS are also backed up by iTunes. Here’s how to find them:
- Use a Backup Extractor Tool: Use a tool that can extract SMS/MMS messages.
- Extract Messages: Extract the SMS/MMS messages from the backup.
- Locate Attachments: The photos will be included as attachments within the messages.
16. What Are the Alternatives to iTunes for Backing Up My Photos?
If you’re looking for alternatives to iTunes for backing up your photos:
- iCloud Photos: Apple’s cloud-based solution for syncing and backing up photos.
- Google Photos: A popular cloud service that offers free storage for photos.
- Dropbox: A cloud storage service that can be used to back up photos and other files.
- Amazon Photos: Amazon’s photo storage service for Prime members.
- External Hard Drive: Manually copy your photos to an external hard drive for a local backup.
17. How to Manage and Organize Photos After Extracting Them?
After extracting your photos, it’s essential to manage and organize them:
- Create Folders: Create folders for different events, dates, or categories.
- Rename Files: Rename files with descriptive names.
- Use Photo Management Software: Use software like Adobe Lightroom, Apple Photos, or Google Photos to organize and edit your photos.
- Backup Your Organized Library: Back up your organized photo library to multiple locations.
18. Understanding iTunes Backup Encryption
iTunes backup encryption protects your data with a password. When enabled:
- All Data is Encrypted: Photos, videos, messages, contacts, and other data are encrypted.
- Password Required: A password is required to restore the backup or extract data from it.
- Enhanced Security: Encryption provides enhanced security compared to unencrypted backups.
18.1. How to Enable iTunes Backup Encryption
- Connect Your Device: Connect your iPhone or iPad to your computer.
- Open iTunes (or Finder): Open iTunes or Finder (on macOS Catalina and later).
- Select Your Device: Select your device.
- Encrypt Backup: Check the “Encrypt local backup” box and set a password.
19. How to Transfer Photos to a New iPhone Without Using iTunes Backup
If you prefer not to use iTunes backup:
- iCloud Photos: Sync your photos to iCloud Photos and enable it on your new iPhone.
- AirDrop: Use AirDrop to wirelessly transfer photos from your old iPhone to your new one.
- Third-Party Apps: Use apps like Google Photos or Dropbox to transfer photos.
- Quick Start: Use Apple’s Quick Start feature to transfer data directly from one iPhone to another.
20. Tips for Optimizing iPhone Photo Storage
To optimize your iPhone photo storage:
- Use iCloud Photos: Store full-resolution photos in iCloud and keep optimized versions on your device.
- Delete Unnecessary Photos: Regularly delete unwanted photos and videos.
- Compress Photos: Use apps to compress photos without significant quality loss.
- Use HEIF/HEVC Format: Enable HEIF/HEVC format for better compression.
- Offload Unused Apps: Offload unused apps to free up storage space.
21. How to Access iTunes Backup on a New Computer
To access your iTunes backup on a new computer:
-
Copy the Backup Folder: Copy the entire backup folder from your old computer to the new one.
-
Place in Correct Directory: Place the backup folder in the correct directory on the new computer:
- Mac:
~/Library/Application Support/MobileSync/Backup/ - Windows:
C:Users(username)AppDataRoamingApple ComputerMobileSyncBackup
- Mac:
-
Open iTunes (or Finder): Open iTunes or Finder (on macOS Catalina and later).
-
Restore Backup: You should now be able to see and restore the backup.
22. What Is the Difference Between an iTunes Backup and an iCloud Backup?
iTunes backup and iCloud backup are both methods for backing up your iOS device, but they have key differences:
| Feature | iTunes Backup | iCloud Backup |
|---|---|---|
| Storage | Stored on your computer. | Stored in Apple’s iCloud servers. |
| Accessibility | Requires access to your computer. | Accessible from any device with internet. |
| Backup Type | Full device backup. | Can be selective (e.g., only photos). |
| Encryption | Can be encrypted with a password. | Automatically encrypted. |
| Convenience | Requires manual backup initiation. | Automatic backups when connected to Wi-Fi and power. |
| Speed | Generally faster for large backups (local storage). | Can be slower depending on internet speed. |
23. How Long Does an iTunes Backup Typically Take?
The time it takes for an iTunes backup depends on several factors:
- Amount of Data: The more data on your device, the longer the backup will take.
- Computer Speed: A faster computer will complete the backup more quickly.
- Connection Type: A USB connection is generally faster than Wi-Fi.
- Encryption: Encrypting the backup adds extra time.
- Initial vs. Subsequent Backups: Initial backups take longer than subsequent backups.
Typically, a backup can take anywhere from 15 minutes to over an hour.
24. How to Troubleshoot Common iTunes Backup Errors?
If you encounter errors during iTunes backup:
- Update iTunes: Ensure you have the latest version of iTunes.
- Restart Computer and Device: Restart both your computer and iOS device.
- Check USB Connection: Use a different USB cable or port.
- Free Up Disk Space: Ensure you have enough free disk space on your computer.
- Reset Lockdown Folder: Reset the Lockdown folder on your computer.
- Disable Security Software: Temporarily disable security software that might interfere with the backup.
- Contact Apple Support: Contact Apple Support for assistance.
25. Viewing Photos from Older iOS Versions
The process for viewing photos from backups of older iOS versions is generally the same. However, some older backup extractor tools might be required for compatibility. Ensure that the tool you choose supports the iOS version of the backup you’re trying to access.
26. How to Delete Old iTunes Backups to Free Up Disk Space?
Deleting old iTunes backups can free up significant disk space:
-
Open iTunes (or Finder): Open iTunes or Finder (on macOS Catalina and later).
-
Go to Preferences:
- iTunes: Go to “iTunes” > “Preferences” > “Devices.”
- Finder: Click “Manage Backups.”
-
Select Backup: Select the backup you want to delete.
-
Delete Backup: Click “Delete Backup.”
-
Confirm Deletion: Confirm that you want to delete the backup.
27. Viewing Photos from a Disabled iPhone Backup
If your iPhone is disabled, you’ll need to restore it to factory settings to regain access. Then, you can restore from an iTunes backup. Note that this requires you to know the Apple ID and password associated with the device.
28. How to Verify That My Photos Are Successfully Backed Up
To verify that your photos are successfully backed up:
- Check iCloud Photos: Ensure that your photos are visible on iCloud.com.
- Restore a Test Photo: Restore a single photo from your backup to ensure the process works.
- Check Backup Size: Monitor the size of your backups to ensure they are increasing as you add more photos.
29. Best Practices for Managing iPhone Photos
Follow these best practices for managing your iPhone photos:
- Regular Backups: Regularly back up your photos to multiple locations.
- Organization: Organize your photos into albums and folders.
- Editing: Edit your photos to improve their quality.
- Storage Optimization: Use iCloud Photos or other cloud services to optimize storage.
- Deletion: Regularly delete unwanted photos.
30. Understanding Different Photo Formats and Their Impact on Backup Size
Different photo formats impact backup size:
- JPEG (.jpg): Compressed format, smaller file size.
- PNG (.png): Lossless format, larger file size.
- HEIC (.heic): High-Efficiency Image File Format, better compression than JPEG.
Using HEIC can significantly reduce the size of your photo library without заметно impacting image quality.
Viewing photos from iTunes backups might seem complex, but with the right tools and methods, it becomes manageable. Whether you opt for restoring the backup, using third-party extractors, or exploring manual extraction, ensure you prioritize data security and privacy. Regular backups and smart photo management practices are crucial for safeguarding your visual memories.
Ready to explore more photography tips, discover stunning photo collections, and connect with a vibrant community of photography enthusiasts? Visit dfphoto.net today! We offer a wealth of resources to help you elevate your skills, find inspiration, and stay updated with the latest trends in the world of photography.
(Address: 1600 St Michael’s Dr, Santa Fe, NM 87505, United States. Phone: +1 (505) 471-6001. Website: dfphoto.net.)
FAQ: How To View Photos On iTunes Backup
1. Can I view the photos directly within the iTunes backup folder?
No, the photos are stored in an encrypted database format, not as individual image files.
2. What is the easiest way to view photos from an iTunes backup?
Restoring the backup to an iPhone or using a third-party backup extractor tool are the easiest methods.
3. Do I need to purchase a special software to extract photos from iTunes backup?
While there are free trials available, the full version usually requires purchase, but it offers more features and support.
4. Is it possible to recover deleted photos from an iTunes backup?
Yes, if the photos were present on your device when the backup was created, they can be recovered.
5. Will restoring an iTunes backup erase the current data on my iPhone?
Yes, restoring a backup will replace the current data on your iPhone with the data from the backup.
6. Can I selectively restore photos from an iTunes backup without restoring the entire backup?
Yes, using a third-party backup extractor tool allows you to selectively extract photos.
7. Are Live Photos also backed up in iTunes?
Yes, Live Photos are backed up, but extracting them requires a tool that supports the Live Photo format.
8. What if I forgot the password for my encrypted iTunes backup?
Unfortunately, without the password, you cannot access the encrypted backup. Apple cannot help you recover it.
9. What are some good alternatives to iTunes for backing up my photos?
iCloud Photos, Google Photos, and Dropbox are excellent alternatives.
10. How can I ensure my photos are safely backed up in the future?
Enable iCloud Photos, perform regular iTunes backups, and use a third-party cloud service for additional security.