Are you eager to discover the magic of transferring photos onto various surfaces with a unique vintage touch? How To Use Photo Transfer Mod Podge, and dfphoto.net offers a detailed guide to mastering this creative technique, including essential tips and tricks. Unleash your artistic potential and transform ordinary objects into personalized masterpieces.
1. What Is Photo Transfer Mod Podge, And Why Should I Use It?
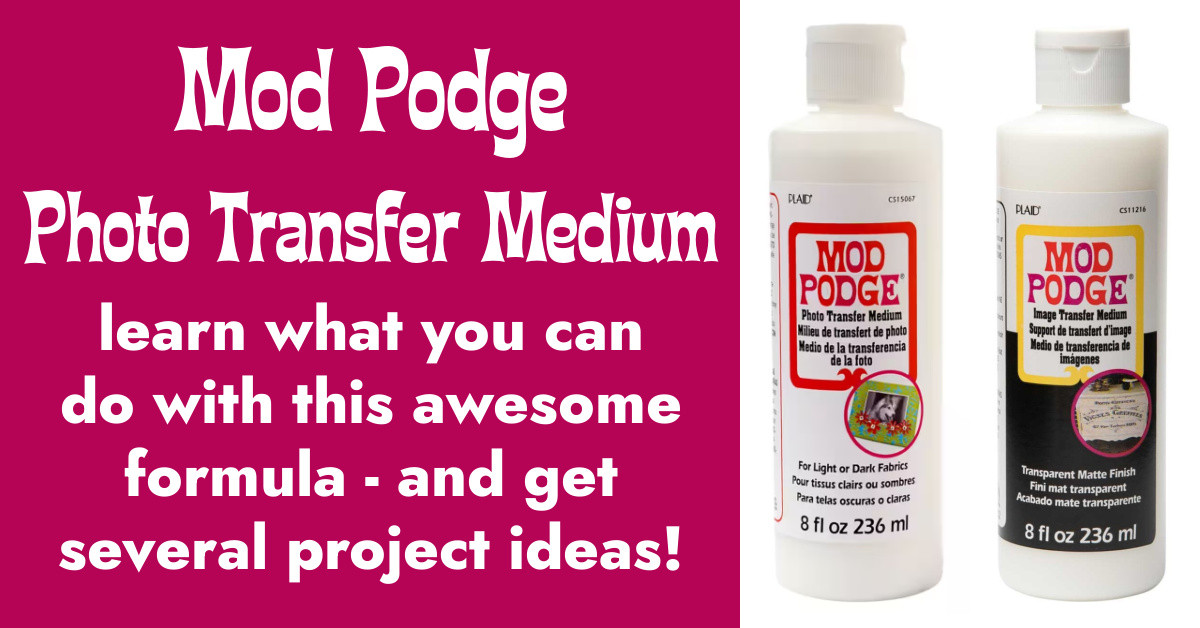
Photo transfer Mod Podge is specifically formulated for transferring images, creating an opaque, white background, unlike regular Mod Podge. This specialized formula allows you to transfer photos onto dark-colored items, expanding your crafting possibilities. Instead of merely adhering an image, photo transfer Mod Podge creates a unique, vintage-style effect, which is appealing for home décor and personalized gifts.
Photo transfer Mod Podge distinguishes itself from regular Mod Podge with its unique formulation designed explicitly for image transfers. The key benefits include:
- Opaque Background: Unlike regular Mod Podge, which dries clear, photo transfer Mod Podge leaves an opaque white background, making it suitable for use on dark-colored surfaces.
- Specialized Adhesion: It ensures optimal adhesion for transferring images from a printed source to a variety of surfaces.
- Vintage Aesthetic: Photo transfer Mod Podge imparts a distinct vintage look to the transferred image, enhancing its visual appeal.
2. What Kind Of Printer Should I Use For Photo Transfer Mod Podge?
Use a dry toner printer, preferably a laserjet printer, to print your image for the best results, but avoid using actual photographs. According to the Santa Fe University of Art and Design’s Photography Department, using dry toner printers like laserjet ensures optimal transfer quality due to the ink’s composition and adherence properties. Inkjet printers might work, but it depends on the ink’s dryness.
 Dry Toner Printer
Expert Tip: Reverse the image on your computer before printing if it contains words to ensure they appear correctly after the transfer.
| Printer Type | Suitability | Notes |
|---|---|---|
| Laserjet | Highly Suitable | Consistently delivers excellent results due to its dry toner. |
| Inkjet | Potentially Okay | Success varies depending on the ink’s dryness. Testing is recommended. |
| Dry Toner Printers | Highly Suitable | Including both inkjet and laserjet. |
| Real Photographs | Not Suitable | Because they will not transfer effectively. You can use a printed image of the photograph. |
| HP Printers | Suitable | Some HP printers work effectively due to their dry ink. |
| Other Printers | Test Recommended | With 10,000 different printers out there, doing a small test will help you. |
3. How Do I Apply The Photo Transfer Mod Podge Correctly?
To use enough medium, place the cut-to-size image face up on a Mod Podge silicone mat and apply the transfer medium over the photo using a foam brush until the image is completely obscured. Pick up a corner with tweezers or a fingernail, flip it, and place it onto the surface.
Use a Mod Podge brayer to roll out the image. Wipe away any excess medium that comes out the sides to prevent it from drying and sticking. Let the photo transfer dry for 24 hours.
| Step | Description |
|---|---|
| 1. Cut Image to Size | Trim the image to the desired dimensions for your project. |
| 2. Place Image Face Up | Position the image face up on a Mod Podge silicone mat to protect your work surface. |
| 3. Apply Mod Podge | Use a foam brush to apply a generous layer of photo transfer Mod Podge, ensuring the image is completely obscured. |
| 4. Flip and Place | Carefully pick up the corner of the image, flip it over, and place it onto the prepared surface where you want the transfer. |
| 5. Roll Out Image | Use a Mod Podge brayer to roll over the image, ensuring even contact and adhesion to the surface. |
| 6. Wipe Excess | Immediately wipe away any excess Mod Podge that squeezes out from the sides to prevent unwanted sticking and drying. |
| 7. Dry for 24 Hours | Allow the photo transfer to dry undisturbed for a full 24 hours to ensure proper bonding and readiness for the next steps. |
4. What Is The Best Way To Rub Off The Paper After Applying Photo Transfer Mod Podge?
Rubbing off the paper requires patience and care; wet the item and gently rub off the paper backing to reveal the image below. Start lightly and let it dry to assess your progress.
If the image isn’t clear, repeat the wetting and rubbing process. With experience, you’ll learn how much pressure to apply without damaging the image. Rubbing too hard can remove the image, so apply medium pressure, let it dry, and repeat if needed.
| Step | Description |
|---|---|
| 1. Wet the Item | Dampen the transferred image with a wet sponge or cloth. |
| 2. Start Lightly | Gently begin rubbing the paper backing with your fingers or a soft cloth. |
| 3. Let Dry to Assess | Allow the area to dry completely to see the quality of the transfer. |
| 4. Repeat if Necessary | If the image isn’t clear enough, re-wet and continue rubbing gently. |
| 5. Apply Medium Pressure | With experience, you’ll find the right balance of pressure to remove the paper without damaging the image. |
| 6. Avoid Rubbing Too Hard | Applying too much pressure can rub away the transferred image. |
| 7. Aim for Gradual Process | It’s better to rub in stages, letting it dry between each, rather than trying to remove all the paper at once. |
5. Can I Achieve A Specific Style With Photo Transfer Mod Podge?
Yes, expect a vintage-style image as an advantage over simply Mod Podging an image down. The item is now washable (if it’s fabric), but the vintage look is unique and appealing. Photo transfers produce a less sharp version of a real photograph, offering a unique aesthetic.
According to Popular Photography magazine, the vintage aesthetic achieved with photo transfer Mod Podge adds character and charm to DIY projects.
| Aspect | Advantage |
|---|---|
| Style | Photo transfer Mod Podge gives images a vintage look, adding character to projects. |
| Washability | When applied to fabric, photo transfer Mod Podge makes the item hand washable. |
| Image Quality | The resulting image is less sharp, providing a unique aesthetic distinct from standard photographs. |
| Home Décor | Ideal for creating personalized and artistic home décor items with a nostalgic feel. |
6. What Surfaces Work Best For Photo Transfer Mod Podge?
Photo Transfer Mod Podge works well on various surfaces, but some surfaces yield better results than others.
- Wood: Wood is one of the most popular surfaces for photo transfers. Its natural texture complements the vintage look achieved with Mod Podge photo transfer medium.
- Fabric: Fabric surfaces, such as canvas bags, t-shirts, and denim jackets, are great for adding personalized touches with photo transfers. Keep in mind that items transferred onto fabric should be hand-washed only.
- Glass: Glass surfaces like mason jars, vases, and picture frames can be transformed with photo transfers. The transparency of glass can create interesting effects with the transferred image.
- Metal: Metal surfaces, such as tin cans, metal signs, and jewelry blanks, offer a smooth base for photo transfers. The contrast between the metal and the transferred image can be visually striking.
- Ceramics: Ceramic surfaces like tiles, plates, and mugs can be customized with photo transfers. Ensure the ceramic surface is clean and smooth for best results.
| Surface | Advantages | Considerations |
|---|---|---|
| Wood | Excellent texture, vintage look | Ensure the wood is smooth and sealed. |
| Fabric | Great for personalization | Hand wash only. |
| Glass | Transparency enhances image | Clean the surface thoroughly. |
| Metal | Smooth base, striking contrast | Use appropriate preparation for metal surfaces. |
| Ceramics | Customizable, unique items | Ensure the surface is clean and smooth. |
7. What Common Mistakes Should I Avoid When Using Photo Transfer Mod Podge?
Several common mistakes can hinder the success of your photo transfer projects. Avoiding these pitfalls can help you achieve better results.
- Using the Wrong Type of Printer: Ensure you use a dry toner printer, such as a laserjet, as inkjet printers may produce inconsistent results.
- Not Reversing Images with Text: For images with text, remember to reverse the image before printing to ensure the text appears correctly after the transfer.
- Applying Too Little or Too Much Medium: Applying too little medium may result in incomplete transfers, while applying too much can cause the image to smudge or blur.
- Rushing the Drying Process: Allow the photo transfer to dry completely for 24 hours before rubbing off the paper. Rushing the drying process can lead to peeling or damage to the transferred image.
- Rubbing Too Aggressively: When removing the paper backing, rub gently to avoid rubbing away the transferred image. Use a soft cloth or your fingertips and apply medium pressure.
- Ignoring Surface Preparation: Ensure the surface is clean, smooth, and properly prepared before applying the photo transfer.
| Mistake | Solution |
|---|---|
| Wrong Printer Type | Use a dry toner printer like laserjet. |
| Not Reversing Text | Reverse images with text before printing. |
| Incorrect Medium Application | Apply enough, but not too much, medium. |
| Rushing Drying | Allow 24 hours for complete drying. |
| Rubbing Too Hard | Rub gently to avoid damaging the image. |
| Ignoring Surface Preparation | Ensure the surface is clean and smooth. |
8. How Can I Protect My Photo Transfer Project?
Protecting your photo transfer project ensures its longevity and preserves its appearance. Several methods can safeguard your transferred image from damage.
- Sealing with Mod Podge: Apply a layer of regular Mod Podge over the transferred image to seal and protect it from moisture, UV rays, and scratches. Choose a Mod Podge formula suitable for your project, such as Gloss, Matte, or Satin.
- Using Varnish or Sealant: Apply a varnish or sealant specifically designed for protecting artwork. These products provide a durable, clear coat that shields the transferred image from wear and tear.
- Framing: If your photo transfer is on a flat surface like wood or canvas, consider framing it behind glass or acrylic to protect it from dust, dirt, and physical damage.
- Avoiding Harsh Chemicals: When cleaning your photo transfer project, avoid using harsh chemicals or abrasive cleaners that can damage the transferred image. Use a soft, damp cloth and mild soap to gently wipe the surface.
- Storing Properly: Store your photo transfer project in a cool, dry place away from direct sunlight to prevent fading or discoloration.
| Protection Method | Description |
|---|---|
| Sealing with Mod Podge | Applying a layer of regular Mod Podge protects against moisture, UV rays, and scratches. |
| Varnish or Sealant | Using a varnish or sealant designed for artwork provides a durable, clear coat. |
| Framing | Framing behind glass or acrylic protects from dust, dirt, and physical damage. |
| Avoiding Harsh Chemicals | Cleaning with a soft, damp cloth and mild soap prevents damage to the image. |
| Proper Storage | Storing in a cool, dry place away from sunlight prevents fading or discoloration. |
9. Can I Use Photo Transfer Mod Podge On Fabric?
Yes, you can use Photo Transfer Mod Podge on fabric, but there are specific considerations to keep in mind to ensure the best results.
- Fabric Preparation: Pre-wash the fabric to remove any sizing or finishes that may interfere with the adhesion of the Mod Podge. Iron the fabric to create a smooth surface for the transfer.
- Application: Apply a thin, even layer of Photo Transfer Mod Podge to the fabric, ensuring complete coverage of the image area.
- Drying Time: Allow the Mod Podge to dry completely for at least 24 hours before proceeding with the next steps.
- Sealing: Seal the transferred image with a layer of regular Mod Podge formulated for fabric. This will help protect the image and make it more durable.
- Washing Instructions: Hand wash the fabric item in cold water with a mild detergent. Avoid using harsh chemicals or bleach. Do not put the item in the dryer; instead, allow it to air dry.
| Aspect | Consideration |
|---|---|
| Fabric Preparation | Pre-wash and iron the fabric to ensure a smooth, clean surface. |
| Application | Apply a thin, even layer of Photo Transfer Mod Podge, covering the entire image area. |
| Drying Time | Allow at least 24 hours for the Mod Podge to dry completely. |
| Sealing | Seal the transferred image with a layer of regular Mod Podge formulated for fabric. |
| Washing | Hand wash in cold water with mild detergent. Avoid harsh chemicals and do not tumble dry. |
10. How Do I Troubleshoot Common Issues With Photo Transfer Mod Podge?
Even with careful application, issues can arise during the photo transfer process. Troubleshooting common problems can help you achieve a successful outcome.
- Image Not Transferring Completely: If the image does not transfer completely, ensure you are using a dry toner printer and that you have applied enough Mod Podge to the image area.
- Image Smudging or Blurring: If the image smudges or blurs during the transfer process, you may be applying too much Mod Podge or rubbing too aggressively. Use a lighter touch when rubbing off the paper backing.
- Paper Not Rubbing Off Easily: If the paper does not rub off easily, try wetting it more thoroughly and allowing it to soak for a few minutes before rubbing.
- Bubbles or Wrinkles: Prevent bubbles or wrinkles by ensuring the surface is smooth and applying the Mod Podge evenly. Use a brayer to smooth out any imperfections.
- Yellowing of the Image: Yellowing can occur if the Mod Podge is exposed to direct sunlight or high temperatures. Store your finished project in a cool, dry place away from direct sunlight.
| Issue | Solution |
|---|---|
| Incomplete Transfer | Ensure a dry toner printer, apply enough Mod Podge. |
| Smudging or Blurring | Apply less Mod Podge, rub more gently. |
| Paper Not Rubbing Off Easily | Wet the paper thoroughly, allow to soak. |
| Bubbles or Wrinkles | Ensure surface is smooth, apply Mod Podge evenly, use a brayer. |
| Yellowing | Store in a cool, dry place away from direct sunlight. |
11. What Are Some Creative Project Ideas Using Photo Transfer Mod Podge?
Photo Transfer Mod Podge opens up a world of creative possibilities. Here are some inspiring project ideas to get you started.
- Personalized Home Decor: Create custom wall art by transferring family photos onto wood panels or canvas.
- Custom Apparel: Design unique t-shirts, tote bags, or denim jackets by transferring images onto fabric.
- Photo Coasters: Make personalized coasters by transferring photos onto ceramic tiles or corkboard.
- Memory Boxes: Decorate memory boxes by transferring photos and mementos onto the surface.
- Personalized Gifts: Create heartfelt gifts by transferring photos onto mugs, picture frames, or decorative plaques.
- Holiday Ornaments: Design custom holiday ornaments by transferring photos onto wooden or glass ornaments.
| Project Idea | Description |
|---|---|
| Home Decor | Create custom wall art, decorative trays, and personalized furniture. |
| Custom Apparel | Design unique t-shirts, tote bags, and denim jackets with custom photo transfers. |
| Photo Coasters | Make personalized coasters by transferring photos onto ceramic tiles, corkboard, or wood. |
| Memory Boxes | Decorate memory boxes with photos and mementos to create a cherished keepsake. |
| Personalized Gifts | Create heartfelt gifts such as mugs, picture frames, and decorative plaques with custom photo transfers. |
| Holiday Ornaments | Design custom holiday ornaments with family photos, festive images, or personalized designs. |
12. Where Can I Find Inspiration and Tutorials for Photo Transfer Mod Podge Projects?
Finding inspiration and tutorials for Photo Transfer Mod Podge projects is easy with the wealth of resources available online and in craft communities.
- Online Craft Blogs: Explore craft blogs like Mod Podge Rocks, which offer step-by-step tutorials, project ideas, and tips for using Photo Transfer Mod Podge.
- Social Media Platforms: Follow crafting accounts on platforms like Pinterest, Instagram, and Facebook for daily inspiration and project ideas.
- YouTube Tutorials: Watch video tutorials on YouTube to learn various techniques and see projects in action. Channels like “Plaid Crafts” offer comprehensive guides.
- Craft Websites: Websites like “Etsy” and “Instructables” host a variety of user-generated tutorials and project ideas for Photo Transfer Mod Podge.
- Local Craft Stores: Visit local craft stores like “Michael’s” or “Hobby Lobby” for in-store workshops and demonstrations.
| Resource | Description |
|---|---|
| Craft Blogs | Step-by-step tutorials, project ideas, and tips. |
| Social Media | Daily inspiration and project ideas on Pinterest, Instagram, and Facebook. |
| YouTube Tutorials | Video tutorials demonstrating techniques and projects in action. |
| Craft Websites | User-generated tutorials and project ideas on Etsy and Instructables. |
| Local Craft Stores | In-store workshops and demonstrations. |
13. What Are the Best Brands of Photo Transfer Mod Podge and Where Can I Buy Them?
While “Mod Podge Photo Transfer Medium” is a well-known and widely used product, other brands offer similar photo transfer mediums that may suit different preferences and project requirements.
- Plaid Crafts: Known for its high-quality crafting products, Plaid Crafts offers a variety of Mod Podge formulas, including the Photo Transfer Medium. Plaid Crafts products are available at major craft stores, online retailers, and directly from the Plaid Crafts website.
- DecoArt: DecoArt offers a range of crafting and painting products, including Americana Decou-Page, which can be used for photo transfer projects. DecoArt products are available at craft stores, online retailers, and through the DecoArt website.
- Aleene’s: Aleene’s is known for its reliable adhesives and crafting supplies. While they may not have a specific “photo transfer” medium, their Original Tacky Glue can be used for some photo transfer techniques. Aleene’s products are available at craft stores and online retailers.
- ArtResin: While primarily known for epoxy resin, ArtResin can be used to create stunning photo transfer projects with a glossy, durable finish. ArtResin products are available online and through select art supply stores.
| Brand | Product | Availability |
|---|---|---|
| Plaid Crafts | Mod Podge Photo Transfer Medium | Major craft stores, online retailers, Plaid Crafts website |
| DecoArt | Americana Decou-Page | Craft stores, online retailers, DecoArt website |
| Aleene’s | Original Tacky Glue | Craft stores, online retailers |
| ArtResin | ArtResin (epoxy resin) | Online, select art supply stores |
14. How Does Photo Transfer Mod Podge Compare to Other Photo Transfer Techniques?
Photo Transfer Mod Podge is one of several methods available for transferring images onto various surfaces. Each technique has its advantages and disadvantages, making them suitable for different projects and preferences.
- Citrus Solvent Transfer: Involves using a citrus-based solvent (such as orange cleaner) to transfer images from laser-printed paper onto surfaces like wood or fabric. This method is known for producing vintage-looking transfers with a slightly distressed aesthetic.
- Acetone Transfer: Uses acetone to transfer images from laser-printed paper onto surfaces like metal or glass. This technique is popular for creating crisp, clean transfers with vibrant colors.
- Iron-On Transfer Paper: Involves printing images onto special iron-on transfer paper and then using an iron to transfer the image onto fabric.
- Gel Medium Transfer: Involves applying a thick layer of gel medium (such as acrylic gel medium) to an image printed on regular paper, then pressing the image onto the desired surface. Once dry, the paper is rubbed away to reveal the transferred image.
- Direct Printing: Some specialized printers can print directly onto various surfaces like wood, metal, or fabric. This method eliminates the need for transfer mediums or papers, resulting in a durable, high-quality image.
| Technique | Advantages | Disadvantages |
|---|---|---|
| Photo Transfer Mod Podge | Easy to use, suitable for various surfaces, creates vintage look | Can be less durable than other methods, may require practice |
| Citrus Solvent Transfer | Produces vintage look, easy to find materials | Requires laser-printed images, can be messy |
| Acetone Transfer | Creates crisp, clean transfers, vibrant colors | Requires laser-printed images, acetone can be harsh |
| Iron-On Transfer Paper | Easy to use for fabric projects, no special equipment needed | Limited to fabric surfaces, image may not be as durable |
| Gel Medium Transfer | Versatile, can be used on various surfaces | Requires patience, can be messy |
| Direct Printing | Durable, high-quality images, no transfer mediums needed | Requires specialized equipment, limited to certain surfaces |
15. What Safety Precautions Should I Take When Using Photo Transfer Mod Podge?
While Photo Transfer Mod Podge is generally safe to use, it’s essential to take certain safety precautions to protect yourself and ensure a pleasant crafting experience.
- Ventilation: Work in a well-ventilated area to avoid inhaling fumes from the Mod Podge. Open windows or use a fan to circulate air.
- Skin Protection: Wear gloves to protect your skin from direct contact with the Mod Podge. This can prevent irritation or allergic reactions.
- Eye Protection: Wear safety glasses or goggles to protect your eyes from splashes or accidental contact with the Mod Podge.
- Keep Away from Children: Keep Photo Transfer Mod Podge and related supplies out of reach of children to prevent accidental ingestion or misuse.
- Read and Follow Instructions: Always read and follow the manufacturer’s instructions and safety guidelines provided on the product label.
| Precaution | Description |
|---|---|
| Ventilation | Work in a well-ventilated area to avoid inhaling fumes. |
| Skin Protection | Wear gloves to protect your skin from direct contact. |
| Eye Protection | Wear safety glasses or goggles to protect your eyes from splashes. |
| Keep Away from Children | Keep Photo Transfer Mod Podge and supplies out of reach of children. |
| Follow Instructions | Read and follow the manufacturer’s instructions and safety guidelines. |
Ready to explore more photography tips and techniques? Visit dfphoto.net for tutorials, inspiration, and a thriving community of photographers.
FAQ Section
- Can I use any type of Mod Podge for photo transfer? No, you must use “Mod Podge Photo Transfer Medium” for transferring images. Regular Mod Podge will not produce the same results.
- Do I need to seal the transferred image after rubbing off the paper? Sealing the transferred image with a layer of regular Mod Podge is recommended to protect it from moisture, UV rays, and scratches.
- Can I use a regular iron for iron-on photo transfers? Yes, a regular iron can be used for iron-on photo transfers. Follow the instructions provided with the iron-on transfer paper for best results.
- How long does it take for Photo Transfer Mod Podge to dry? Allow the Photo Transfer Mod Podge to dry completely for at least 24 hours before rubbing off the paper.
- Can I use Photo Transfer Mod Podge on dark-colored surfaces? Yes, Photo Transfer Mod Podge is suitable for use on dark-colored surfaces because it creates an opaque white background.
- What type of paper works best for Photo Transfer Mod Podge? Use regular printer paper for best results. Avoid using glossy or photo paper, as the image may not transfer properly.
- How do I prevent bubbles or wrinkles when applying Mod Podge? Ensure the surface is smooth and apply the Mod Podge evenly. Use a brayer to smooth out any imperfections.
- Can I wash fabric items with Photo Transfer Mod Podge on them? Hand wash the fabric item in cold water with a mild detergent. Avoid using harsh chemicals or bleach. Do not put the item in the dryer; instead, allow it to air dry.
- What should I do if the paper doesn’t rub off easily during the transfer process? Try wetting the paper more thoroughly and allowing it to soak for a few minutes before rubbing.
- How do I store Photo Transfer Mod Podge? Store Photo Transfer Mod Podge in a cool, dry place away from direct sunlight to prevent it from drying out or becoming discolored.
Call to Action
Ready to dive deeper into the world of photography? Explore dfphoto.net for comprehensive tutorials, inspiring galleries, and a vibrant community of fellow photography enthusiasts. Don’t miss out on the opportunity to enhance your skills and connect with like-minded individuals. Visit dfphoto.net today and start your journey towards photographic excellence!