Once upon a time, achieving high-quality enlarged photos required professional equipment. High-end digital cameras or lab scanners were essential to capture or process images suitable for large prints. However, with today’s advanced smartphone cameras boasting lenses exceeding 10 megapixels, virtually any photo you take has the potential to become a stunning Large Format Print. For instance, the iPhone 11 features a 12-megapixel lens, illustrating the capability now in our pockets.
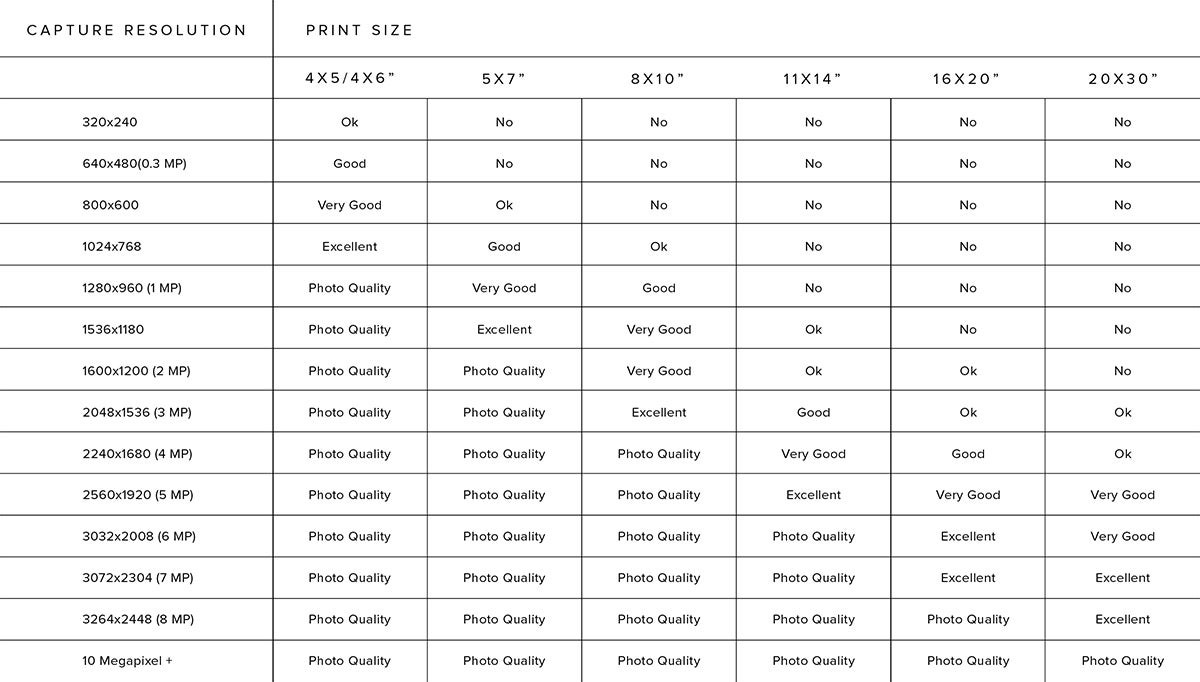 Chart showing optimized print size for various resolutions
Understanding how large you can realistically upsize your photo while maintaining acceptable quality is key. This primarily depends on dots per inch (DPI), which refers to the density of dots printed per inch of your image. A higher DPI translates to a sharper, clearer image, while a lower DPI results in a grainier, lower-quality print. We will guide you through determining your photo’s DPI shortly.
Understanding DPI for Upsized Photos: What’s Optimal?
For producing photo prints of the highest caliber, a DPI of 300 is generally recommended. This standard is often associated with “giclée” prints, known for their exceptional detail and quality. However, most images will still appear visually pleasing and avoid noticeable pixelation at a DPI of 150 or higher. A simple rule of thumb is: avoid enlarging photos to more than double their maximum printable size at full quality. Attempting to go below 150 DPI will typically trigger a low-resolution warning in most photo editing software, signaling potential quality issues.
It’s also important to recognize that images originating from sources like your phone, Facebook, or Instagram are often web-optimized at 72 DPI. This is true regardless of your smartphone camera’s megapixel count. Fortunately, adjusting DPI is a straightforward process, as we’ll outline below.
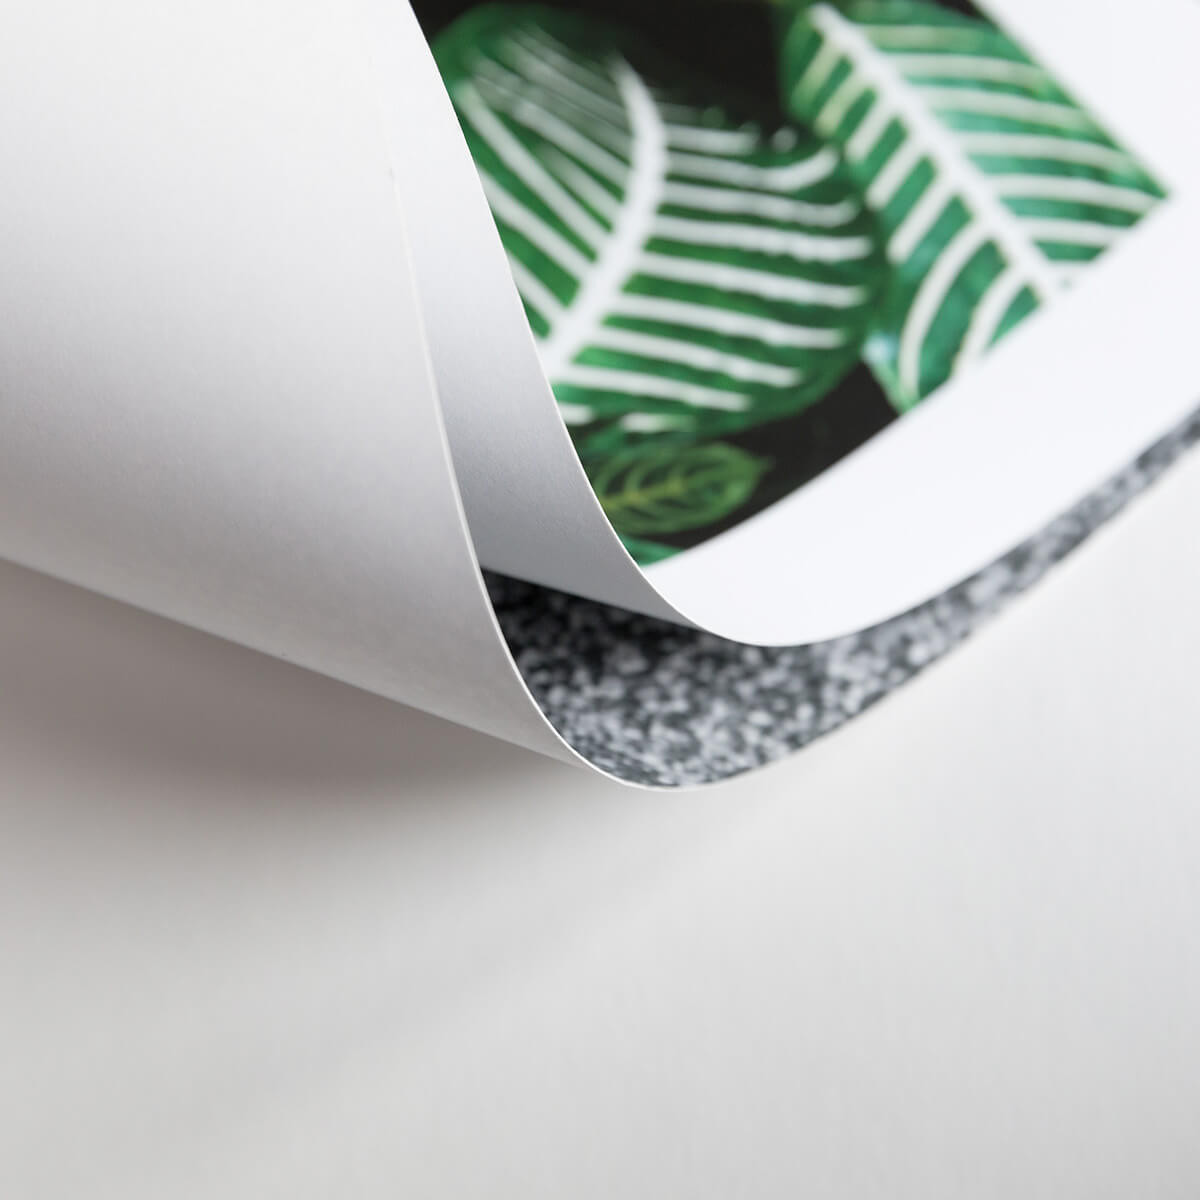 Zoomed in detail of large format prints showcasing paper texture and print quality
Step-by-Step Guide: How to Upsize Digital Photos for Printing
You can effectively upsize your photos and adjust their DPI using the built-in photo editing tools available on your computer. These native tools are often sufficient to prepare your images for printing. For users with access to more advanced software like Photoshop, we will explore additional techniques later in this guide. Adjusting the DPI will also help you determine the largest print size possible while preserving your photo’s original quality.
- Open your image: Locate the photo file on your computer and double-click to open it in the default preview application. To open multiple images simultaneously, select them all, right-click, and choose “open.”
- Access Adjust Size tool: In the menu bar of the preview application, find and click on “Tools.”
- Select “Adjust Size”: From the “Tools” dropdown menu, select “Adjust Size.” This action will display adjustable fields for Width, Height, and Resolution.
- Choose units: Set the units for Width and Height to “inches” and the Resolution to “pixels/inch.” For our purposes, “pixels/inch” is interchangeable with DPI.
- Set Resolution and Uncheck “Resample”: Crucially, uncheck the “Resample Image” checkbox. Then, set your Resolution to 300 pixels/inch. With “Resample Image” unchecked, the Width and Height dimensions will automatically adjust to reflect the maximum size at 300 DPI while maintaining the original pixel data.
- Resize and Save: Once you have reviewed the automatically adjusted dimensions and confirmed they are suitable for your desired upsize, click “okay” and save the file. Don’t worry about precise aspect ratios at this stage; you can easily crop the image within the printing editor later.
After determining your maximum printable Width and Height at 300 DPI, you can experiment with slightly larger sizes to find a balance between size and acceptable quality. Ultimately, the decision of prioritizing size or absolute quality depends on your personal preference for the specific photo.
A Smart Trick for Greater Enlargement
If you are determined to upsize a digital image beyond its initial resolution limits for a larger print, consider this effective technique: print the image at its maximum recommended size at 300 DPI, and then scan this print using a high-resolution scanner. While it may seem counterintuitive, scanning a print allows you to capture it at a higher resolution than the original digital file might have allowed for at a larger size. The scanner’s high DPI capability enables you to effectively enlarge the image up to four times its printed size while retaining good quality. The next section explains this process in more detail.
Upsizing Old Photos Without Losing Quality: Scanning to the Rescue
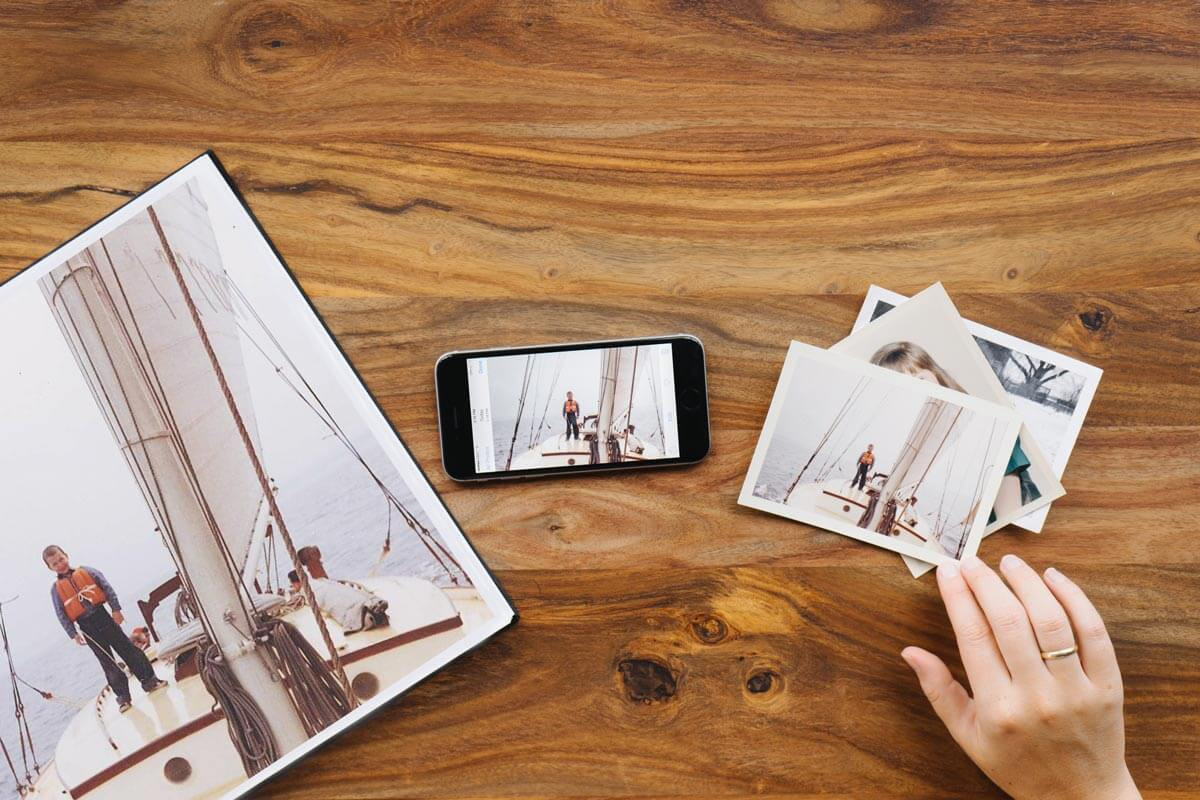 Old photos on table next to enlarged version showing the comparison of original and upsized scanned print
Scanning old photos introduces a unique set of considerations when it comes to upsizing. Similar to digital photos, the key factor in enlarging printed photos is DPI, but in this context, it’s the DPI of your scanner that becomes paramount. Many consumer-grade home scanners are capable of capturing images at resolutions up to 1200 DPI. This is four times the resolution typically needed for high-quality prints! This impressive capability means you can scan a physical photo print and reprint it at up to four times larger than its original size, all while preserving the visual quality captured in the scanned image.
Begin by adjusting your scanner settings to increase the resolution. Scanners are often not set to their maximum 1200 DPI by default. Once you have scanned the photo, you will then need to adjust the resolution of the resulting digital file. You can achieve this by following the same steps outlined earlier for digital photos, using your computer’s preview tools or photo editing software.
Setting Your Photos Up for Upsizing Success: Best Practices
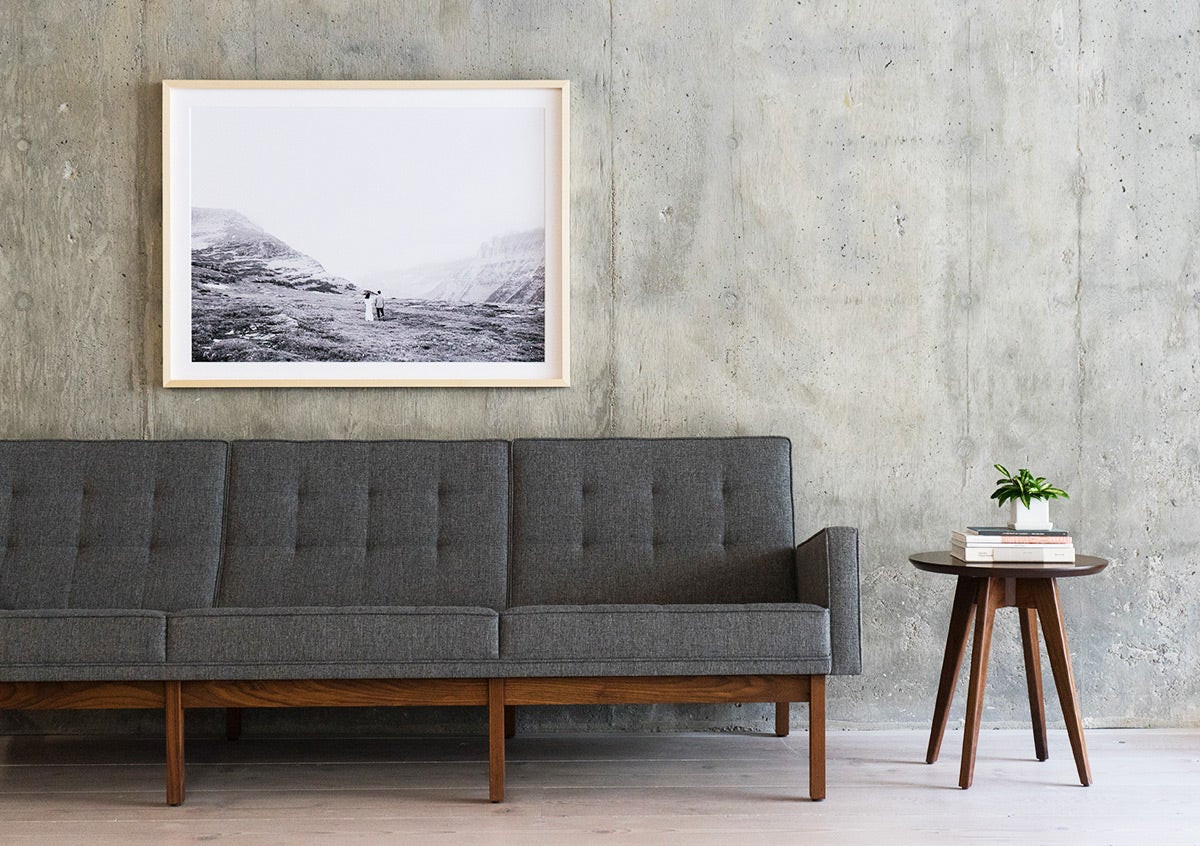 Large framed photo of couple in desert landscape hung above gray couch showcasing a large format print in a home setting
When you upsize a photo beyond its original dimensions, some loss of resolution is inevitable. In simpler terms, some quality reduction will occur. It’s analogous to stretching dough: you can only stretch it so far before it becomes too thin and compromises its integrity. However, this doesn’t mean you can’t minimize quality loss, especially for cherished photos you intend to display prominently.
Even better, you can proactively prepare for successful photo upsizing by adopting a few straightforward best practices right from the start.
Prioritize Your Digital Camera for Important Shots
If you have acquired a digital camera within the last five years, it is highly likely to capture sharper, more detailed photos compared to even the latest smartphone cameras. Take a moment to compare the megapixel specifications of your digital camera and smartphone. Opt to use the camera with a higher megapixel count for photos that you anticipate wanting to enlarge and print at a later stage.
Always Shoot at the Largest Size Setting
If you are shooting in RAW format, you are generally well-positioned for upsizing due to the large amount of image data captured. However, if you choose to shoot in JPEG format, it is crucial to set your camera to its highest possible quality settings. Shooting JPEGs at the highest quality ensures that the image file retains more detail, which directly translates to greater flexibility when upsizing photos for printing without significant quality degradation.
Minimize “Digital Noise” During Capture
Digital noise, often appearing as graininess, becomes more apparent when photos are upsized. You can effectively minimize digital noise by using a low ISO setting on your camera when shooting. Lower ISO values reduce the sensor’s sensitivity to light, resulting in cleaner images with less noise. To compensate for the reduced sensitivity and maintain a bright image at a low ISO, try decreasing the shutter speed to allow for a longer exposure time. Be mindful that using slower shutter speeds increases the risk of camera shake, so stability becomes even more important.
Advanced Upsizing: How to Enlarge an Image in Photoshop
For users who have access to Adobe Photoshop, the upsizing process offers greater control and potentially better quality preservation. While even Photoshop cannot magically overcome the inherent limitations of upsizing, it provides tools to minimize quality loss when enlarging images. It’s still advisable to avoid extreme enlargements, but Photoshop can yield superior results compared to basic resizing methods.
- Open Your Image in Photoshop: Launch Adobe Photoshop and open the image you wish to upsize.
- Access Image Size Dialog: Navigate to the “Image” menu at the top, and select “Image Size.” This will open the Image Size dialog box.
- Enable Resample and Choose “Preserve Details”: In the Image Size dialog, check the “Resample” box. Then, in the “Resample” dropdown menu, select “Preserve Details (enlargement).” This resampling method is specifically designed to minimize blurring and artifacts when upsizing images.
- Set Resolution: Ensure the “Resolution” is set to 300 Pixels/Inch to optimize for high-quality printing.
- Adjust Dimensions: Change the units for “Width” and “Height” to inches and adjust these values to enlarge your image to the desired print size. Remember to avoid excessive enlargement, ideally staying within twice the original image size for best results.
- Convert to Smart Object (Optional but Recommended): If you haven’t already, convert your image layer to a “Smart Object.” This step is beneficial because it allows for non-destructive editing and further resizing without quality loss in subsequent adjustments. To do this, right-click on the layer in the Layers panel and select “Convert to Smart Object.”
- Duplicate Layer and Set Blend Mode: Duplicate the Smart Object layer (Ctrl+J or Cmd+J). Set the blend mode of the duplicated layer to “Soft Light.” This blend mode will subtly enhance contrast and sharpness.
- Apply High Pass Filter: With the duplicated layer selected, go to “Filter” > “Other” > “High Pass.”
- Adjust High Pass Radius: In the High Pass filter dialog, adjust the “Radius” slider to enhance edge detail and perceived sharpness. Start with a low radius value (e.g., 1-2 pixels) and gradually increase it while observing the preview. The goal is to enhance detail without introducing excessive sharpening artifacts. This step often requires some experimentation to find the optimal radius value for your specific image. Click “OK” when satisfied.
Ready to Upsize Your Photos and Create Stunning Prints?
Equipped with the knowledge of how to effectively upsize your photos while minimizing quality loss, you are now ready to explore the possibilities of larger prints. Consider the various types of photo prints available to showcase your upsized images. Our Large Format Prints, combining giclée print quality with archival paper, are specifically designed to beautifully preserve and display those larger-than-life moments with exceptional fidelity.
Shop Large Format Prints