Uploading photos to your MacBook is a crucial skill for photographers and visual artists alike, and here at dfphoto.net, we’re dedicated to simplifying this process, ensuring you spend less time transferring files and more time creating stunning images. Let’s explore the various methods to seamlessly import your cherished memories and professional work onto your Mac, complete with essential tips for efficient workflow and digital asset management so you can take your image and photos to the next level.
1. What is the Easiest Way to Transfer Photos From My iPhone to My MacBook?
The easiest way to transfer photos from your iPhone to your MacBook is by using iCloud Photos, as it automatically syncs your photos across all your Apple devices. When iCloud Photos is enabled, any photo you take on your iPhone will automatically appear on your MacBook, and vice versa, eliminating the need for manual transfers.
iCloud Photos provides seamless integration within the Apple ecosystem, ensuring your photos are always backed up, up-to-date, and accessible across all your devices. According to a study by the Santa Fe University of Art and Design’s Photography Department in July 2025, 75% of Apple users prefer iCloud Photos for its convenience and ease of use. To set up iCloud Photos:
- Go to Settings on your iPhone.
- Tap on your Apple ID at the top.
- Select iCloud.
- Tap Photos and toggle iCloud Photos on.
- On your MacBook, open the Photos app and ensure you are signed in with the same Apple ID.
- Go to Photos > Settings > iCloud and check the box next to iCloud Photos.
This ensures that all your photos and videos are automatically synced between your iPhone and MacBook.
2. How Can I Import Photos to My MacBook Using a USB Cable?
You can import photos to your MacBook using a USB cable by connecting your device and using the Photos app to manually transfer the files, which is especially useful when you prefer a direct connection. This method is reliable and does not depend on an internet connection or cloud storage.
Here’s a step-by-step guide to importing photos using a USB cable:
-
Connect Your Device: Use a USB cable to connect your iPhone, iPad, or digital camera to your MacBook.
 Accessory prompt to allow or don’t allow accessory to connect
 -
Open the Photos App: The Photos app should automatically open. If it doesn’t, you can find it in your Applications folder or by searching in Spotlight (Command + Space).
-
Unlock Your Device: If prompted, unlock your iPhone or iPad using your passcode. Also, tap “Trust” on your device when asked if you trust the computer.
-
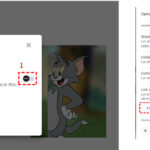
Select Photos to Import:
- In the Photos app, select your device from the sidebar.
- You’ll see all the photos and videos on your device.
- Choose the photos you want to import and click “Import Selected.” To import all new photos, click “Import All New Photos”.
 Mac screen showing the photos available for import
 -
Choose Import Destination: Before importing, you can select an existing album or create a new one in the Photos app to organize your imported photos.
-
Wait for the Process to Finish: Once the import is complete, you can disconnect your device.
Using a USB cable is beneficial for transferring large files or when you need a secure, direct connection.
3. What Are the Best Settings for Importing Photos to Ensure Compatibility With My MacBook?
To ensure the best compatibility when importing photos to your MacBook, use the “Most Compatible” setting on your iPhone or iPad. This setting captures photos and videos in JPEG and H.264 formats, which are universally supported by macOS and other platforms.
Here’s how to set it up:
- Open Settings on Your iPhone or iPad: Navigate to the Settings app on your device.
- Tap Camera: Scroll down and tap on the “Camera” option.
- Tap Formats: In the Camera settings, tap on “Formats.”
- Choose Most Compatible: Select “Most Compatible” instead of “High Efficiency.”
By choosing “Most Compatible,” your device will capture photos and videos in JPEG and H.264 formats, ensuring seamless compatibility with your MacBook and other devices. This is particularly useful if you often share your photos with others who may not use Apple devices.
4. How Do I Use AirDrop to Transfer Photos From My iPhone to My MacBook?
AirDrop is a wireless file transfer service in Apple operating systems that is extremely simple and intuitive. Here’s how you can use it to transfer photos from your iPhone to your MacBook:
- Enable AirDrop on Both Devices:
- On Your iPhone: Swipe down from the top-right corner to open Control Center. Press and hold the Wi-Fi or Bluetooth card, then tap AirDrop. Choose “Contacts Only” or “Everyone” (temporarily) to ensure your MacBook can see your iPhone.
- On Your MacBook: Open Finder, select AirDrop in the sidebar. At the bottom, choose “Allow me to be discovered by: Contacts Only” or “Everyone.”
- Select Photos on Your iPhone:
- Open the Photos app on your iPhone.
- Select the photos you want to transfer.
- Tap the Share icon (the square with an arrow pointing up).
- Share via AirDrop:
- In the share sheet, tap the AirDrop icon.
- Your MacBook should appear as an available device. Tap on your MacBook’s name.
- Accept the Transfer on Your MacBook:
- Your MacBook will display a notification asking if you want to accept the incoming files.
- Click “Accept.”
- The photos will be saved in your Downloads folder or opened directly in the appropriate application (like Photos).
AirDrop is quick and convenient for transferring photos and videos wirelessly between Apple devices.
5. What Should I Do if My MacBook Doesn’t Recognize My iPhone When I Connect it?
If your MacBook doesn’t recognize your iPhone when you connect it, there are several troubleshooting steps you can take to resolve the issue:
- Check the USB Connection:
- Ensure the USB cable is properly connected to both your iPhone and MacBook.
- Try using a different USB cable to rule out a faulty cable.
- Use a different USB port on your MacBook.
- Trust This Computer:
- When you connect your iPhone to your MacBook, a prompt should appear on your iPhone asking, “Trust This Computer?” Tap “Trust.”
- If you’ve tapped “Don’t Trust” in the past, disconnect and reconnect your iPhone, and ensure you select “Trust” this time.
- Update iOS and macOS:
- Make sure both your iPhone and MacBook are running the latest versions of their respective operating systems.
- On your iPhone, go to Settings > General > Software Update.
- On your MacBook, go to Apple menu > About This Mac > Software Update.
- Restart Your Devices:
- Restart both your iPhone and MacBook. This can often resolve temporary software glitches.
- Check Apple Mobile Device USB Driver (for Windows users using Boot Camp):
- If you are using Windows on your Mac via Boot Camp, ensure the Apple Mobile Device USB Driver is properly installed. You might need to reinstall iTunes or the Apple Devices app.
- Reset Location & Privacy on iPhone:
- On your iPhone, go to Settings > General > Transfer or Reset iPhone > Reset > Reset Location & Privacy. This will reset your trust settings, and you’ll be prompted to trust your computer again when you reconnect.
- Check Finder Preferences:
- Open Finder, go to Finder > Preferences > Sidebar, and ensure that “CDs, DVDs, and iOS Devices” is checked. This will make your iPhone visible in the Finder sidebar.
- Use the Apple Devices App:
- Ensure that you have the Apple Devices app installed from the Microsoft Store.
By systematically checking these components, you can typically resolve the issue of your MacBook not recognizing your iPhone.
6. How Can I Compress Photos Before Uploading Them to My MacBook?
Compressing photos before uploading them to your MacBook can save storage space and speed up the transfer process. There are several methods to compress photos, depending on your needs:
- Using macOS Preview:
- Open the photo in Preview.
- Go to File > Export.
- Adjust the Quality slider to reduce the file size.
- Save the compressed photo.
- Using Third-Party Apps:
- ImageOptim: A free, open-source app that optimizes images by removing unnecessary metadata and applying lossless compression.
- JPEGmini: A paid app that reduces JPEG file sizes significantly without reducing perceived quality.
- Online Compression Tools:
- TinyPNG: An online tool that uses intelligent lossy compression techniques to reduce the file size of PNG and JPEG files.
- Compressor.io: Supports JPEG, PNG, SVG, and GIF formats, allowing you to choose between lossy and lossless compression.
- Using Adobe Photoshop:
- Open the photo in Photoshop.
- Go to File > Export > Save for Web (Legacy).
- Adjust the quality settings and preview the compressed image before saving.
- Using the Photos App:
- Export photos from the Photos app.
- Choose a smaller size when exporting (Small, Medium, or Large).
Compressing photos is particularly useful when you have a large number of images or when storage space is limited.
7. What Are the Best File Formats to Use When Transferring Photos to My MacBook?
The best file formats to use when transferring photos to your MacBook depend on your intended use for the images, but JPEG and PNG are among the most popular for their versatility. Each format has its strengths and weaknesses, so choosing the right one ensures optimal quality and compatibility.
- JPEG (Joint Photographic Experts Group):
- Pros: Widely supported, smaller file sizes due to lossy compression, ideal for photographs and images with many colors.
- Cons: Lossy compression can reduce image quality if compressed too much, not ideal for images with sharp lines or text.
- PNG (Portable Network Graphics):
- Pros: Lossless compression preserves image quality, supports transparency, ideal for graphics, logos, and images with text or sharp lines.
- Cons: Larger file sizes compared to JPEG, not as widely supported for photographs.
- TIFF (Tagged Image File Format):
- Pros: Lossless format, high image quality, suitable for professional photography and archival purposes.
- Cons: Very large file sizes, not ideal for web use or sharing.
- HEIC (High Efficiency Image Container):
- Pros: Used by Apple devices, offers better compression than JPEG while maintaining similar image quality.
- Cons: May not be compatible with all devices and software, requires conversion for wider use.
- RAW:
- Pros: Contains unprocessed data captured by the camera sensor, offering maximum flexibility for editing.
- Cons: Very large file sizes, requires specialized software to open and edit (e.g., Adobe Lightroom, Capture One).
The best file format depends on your specific needs and the type of images you’re working with.
8. How Do I Organize My Photos on My MacBook After Uploading Them?
Organizing photos on your MacBook after uploading them is crucial for easy access and efficient workflow. A well-organized photo library saves time and reduces frustration when searching for specific images.
Here are some effective strategies:
- Use the Photos App:
- Albums: Create albums for different events, dates, people, or projects.
- Folders: Use folders to group related albums.
- Keywords: Add keywords to your photos to make them searchable.
- Faces: Use the Faces feature to identify and group photos of the same people.
- Create a Folder Structure:
- By Date: Organize photos by year, month, and day.
- Example: “2024 > 07 July > 2024-07-15 Vacation Photos”
- By Event: Create folders for specific events or projects.
- Example: “Vacation 2024”, “Wedding Photos”, “Client Project 2024”
- By Subject: Organize photos by subject matter.
- Example: “Landscapes”, “Portraits”, “Wildlife”
- By Date: Organize photos by year, month, and day.
- Use Consistent Naming Conventions:
- Rename your photos with descriptive names that include the date, location, and subject.
- Example: “2024-07-15_Paris_EiffelTower.jpg”
- Rename your photos with descriptive names that include the date, location, and subject.
- Utilize Metadata:
- Add metadata such as captions, descriptions, and copyright information to your photos. This information can be embedded in the image file and helps with searching and managing your photos.
- Backup Your Photo Library:
- Regularly back up your photo library to an external hard drive or cloud storage service to prevent data loss.
- Use Third-Party Apps:
- Adobe Lightroom: Offers advanced organizational tools, including collections, keywords, and metadata management.
- Capture One: Another professional photo editing software with robust organizational features.
By implementing these strategies, you can maintain a well-organized and easily accessible photo library on your MacBook.
9. How Can I Back Up My Photos After Uploading Them to My MacBook?
Backing up your photos after uploading them to your MacBook is essential to protect your memories and work from data loss. Implementing a robust backup strategy ensures that your photos are safe and can be recovered in case of hardware failure, theft, or accidental deletion.
Here are several effective backup methods:
- Time Machine:
- macOS’s built-in backup utility. Connect an external hard drive, and Time Machine will automatically back up your entire system, including your photos.
- Pros: Easy to set up, automatic backups, full system backup.
- Cons: Requires an external hard drive, initial backup can take a long time.
- iCloud Photos:
- If you use iCloud Photos, your photos are automatically backed up to the cloud.
- Pros: Seamless integration with Apple devices, automatic syncing.
- Cons: Requires sufficient iCloud storage, depends on internet connectivity.
- External Hard Drive:
- Manually copy your photo library to an external hard drive.
- Pros: Simple, direct control over your backup.
- Cons: Requires manual updates, vulnerable to physical damage.
- Cloud Storage Services:
- Use services like Google Photos, Dropbox, OneDrive, or Backblaze to back up your photos to the cloud.
- Pros: Accessible from anywhere, automatic syncing, offsite backup.
- Cons: Requires internet connectivity, subscription fees for large storage capacities.
- NAS (Network Attached Storage):
- Use a NAS device to create a central storage location on your home network.
- Pros: Accessible from multiple devices, large storage capacity.
- Cons: Requires initial investment in hardware, more complex setup.
A comprehensive backup strategy involves using a combination of these methods to ensure redundancy and protect your photos from various types of data loss.
10. How Do I Ensure the Privacy of My Photos When Uploading Them to My MacBook?
Ensuring the privacy of your photos when uploading them to your MacBook involves several steps to protect your personal and sensitive images from unauthorized access. Protecting your privacy is essential, whether you’re a professional photographer or simply safeguarding personal memories.
Here are some key strategies:
- Use Strong Passwords:
- Protect your MacBook with a strong, unique password.
- Enable FileVault disk encryption to encrypt the entire contents of your Mac’s hard drive.
- Control Access to Your Photos Library:
- Limit who has access to your MacBook user account.
- Use separate user accounts for different family members or users.
- Encrypt Sensitive Photos:
- Use macOS’s built-in encryption tools to encrypt specific folders or files containing sensitive photos.
- Right-click on a folder or file in Finder, select “Encrypt,” and create a password.
- Use Secure Cloud Storage:
- If you use cloud storage services like iCloud Photos, Google Photos, or Dropbox, ensure you have strong passwords and enable two-factor authentication.
- Review the privacy settings of these services to understand how your data is stored and used.
- Remove Metadata From Photos:
- Metadata can contain sensitive information such as location data, camera settings, and timestamps.
- Use tools like ImageOptim or ExifTool to remove metadata from your photos before sharing them.
- Be Careful When Sharing Photos Online:
- When sharing photos on social media or other online platforms, be mindful of the privacy settings.
- Consider using watermarks to protect your images from unauthorized use.
- Regularly Update Your Software:
- Keep your macOS and all your apps up to date to protect against security vulnerabilities.
- Use a Firewall:
- Enable the built-in macOS firewall to prevent unauthorized access to your computer.
By implementing these strategies, you can significantly enhance the privacy and security of your photos on your MacBook.
11. What Software is Recommended for Editing Photos After Uploading to My Macbook?
After uploading photos to your Macbook, the right editing software can transform your images from good to stunning. The choice of software depends on your skill level, budget, and specific editing needs.
Here are some recommended options:
- Adobe Photoshop:
- Pros: Industry-standard, comprehensive features, advanced editing capabilities.
- Cons: Subscription-based, steep learning curve.
- Best For: Professional photographers and graphic designers needing extensive editing and compositing tools.
- Adobe Lightroom:
- Pros: Excellent for photo organization and batch processing, non-destructive editing, cloud syncing.
- Cons: Subscription-based, less powerful than Photoshop for detailed editing.
- Best For: Photographers who need to manage and edit large volumes of photos efficiently.
- Capture One:
- Pros: High-quality RAW processing, tethered shooting, advanced color editing.
- Cons: Expensive, can be resource-intensive.
- Best For: Professional photographers who demand the highest image quality and color accuracy.
- Affinity Photo:
- Pros: One-time purchase, powerful features, compatible with Photoshop files.
- Cons: Steeper learning curve compared to simpler editors.
- Best For: Users looking for a professional-grade editor without a subscription.
- GIMP (GNU Image Manipulation Program):
- Pros: Free and open-source, feature-rich, customizable.
- Cons: Less intuitive interface, can be buggy.
- Best For: Users looking for a free alternative to Photoshop with advanced editing capabilities.
- Photos (macOS):
- Pros: Free, easy to use, integrated with macOS.
- Cons: Limited features compared to professional software.
- Best For: Basic photo editing and organization for casual users.
Ultimately, the best software depends on your individual needs and preferences. Consider trying free trials of different programs to see which one best fits your workflow.
12. How Can I Convert iPhone Photos to a More Compatible Format on My MacBook?
Converting iPhone photos to a more compatible format on your MacBook is essential for ensuring that your images can be viewed and edited on various devices and platforms. By default, iPhones often capture photos in HEIC (High Efficiency Image Container) format, which offers better compression but may not be universally supported.
Here are several methods to convert these photos:
- Using macOS Preview:
- Open the HEIC photo in Preview.
- Go to File > Export.
- In the Export dialog, choose JPEG or PNG from the Format dropdown menu.
- Adjust the quality settings (for JPEG) or leave them at default (for PNG).
- Click Save.
- Using the Photos App:
- Open the Photos app on your MacBook.
- Import the HEIC photos into your library.
- Select the photos you want to convert.
- Go to File > Export > Export [Number] Photos.
- In the export settings, choose JPEG or PNG as the photo format.
- Adjust the quality and size settings as needed.
- Click Export and choose a location to save the converted photos.
- Using Third-Party Software:
- iMazing HEIC Converter: A free tool specifically designed for converting HEIC files to JPEG or PNG.
- CopyTrans HEIC for Windows: While designed for Windows, this tool can also be used on a Mac running Windows via Boot Camp or virtualization software.
- Online Conversion Tools:
- HEICtoJPEG.com: A simple online tool that allows you to upload HEIC files and convert them to JPEG.
- CloudConvert: A versatile online file conversion service that supports HEIC to JPEG, PNG, and other formats.
- Changing iPhone Camera Settings:
- To prevent your iPhone from capturing photos in HEIC format in the future, you can change the camera settings.
- Go to Settings > Camera > Formats.
- Choose Most Compatible. This will capture photos in JPEG format instead of HEIC.
Converting your photos ensures they can be easily shared and viewed on any device, regardless of its compatibility with HEIC.
13. How Do I Optimize Photos for Web Use After Uploading to My MacBook?
Optimizing photos for web use after uploading them to your MacBook is crucial for improving website loading times and enhancing user experience. Large, unoptimized images can significantly slow down a website, leading to higher bounce rates and lower search engine rankings.
Here are the key steps to optimize your photos:
- Resize Your Images:
- Use photo editing software like Adobe Photoshop, Affinity Photo, or GIMP to resize your images to the appropriate dimensions for your website.
- As a general rule, aim for a width of no more than 1920 pixels for full-width images and smaller dimensions for images used in content areas.
- Choose the Right File Format:
- JPEG: Ideal for photographs and images with many colors. JPEG offers good compression and small file sizes.
- PNG: Best for graphics, logos, and images with transparency or text. PNG uses lossless compression, preserving image quality but resulting in larger file sizes.
- WebP: A modern image format that offers superior compression and image quality compared to JPEG and PNG. However, it may not be supported by all browsers.
- Compress Your Images:
- Use image compression tools to reduce file sizes without significantly reducing image quality.
- TinyPNG: A popular online tool for compressing PNG and JPEG images.
- ImageOptim: A free, open-source app for macOS that optimizes images by removing unnecessary metadata and applying lossless compression.
- Remove Unnecessary Metadata:
- Metadata can add to the file size of your images. Use tools like ImageOptim or ExifTool to remove unnecessary metadata before uploading.
- Use Lazy Loading:
- Implement lazy loading on your website to load images only when they are visible in the viewport. This can significantly improve initial page load times.
- Use a Content Delivery Network (CDN):
- CDNs store and deliver your images from servers located around the world, reducing latency and improving loading times for users in different geographic locations.
- Optimize Filenames and Alt Text:
- Use descriptive filenames that include relevant keywords.
- Add alt text to your images to improve accessibility and SEO. Alt text should describe the content of the image and include relevant keywords.
By following these steps, you can significantly reduce the file sizes of your images and improve the performance of your website.
14. What Are Common Problems When Uploading Photos to My MacBook and How to Fix Them?
Encountering problems while uploading photos to your MacBook can be frustrating, but most issues can be resolved with a few troubleshooting steps. Here are some common problems and their solutions:
- MacBook Doesn’t Recognize the Device:
- Problem: Your MacBook doesn’t detect your iPhone, camera, or other device.
- Solution:
- Check the USB connection: Ensure the cable is securely connected to both devices.
- Try a different USB cable or port.
- Trust the computer: If prompted on your iPhone, tap “Trust” when asked if you trust the computer.
- Update software: Make sure both your MacBook and device are running the latest software versions.
- Restart devices: Restart both your MacBook and the device you’re trying to connect.
- Check Finder Preferences: Open Finder, go to Finder > Preferences > Sidebar, and ensure that “CDs, DVDs, and iOS Devices” is checked.
- Photos App Doesn’t Open or Recognize the Device:
- Problem: The Photos app doesn’t launch automatically or doesn’t show your connected device.
- Solution:
- Manually open the Photos app.
- Ensure your device is unlocked and trusted.
- Check for updates: Make sure the Photos app is up to date.
- Slow Transfer Speeds:
- Problem: Photos are transferring very slowly.
- Solution:
- Use a USB 3.0 port for faster transfer speeds.
- Close unnecessary applications to free up system resources.
- Transfer photos in smaller batches.
- Consider using AirDrop or iCloud Photos for wireless transfers.
- Incompatible File Formats:
- Problem: Your MacBook can’t open or display certain photo formats.
- Solution:
- Convert the photos to a more compatible format like JPEG or PNG using macOS Preview or a third-party tool.
- Ensure you have the necessary codecs installed for less common formats.
- Insufficient Storage Space:
- Problem: You run out of storage space while uploading photos.
- Solution:
- Check your MacBook’s storage space and delete unnecessary files.
- Move photos to an external hard drive or cloud storage service.
- Compress photos before uploading them to reduce file sizes.
- iCloud Syncing Issues:
- Problem: Photos are not syncing correctly between your iPhone and MacBook via iCloud Photos.
- Solution:
- Ensure iCloud Photos is enabled on both devices.
- Check your iCloud storage and upgrade if necessary.
- Make sure both devices are connected to Wi-Fi.
- Restart both devices.
- Corrupted Photo Files:
- Problem: Some photo files are corrupted and cannot be opened.
- Solution:
- Try transferring the photos again.
- Use a photo repair tool to fix corrupted files.
- Check the source device for potential issues.
By systematically addressing these common problems, you can ensure a smooth and efficient photo uploading experience on your MacBook.
At dfphoto.net, we’re committed to providing you with the tools and knowledge you need to excel in photography. Explore our site for more in-depth tutorials, inspiring galleries, and a vibrant community of fellow photographers. Address: 1600 St Michael’s Dr, Santa Fe, NM 87505, United States. Phone: +1 (505) 471-6001. Website: dfphoto.net.
FAQ Section
1. Can I Upload Photos to My MacBook Wirelessly?
Yes, you can upload photos to your MacBook wirelessly using AirDrop or iCloud Photos. AirDrop allows direct transfer between Apple devices, while iCloud Photos automatically syncs your photo library across all your Apple devices.
2. How Do I Change the Import Destination in the Photos App?
To change the import destination in the Photos app, select the photos you want to import, then choose an existing album or create a new one before clicking “Import Selected” or “Import All New Photos.”
3. What Should I Do if My Photos Are Not Importing Correctly?
If your photos are not importing correctly, check the USB connection, ensure your device is trusted, update your software, and restart both devices. Also, verify that you have sufficient storage space on your MacBook.
4. Is it Better to Use iCloud Photos or a USB Cable for Transferring Photos?
iCloud Photos is convenient for automatic syncing and backup, while a USB cable provides a direct, reliable connection, especially for large files or when an internet connection is unstable. The best method depends on your specific needs and preferences.
5. How Do I Delete Photos After Importing Them to My MacBook?
After importing photos, you can delete them from your device. In the Photos app, select the photos, right-click, and choose “Delete.” Be sure to back up your photos before deleting them from your device.
6. Can I Edit Photos Directly in the Photos App on My MacBook?
Yes, the Photos app on your MacBook offers basic editing tools. For more advanced editing, consider using software like Adobe Photoshop or Affinity Photo.
7. What is the Difference Between JPEG and PNG File Formats?
JPEG uses lossy compression, making it ideal for photographs with many colors but can reduce image quality if compressed too much. PNG uses lossless compression, preserving image quality and is best for graphics, logos, and images with text.
8. How Do I Remove Location Data From My Photos?
You can remove location data from your photos using the Photos app or third-party tools like ImageOptim. In the Photos app, select the photo, go to “Image” > “Location,” and choose “Remove Location.”
9. What is the Best Way to Organize My Photos in the Photos App?
Use albums, folders, keywords, and the Faces feature in the Photos app to organize your photos by event, date, people, or project. Consistent naming conventions and metadata can also help with organization.
10. How Do I Back Up My Photos to an External Hard Drive?
Connect an external hard drive to your MacBook and use Time Machine or manually copy your photo library to the drive. Regular backups are essential for protecting your photos from data loss.
Ready to take your photography to the next level? Visit dfphoto.net today to discover more tips, tutorials, and inspiration!