Are you looking to share your stunning visuals on Instagram but unsure how to navigate the uploading process? This guide from dfphoto.net will walk you through various methods for effortlessly posting photos on Instagram, ensuring your content shines. We’ll cover uploading from the app, Instagram Web, and even using third-party tools, providing you with all the skills you need to enhance your photo sharing and visual storytelling. Let’s dive into the world of visual content, social media management, and image sharing!
1. Why Can’t I Upload Photos to Instagram Directly?
Can’t seem to get your photos onto Instagram? The most common culprits include:
- Internet Connection Issues: A weak or unstable internet connection is often the primary reason why uploads fail. Ensure you have a strong Wi-Fi or cellular signal.
- Instagram App Problems: An outdated app, bugs, or corrupted cache files can prevent successful uploads. Try updating the app, clearing the cache, or reinstalling it.
- File Size and Format: Instagram has limitations on file size and format. Images that are too large or in an unsupported format may not upload.
- Account Issues: In rare cases, account restrictions or temporary blocks can prevent uploads.
Troubleshooting Tips:
- Check Your Internet Connection: Test your connection speed and stability. Switch between Wi-Fi and cellular data to see if one works better.
- Update Instagram App: Ensure you have the latest version of the Instagram app from the App Store (iOS) or Google Play Store (Android).
- Clear Cache and Data: In your device’s settings, find the Instagram app and clear its cache and data. This can resolve issues caused by corrupted files.
- Reduce File Size: Use image compression tools to reduce the file size of your photos without significantly impacting quality.
- Check File Format: Ensure your photos are in a supported format like JPEG or PNG.
- Restart Your Device: A simple restart can often resolve temporary software glitches.
- Try a Different Device: If possible, try uploading from another phone or tablet to see if the issue is device-specific.
- Contact Instagram Support: If none of the above steps work, contact Instagram support for further assistance.
Addressing these common issues will help you overcome upload challenges and get your photos onto Instagram seamlessly.
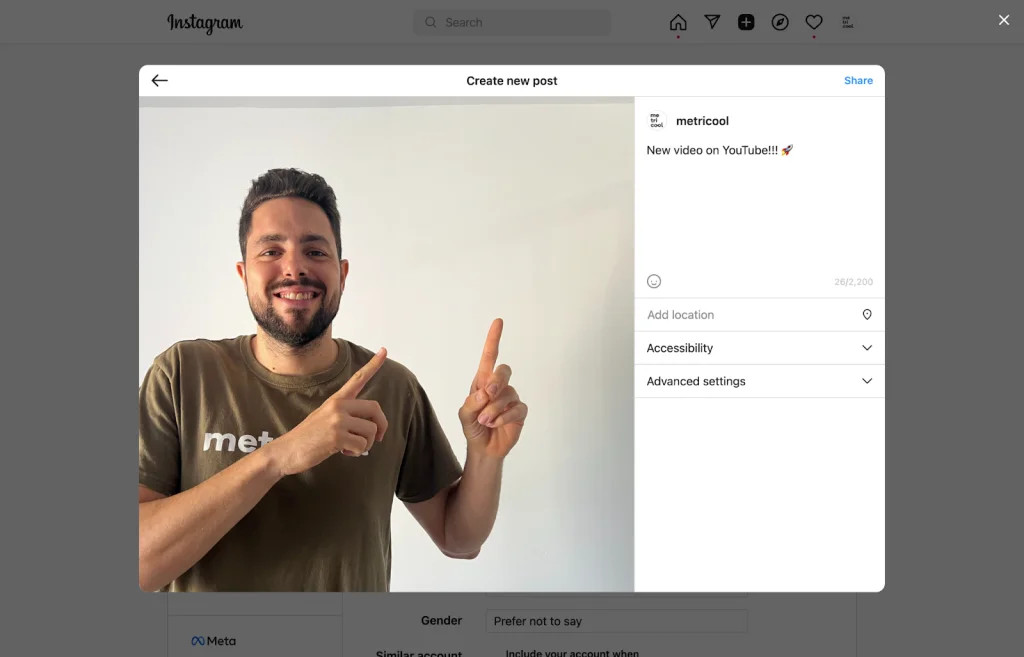
2. How Do I Upload a Photo to Instagram From My Phone?
Uploading photos to Instagram from your mobile device is a straightforward process:
- Open Instagram: Launch the Instagram app on your iOS or Android device.
- Tap the Plus Icon: Look for the ‘+’ icon, usually located at the bottom of the screen, or at the top-right corner of the screen.
- Select Photo: Choose ‘Post’. Select a photo from your phone’s gallery. Grant Instagram access to your photos if prompted.
- Edit (Optional): Use Instagram’s built-in editing tools to apply filters, adjust brightness, contrast, and more.
- Write Caption: Add a caption, tag friends, include relevant hashtags, and specify a location.
- Share: Tap ‘Share’ to post the photo to your Instagram feed.
 Instagram mobile upload
Tips for Mobile Uploads:
- Use High-Quality Images: Ensure your photos are clear and well-composed.
- Craft Engaging Captions: Write captions that tell a story, ask questions, or provide context.
- Utilize Hashtags: Research and use relevant hashtags to increase visibility.
- Tag People: Tag friends or collaborators who are featured in the photo.
- Add Location: Specify the location where the photo was taken to attract local followers.
3. What Image Size Is Best When I Upload a Photo to Instagram?
Using the correct image size is crucial for maintaining quality and ensuring your photos look their best on Instagram:
- Square: 1080 x 1080 pixels (1:1 aspect ratio)
- Portrait: 1080 x 1350 pixels (4:5 aspect ratio)
- Landscape: 1080 x 566 pixels (1.91:1 aspect ratio)
Key Considerations:
- Resolution: Aim for a resolution of at least 1080 pixels for the shortest side of your image.
- Aspect Ratio: Instagram supports aspect ratios between 1.91:1 and 4:5.
- File Size: Keep your file size below 8MB to avoid compression.
- Format: Use JPEG for most photos and PNG for images with text or graphics.
Tools for Resizing:
- Mobile Apps: Adobe Lightroom Mobile, Snapseed
- Desktop Software: Adobe Photoshop, GIMP
- Online Tools: ResizePixel, PicResize
By optimizing your image size, you can prevent Instagram from compressing your photos, preserving their clarity and detail.
4. How Do I Upload a Photo to Instagram From My Computer?
Although Instagram is primarily a mobile app, you can also upload photos from your computer using Instagram Web:
- Go to Instagram Website: Open your web browser and go to Instagram’s website.
- Log In: Enter your username and password to log in to your account.
- Click the Plus Icon: Look for the ‘+’ icon, usually located at the top-right corner of the screen.
- Select Photo: Choose the photo you want to upload from your computer’s files.
- Edit (Optional): Use Instagram’s built-in editing tools to crop, apply filters, and adjust settings.
- Write Caption: Add a caption, tag friends, include hashtags, and specify a location.
- Share: Click ‘Share’ to post the photo to your Instagram feed.
 Instagram web upload
Benefits of Using Instagram Web:
- Larger Screen: Easier to view and edit photos on a larger display.
- Convenience: Quickly upload photos directly from your computer’s files.
- Accessibility: Access Instagram from any computer with an internet connection.
5. What Are Some Third-Party Apps to Upload Photos to Instagram?
Several third-party apps can streamline your Instagram photo uploads:
- Metricool: A social media management tool that allows you to schedule and upload photos, manage multiple accounts, and analyze performance metrics.
- Later: A popular scheduling app with features for visual planning, hashtag suggestions, and analytics.
- Buffer: A social media scheduling tool that supports Instagram and other platforms, offering content planning and analytics.
- Hootsuite: A comprehensive social media management platform with tools for scheduling, monitoring, and engaging with your audience.
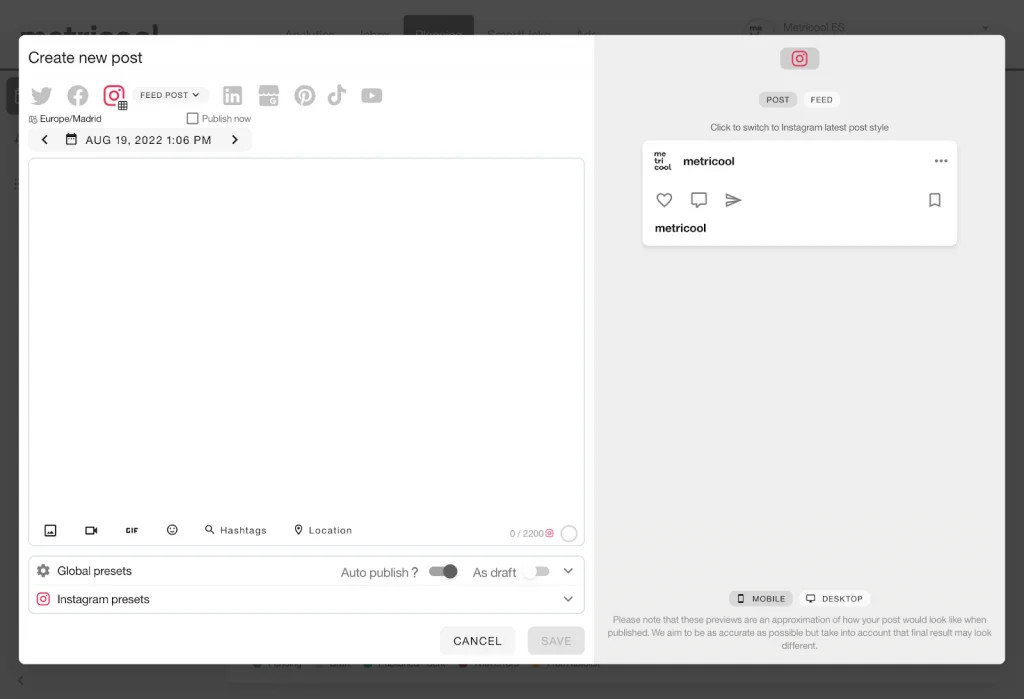 Uploading photos to Instagram with Metricool
Benefits of Using Third-Party Apps:
- Scheduling: Plan and schedule posts in advance to maintain a consistent posting schedule.
- Multiple Accounts: Manage multiple Instagram accounts from one platform.
- Analytics: Track performance metrics to optimize your content strategy.
- Content Planning: Visually plan your feed to create a cohesive aesthetic.
6. How Can I Schedule Photos to Upload on Instagram?
Scheduling photos on Instagram can save you time and ensure a consistent posting schedule:
- Choose a Scheduling Tool: Select a third-party app like Metricool, Later, Buffer, or Hootsuite.
- Connect Your Account: Link your Instagram account to the scheduling tool.
- Upload Photo: Upload the photo you want to schedule.
- Write Caption: Add a caption, hashtags, and tags.
- Set Date and Time: Choose the date and time you want the photo to be published.
- Schedule: Schedule the post and let the tool automatically publish it to your Instagram feed.
Tips for Scheduling:
- Plan Ahead: Schedule your posts in advance to maintain a consistent posting schedule.
- Optimize Timing: Analyze your audience’s activity to determine the best times to post.
- Use High-Quality Images: Ensure your scheduled photos are clear and well-composed.
- Engage with Comments: Monitor your posts and respond to comments to foster engagement.
7. How Do I Upload Multiple Photos to Instagram as a Carousel?
Creating a carousel post on Instagram allows you to share multiple photos or videos in a single post:
- Open Instagram: Launch the Instagram app.
- Tap the Plus Icon: Tap the ‘+’ icon to create a new post.
- Select Multiple Photos: Tap the multiple photo icon (usually a stack of squares) and select up to 10 photos or videos from your gallery.
- Edit (Optional): Edit each photo or video individually or apply the same filter to all.
- Write Caption: Add a caption, tags, and location.
- Share: Tap ‘Share’ to publish the carousel post to your Instagram feed.
Tips for Carousel Posts:
- Tell a Story: Use the carousel to tell a story or showcase different aspects of a topic.
- Use High-Quality Visuals: Ensure all photos and videos are clear and visually appealing.
- Include a Call to Action: Encourage viewers to swipe through the carousel.
- Optimize for Mobile: Design your carousel with mobile viewing in mind.
8. How Can I Ensure My Uploaded Photos Look Good on Instagram?
To ensure your uploaded photos look their best on Instagram, consider the following:
- Use High-Resolution Images: Start with high-resolution photos to maintain clarity.
- Edit Your Photos: Use editing tools to adjust brightness, contrast, saturation, and sharpness.
- Optimize Image Size: Use the recommended image sizes to avoid compression.
- Choose the Right Format: Use JPEG for most photos and PNG for images with text or graphics.
- Consider Your Feed’s Aesthetic: Maintain a consistent style and color palette to create a cohesive feed.
Recommended Editing Apps:
- Adobe Lightroom Mobile: Professional-grade editing tools for mobile devices.
- Snapseed: A free and powerful photo editing app by Google.
- VSCO: A popular app with a wide range of filters and editing tools.
9. What Are Some Common Mistakes to Avoid When Uploading Photos to Instagram?
Avoid these common mistakes to ensure a smooth and successful photo uploading experience:
- Ignoring Image Size Guidelines: Uploading photos that are too large or small can result in poor quality.
- Using Low-Resolution Images: Low-resolution images appear blurry and unprofessional.
- Neglecting Editing: Failing to edit your photos can result in dull and unappealing visuals.
- Overusing Filters: Overusing filters can make your photos look artificial.
- Ignoring Copyright: Posting photos without permission can lead to legal issues.
- Not Engaging with Followers: Failing to respond to comments and messages can hurt engagement.
10. How Do I Delete a Photo I Uploaded to Instagram?
If you need to remove a photo you’ve uploaded to Instagram:
- Go to Your Profile: Open the Instagram app and go to your profile.
- Select the Photo: Find the photo you want to delete and tap on it.
- Tap the Three Dots: Tap the three dots (ellipsis) icon located at the top-right corner of the post.
- Select Delete: Choose ‘Delete’ from the options.
- Confirm: Confirm that you want to delete the photo.
Important Considerations:
- Deletion is Permanent: Once a photo is deleted, it cannot be recovered.
- Backup Your Photos: Before deleting a photo, make sure you have a backup copy saved elsewhere.
- Consider Archiving: If you’re unsure about deleting a photo, you can archive it instead. Archiving removes the photo from your public profile but keeps it accessible to you.
11. Why Are My Instagram Photos Blurry?
Blurry photos on Instagram can be caused by several factors:
- Low Resolution: Starting with a low-resolution image will result in a blurry photo after uploading.
- Compression: Instagram compresses images to reduce file size, which can sometimes lead to a loss of quality.
- Incorrect Image Size: Uploading photos that don’t adhere to Instagram’s recommended dimensions can cause distortion and blurriness.
- Poor Lighting: Insufficient lighting during the photo’s capture can result in a grainy or blurry image.
- Camera Shake: Camera shake during the photo’s capture can cause blurriness, especially in low-light conditions.
Solutions to Prevent Blurry Photos:
- Use High-Resolution Images: Start with photos that have a high resolution.
- Optimize Image Size: Resize your photos to Instagram’s recommended dimensions before uploading.
- Ensure Good Lighting: Take photos in well-lit environments or use artificial lighting.
- Use a Tripod: Use a tripod to stabilize your camera and prevent camera shake.
- Clean Your Lens: Clean your camera lens to remove any smudges or dirt that may cause blurriness.
12. How Can I Improve the Quality of My Instagram Photos?
Improving the quality of your Instagram photos involves a combination of techniques and best practices:
- Use a Good Camera: Use a high-quality camera, whether it’s a smartphone camera or a dedicated camera.
- Master Composition: Learn basic composition techniques, such as the rule of thirds, leading lines, and symmetry.
- Pay Attention to Lighting: Use natural light whenever possible, and avoid harsh shadows and overexposure.
- Edit Your Photos: Use editing tools to enhance colors, adjust brightness, and sharpen details.
- Use Filters Sparingly: Use filters to enhance your photos, but avoid overusing them.
- Maintain a Consistent Style: Develop a consistent style and color palette to create a cohesive feed.
- Experiment and Learn: Experiment with different techniques and learn from your mistakes.
13. What Are the Best Hashtags to Use When Uploading Photos to Instagram?
Using relevant hashtags can significantly increase the visibility of your Instagram photos:
- Research: Use tools like Hashtagify or RiteTag to find trending and relevant hashtags.
- Mix Popular and Niche Hashtags: Use a combination of popular and niche hashtags to reach a wider audience.
- Use Location-Based Hashtags: Use location-based hashtags to attract local followers.
- Create Branded Hashtags: Create branded hashtags to promote your brand or business.
- Don’t Overdo It: Avoid using too many hashtags, as this can appear spammy.
Examples of Popular Hashtags:
-
photography
-
instagood
-
photooftheday
-
travel
-
fashion
-
beauty
-
food
14. How Do Instagram Stories Differ From Photo Uploads to My Feed?
Instagram Stories and photo uploads to your feed serve different purposes and have distinct characteristics:
- Stories:
- Ephemeral: Stories disappear after 24 hours.
- Interactive: Stories offer interactive features like polls, quizzes, and questions.
- Informal: Stories are often used for casual, behind-the-scenes content.
- Vertical Format: Stories are designed for vertical viewing on mobile devices.
- Feed Photos:
- Permanent: Feed photos remain on your profile until you delete them.
- Curated: Feed photos are typically more polished and carefully curated.
- Formal: Feed photos are often used for showcasing your best work.
- Various Formats: Feed photos can be square, portrait, or landscape.
When to Use Stories vs. Feed Photos:
- Stories: Use Stories for sharing daily moments, behind-the-scenes content, and engaging with your audience in real-time.
- Feed Photos: Use Feed Photos for showcasing your best work, creating a cohesive aesthetic, and building a lasting impression.
15. How Do I Add a Location to My Instagram Photo?
Adding a location to your Instagram photo can help attract local followers and increase visibility:
- Upload Photo: Upload the photo you want to share.
- Write Caption: Write a caption for your photo.
- Add Location: Tap ‘Add Location’ and search for the location where the photo was taken.
- Share: Share the photo with the location added.
Benefits of Adding a Location:
- Attract Local Followers: Reach people who are interested in your area.
- Increase Visibility: Make your photos discoverable through location-based searches.
- Engage with Local Businesses: Connect with local businesses and organizations.
16. How Can I Tag People in My Instagram Photo?
Tagging people in your Instagram photo can help increase engagement and visibility:
- Upload Photo: Upload the photo you want to share.
- Write Caption: Write a caption for your photo.
- Tag People: Tap ‘Tag People’ and tap on the photo to add a tag. Search for the person you want to tag and select them from the list.
- Share: Share the photo with the tagged people.
Benefits of Tagging People:
- Increase Engagement: Notify the tagged people and their followers.
- Expand Reach: Make your photos visible to a wider audience.
- Give Credit: Give credit to people who are featured in the photo.
17. How Do I Write a Good Caption for My Instagram Photo?
A good caption can significantly enhance the impact of your Instagram photo:
- Tell a Story: Share a story or anecdote related to the photo.
- Ask a Question: Engage your audience by asking a question.
- Use Humor: Use humor to make your caption more engaging.
- Include a Call to Action: Encourage your audience to take action, such as liking, commenting, or sharing.
- Use Relevant Hashtags: Include relevant hashtags to increase visibility.
- Keep It Concise: Keep your caption concise and easy to read.
- Proofread: Proofread your caption for spelling and grammar errors.
Examples of Effective Captions:
- “Chasing sunsets in Santa Fe. What’s your favorite place to watch the sunset?”
- “Exploring the hidden gems of New Mexico. Can you guess where this photo was taken?”
- “Feeling grateful for these moments of peace and tranquility. What are you grateful for today?”
18. What Are Some Tips for Taking Better Photos for Instagram?
Improving your photography skills can significantly enhance the quality of your Instagram feed:
- Learn the Basics: Learn the basics of photography, such as aperture, shutter speed, and ISO.
- Master Composition: Use composition techniques to create visually appealing photos.
- Pay Attention to Lighting: Use natural light whenever possible, and avoid harsh shadows and overexposure.
- Experiment with Angles: Experiment with different angles to find the most flattering perspective.
- Use a Tripod: Use a tripod to stabilize your camera and prevent camera shake.
- Edit Your Photos: Use editing tools to enhance colors, adjust brightness, and sharpen details.
- Practice Regularly: Practice regularly to improve your skills and develop your own style.
19. How Do I Use Instagram Insights to Improve My Photo Uploads?
Instagram Insights provides valuable data about your audience and the performance of your posts:
- Track Engagement: Monitor your likes, comments, and shares to see which photos resonate with your audience.
- Analyze Demographics: Understand the demographics of your followers, such as age, gender, and location.
- Identify Best Times to Post: Determine the best times to post based on when your followers are most active.
- Track Hashtag Performance: See which hashtags are driving the most traffic to your photos.
- Experiment and Analyze: Experiment with different types of photos, captions, and hashtags, and analyze the results to optimize your strategy.
Accessing Instagram Insights:
- Switch to a Professional Account: Switch to a business or creator account to access Instagram Insights.
- Go to Your Profile: Go to your profile and tap the three lines (hamburger menu) icon.
- Select Insights: Choose ‘Insights’ from the options.
20. What Are Some Ethical Considerations When Uploading Photos to Instagram?
When uploading photos to Instagram, it’s important to consider the following ethical considerations:
- Copyright: Respect copyright laws and only upload photos that you have the right to use.
- Privacy: Respect the privacy of others and avoid uploading photos without their consent.
- Authenticity: Be authentic and transparent in your posts, and avoid misleading or deceptive content.
- Respectful Content: Avoid uploading content that is offensive, discriminatory, or harmful.
- Disclosure: Disclose sponsored content or collaborations.
By following these ethical guidelines, you can contribute to a positive and responsible Instagram community.
Uploading photos to Instagram is a simple yet powerful way to share your creativity and connect with others. Whether you’re using the app, Instagram Web, or a third-party tool, mastering the art of photo uploads can help you build a strong presence on this dynamic platform. Remember to focus on high-quality visuals, engaging captions, and strategic use of hashtags to maximize your impact.
Ready to take your photography skills to the next level? Visit dfphoto.net for in-depth tutorials, stunning photo collections, and a vibrant community of photography enthusiasts. Explore new techniques, find inspiration, and connect with fellow photographers in the US. Address: 1600 St Michael’s Dr, Santa Fe, NM 87505, United States. Phone: +1 (505) 471-6001. Website: dfphoto.net.
FAQ: Mastering Instagram Photo Uploads
1. Why is my Instagram upload stuck?
A stuck upload is often due to a poor internet connection. Ensure you have a stable Wi-Fi or cellular signal. Also, check if the Instagram app needs updating. Sometimes, simply restarting the app or your device can resolve the issue.
2. How do I upload high-quality photos to Instagram?
To maintain high quality, start with a high-resolution image and optimize it to Instagram’s recommended dimensions (1080px width). Use JPEG format for most photos and PNG for images with text. Avoid over-editing, as excessive adjustments can degrade quality.
3. Can I upload photos to Instagram from my desktop?
Yes, you can upload photos from your desktop using Instagram Web. Simply log in to your account, click the ‘+’ icon, and select the photo you want to upload. You can also use third-party tools like Metricool for scheduling and uploading.
4. How do I schedule Instagram posts?
Use third-party tools like Metricool, Later, Buffer, or Hootsuite to schedule your posts. These tools allow you to plan your content in advance and automatically publish it at the optimal time.
5. Why are my Instagram Stories blurry?
Blurry Stories often result from poor internet connection, low-resolution images, or Instagram’s compression. Ensure you’re using high-quality visuals and uploading with a stable connection.
6. How do I create a carousel post on Instagram?
To create a carousel, tap the ‘+’ icon, select the multiple photo icon, and choose up to 10 photos or videos. You can then edit each item individually and add a caption before sharing.
7. How do I add a location to my Instagram photo?
When creating a post, tap ‘Add Location’ and search for the place where the photo was taken. Adding a location can help attract local followers.
8. What are the best hashtags to use for my Instagram photos?
Research relevant hashtags using tools like Hashtagify. Mix popular and niche hashtags to reach a wider audience. Also, consider using location-based and branded hashtags.
9. How do I tag someone in my Instagram photo?
After uploading your photo, tap ‘Tag People’ and then tap on the photo to add a tag. Search for the person you want to tag and select them from the list.
10. How can I improve engagement on my Instagram posts?
Write engaging captions that tell a story or ask a question. Use relevant hashtags, tag people, and respond to comments to foster interaction. Also, post consistently and at optimal times based on your audience’s activity.

