Apple’s Live Photo feature, launched in 2015 with the iPhone 6S, adds a touch of motion and life to your still images. Initially, it might have seemed puzzling – a brief video capturing the moments before and after you hit the shutter button. However, as users have become more accustomed to Live Photos, they’ve discovered their unique charm. From catching the genuine surprise during a proposal to those candid, laughing moments with friends, Live Photos capture more than just a static image.
Adding a Live Photo to your Instagram feed or story can inject dynamism into your content, whether it’s showcasing your outfit of the day or adding flair to a photo dump. A Live Photo subtly hints at authenticity, suggesting a spontaneous moment caught on camera.
Despite their appeal, posting Live Photos on Instagram isn’t always intuitive. You might have tried pressing and holding on a Live Photo within Instagram, or converting it to a Boomerang, only to find it appearing as a regular still photo. If you’re wondering how to share your moving memories, here’s a comprehensive guide on posting Live Photos to Instagram effectively.
Posting Live Photos to Your Instagram Story: A Simple Method
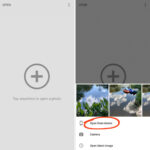
Sharing a Live Photo on your Instagram Story is quite straightforward. Begin by accessing your Story feature, either by swiping left on your Instagram home screen or tapping the plus (+) icon at the top right and selecting “Story”. Once in the Story interface, access your photo library by tapping the camera roll icon, usually located at the bottom left of the screen. Select the Live Photo you wish to upload.
Access your iPhone camera roll to select a live photo for your Instagram story.
After selecting your Live Photo, press and hold down on the photo displayed on your screen. You’ll notice the Live Photo will transform into a Boomerang, playing back and forth. Releasing your finger will revert it to a still image. To post it as a Boomerang, ensure you are holding down until it plays, then simply tap “Your Story” at the bottom. Your Live Photo will then be shared as a Boomerang video on your Instagram Story.
Sharing Live Photos as Instagram Posts: Converting to Video First
If your aim is to publish a Live Photo as a standard Instagram post on your feed, a slight conversion is needed beforehand. First, navigate to your iPhone’s Photos app and locate the Live Photo you intend to share. Tap on the share icon, which looks like a square with an upward arrow, typically found in the bottom left corner of the screen.
Locate and tap “Save as Video” to convert your live photo into a video format for Instagram post.
Scroll through the share options until you find “Save as Video”. Tap this option. This action converts your Live Photo into a short video clip and saves it to your camera roll as a separate video file.
Now, to post this on Instagram, open the Instagram app and tap the plus (+) icon to create a new post. Select “Post” and then choose the video you just saved from your camera roll. Proceed with the usual steps of adding a caption, filters, and tags before sharing. Your followers will now be able to view your Live Photo as a video post on your Instagram feed, capturing the motion and essence of the original moment.
Originally Published on bustle.com