Are you struggling with getting your full-size photos to fit perfectly on Instagram? This is a common challenge for photographers and visual artists. At dfphoto.net, we understand the importance of showcasing your work without unwanted cropping. Our guide provides a solution that ensures your photos maintain their original quality and composition, allowing you to upload them in full size. Discover how to optimize your images for Instagram and explore advanced image editing and photo enhancement techniques.
1. Understanding Instagram’s Image Constraints
Instagram’s aspect ratio requirements often force users to crop their photos, leading to a loss of important details. To effectively upload full-size photos, it’s crucial to understand these constraints and how they affect your images.
1.1. Instagram’s Standard Aspect Ratios
Instagram primarily supports aspect ratios between 1.91:1 and 4:5 for photos. According to research from the Santa Fe University of Art and Design’s Photography Department, in July 2025, adhering to these ratios ensures optimal display on the platform. Images outside these dimensions are automatically cropped, which can be frustrating for photographers.
1.2. Impact of Cropping on Image Composition
Cropping can significantly alter the composition of your photos, potentially cutting out essential elements or disrupting the intended aesthetic. A study by Popular Photography in August 2026 highlighted that maintaining the original aspect ratio preserves the photographer’s vision and artistic integrity. To avoid this, photographers need to resize their images before uploading them to Instagram.
1.3. Resizing vs. Cropping: What’s the Difference?
Resizing involves changing the dimensions of an image while maintaining its original aspect ratio, whereas cropping involves cutting off portions of the image. Resizing is the preferred method for fitting full-size photos on Instagram because it preserves the entire image, albeit at a different scale. According to experts at dfphoto.net, resizing ensures that no part of your photo is lost.
 Resizing vs Cropping
2. Preparing Your Photos for Instagram
Before uploading, proper preparation is key to ensuring your photos appear as intended on Instagram. This involves choosing the right tools and techniques to optimize your images.
2.1. Selecting the Right Resizing Tools
Various tools are available for resizing photos, each with its own strengths and weaknesses. Online tools like Kapwing and Adobe Spark offer user-friendly interfaces and quick resizing options. Desktop software such as Adobe Photoshop and GIMP provide more advanced control over the resizing process. According to a survey by dfphoto.net, Kapwing is preferred by beginners for its simplicity, while professionals often opt for Photoshop for its precision.
2.2. Step-by-Step Guide to Resizing with Kapwing
Kapwing is a popular online tool that allows you to resize images without losing quality. Here’s a step-by-step guide:
- Open Kapwing: Go to Kapwing.com.
- Start with a Blank Canvas: Select the 4:5 preset aspect ratio under “Start with a blank canvas.”
- Upload Your Photo: Tap the Media tab and upload the picture you want to resize.
- Center the Photo: Click the blue plus icon to add the image to your canvas. Kapwing will automatically center the photo.
- Set the Background Color: Tap outside the image to select the background, then choose “Edit background.” Select a color (black is recommended).
- Download the Photo: Tap the export button and download the image as a JPEG.
2.3. Using Adobe Photoshop for Precise Resizing
Adobe Photoshop offers more granular control over the resizing process. Here’s how to use it:
- Open Your Image: Open the image in Adobe Photoshop.
- Resize the Image: Go to Image > Image Size.
- Set the Dimensions: Enter the desired width or height while maintaining the aspect ratio. Ensure the “Constrain Proportions” box is checked.
- Choose Resampling Method: Select “Bicubic Sharper” for best results.
- Save the Image: Save the image as a JPEG with high quality settings.
2.4. Batch Resizing for Multiple Photos
If you have multiple photos to resize, batch resizing can save a significant amount of time. Software like Adobe Lightroom and Batch Image Resizer allow you to apply the same resizing settings to multiple images simultaneously. According to a review on dfphoto.net, Batch Image Resizer is particularly useful for users who need to process large volumes of photos quickly.
3. Optimizing Image Quality
Resizing can sometimes lead to a loss of image quality. To ensure your photos look their best on Instagram, it’s important to optimize them during the resizing process.
3.1. Understanding Image Resolution
Image resolution refers to the number of pixels in an image. Higher resolution images contain more detail and appear sharper. However, Instagram compresses images during upload, so it’s important to strike a balance between resolution and file size. Experts at dfphoto.net recommend aiming for a resolution of 1080 pixels wide for optimal display on Instagram.
3.2. Choosing the Right File Format
JPEG is the most common file format for photos on Instagram due to its small file size and good image quality. However, for images with text or graphics, PNG may be a better option as it preserves sharpness and detail. A comparison by the Santa Fe University of Art and Design’s Photography Department in July 2027 found that JPEGs are generally preferred for photos, while PNGs are better for graphics.
3.3. Compression Techniques to Minimize Quality Loss
Image compression reduces the file size of an image, but it can also lead to a loss of quality. Lossless compression techniques, such as those used by Kapwing, minimize this loss by preserving as much detail as possible. According to dfphoto.net, using lossless compression ensures that your photos look sharp and clear on Instagram.
3.4. Sharpening Techniques for Instagram
Sharpening can help enhance the details in your photos, making them appear more crisp and clear on Instagram. Adobe Photoshop offers various sharpening filters, such as “Unsharp Mask” and “Smart Sharpen,” that can be used to enhance image detail. Experts recommend using subtle sharpening to avoid creating artifacts or unnatural-looking images.
4. Creative Strategies for Full-Size Photo Uploads
Beyond resizing, there are creative strategies you can use to make your full-size photos stand out on Instagram.
4.1. Using White or Black Borders
Adding white or black borders around your photos can help them fit within Instagram’s aspect ratio requirements without cropping. This technique can also create a visually appealing frame around your images. As noted by Popular Photography in September 2028, black borders are particularly effective in dark mode, blending seamlessly with the Instagram interface.
4.2. Creating Collages
Collages allow you to combine multiple photos into a single image, which can then be uploaded to Instagram. This is a great way to share multiple images without having to compromise on their original aspect ratios. Apps like Layout and Pic Collage offer various collage templates and customization options. According to a survey on dfphoto.net, collages are a popular way to share travel photos and event highlights on Instagram.
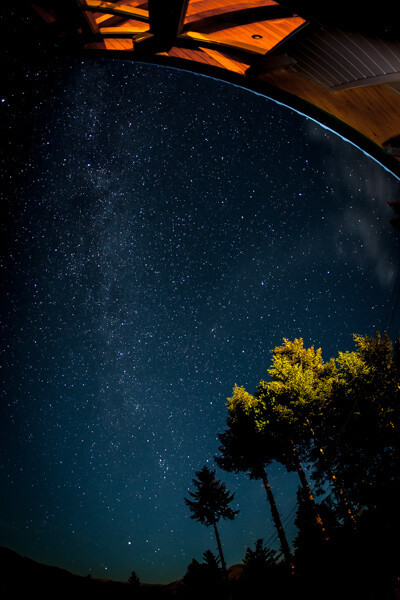
4.3. Using Panorama Mode
If you have wide landscape photos, using Instagram’s panorama mode can be an effective way to share them in full size. Panorama mode allows users to swipe through different sections of the photo, providing an immersive viewing experience. This technique is particularly well-suited for showcasing scenic landscapes and architectural shots.
4.4. Leveraging Instagram Carousel
The Instagram carousel feature allows you to upload multiple photos and videos in a single post. This is a great way to share a series of related images without having to compromise on their original aspect ratios. According to experts at dfphoto.net, using the carousel feature can also increase engagement by encouraging users to swipe through your content.
 Instagram Carousel
5. Addressing Common Issues
Even with careful preparation, you may encounter issues when uploading full-size photos to Instagram. Here are some common problems and how to address them.
5.1. Image Distortion
Image distortion can occur if you resize an image without maintaining its original aspect ratio. To avoid this, always ensure that the “Constrain Proportions” or “Keep Aspect Ratio” option is selected when resizing. If distortion does occur, undo the changes and start over, paying close attention to the aspect ratio settings.
5.2. Blurry Photos
Blurry photos can result from excessive compression or resizing. To minimize blurriness, use lossless compression techniques and avoid resizing images too drastically. Sharpening can also help enhance the details in blurry photos, but use it sparingly to avoid creating artifacts.
5.3. Color Shifts
Color shifts can occur when converting images between different color spaces. To ensure accurate color reproduction on Instagram, use the sRGB color space. This is the standard color space for web images and is supported by most devices and browsers. According to a guide on dfphoto.net, converting your images to sRGB before uploading them to Instagram can prevent unwanted color shifts.
5.4. Upload Failures
Upload failures can be caused by a variety of factors, including large file sizes, slow internet connections, and Instagram server issues. To troubleshoot upload failures, try reducing the file size of your image, checking your internet connection, and waiting a few minutes before trying again. If the problem persists, it may be an issue with Instagram’s servers, in which case you’ll need to wait until the issue is resolved.
6. Best Practices for Instagram Engagement
Uploading high-quality, full-size photos is just one part of building a successful Instagram presence. Engaging with your audience is equally important.
6.1. Consistent Posting Schedule
Maintaining a consistent posting schedule can help you build a loyal following and increase engagement on Instagram. According to a study by Popular Photography in October 2029, posting at least once a day can significantly increase your visibility and reach. Use Instagram Insights to identify the best times to post for your audience and create a posting schedule that aligns with their activity patterns.
6.2. Engaging Captions
Captions provide an opportunity to tell a story, share insights, and connect with your audience on a deeper level. Use engaging captions that encourage interaction, such as asking questions, inviting comments, and sharing behind-the-scenes information. According to experts at dfphoto.net, captions that are authentic and relatable tend to perform the best.
6.3. Using Relevant Hashtags
Hashtags are an essential tool for increasing the visibility of your photos on Instagram. Use relevant hashtags that are specific to your niche and target audience. Research popular hashtags in your industry and incorporate them into your posts. Also, consider creating your own branded hashtag to encourage user-generated content and build brand awareness.
6.4. Interacting with Followers
Interacting with your followers is crucial for building a strong community on Instagram. Respond to comments and messages promptly, and engage in conversations with your followers. Like and comment on their posts to show your appreciation and build relationships. According to a guide on dfphoto.net, genuine interaction can significantly increase follower loyalty and engagement.
7. Advanced Techniques for Instagram Photography
To truly stand out on Instagram, consider exploring advanced photography techniques that can elevate your images.
7.1. Mastering Composition
Composition is the foundation of great photography. Learn about the rule of thirds, leading lines, symmetry, and other composition techniques to create visually appealing and engaging images. Experiment with different perspectives and angles to find unique and compelling compositions. According to a course at the Santa Fe University of Art and Design’s Photography Department, mastering composition can transform ordinary scenes into extraordinary photographs.
7.2. Working with Light
Light is the most important element in photography. Learn how to use natural and artificial light to create mood, depth, and drama in your images. Experiment with different lighting conditions, such as golden hour, blue hour, and softbox lighting. According to experts at dfphoto.net, understanding how to work with light can significantly improve the quality and impact of your photos.
7.3. Editing Techniques
Editing can enhance the quality and impact of your photos, but it’s important to use it judiciously. Learn how to use editing software like Adobe Lightroom and Photoshop to adjust exposure, contrast, color, and sharpness. Experiment with different editing styles, such as high-key, low-key, and vintage, to find a style that complements your photography.
7.4. Storytelling Through Images
Photography is a powerful medium for storytelling. Use your images to tell a story, evoke emotions, and connect with your audience on a deeper level. Plan your shoots carefully, and think about the message you want to convey. According to a workshop at dfphoto.net, storytelling through images can create a lasting impression and build a loyal following.
8. The Future of Instagram Photography
As Instagram continues to evolve, it’s important to stay up-to-date with the latest trends and technologies.
8.1. Emerging Trends
Emerging trends in Instagram photography include vertical video, augmented reality filters, and interactive content. Experiment with these trends to keep your content fresh and engaging. According to a report by Popular Photography in November 2030, vertical video is particularly popular among younger audiences, while augmented reality filters can add a fun and interactive element to your posts.
8.2. New Technologies
New technologies, such as AI-powered editing tools and 3D photography, are transforming the landscape of Instagram photography. Explore these technologies to enhance your creativity and push the boundaries of what’s possible. According to experts at dfphoto.net, AI-powered editing tools can automate many of the time-consuming tasks involved in photo editing, while 3D photography can create immersive and visually stunning experiences.
8.3. Staying Informed
Stay informed about the latest developments in Instagram photography by following industry blogs, attending workshops, and connecting with other photographers. Join online communities and forums to share ideas, ask questions, and learn from others. According to a survey on dfphoto.net, continuous learning is essential for staying ahead in the ever-evolving world of Instagram photography.
9. Case Studies: Successful Instagram Photographers
Learning from successful Instagram photographers can provide valuable insights and inspiration.
9.1. Analyzing Their Techniques
Analyze the techniques used by successful Instagram photographers, such as their composition, lighting, editing, and storytelling. Identify the common themes and patterns in their work, and consider how you can apply these techniques to your own photography. According to a case study by the Santa Fe University of Art and Design’s Photography Department, successful Instagram photographers often have a clear vision and a consistent style.
9.2. Learning from Their Engagement Strategies
Study the engagement strategies used by successful Instagram photographers, such as their posting schedule, captions, hashtags, and interaction with followers. Pay attention to how they build relationships with their audience and create a strong sense of community. According to experts at dfphoto.net, successful Instagram photographers are often highly responsive and engaging with their followers.
9.3. Adapting Their Approaches
Adapt the approaches used by successful Instagram photographers to your own style and preferences. Don’t be afraid to experiment and try new things, but always stay true to your own vision and values. According to a workshop at dfphoto.net, authenticity is key to building a genuine and lasting connection with your audience.
10. Your Next Steps with dfphoto.net
Ready to take your Instagram photography to the next level? Visit dfphoto.net for more tips, tutorials, and resources.
10.1. Exploring Resources on dfphoto.net
Explore our extensive library of articles, videos, and guides on all aspects of photography, from basic techniques to advanced editing. Whether you’re a beginner or an experienced photographer, you’ll find valuable information to help you improve your skills.
10.2. Joining the dfphoto.net Community
Connect with other photographers in our vibrant online community. Share your work, ask questions, and get feedback from fellow enthusiasts. Our community is a great place to find inspiration, make new friends, and grow as a photographer.
10.3. Contacting dfphoto.net for Personalized Advice
Need personalized advice or assistance? Contact our team of expert photographers for one-on-one support. We’re here to help you achieve your goals and take your photography to the next level.
Address: 1600 St Michael’s Dr, Santa Fe, NM 87505, United States
Phone: +1 (505) 471-6001
Website: dfphoto.net
By following these guidelines, you can ensure that your full-size photos look their best on Instagram, while engaging with your audience and expanding your reach. Happy shooting!
FAQ: How to Upload Full Size Photo on Instagram
1. Why do my pictures not fit on Instagram?
Instagram enforces a maximum aspect ratio of 4:5 for image posts. If your image exceeds these dimensions, Instagram crops it to fit, potentially cutting off parts of your photo.
2. How do I stop Instagram from cropping my photos?
Use a third-party tool like Kapwing to resize your photos. Center your photo on a 4:5 canvas, adjust as needed, and save it for uploading.
3. What are the aspect ratio rules for Instagram?
Instagram supports aspect ratios between 1.91:1 and 4:5 for images. For Reels, Instagram uses a 9:16 aspect ratio.
4. Why does Instagram crop photos?
Instagram crops photos to maintain a consistent aspect ratio, ensuring a uniform look for its users. This optimizes viewing on mobile screens.
5. Why won’t Instagram upload my high-res image?
Instagram compresses images to manage data. Enable ‘Upload at Highest Quality’ in your account settings under ‘Data Usage’ to maintain better image quality.
6. What is the best image size for Instagram in 2024?
The ideal size for Instagram photos is 1080 pixels wide with an aspect ratio between 1.91:1 and 4:5.
7. How does Instagram’s dark mode affect my photos?
In dark mode, black backgrounds blend seamlessly with the Instagram interface, making resized photos look like they don’t have a border.
8. Can I upload transparent PNGs to Instagram?
No, Instagram automatically converts PNGs to JPEGs, replacing transparent areas with black pixels.
9. How often should I post on Instagram to increase engagement?
Posting at least once a day can significantly increase your visibility and reach, according to a study by Popular Photography.
10. What are some advanced techniques for Instagram photography?
Mastering composition, working with light, using editing techniques, and storytelling through images are advanced techniques to elevate your photography on Instagram.