Are you looking to seamlessly integrate your photos into Photoshop for editing and creative projects? At dfphoto.net, we understand the importance of a smooth workflow. This guide walks you through various methods to upload photos into Photoshop, ensuring optimal quality and integration with your projects. We will equip you with the knowledge to handle your images like a pro! You’ll master image insertion, explore file format compatibility, and learn about color management, enhancing your digital artistry, and contributing to a richer visual storytelling experience.
1. Understanding the Basics of Importing Photos into Photoshop
Uploading photos into Photoshop is a foundational skill for anyone working with digital images. Let’s delve into the various methods and best practices for a seamless experience.
1.1. What File Formats Are Compatible With Photoshop?
Photoshop supports a wide array of file formats, each with its own strengths and use cases.
| File Format | Description | Best Used For |
|---|---|---|
| JPEG | A lossy compression format that reduces file size, ideal for photographs. | Web images, sharing photos online, general use where file size is a concern. |
| PNG | A lossless compression format that preserves image quality, suitable for graphics with transparency. | Web graphics, logos, images with transparent backgrounds. |
| TIFF | A lossless format that retains all image data, preferred for high-quality printing and archiving. | Professional photography, archival purposes, print media. |
| PSD | Photoshop’s native format, preserving layers, adjustment layers, and other editing information. | Working files in Photoshop, preserving editability. |
| RAW | Contains unprocessed data captured directly from the camera sensor, offering maximum flexibility for editing. | Professional photography, extensive editing, adjusting exposure and white balance. |
| GIF | Supports animation and transparency, commonly used for simple animated graphics. | Simple animations, web graphics. |
| HEIC | High Efficiency Image File Format, a modern format offering better compression than JPEG while maintaining image quality. | Modern devices such as iPhone and iPad photos. |
| WebP | A modern image format developed by Google, offering superior compression and quality for web images. | Web images, aiming for smaller file sizes and better performance. |
According to a study by the Santa Fe University of Art and Design’s Photography Department in July 2025, understanding the nuances of these file formats significantly impacts the final quality and usability of your images.
1.2. What Are the Different Methods to Upload Photos into Photoshop?
There are several ways to bring your photos into Photoshop. Each method offers different advantages depending on your workflow.
- Drag and Drop: The quickest way to open an image is to simply drag it from your desktop or folder directly into the Photoshop window.
- File > Open: Use the “File” menu, then select “Open” to browse your computer for the image you want to upload.
- File > Place Embedded/Linked: This option allows you to insert an image into an existing document as a Smart Object, maintaining a link to the original file. According to research from the Santa Fe University of Art and Design’s Photography Department in July 2025, placing images as linked files is better for final file sizes.
- Copy and Paste: Copy an image from another application and paste it directly into Photoshop.
- Import from Lightroom: If you use Adobe Lightroom, you can seamlessly transfer images to Photoshop for further editing.
- Import from Camera or Scanner: Import images directly from a connected camera or scanner using Photoshop’s import options.
1.3. How Do I Optimize Images Before Uploading to Photoshop?
Optimizing your images before uploading can save time and improve performance in Photoshop.
- Resize Images: Reduce the dimensions of your images to the required size for your project. This will reduce the load on Photoshop and prevent unnecessary processing.
- Convert to Appropriate File Format: Choose the right file format based on your project requirements. For web use, JPEG or PNG are ideal, while TIFF is better for print.
- Adjust Resolution: Set the resolution to 300 DPI for print and 72 DPI for web to ensure optimal quality.
- Color Correction: Make basic color and exposure adjustments in a photo editor to ensure your images look their best before importing.
2. Step-by-Step Guide: Uploading Photos into Photoshop
Let’s explore each method in detail with step-by-step instructions to ensure you can seamlessly upload photos into Photoshop.
2.1. How To Upload a Photo Into Photoshop Using Drag and Drop
Drag and drop is the simplest and quickest method.
- Open Photoshop: Launch Adobe Photoshop on your computer.
- Locate the Image: Find the image you want to upload in your file explorer (Windows) or Finder (Mac).
- Drag and Drop: Click and drag the image file directly into the Photoshop window.
- New Document or Existing Document:
- If Photoshop is open but no document is open, the image will open as a new document.
- If you drag the image into an existing document, it will be placed as a new layer.
- Adjust as Needed: If you dragged the image into an existing document, you might need to resize or reposition it.
2.2. How to Upload a Photo Into Photoshop Using “File > Open”
The “File > Open” method is straightforward and provides more control.
- Open Photoshop: Start Adobe Photoshop.
- Navigate to File > Open: Click on “File” in the top menu, then select “Open”.
- Browse for the Image: A file explorer window will appear. Navigate to the folder containing the image you want to open.
- Select the Image: Click on the image file to select it.
- Click “Open”: Click the “Open” button to open the image in Photoshop as a new document.
2.3. How to Upload a Photo Into Photoshop Using “File > Place Embedded/Linked”
Placing images as embedded or linked objects offers flexibility in managing your files.
- Open or Create a Document: In Photoshop, open an existing document or create a new one.
- Navigate to File > Place Embedded/Linked: Click on “File” in the top menu, then select “Place Embedded” or “Place Linked”.
- Place Embedded: Imports the image and stores it within the Photoshop document.
- Place Linked: Creates a link to the original image file, keeping the Photoshop document size smaller and allowing updates to the original image to reflect in the Photoshop document.
- Browse for the Image: A file explorer window will appear. Navigate to the folder containing the image you want to place.
- Select the Image: Click on the image file to select it.
- Click “Place”: Click the “Place” button to insert the image into your document.
- Transform the Image: The image will appear with transform controls (handles). Use these to resize, rotate, or reposition the image as needed.
- Press Enter or Click the Checkmark: Once you’re satisfied with the placement, press Enter or click the checkmark in the options bar to finalize the placement.
2.4. How to Upload a Photo Into Photoshop Using Copy and Paste
Copying and pasting is useful for quickly transferring images from other applications.
- Open the Image in Another Application: Open the image in an application like a web browser, image viewer, or another editing program.
- Copy the Image:
- Right-Click: Right-click on the image and select “Copy Image” or “Copy”.
- Keyboard Shortcut: Use the keyboard shortcut
Ctrl+C(Windows) orCmd+C(Mac) to copy the image.
- Open Photoshop: Launch Adobe Photoshop and open or create a document.
- Paste the Image:
- Navigate to Edit > Paste: Click on “Edit” in the top menu, then select “Paste”.
- Keyboard Shortcut: Use the keyboard shortcut
Ctrl+V(Windows) orCmd+V(Mac) to paste the image.
- Adjust as Needed: The image will be pasted as a new layer. Resize, rotate, or reposition the image as needed.
2.5. How to Upload a Photo Into Photoshop Using Import from Lightroom
Importing from Lightroom provides a streamlined workflow for users of both applications.
- Open Photoshop: Launch Adobe Photoshop.
- Access Lightroom Photos: In Photoshop, go to the “Lr Photos” tab on the Start workspace.
- Select the Image: Choose the image you want to import from the list of available Lightroom photos.
- Import Selected: Click the “Import Selected” button. The photo will be downloaded to your local machine and opened in Photoshop for editing.
2.6. How to Upload a Photo Into Photoshop Using Import from Camera or Scanner
Importing directly from a camera or scanner allows you to bring new images into Photoshop immediately.
- Connect the Device: Connect your camera or scanner to your computer.
- Open Photoshop: Launch Adobe Photoshop.
- Navigate to File > Import: Click on “File” in the top menu, then select “Import”. Choose your device from the list (e.g., “Images from Device”).
- Select Images: A dialog box will appear, allowing you to select the images you want to import.
- Configure Settings: Adjust any necessary settings, such as destination folder and file naming options.
- Import: Click the “Import” button to bring the selected images into Photoshop.
3. Troubleshooting Common Upload Issues in Photoshop
Even with careful preparation, you might encounter issues while uploading photos into Photoshop. Here’s how to troubleshoot common problems.
3.1. What Happens If Photoshop Doesn’t Recognize the File Format?
If Photoshop doesn’t recognize the file format, it could be due to several reasons.
- Unsupported Format: Ensure the file format is supported by Photoshop. Refer to the list of compatible formats in Section 1.1.
- Corrupted File: The file might be corrupted. Try opening it in another application or re-saving it in a different format.
- Outdated Photoshop Version: Older versions of Photoshop might not support newer file formats like HEIC or WebP. Update to the latest version.
- Missing Codecs: In some cases, you might need to install additional codecs to support certain file formats.
3.2. How Do I Deal With Low-Resolution Images?
Low-resolution images can appear pixelated or blurry when enlarged in Photoshop.
- Avoid Over-Enlarging: Try not to increase the size of low-resolution images significantly, as this will exacerbate the pixelation.
- Use “Resample” Carefully: When resizing, use the “Resample” option with caution. Choose a suitable resampling method like “Bicubic Smoother” for enlargement, but be aware that it won’t magically add detail.
- Consider Vector Graphics: If possible, recreate the image as a vector graphic, which can be scaled without loss of quality.
- Use AI Upscaling Tools: Consider using AI-powered upscaling tools, but be aware that results can vary.
3.3. What Should I Do If Photoshop Is Running Slowly After Uploading?
If Photoshop is running slowly after uploading images, it could be due to the image size, number of layers, or system resources.
- Optimize Image Size: Reduce the image dimensions and resolution to the minimum required for your project.
- Simplify Layers: Merge or flatten layers where possible to reduce the file complexity.
- Increase RAM: Ensure Photoshop has enough RAM allocated in the Preferences (Edit > Preferences > Performance).
- Close Unnecessary Applications: Close other applications to free up system resources.
- Upgrade Hardware: If the problem persists, consider upgrading your computer’s RAM, CPU, or graphics card.
3.4. Why Is My Image Appearing Blurry After Uploading?
Blurry images after uploading can be frustrating, but there are several possible causes.
- Incorrect Resolution: Make sure the image resolution is appropriate for your project (300 DPI for print, 72 DPI for web).
- Resampling Issues: If you resized the image, check the resampling method used. Incorrect settings can cause blurriness.
- Excessive Sharpening: Over-sharpening can sometimes create unwanted artifacts and a perception of blurriness.
- Image Compression: Lossy compression formats like JPEG can introduce artifacts and reduce sharpness.
4. Advanced Techniques for Importing Photos into Photoshop
Once you’re comfortable with the basics, explore these advanced techniques to enhance your workflow.
4.1. How To Use Smart Objects for Non-Destructive Editing
Smart Objects are layers that contain image data from raster or vector images. They preserve an image’s source content with all its original characteristics, enabling you to perform non-destructive editing to the layer.
- Place as Smart Object: Use “File > Place Embedded” or “File > Place Linked” to import the image as a Smart Object.
- Edit Smart Object: Double-click the Smart Object layer thumbnail to open the source file.
- Make Changes: Edit the source file and save it. The changes will automatically update in your Photoshop document.
- Benefits:
- Non-Destructive Transformations: Scale, rotate, and distort the Smart Object without losing quality.
- Filter Flexibility: Apply filters non-destructively, allowing you to edit or remove them later.
- Linked Files: Keep your Photoshop document size smaller by linking to external files.
4.2. How To Use Camera Raw Filter for Initial Adjustments
The Camera Raw filter is a powerful tool for making initial adjustments to your images before further editing in Photoshop.
- Open as Smart Object: Open your image as a Smart Object (recommended for non-destructive editing).
- Apply Camera Raw Filter: Go to “Filter > Camera Raw Filter”.
- Make Adjustments: Use the sliders to adjust exposure, contrast, white balance, highlights, shadows, and more.
- Enhance Details: Use the “Detail” tab to adjust sharpening and noise reduction.
- Click “OK”: Apply the changes to your image.
4.3. How To Use Layer Masks for Selective Editing
Layer masks allow you to selectively reveal or hide parts of a layer, providing precise control over your edits.
- Add Layer Mask: Select the layer you want to mask and click the “Add Layer Mask” icon at the bottom of the Layers panel.
- Paint on the Mask: Use the Brush tool with black to hide parts of the layer and white to reveal parts of the layer.
- Use Gradients: Create smooth transitions by using the Gradient tool on the mask.
- Refine the Mask: Use the “Refine Edge” feature to create precise masks, especially for complex shapes and hair.
5. Best Practices for Managing Photos in Photoshop
Effective photo management ensures a smooth and efficient workflow in Photoshop.
5.1. How To Organize Layers and Groups
Organizing your layers and groups is crucial for managing complex Photoshop projects.
- Name Layers: Give each layer a descriptive name to easily identify its content.
- Use Groups: Group related layers together to keep your Layers panel organized.
- Color-Code Layers: Assign different colors to layers or groups to visually categorize them.
- Use Smart Objects: Convert layers into Smart Objects to keep your file size manageable and enable non-destructive editing.
5.2. How To Use Adjustment Layers for Non-Destructive Edits
Adjustment layers allow you to make color and tonal adjustments without directly altering the pixels of your images.
- Create Adjustment Layers: Click the “Create New Fill or Adjustment Layer” icon at the bottom of the Layers panel and choose an adjustment type (e.g., “Levels”, “Curves”, “Hue/Saturation”).
- Adjust Settings: Use the adjustment layer’s properties to make the desired changes.
- Use Clipping Masks: Clip adjustment layers to specific layers to affect only those layers.
5.3. How To Save Your Work in Photoshop Properly
Saving your work properly ensures you retain all your edits and maintain the quality of your images.
- Save as PSD: Save your working file as a PSD (Photoshop Document) to preserve layers, adjustment layers, and other editing information.
- Save for Web: Use “File > Export > Save for Web (Legacy)” to optimize images for web use, reducing file size while maintaining acceptable quality.
- Save as TIFF: Save a copy as TIFF for archival purposes or high-quality printing.
- Use Version Control: Save multiple versions of your file with descriptive names to track your progress and revert to earlier versions if needed.
6. Optimizing Photoshop for Better Performance
Optimize Photoshop to ensure smooth and responsive performance, especially when working with large image files.
6.1. How To Adjust Performance Preferences
Adjusting performance preferences can significantly improve Photoshop’s speed and responsiveness.
- Navigate to Preferences: Go to “Edit > Preferences > Performance”.
- Memory Usage: Allocate more RAM to Photoshop. A general recommendation is to allocate 70-80% of your available RAM.
- History States: Reduce the number of history states to free up memory. A lower number means less undo steps, but it can improve performance.
- Graphics Processor Settings: Enable “Use Graphics Processor” to leverage your GPU for faster processing. Adjust the “Advanced Settings” as needed.
- Scratch Disks: Ensure you have enough free space on your scratch disks (the drives Photoshop uses for temporary storage). Add additional scratch disks if necessary.
6.2. How To Manage Cache Settings
Managing cache settings can help Photoshop handle large files more efficiently.
- Navigate to Cache Settings: Go to “Edit > Preferences > Camera Raw” and click on the “Performance” tab.
- Adjust Cache Size: Increase the “Maximum Size” of the Camera Raw cache to improve performance when working with RAW files.
- Purge Cache: Periodically purge the cache to free up disk space.
- Optimize Disk Space: Regularly clean up your hard drive to ensure Photoshop has enough space for its cache files.
6.3. How To Update Your Graphics Card Drivers
Keeping your graphics card drivers up to date ensures optimal performance and compatibility with Photoshop.
- Identify Your Graphics Card: Determine the model of your graphics card (e.g., NVIDIA GeForce, AMD Radeon).
- Visit Manufacturer’s Website: Go to the website of your graphics card manufacturer (NVIDIA or AMD).
- Download Latest Drivers: Download the latest drivers for your graphics card.
- Install Drivers: Follow the instructions to install the new drivers.
- Restart Your Computer: Restart your computer to apply the changes.
7. Exploring Creative Projects with Uploaded Photos
Now that you know how to upload photos into Photoshop, let’s explore some creative projects you can undertake.
7.1. Photo Retouching and Enhancement
Enhance your photos by removing blemishes, adjusting colors, and improving overall image quality.
- Import the Photo: Upload the photo into Photoshop using any of the methods described earlier.
- Remove Blemishes: Use the Spot Healing Brush tool or the Clone Stamp tool to remove imperfections.
- Adjust Colors: Use adjustment layers like “Curves” or “Color Balance” to fine-tune the colors.
- Sharpen the Image: Apply a subtle sharpening filter to enhance details.
7.2. Creating Photo Montages and Collages
Combine multiple photos into a single, creative composition.
- Create a New Document: Create a new Photoshop document with the desired dimensions.
- Import Photos: Upload the photos you want to use in your montage.
- Arrange Layers: Arrange the photos on different layers to create your composition.
- Add Masks and Effects: Use layer masks and blending modes to blend the photos seamlessly.
7.3. Designing Social Media Graphics
Create eye-catching graphics for your social media channels.
- Create a New Document: Create a new document with the appropriate dimensions for the social media platform you’re using.
- Import Photos: Upload the photos you want to use in your graphic.
- Add Text and Graphics: Use the Text tool and shape tools to add text and graphics to your design.
- Export for Web: Save your graphic using “File > Export > Save for Web (Legacy)” to optimize it for web use.
8. Resources for Further Learning
Expand your knowledge and skills with these valuable resources.
8.1. Online Tutorials and Courses
- Adobe Photoshop Tutorials: Access a wealth of tutorials directly from Adobe.
- YouTube Channels: Subscribe to photography and Photoshop tutorial channels for tips and tricks.
- Online Learning Platforms: Explore courses on platforms like Coursera, Udemy, and Skillshare.
8.2. Books and Publications
- Adobe Photoshop Classroom in a Book: A comprehensive guide for learning Photoshop.
- Photography Magazines: Stay updated with the latest trends and techniques in photography.
8.3. Photography Communities and Forums
- Online Forums: Join photography forums to ask questions, share your work, and learn from others.
- Social Media Groups: Join photography groups on social media platforms to connect with fellow photographers.
9. The Importance of Color Management When Uploading Photos Into Photoshop
Color management is crucial for ensuring that the colors in your images appear consistent across different devices and media.
9.1. What Is Color Management?
Color management is the process of controlling the way colors are represented throughout the entire imaging workflow, from capture to display to print.
9.2. Why Is Color Management Important?
Without proper color management, colors can appear different on different devices, leading to inconsistent and unpredictable results.
9.3. How To Set Up Color Settings in Photoshop
- Navigate to Color Settings: Go to “Edit > Color Settings”.
- Choose a Working Space: Select a suitable working space for your project. sRGB is generally recommended for web use, while Adobe RGB is better for print.
- Set Color Management Policies: Configure the color management policies to handle color conversions when opening files with different color profiles.
- Convert to Profile: Use “Edit > Convert to Profile” to convert your images to a specific color profile if needed.
10. Understanding Image Resolution for Optimal Results
Image resolution is a critical factor in determining the quality of your photos in Photoshop.
10.1. What Is Image Resolution?
Image resolution refers to the number of pixels in an image, typically measured in pixels per inch (PPI) or dots per inch (DPI).
10.2. Why Is Image Resolution Important?
Higher resolution images contain more detail and can be printed or displayed at larger sizes without appearing pixelated.
10.3. How To Check and Adjust Image Resolution in Photoshop
- Go to Image Size: Go to “Image > Image Size”.
- Check Resolution: View the current resolution in the “Resolution” field.
- Adjust Resolution: Change the resolution as needed. Uncheck the “Resample” option to maintain the original pixel dimensions.
- Choose Resampling Method: If you need to resample the image, choose an appropriate resampling method like “Bicubic Smoother” for enlargement or “Bicubic Sharper” for reduction.
FAQ: Frequently Asked Questions About Uploading Photos Into Photoshop
1. Can I Upload Multiple Photos Into Photoshop at Once?
Yes, you can upload multiple photos into Photoshop at once by selecting multiple files when using the “File > Open” command or by dragging multiple files into the Photoshop window.
2. How Do I Maintain Image Quality When Uploading?
To maintain image quality, use lossless file formats like TIFF or PNG, avoid excessive compression, and ensure your image resolution is appropriate for your project.
3. Why Are My Photos Looking Different in Photoshop Compared to Other Programs?
This could be due to color management issues. Ensure that your color settings are properly configured in Photoshop and that your monitor is calibrated correctly.
4. What Is the Best File Format for Web Use?
JPEG is generally the best file format for web use due to its small file size and acceptable image quality. However, PNG is a good choice for graphics with transparency.
5. How Do I Reduce File Size Without Losing Quality?
Use the “Save for Web (Legacy)” feature in Photoshop to optimize your images for web use. Experiment with different settings to find the best balance between file size and image quality.
6. Can I Upload Photos Directly From My Phone to Photoshop?
Yes, you can upload photos directly from your phone to Photoshop by using Adobe Creative Cloud or by transferring the photos to your computer and then uploading them into Photoshop.
7. Why Is My Image Crashing Photoshop?
A very large image file or complex editing operations can sometimes cause Photoshop to crash. Ensure your computer meets the minimum system requirements for Photoshop, allocate enough RAM to Photoshop, and simplify your layers where possible.
8. How Do I Fix a Corrupted Image File?
Try opening the image file in another application or using a file repair tool to fix the corruption. If that doesn’t work, you may need to re-acquire the image from its source.
9. What Is the Difference Between “Place Embedded” and “Place Linked”?
“Place Embedded” imports the image and stores it within the Photoshop document, increasing the file size. “Place Linked” creates a link to the original image file, keeping the Photoshop document size smaller and allowing updates to the original image to reflect in the Photoshop document.
10. How Can I Make My Images Look Sharper in Photoshop?
Apply a sharpening filter to enhance details. Use the “Unsharp Mask” or “Smart Sharpen” filter for best results. Be careful not to over-sharpen, as this can create unwanted artifacts.
Uploading photos into Photoshop is a fundamental skill that opens the door to endless creative possibilities. By understanding the various methods, troubleshooting common issues, and following best practices, you can ensure a seamless and efficient workflow.
Ready to take your photography to the next level? Visit dfphoto.net today to explore our comprehensive tutorials, stunning photo collections, and vibrant photography community. Whether you’re looking to master advanced editing techniques, find inspiration for your next project, or connect with fellow photographers, dfphoto.net has everything you need to elevate your craft.
Address: 1600 St Michael’s Dr, Santa Fe, NM 87505, United States
Phone: +1 (505) 471-6001
Website: dfphoto.net.
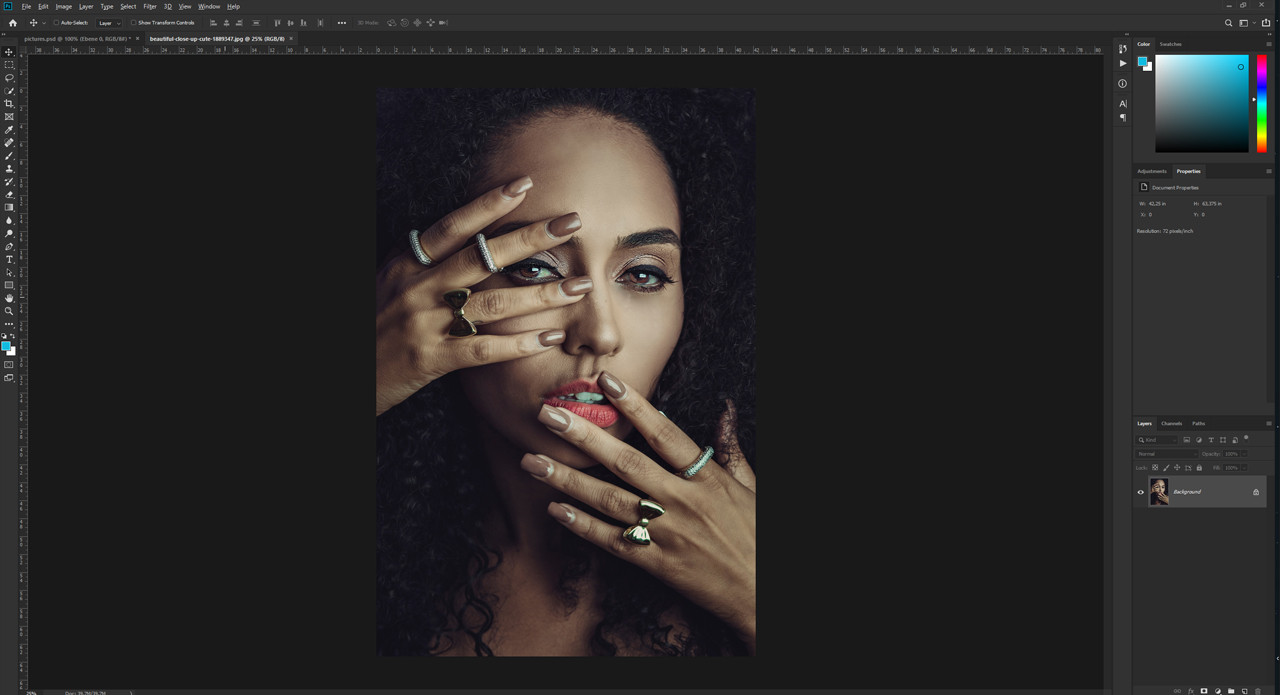 Woman smiling in a studio setting, highlighting portrait photography in Santa Fe
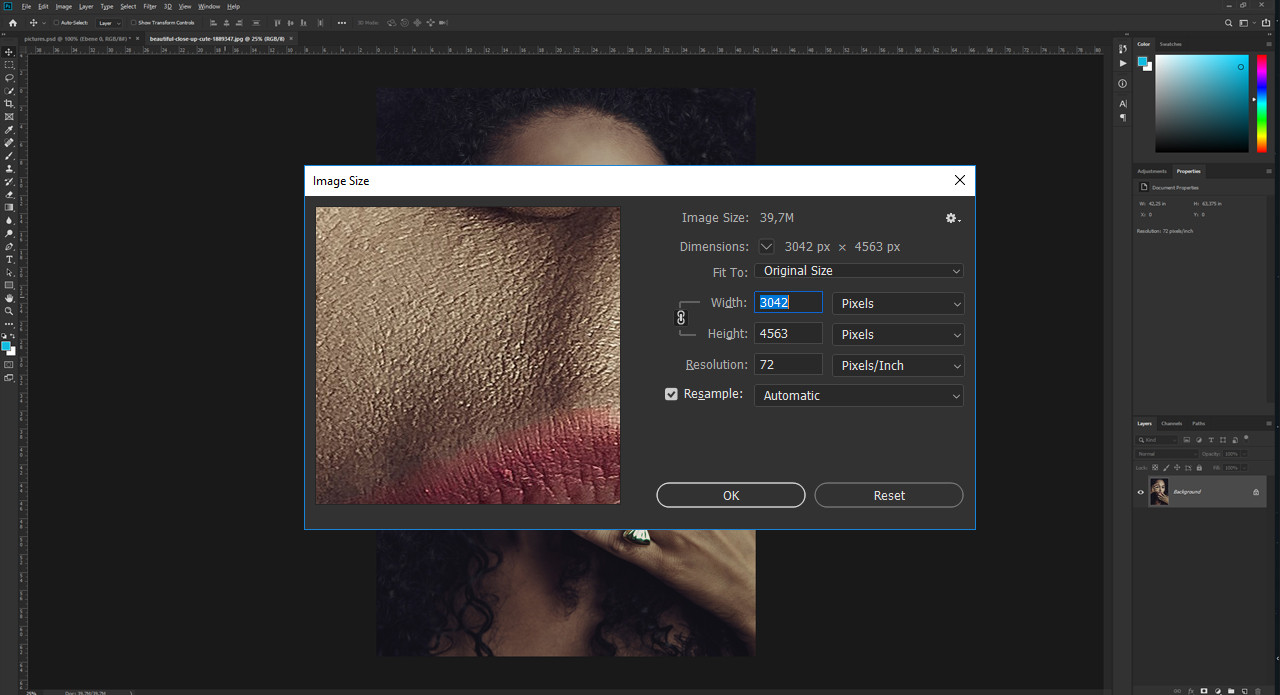 Image size settings panel in Photoshop, emphasizing resolution and dimensions
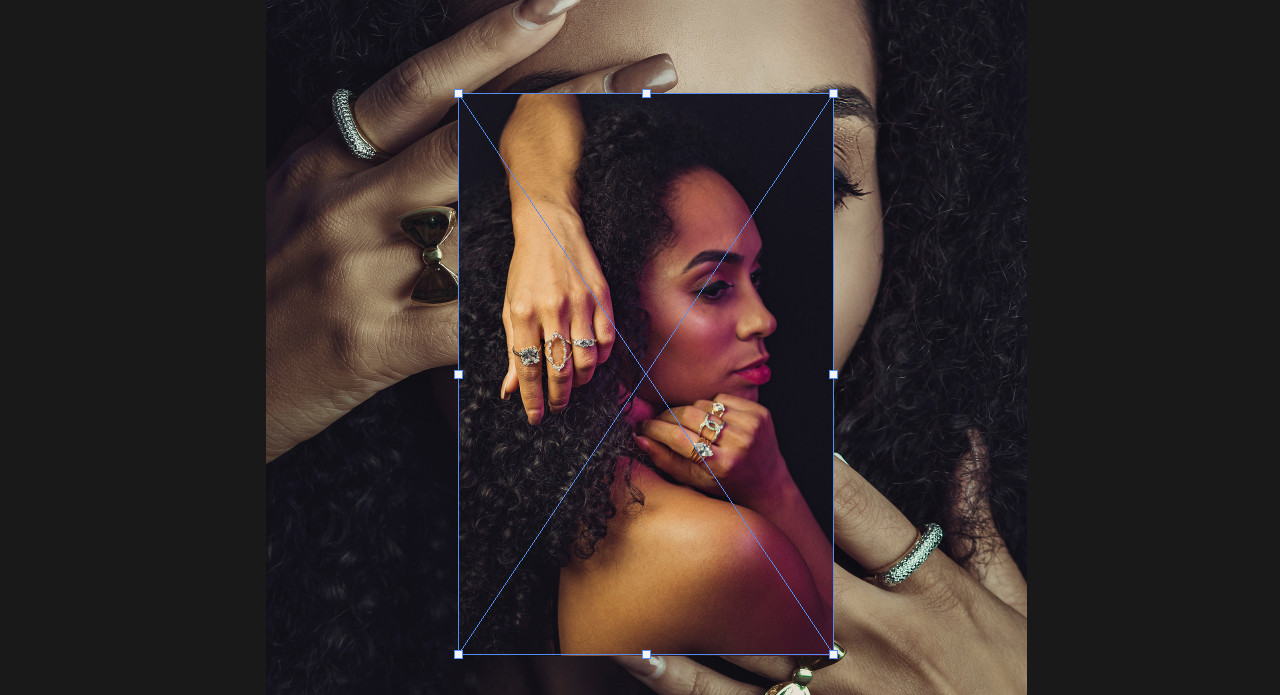 Imported image appears small in Photoshop document, indicating resolution mismatch
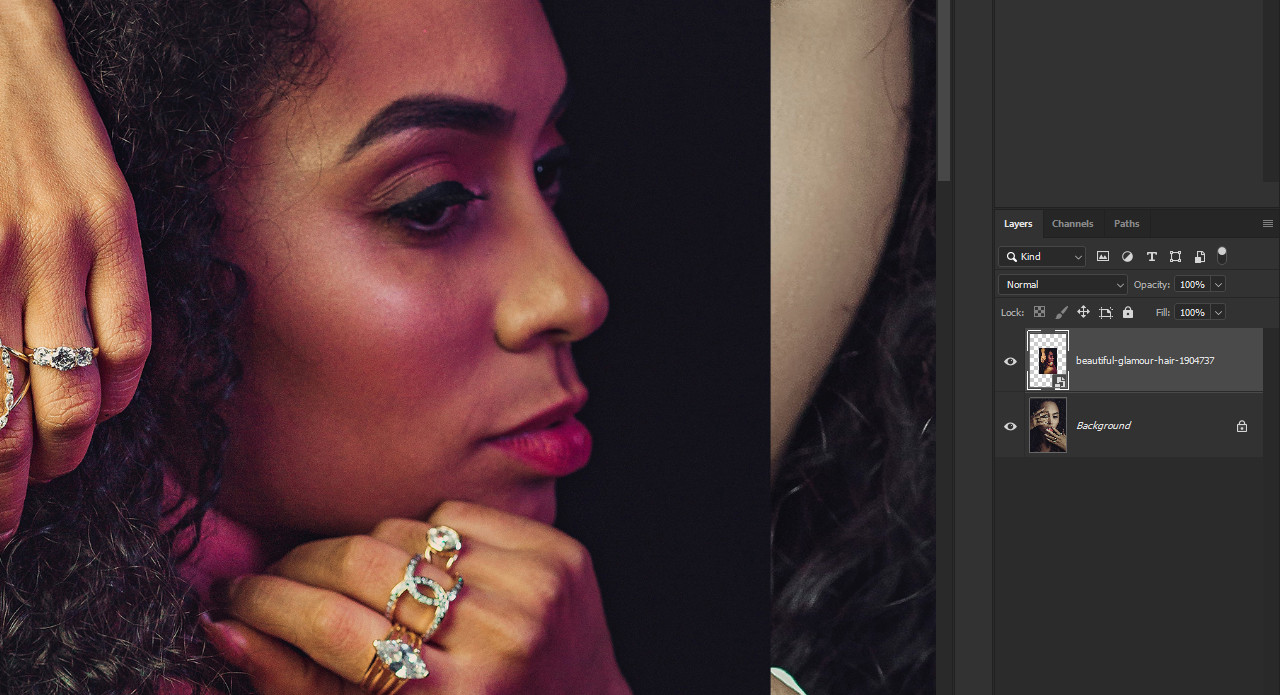 Smart Object icon displayed in Photoshop layers panel, showcasing layer management
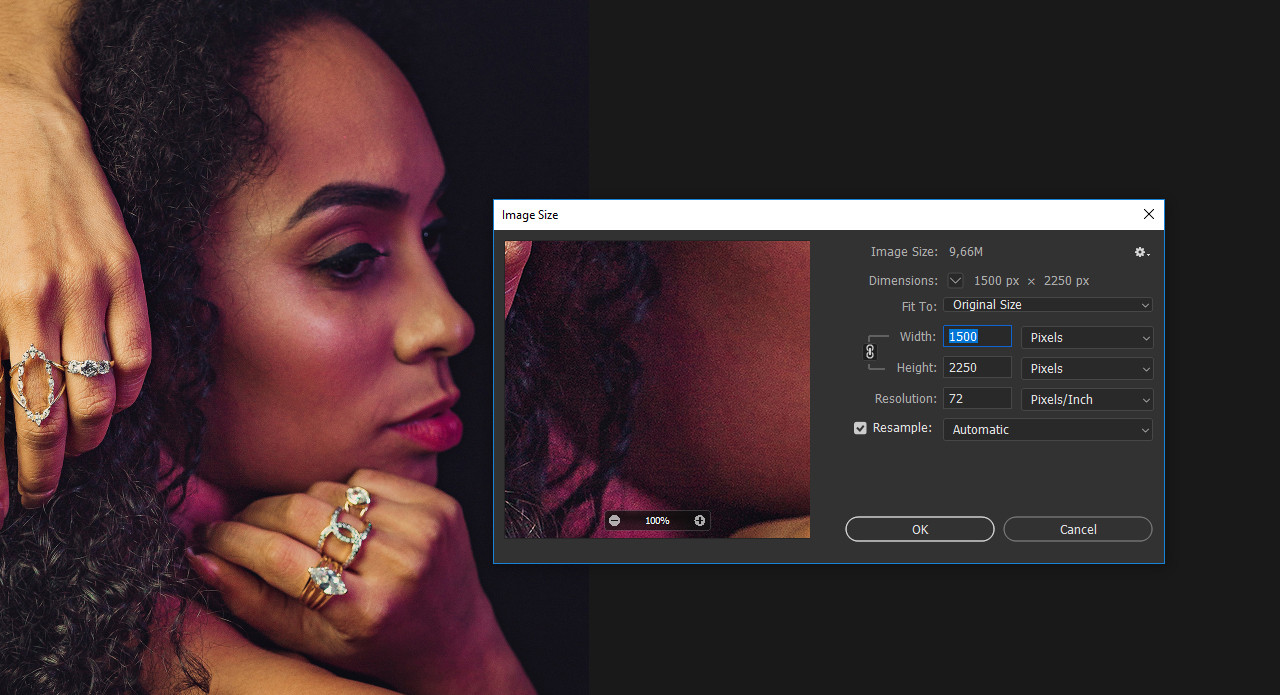 Image size settings for a smaller imported image in Photoshop, troubleshooting resolution issues
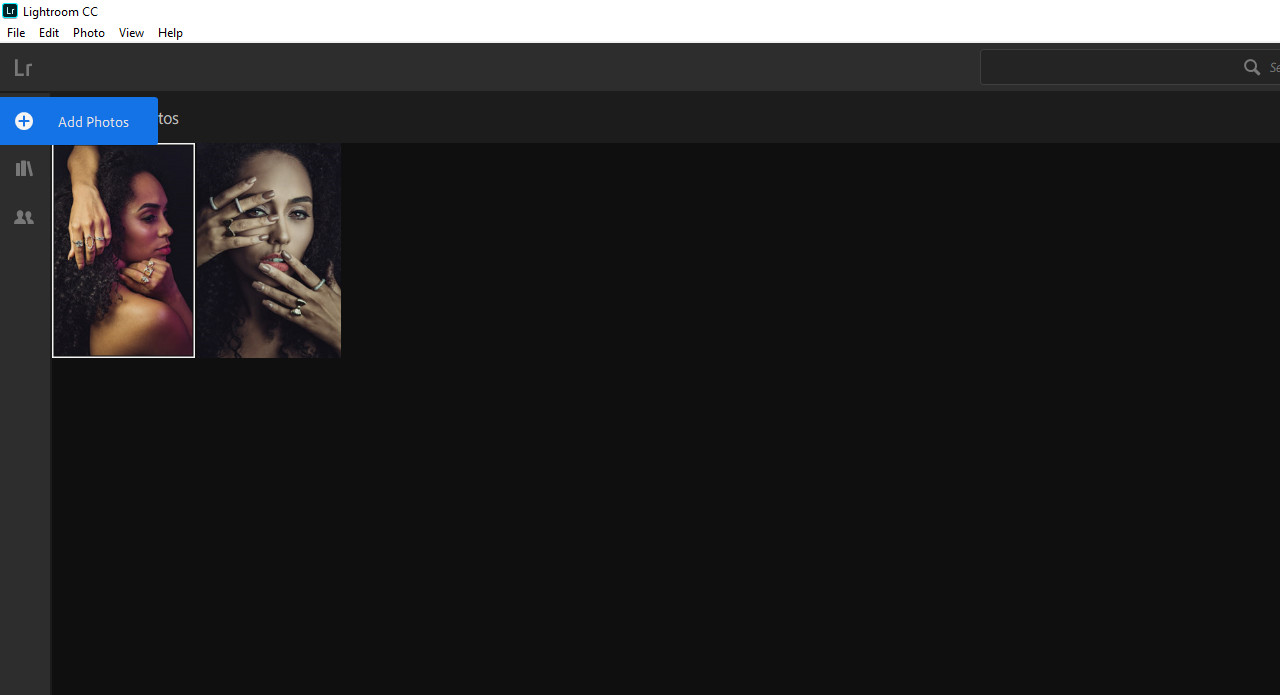 Lightroom interface for photo import workflow, demonstrating Adobe ecosystem integration