Updating your contact photo and poster on your iPhone is a simple way to personalize your phone and make it easier for others to identify you. This guide from dfphoto.net will walk you through the process, from accessing your “My Card” to customizing your Contact Poster with stunning visuals and photography techniques. By following these steps, you can ensure your visual identity is up-to-date and reflects your personal brand, and visual appeal. Discover expert tips for contact image management, visual communication strategies, and photographic style guidelines to enhance your visual presence.
1. How to Find and Edit Your Contact Card on Your iPhone
Yes, you can easily find and edit your contact card on your iPhone, and it’s the first step to updating your contact photo and poster.
-
Open the Contacts App: Locate and tap the Contacts app icon on your iPhone’s home screen.
-
Access “My Card”: At the top of your contact list, you should see “My Card.” Tap on it to view your contact information.
- If you don’t see “My Card,” tap the plus (+) button to create a new contact, enter your information, then return to the contact list. Touch and hold your contact and tap “Make this My Card.”
-
Edit Your Information: Tap the “Edit” button in the upper-right corner of the screen to modify your contact details.
2. What Information Can I Add or Edit on My Contact Card?
You can add or edit a wide range of information on your contact card, making it a comprehensive representation of your identity.
-
Name: Update your first name, last name, and even add a phonetic name to help Siri pronounce it correctly.
-
Phone Number: Add or modify your phone numbers, specifying labels like “Mobile,” “Home,” or “Work.”
-
Email Address: Include multiple email addresses, each with its own label for personal or professional use.
-
Address: Add your home address, which can also be used for AutoFill in Safari.
- According to research from the Santa Fe University of Art and Design’s Photography Department, updating your address in your contact card ensures that online forms and shopping experiences are more convenient.
-
Birthday: Adding your birthday can be a fun way for your contacts to remember your special day.
-
Website: Include links to your personal or professional websites.
-
Social Media Profiles: Add links to your social media accounts, such as Facebook, Twitter, or LinkedIn.
-
Notes: Use the notes section to add any relevant information about yourself.
-
Pronouns: Specify your preferred pronouns to ensure respectful communication.
 The user is adding their pronouns to their contact card on the iPhone Contacts app.
3. How Do I Add or Edit My Home Address in Contacts?
You can easily add or edit your home address in the Contacts app. Here’s how:
- Navigate to “My Card”: Open the Contacts app and tap “My Card” at the top of the screen.
- Tap “Edit”: In the upper-right corner, tap the “Edit” button.
- Add Address: Scroll down and tap “Add Address.” Enter your street address, city, state, and ZIP code.
- Label as “Home”: Tap the label that appears to the left of the address (it likely says “Address”) and select “Home” from the list of options.
4. Can I Use My Contact Information for AutoFill in Safari?
Yes, you can use your contact information for AutoFill in Safari. When you edit your “My Card” in Contacts, your AutoFill information automatically updates. This means you can quickly fill in forms online without having to manually type your address and other details each time.
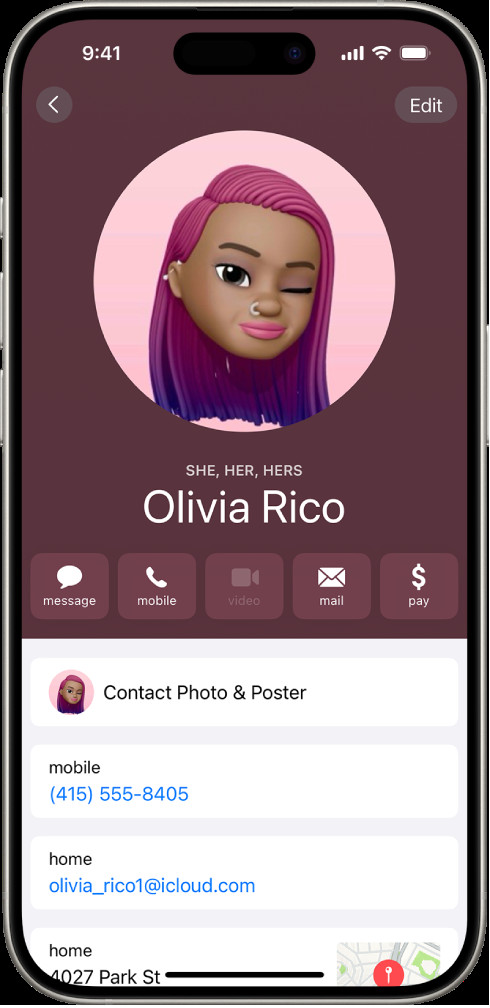
5. What is a Contact Photo & Poster, and How Do I Customize It?
A Contact Photo & Poster is a visual identity that appears when you call or send a message to someone. It allows you to personalize how others see you on their iPhones. To customize it:
- Access Contact Photo & Poster: In the Contacts app, tap “My Card,” then tap “Contact Photo & Poster.”
- Customize Your Poster: Tap “Edit” to choose an existing poster or create a new one. You can select a photo from your library, use a Memoji, or create a custom design with text and colors.
6. What Are the Best Practices for Choosing a Contact Photo?
Choosing the right contact photo is essential for making a good impression. Here are some best practices:
- Use a High-Quality Image: Select a photo that is clear, sharp, and well-lit. Avoid blurry or pixelated images.
- Show Your Face: Choose a photo that clearly shows your face. A headshot or a close-up is ideal.
- Smile: A friendly smile can make you appear more approachable and welcoming.
- Reflect Your Personality: Pick a photo that reflects your personality and style. If you’re professional, a more formal photo might be appropriate. If you’re creative, you can opt for something more artistic.
- Avoid Distractions: Choose a photo with a clean background and minimal distractions.
- Consider Color: Think about the colors in your photo and how they might be perceived. Warm colors like red and orange can convey energy and excitement, while cool colors like blue and green can evoke calmness and trustworthiness.
7. How Do I Create a New Contact Poster on My iPhone?
Creating a new Contact Poster allows you to express your creativity and personalize your visual identity. Here’s how:
-
Navigate to Contact Photo & Poster: Open the Contacts app, tap “My Card,” and then tap “Contact Photo & Poster.”
-
Tap Edit: Tap “Edit” to begin creating your poster.
-
Choose a Style: You can choose from several styles:
- Photo: Select a photo from your library and customize it with filters, crops, and adjustments.
- Memoji: Create a personalized Memoji that represents you and use it as your poster.
- Monogram: Design a poster with your initials using different fonts and colors.
-
Customize Further: Add your name, choose a font, select colors, and experiment with different layouts.
-
Preview and Save: Preview your poster to see how it will appear to others, then tap “Done” to save it.
8. What Are Some Creative Ideas for Designing a Contact Poster?
Designing a creative Contact Poster can help you stand out and express your unique personality. Here are some ideas:
- Use a Portrait: A well-composed portrait can be both professional and personal.
- Incorporate Your Hobbies: If you’re passionate about a particular hobby, include it in your poster.
- Use a Monogram with Style: Create a monogram using elegant fonts and colors.
- Add a Background: Choose a background that complements your photo or design.
- Use Quotes or Sayings: Add a favorite quote or saying that reflects your personality.
9. How Can I Share My Name and Contact Image Automatically?
You can automatically share your name, photo, and poster with people in your contacts, making it easier for them to identify you when you call or message them. Here’s how to set it up:
- Go to Contact Photo & Poster: In the Contacts app, tap “My Card” and then tap “Contact Photo & Poster.”
- Turn on Name & Photo Sharing: Toggle the “Name & Photo Sharing” switch to the on position.
- Choose Sharing Options: You can choose to share automatically with “Contacts Only” or select “Always Ask” to be prompted before your information is shared with anyone you’re communicating with.
10. What Are the Privacy Implications of Sharing My Contact Image?
Sharing your contact image can be convenient, but it’s essential to consider the privacy implications.
- Who Can See Your Information: When you share your name and photo, anyone in your contacts can see it. If you choose “Always Ask,” you have more control over who sees your information on a case-by-case basis.
- Security Risks: Sharing your photo and name could potentially expose you to security risks. Be mindful of who you share your information with and avoid sharing it with unknown or untrusted contacts.
- Control Over Sharing: You can turn off Name & Photo Sharing at any time to stop sharing your information automatically.
11. How Do I Add or Edit Contact Pronouns on My iPhone?
Adding or editing contact pronouns is a simple way to promote inclusivity and respect in your communication. Here’s how to do it:
- Open the Contacts App: Launch the Contacts app on your iPhone.
- Select a Contact: Tap “My Card” to add your pronouns or select another contact to add theirs.
- Tap Edit: In the upper-right corner, tap the “Edit” button.
- Add Pronouns: Scroll down and tap “Add Pronouns.”
- Select Language: Choose your preferred language.
- Enter Pronouns: Add the correct pronouns (e.g., She/Her/Hers, He/Him/His, They/Them/Theirs).
- Save Changes: Tap “Done” to save the changes.
12. Are Pronouns Shared When I Share Contact Information?
No, pronouns are not shared by default when you share your contact information through Contacts or NameDrop. When you share another contact’s information, their pronouns are never shared.
13. How Do I Create or Edit My Medical ID?
Creating or editing your Medical ID can be crucial in emergency situations, providing essential health information to first responders. Here’s how to set it up:
- Access Medical ID: Open the Contacts app and tap “My Card” at the top of the screen.
- Tap Edit: In the upper-right corner, tap the “Edit” button.
- Create or Edit: Scroll down and tap “Create Medical ID” or “Edit Medical ID.”
- Enter Information: Fill in your medical information, including medical conditions, allergies, medications, and emergency contacts.
- Save Changes: Tap “Done” to save the changes.
14. What Information Should I Include in My Medical ID?
When creating your Medical ID, include the following essential information:
- Medical Conditions: List any significant medical conditions you have, such as diabetes, asthma, or heart disease.
- Allergies: Include any allergies you have, especially to medications, food, or insect stings.
- Medications: List the medications you are currently taking, including dosages and frequency.
- Emergency Contacts: Add the names and phone numbers of your emergency contacts.
- Blood Type: Include your blood type if you know it.
- Organ Donor Status: Indicate whether you are an organ donor.
15. How Do I Access Someone Else’s Medical ID in an Emergency?
In an emergency, you can access someone’s Medical ID from the iPhone’s lock screen.
- Swipe Up: On the lock screen, swipe up from the bottom.
- Tap Emergency: Tap “Emergency” in the lower-left corner.
- Tap Medical ID: Tap “Medical ID” to view the person’s medical information.
16. What is NameDrop, and How Can I Use It to Share My Contact Info?
NameDrop is a feature on the iPhone that allows you to quickly share your contact information with someone nearby. To use NameDrop:
- Open Contacts or Tap Share: Open the Contacts app, select “My Card,” and tap “Share.” Alternatively, you can tap the share button in another app, such as Phone or Messages.
- Bring iPhones Together: Hold your iPhone near the other person’s iPhone.
- Choose What to Share: Select whether you want to share your contact card or just receive the other person’s contact card.
- Complete the Transfer: Wait for the transfer to complete. Your contact information will be shared with the other person.
17. How Can I Improve the Quality of My Contact Photos?
Improving the quality of your contact photos can make a significant difference in how you are perceived. Here are some tips:
- Use Good Lighting: Natural light is best. Avoid harsh shadows or direct sunlight.
- Focus on Sharpness: Ensure your photo is in focus. Use your camera’s autofocus feature or tap the screen to focus on your face.
- Crop Appropriately: Crop your photo to focus on your face. Avoid cropping too tightly or leaving too much empty space.
- Use Editing Tools: Use photo editing apps to adjust brightness, contrast, and colors.
- Consider Composition: Think about the composition of your photo. Use the rule of thirds to create a balanced and visually appealing image.
- Update Regularly: Keep your contact photo up-to-date to reflect your current appearance.
18. What Are Some Common Mistakes to Avoid When Updating Contact Information?
When updating your contact information, avoid these common mistakes:
- Using Outdated Photos: Make sure your photo is current and reflects your current appearance.
- Including Inaccurate Information: Double-check all your contact details to ensure they are accurate.
- Forgetting to Save Changes: Always save your changes after updating your contact information.
- Using Low-Quality Images: Avoid using blurry or pixelated photos.
- Sharing Too Much Information: Be mindful of the information you share and avoid including sensitive details that could compromise your privacy.
19. How Can dfphoto.net Help Me Improve My Contact Photos and Posters?
dfphoto.net is your ultimate resource for improving your contact photos and posters. We offer:
- Photography Tips and Tutorials: Learn the latest photography techniques for capturing stunning portraits and visuals.
- Editing Guides: Master photo editing with step-by-step tutorials on using popular software.
- Inspiration and Ideas: Discover creative ideas for designing unique and eye-catching contact posters.
- Equipment Reviews: Get expert reviews and recommendations on the best photography equipment.
- Community Support: Connect with a community of photographers and artists to share ideas and get feedback.
20. How Do I Troubleshoot Issues with Contact Photos Not Syncing?
If you’re experiencing issues with contact photos not syncing, here are some troubleshooting steps:
- Check Your iCloud Settings: Make sure Contacts are enabled in your iCloud settings. Go to Settings > [Your Name] > iCloud and ensure the Contacts toggle is turned on.
- Restart Your iPhone: Sometimes a simple restart can resolve syncing issues.
- Update iOS: Ensure your iPhone is running the latest version of iOS. Go to Settings > General > Software Update to check for updates.
- Check Your Internet Connection: Make sure you have a stable internet connection.
- Sign Out and Back Into iCloud: Try signing out of your iCloud account and then signing back in.
- Reset Sync History: Go to Settings > Contacts > Accounts > iCloud and toggle Contacts off and on again. When prompted, choose “Delete from My iPhone” and then turn Contacts back on.
- Check for Duplicate Contacts: Duplicate contacts can sometimes cause syncing issues. Use a contact management app to find and merge duplicate contacts.
21. Can I Customize Contact Photos for Different People?
Yes, you can customize contact photos for different people, allowing you to easily identify them when they call or message you. To do this:
- Open the Contacts App: Launch the Contacts app on your iPhone.
- Select a Contact: Tap the name of the contact you want to customize.
- Tap Edit: In the upper-right corner, tap the “Edit” button.
- Add Photo: Tap “Add Photo” or tap the existing photo to change it.
- Choose a Photo: Select a photo from your library, take a new photo, or choose a Memoji.
- Adjust and Crop: Adjust the photo and crop it to fit the contact photo frame.
- Save Changes: Tap “Done” to save the changes.
22. What File Formats Are Best for Contact Photos?
The best file formats for contact photos are JPEG and PNG.
- JPEG: JPEG is a widely supported format that offers good image quality with relatively small file sizes. It’s ideal for photos with complex colors and details.
- PNG: PNG is a lossless format that preserves image quality without compression artifacts. It’s best for images with sharp lines, text, or graphics.
23. How Do I Resize a Photo for a Contact Picture?
Resizing a photo for a contact picture ensures it fits properly and looks its best. Here’s how to do it:
- Use a Photo Editing App: Use a photo editing app like Photos, Snapseed, or Adobe Lightroom Mobile.
- Open the Photo: Open the photo you want to resize in the app.
- Resize Option: Look for a “Resize” or “Image Size” option in the app’s menu.
- Set Dimensions: Set the dimensions of the photo to a smaller size. A good size for a contact photo is around 300×300 pixels.
- Save the Resized Photo: Save the resized photo to your device.
- Add to Contact: Add the resized photo to your contact.
24. What Are the Legal Considerations When Using Photos for Contact Images?
When using photos for contact images, be mindful of the following legal considerations:
- Copyright: Make sure you have the right to use the photo. If you didn’t take the photo yourself, you may need to get permission from the copyright holder.
- Model Release: If the photo includes recognizable people, you may need to get a model release from them, especially if you plan to share the contact image publicly.
- Privacy: Respect the privacy of others when using their photos. Avoid using photos that could be embarrassing or offensive.
- Terms of Service: Be aware of the terms of service of any apps or services you use to create or share contact images.
25. How Do I Back Up My Contact Photos and Information?
Backing up your contact photos and information ensures that you don’t lose them if your iPhone is lost, stolen, or damaged. Here’s how to do it:
- Use iCloud: iCloud automatically backs up your contacts and photos. Go to Settings > [Your Name] > iCloud and make sure Contacts and Photos are enabled.
- Use iTunes or Finder: You can also back up your iPhone to your computer using iTunes (on older macOS versions) or Finder (on newer macOS versions). Connect your iPhone to your computer and follow the prompts to back up your device.
- Use Third-Party Apps: There are also third-party apps that can back up your contacts and photos.
26. What Are Some Popular Apps for Editing Contact Photos?
There are many popular apps for editing contact photos, each with its own unique features and capabilities. Here are some top choices:
- Photos (iOS): The built-in Photos app on your iPhone offers basic editing tools for adjusting brightness, contrast, and colors.
- Snapseed (Google): Snapseed is a free photo editing app with a wide range of tools and filters.
- Adobe Lightroom Mobile (Adobe): Adobe Lightroom Mobile is a professional-grade photo editing app with advanced features for adjusting colors, details, and more.
- VSCO (Visual Supply Company): VSCO is a popular app for adding filters and effects to your photos.
- PicsArt (PicsArt, Inc.): PicsArt is a versatile photo editing app with a wide range of tools for creating collages, adding text, and more.
27. How Can I Use Memoji as My Contact Poster?
Using a Memoji as your Contact Poster is a fun and creative way to personalize your visual identity. Here’s how to do it:
- Open Contacts App: Launch the Contacts app on your iPhone.
- Select “My Card”: Tap “My Card” at the top of the screen.
- Tap “Contact Photo & Poster”: Choose this option to customize your contact display.
- Tap “Edit”: This allows you to modify your current Contact Photo & Poster.
- Select Memoji: Choose the Memoji option to create or select an existing Memoji.
- Customize Memoji: Customize your Memoji by changing its skin tone, hairstyle, and facial features.
- Choose a Pose: Select a pose and expression for your Memoji.
- Add Style: Add a background color or gradient to your Memoji.
- Save Changes: Tap “Done” to save the changes.
28. How Do I Keep My Contact Information Up-to-Date?
Keeping your contact information up-to-date ensures that others can easily reach you and that your information is accurate. Here are some tips:
- Set a Reminder: Set a reminder on your calendar to review and update your contact information regularly.
- Update Immediately: Update your contact information as soon as it changes, such as when you move to a new address or get a new phone number.
- Use iCloud: Use iCloud to automatically sync your contact information across all your devices.
- Review Annually: Review your contact information annually to make sure it’s still accurate and up-to-date.
29. What Should I Do If Someone’s Contact Photo Is Inappropriate?
If you encounter an inappropriate contact photo, here are some steps you can take:
- Talk to the Person: If you feel comfortable doing so, talk to the person and explain why you find the photo inappropriate.
- Remove the Photo: If you don’t want to see the photo, you can remove it from your contact list.
- Report the Photo: If the photo is offensive or illegal, you can report it to the appropriate authorities or service providers.
- Set Boundaries: Set boundaries with the person and let them know what type of content you are comfortable seeing.
30. How Can I Ensure My Contact Photo Looks Good on All Devices?
Ensuring your contact photo looks good on all devices requires a few considerations:
- Use a High-Resolution Image: Start with a high-resolution image to ensure it looks sharp and clear on all devices.
- Crop Appropriately: Crop the photo to focus on your face and avoid leaving too much empty space.
- Test on Different Devices: Test the photo on different devices to see how it looks.
- Adjust as Needed: Adjust the photo as needed to ensure it looks good on all devices.
31. What Are Some Advanced Techniques for Creating Contact Posters?
For those looking to take their Contact Posters to the next level, here are some advanced techniques:
- Use Professional Photography: Hire a professional photographer to take high-quality photos for your Contact Poster.
- Master Photo Editing: Learn advanced photo editing techniques to enhance your photos and create stunning visuals.
- Incorporate Graphic Design: Use graphic design software to create custom designs and graphics for your Contact Poster.
- Use Animation: Create animated Contact Posters using GIFs or short videos.
- Create a Series: Create a series of Contact Posters that tell a story or showcase your personality.
32. How Do I Use Siri to Update My Contact Information?
While Siri can’t directly update your contact information, it can help you find and access your contact card quickly. Here’s how:
- Activate Siri: Activate Siri by saying “Hey Siri” or pressing the side button on your iPhone.
- Ask Siri to Open My Card: Say “Open My Card” or “Show My Contact Card.”
- Edit Manually: Siri will open your contact card in the Contacts app, where you can manually edit your information.
33. What Is the Difference Between “My Card” and Other Contacts?
“My Card” is your personal contact card in the Contacts app. It contains your own contact information, such as your name, phone number, email address, and photo. Unlike other contacts, “My Card” is used for AutoFill in Safari, sharing your contact information with others, and accessing your Medical ID.
34. How Do I Customize the Labels for Contact Information?
You can customize the labels for contact information to better organize your contacts. Here’s how:
- Open the Contacts App: Launch the Contacts app on your iPhone.
- Select a Contact: Tap the name of the contact you want to customize.
- Tap Edit: In the upper-right corner, tap the “Edit” button.
- Customize Labels: Tap the label you want to customize (e.g., “Mobile,” “Home,” “Work”) and select a different label from the list. You can also create a custom label by tapping “Add Custom Label.”
- Save Changes: Tap “Done” to save the changes.
35. How Do I Merge Duplicate Contacts on My iPhone?
Merging duplicate contacts helps keep your contact list organized and accurate. Here’s how to do it:
- Open the Contacts App: Launch the Contacts app on your iPhone.
- Check for Duplicates: The Contacts app may automatically detect duplicate contacts and display a “Duplicates Found” message.
- Merge Manually: If you don’t see the message, you can manually find and merge duplicate contacts. Tap “All Contacts” and scroll through your list to identify duplicates.
- Tap Edit: Tap the “Edit” button in the upper-right corner.
- Link Contacts: Scroll down and tap “Link Contacts.” Select the duplicate contact you want to merge.
- Merge: Tap “Link” to merge the contacts.
- Save Changes: Tap “Done” to save the changes.
36. How Do I Delete a Contact on My iPhone?
Deleting a contact is a simple process:
- Open the Contacts App: Launch the Contacts app on your iPhone.
- Select a Contact: Tap the name of the contact you want to delete.
- Tap Edit: In the upper-right corner, tap the “Edit” button.
- Scroll Down: Scroll down to the bottom of the screen.
- Tap Delete Contact: Tap “Delete Contact.”
- Confirm: Confirm that you want to delete the contact.
37. Can I Restore Deleted Contacts?
Yes, you can restore deleted contacts from iCloud. Here’s how:
- Go to iCloud.com: Open a web browser and go to iCloud.com.
- Sign In: Sign in with your Apple ID and password.
- Go to Account Settings: Click on your name in the upper-right corner and select “Account Settings.”
- Restore Contacts: Scroll down to the “Advanced” section and click “Restore Contacts.”
- Choose a Backup: Choose a backup from the list and click “Restore.”
- Wait for Restoration: Wait for the contacts to be restored to your iPhone.
38. What Are Some Best Practices for Organizing My Contacts?
Organizing your contacts can make it easier to find and manage them. Here are some best practices:
- Use Clear and Consistent Naming Conventions: Use clear and consistent naming conventions for your contacts.
- Add Complete Information: Add as much information as possible for each contact.
- Use Groups: Use groups to organize your contacts into categories.
- Customize Labels: Customize the labels for contact information to better organize your contacts.
- Merge Duplicate Contacts: Merge duplicate contacts to keep your contact list organized and accurate.
- Delete Unnecessary Contacts: Delete unnecessary contacts to keep your contact list clean.
- Back Up Regularly: Back up your contacts regularly to ensure that you don’t lose them.
Updating your contact photo and poster on your iPhone is a simple yet impactful way to personalize your device and make it easier for others to identify you. By following these steps and best practices, you can ensure that your visual identity is up-to-date, accurate, and reflects your personality. Remember to visit dfphoto.net for more photography tips, editing guides, and creative ideas to enhance your contact photos and posters. Join our community of photographers and artists to share your creations and get inspired! Explore the dfphoto.net website or contact us at Address: 1600 St Michael’s Dr, Santa Fe, NM 87505, United States. Phone: +1 (505) 471-6001.